
When embarking on a woodworking project, having the right plans for your shed is crucial. Effective woodworking shed plans provide a solid foundation for any builder, whether you’re a novice or a seasoned craftsman. There are several essential features to consider that can make your plans practical and user-friendly.
Clarity and Detail
The most effective woodworking shed plans include clear instructions and detailed drawings. It’s important that the plans outline each step, from the initial layout to the final touches. The illustrations should show measurements and assembly details that can help you visualize the project. Clarity reduces the risk of mistakes and can save you time and materials.
Materials List
A comprehensive list of materials is vital. This list should itemize everything you need, from the main construction materials to the smallest screws. Here’s an example of a materials list:
- 2×4 lumber for framing
- 1/2″ plywood for walls
- Roofing shingles
- Wood screws and nails
- Paint or wood stain
Having a complete materials list allows you to gather everything before starting your project. This way, you’re not forced to pause the work to run to the hardware store.
Dimensions and Space Planning
The dimensions of your shed should cater to your specific woodworking needs. Make sure your plans reflect practical dimensions that provide enough space for tools, materials, and movement. Here’s a basic dimension guide:
| Item | Recommended Size |
|---|---|
| Workbench | 60″ x 30″ |
| Tool Storage Area | 4′ x 6′ |
| Walking Space | 3′ Width |

Adjust these dimensions depending on your available space and woodworking activities. The right dimensions help prevent clutter and ensure a smooth workflow.
Ventilation and Lighting
Good woodworking shed plans will also emphasize the importance of ventilation and lighting. Solid ventilation keeps the air fresh and reduces the buildup of harmful fumes from paints or adhesives. Adequate natural light or placeholders for electrical fixtures ensures you can see what you’re working on without straining your eyes. Consider including:
- Windows for natural light and airflow
- Skylights for additional lighting
- Electrical outlets for power tools
Accessibility and Workflow
Think about how you’ll access tools and materials within the shed. Consider arranging your workbench and storage areas to create a logical workflow. For instance, you might want tools that are frequently used to be easily reachable. Also, ensure that the entrance is wide enough for carrying in large pieces of wood.
Future Expansion
Plans that allow for future expansion or modifications can add great value. If you anticipate needing more space or different tools, it’s wise to design your woodworking shed with this in mind. Options include leaving extra space for a future workbench or planning for additional storage options later on.
Easy Assembly
An underrated aspect of effective woodworking shed plans is ease of assembly. Use plans that provide pre-cut measurements or modular sections. This can greatly reduce time and confusion when putting everything together. Look for plans that explicitly mention ease of assembly based on skill levels.
In the world of woodworking, a great shed can serve as a hub of creativity and productivity. If you’re looking for high-quality woodworking shed plans, consider visiting Woodsmith Plans for expert-designed options. Another noteworthy resource is Woodworker’s Source, offering a variety of plans suitable for all skill levels.
By focusing on these essential features, you can ensure that your woodworking shed plans are effective and tailored to meet your individual needs. Take your time to evaluate the plans and fine-tune them to suit your woodworking aspirations, ensuring a successful and enjoyable building experience.
Maximizing Space: Organizing Your Woodworking Shed
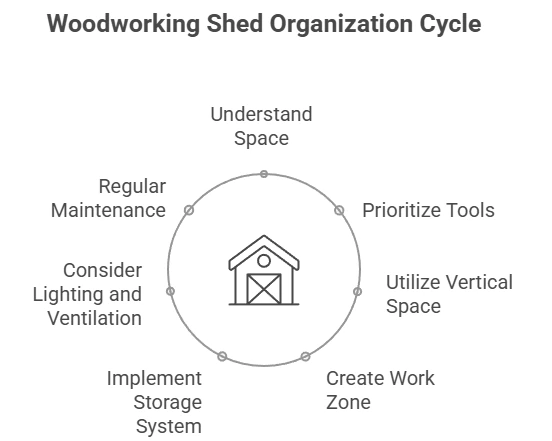
Understanding Your Space
Organizing a woodworking shed starts with understanding the space you have. Each shed is unique, with different layouts and dimensions. Walk through your shed and take note of the following:
- Total square footage
- Location of windows and doors
- Existing shelving or storage
- Workstation areas
Knowing your shed’s specifics helps you make informed decisions about organizing your tools and materials.
Prioritize Your Tools
Not all tools are created equal. Some are essential, while others see less frequent use. To maximize your woodworking shed, prioritize your tools by frequency of use:
- Everyday Tools (e.g., saws, drills): Keep these easily accessible.
- Occasional Tools (e.g., sanders, routers): Store these in a designated area.
- Seasonal Tools (e.g., snow blowers, outdoor tools): Consider off-site storage if you lack space.
This system helps maintain efficiency, making it easy to find what you need when you need it.
Utilize Vertical Space
Woodworking sheds often have limited floor space but plenty of vertical area. Installing shelving units or pegboards can help organize tools and materials effectively. Here are some ideas to consider:
- Shelves: Use sturdy shelves to store larger items like wood and machines.
- Pegboards: Hang smaller tools on pegboards for easy visibility and access.
- Wall-mounted racks: Excellent for larger items like clamps, hoses, or ladders.
Create a Work Zone
Having a well-defined work zone is crucial for productivity. Designate areas for different tasks, such as cutting, sanding, and assembly. Consider these points:
- Your workbench should have enough surface area for project sizes you typically handle.
- Keep power outlets nearby for easy access to electricity.
- Consider adding a small rolling cart for tools that you need frequently.
Implement a Material Storage System
Efficiently managing your materials not only helps you save space but also keeps everything in order. Here are some material storage strategies:
- Wood Racks: Build or buy racks to hold long pieces of lumber, making them easy to access.
- Bins and Boxes: Use labeled bins for various types of screws, nails, and smaller items.
- Clear Containers: Opt for transparent storage solutions, making it easy to see what you have.
Consider Lighting and Ventilation
A well-lit and ventilated woodworking shed is crucial for comfort and safety. Here’s why:
- Good lighting prevents accidents and creates a more enjoyable atmosphere to work in.
- Proper ventilation reduces dust and fumes, improving air quality.
- Natural light can save on electric bills and trigger creativity during the day.
Use bright, energy-efficient LED lights and ensure windows are unobstructed for natural light.
Regular Maintenance and Decluttering
To maintain your woodworking shed’s organization, regular upkeep is essential. Establish a routine for:
- Cleaning surfaces and floors
- Checking tool conditions and sharpness
- Evaluating whether items are still needed for your projects
Doing this will not only keep your space functional but will also help inspire creativity.
Resources for Woodworking Shed Plans
If you need ideas or templates for your woodworking shed plans, consider visiting the following resources:
By employing these strategies and becoming familiar with your shed’s layout, you’ll maximize your woodworking space effectively. Remember, an organized shed not only boosts productivity but also enhances creativity. Invest time into your woodworking shed organization once and enjoy the benefits for years to come.
Choosing the Right Materials for Your Shed Build

Building a shed is an exciting project, but choosing the right materials can make all the difference in the durability and look of your shed. When it comes to selecting materials, it’s essential to consider factors such as climate, budget, and personal style. Here’s a comprehensive guide to help you navigate your options.
Wood Types for Shed Construction
Wood is a classic choice for shed materials due to its natural aesthetics and strength. Here are popular types of wood you might consider:
- Pressure-Treated Pine: This wood is a top choice for outdoor projects. It resists decay and insect damage, making it ideal for those in humid climates.
- Cedar: Known for its beauty and resistance to rot, cedar requires less maintenance than other woods. It’s particularly suitable for decorative elements.
- Redwood: Similar to cedar, redwood has natural oils that help resist moisture and pests. Its rich color adds a touch of luxury to your shed.
- OSB (Oriented Strand Board): This engineered wood product is budget-friendly and provides good strength for wall and roof sheathing.
Roofing Materials
Your choice of roofing material is just as crucial as your walls. Here are a few options to consider:
- Asphalt Shingles: Affordable and easy to install, asphalt shingles come in various colors and styles, making them a popular choice.
- Metal Roofing: Known for its durability and long lifespan, metal roofing can withstand harsh weather conditions. It’s more expensive initially, but can save money long-term on repairs.
- Wood Shakes: While beautiful, these require regular maintenance to prevent rot. They add a rustic charm but may not be suitable for all climates.
Flooring Options
The flooring of your shed needs to withstand heavy weight and moisture. Here are some choices:
- Plywood: This is a common choice for flooring. Use exterior-grade plywood that stands up to moisture.
- Concrete: Ideal for larger sheds, concrete provides a solid base. It’s low-maintenance but can increase the total cost.
- Wood Decking: While attractive, ensure you treat your wood to resist decay and insects.
Insulation Considerations
If you plan to use your shed as a workshop or extra living space, insulating it will make it more comfortable year-round. Here are some insulation options:
- Fiberglass Batts: Cost-effective and easy to install, fiberglass batts are suitable for wall cavities.
- Foam Board: This insulation offers excellent moisture resistance and can provide higher R-values per inch.
- Spray Foam: A bit pricier but provides maximum insulation efficiency and seals gaps, enhancing energy efficiency.
Choosing Shed Hardware
Don’t overlook the importance of quality hardware. It can affect the longevity of your shed. Consider the following:
- Hinges and Locks: Opt for stainless steel or galvanized options to resist rust and corrosion.
- Nails and Screws: Choose galvanized nails and screws to prevent rust. They should be ample in size to hold everything securely together.
Environmental Considerations
Choosing eco-friendly materials can contribute to sustainability. Consider these options:
- Reclaimed Wood: Using salvaged wood reduces waste and gives your shed a unique character.
- Sustainable Lumber: Seek out wood that is certified by organizations such as the Forest Stewardship Council (FSC).
By carefully choosing materials that fit your budget and your vision, you can create a woodworking shed that meets your needs and stands the test of time. If you’re looking for more detailed woodworking shed plans, websites like Wood Magazine or Woodworker’s Source offer great resources.
Spend time researching, and don’t hesitate to seek advice from professionals or experienced friends who have built their own sheds. Happy building!
Tips for Customizing Your Woodworking Shed to Fit Your Needs
Building a woodworking shed is an exciting project that opens the door to creativity and productivity. Yet, what truly enhances this experience is customizing the shed to meet your specific needs. Each woodworker has unique preferences, tools, and workflows that can make a world of difference in the efficiency of their workspace. Here are some indispensable tips for customizing your woodworking shed.
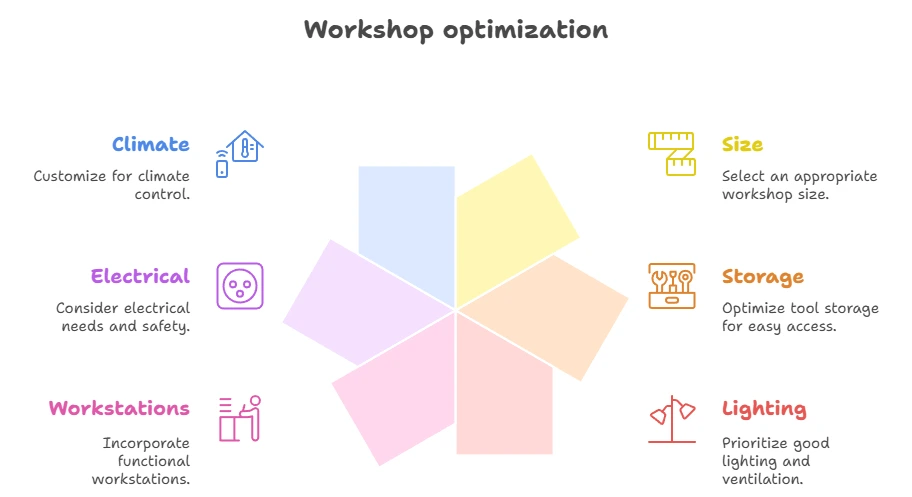
Choose the Right Size
The first step in customizing your woodworking shed is selecting the appropriate size. Consider not only the space you have available but also the tools and equipment you will use. If you plan to work with large pieces of wood or require extra space for your projects, opt for a larger shed. Here’s a quick guide:
| Size | Ideal for |
|---|---|
| 8×10 ft | Basic tools, small projects |
| 12×16 ft | Medium-sized tools, additional workspace |
| 16×20 ft | Large tools, multiple workstations |
Optimize Tool Storage
Efficient tool storage is crucial in any woodworking shed. Utilize vertical space by installing wall-mounted racks for your tools. Consider incorporating pegboards or magnetic strips for easy access to frequently used items. You can also use the following storage solutions:
- Drawers: Install drawers under your workbench for power tools and smaller hand tools.
- Shelving: Add shelves for bulk storage of materials, paints, or finishes.
- Tool Chests: A mobile tool chest can offer organization while allowing flexibility in your workspace.
Prioritize Lighting and Ventilation
Working in a well-lit and ventilated environment can greatly improve your woodworking experience. Here are some enhancements to consider:
- Natural Light: Install windows to take advantage of natural light during the day.
- Task Lighting: Use overhead lighting and spotlights above workstations for detailed tasks.
- Ventilation Windows: Incorporate adjustable vents or exhaust fans to keep the air fresh, especially when working with wood stains or finishes.
Incorporate Workstations
Customizing is about creating environments that cater to your workflow. Here are some workstations to consider:
- Cutting Station: Set up a dedicated area with a miter saw and a large work surface for making precise cuts.
- Assembly Table: Having a sturdy assembly table allows for glue-ups and larger projects to be managed easily.
- Finishing Station: Designate a section for finishing work to minimize mess in your main work area.
Electrical Considerations
A well-equipped woodworking shed often requires reliable electrical outlets. Here are a few recommendations:
- Multiple Outlets: Install outlets near your workstations to avoid using long extension cords.
- Dedicated Circuits: For high-powered tools, consider using circuits that can handle their electricity requirements.
- Lighting Controls: Implement switches at the entrance for easy operation as you enter your workspace.
Customize for Climate Control
Depending on your geographic location, climate control may be crucial. Here are options to consider:
- Insulation: Insulate your shed to keep it warm in the winter and cool in the summer.
- Heating/Cooling Units: Consider small electric heaters or portable fans to optimize comfort.
- Humidity Controllers: If moisture is an issue, using a dehumidifier can protect your wood and tools.
Take your time planning and implementing these changes in your woodworking shed. The customization process allows you to create a space that is not only functional but also enjoyable to work in. For more ideas and expert plans on woodworking shed customization, check out resources like Wood Magazine and Woodworker’s Journal.
Maintenance Tips to Keep Your Woodworking Shed in Top Shape
When you invest in a woodworking shed, maintaining it becomes crucial to ensure that it serves you well for years to come. Proper maintenance not only keeps your tools organized but also enhances the longevity and functionality of your woodworking space. Here are some easy and effective tips that will help you keep your woodworking shed in top shape.
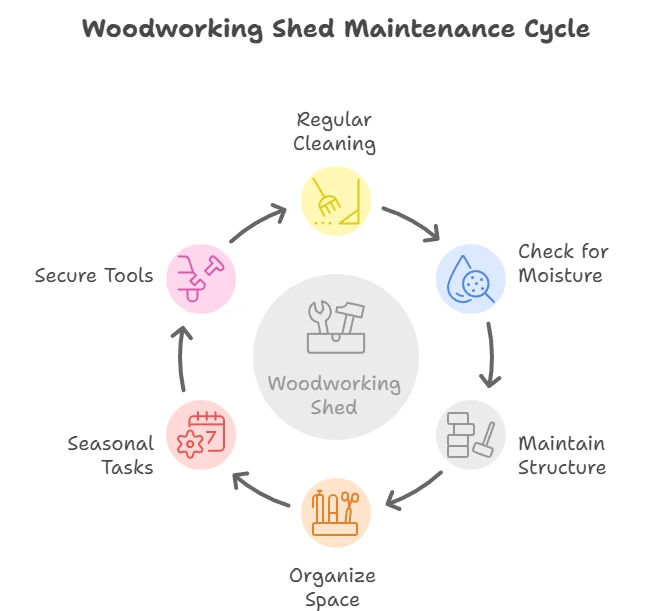
Regular Cleaning
One of the simplest yet most effective maintenance tasks is regular cleaning. Dust, wood shavings, and other debris can accumulate quickly. Here are some cleaning tips:
- Flooring: Sweep or vacuum the floor frequently to remove sawdust. This helps prevent slips and keeps your working environment safe.
- Work Surfaces: Wipe down tables and workbenches regularly with a damp cloth to avoid build-up.
- Tools: Clean tools after every use. This helps maintain their sharpness and prevents rust.
Check for Moisture
Moisture can be harmful to both wood and tools. It can lead to mold and rust, which can damage your equipment over time. Here are some steps to manage moisture:
- Ventilation: Ensure adequate ventilation in your shed. Open windows or install vents to allow airflow.
- Dehumidifier: Depending on your local humidity levels, consider using a dehumidifier to control moisture.
- Insulation: Insulate your shed properly to prevent condensation during temperature changes.
Maintenance of Structure
Keeping the structure of your woodworking shed sound is essential. Regular inspections can save you from costly repairs later:
- Check for Leaks: Inspect the roof and walls for leaks, especially after heavy rain. Repair any damage immediately.
- Pest Control: Look for signs of infestations. Using traps or natural repellents can help keep pests at bay.
- Paint and Seal: Apply a fresh coat of paint or sealant annually to protect wood surfaces from the elements.
Organize Your Space
An organized shed can enhance your productivity and make finding tools easier:
- Tool Storage: Use wall-mounted racks or pegboards to keep tools off the floor and within easy reach.
- Labeling: Label boxes and containers to find items quickly.
- Inventory: Regularly update an inventory of your tools and materials to ensure everything is accounted for.
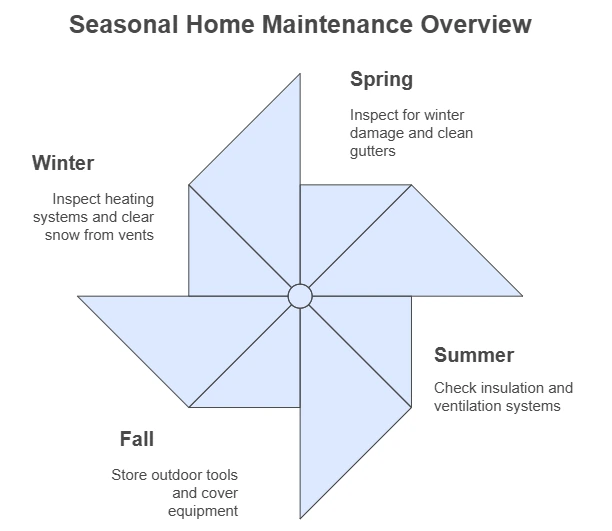
Seasonal Maintenance Tasks
Different seasons may require specific maintenance tasks to ensure that your woodworking shed is functioning well:
| Season | Tasks |
|---|---|
| Spring | Inspect for winter damage and clean out gutters |
| Summer | Check insulation and ventilation systems |
| Fall | Store away outdoor tools and cover equipment |
| Winter | Inspect heating systems and clear snow from vents |
Secure Your Tools
Keep your tools safe and secure to prevent theft and damage:
- Locking System: Invest in a reliable locking system for your shed.
- Tool Cabinets: Use closed cabinets to store valuable tools when not in use.
- Alarm System: Consider installing an alarm system if your shed contains expensive tools or equipment.
By following these maintenance tips, you can ensure your woodworking shed remains a functional and enjoyable space for your projects. Remember, the time you invest in upkeep today pays off in the long run in terms of efficiency and safety.
For more detailed plans and resources, you can check out Wood Magazine or Woodworker’s Source. They offer insights on woodworking shed plans and can guide you on how to make the most of your woodworking space.
Conclusion
Crafting an efficient and enjoyable woodworking shed starts with solid plans that encompass essential features tailored to your specific needs. By prioritizing organization and maximizing space, you can create a functional environment that enhances your creativity and productivity. Selecting the right materials not only ensures durability but also complements your style, making your shed a welcoming place to work.
Customization plays a crucial role in transforming your shed into a personalized haven. Whether it means adding extra shelving for tools or installing proper lighting for intricate projects, these adjustments can significantly improve your woodworking experience.
Moreover, regular maintenance is vital to keep your woodworking shed in top shape. Simple tasks like checking for leaks, maintaining clean surfaces, and performing seasonal inspections will extend the life of your investment. By following these guidelines, you will not only build a shed that meets your functional needs but also fosters a comfortable and inspiring workspace.
Remember, your woodworking shed should be more than just a storage area. It should be a reflection of your passion for woodworking, designed with your workflow in mind. Investing time in planning and maintaining it wisely will enhance your enjoyment and satisfaction in every project you undertake. As you embark on this journey, let your creativity flourish in a shed that feels uniquely yours. Embrace the process, and soon you’ll create not just a workspace, but a sanctuary where your ideas come to life.