 ATTENTION: World's Largest Collection of 16,000 Woodworking Plans!
Stop struggling with incomplete plans that waste your time and money!
Step-by-step instructions that make woodworking super easy, even for beginners
Detailed schematics, cutting lists, and materials lists for every project
Get new plans monthly for life - no recurring fees or hidden costs
Request custom plans for your unique projects at no extra charge
Get 4 valuable bonuses including woodworking guides and business tips
GET INSTANT ACCESS NOW!
ATTENTION: World's Largest Collection of 16,000 Woodworking Plans!
Stop struggling with incomplete plans that waste your time and money!
Step-by-step instructions that make woodworking super easy, even for beginners
Detailed schematics, cutting lists, and materials lists for every project
Get new plans monthly for life - no recurring fees or hidden costs
Request custom plans for your unique projects at no extra charge
Get 4 valuable bonuses including woodworking guides and business tips
GET INSTANT ACCESS NOW!
When you’re diving into Woodworking Plans Planter, there are a few essential elements that can make your project successful and enjoyable. Understanding these components ensures you create planters that not only look great but also stand the test of time.
Essential Elements of Effective Woodworking Plans
Material Selection
Choosing the right materials is crucial for your planter’s durability and functionality. Here are some popular options:
- Wood Types: Cedar, redwood, and treated pine are excellent choices due to their resistance to rot and insects.
- Paints and Stains: Using non-toxic sealants and finishes protects the wood while being safe for the plants.
- Hardware: Strong screws and brackets provide stability and longevity to your planter designs.
Design and Size
The size and design of your planter should cater to the type of plants you want to grow. Here are some key factors to keep in mind:
- Dimensions: Measure the desired area in your garden or patio before determining the dimensions of your planter.
- Plant Types: Research the space requirements of your plants. Some need deeper soil than others.
- Drainage: Your plans must include adequate drainage holes to prevent waterlogging.
Simplified Building Steps
Every effective Woodworking Plans Planter should outline detailed steps for building. Here’s a simplified breakdown to help you get started:
- Gather Tools: Essential tools include a saw, drill, measuring tape, sandpaper, and safety gear.
- Cut Your Wood: Based on your measurements, cut the wood for the sides, base, and top.
- Assemble: Start by assembling the base and sides using screws or nails. Ensure everything is square and secure.
- Add Drainage Holes: Drill small holes in the bottom to allow excess water to escape, protecting your plants.
- Finish Up: Sand the edges and apply paint or stain as desired for a polished look.
Popular Planter Styles
Planter styles vary significantly, and selecting the right one can enhance your garden’s aesthetic. Here are a few popular styles:
- Rectangular Planters: Ideal for herbs and flowers; they fit well against walls or fences.
- Raised Beds: Perfect for vegetables, they provide good drainage and make gardening easier.
- Decorative Planters: Add beauty to your space. They can come in various shapes and sizes to fit any decor.
Maintenance Tips for Longevity
Once your planter is built, regular maintenance is essential for its longevity. Consider these tips:
- Inspect Regularly: Check for signs of rot, loose screws, or wear.
- Reapply Finish: Every couple of years, reapply wood sealant to protect against moisture damage.
- Remove Debris: Clean out old plant debris to avoid attracting pests and diseases.
With an understanding of the essential elements of effective Woodworking Plans Planter, you’re set to create beautiful, functional pieces that enhance your outdoor space. For more detailed woodworking plans and techniques, check out Wood Magazine and Woodworking Network. These resources provide excellent structures, designs, and tips to guide you along your woodworking journey.
Engaging in woodworking projects like planters not only allows you to cultivate your plants nicely, but it also helps improve your woodworking skills. So gather your tools, choose your favorite planter, and get started on your next woodworking adventure!
Choosing the Right Wood Types for Outdoor Planters
Outdoor planters can enhance your garden’s décor while providing a perfect home for your favorite plants. However, choosing the right wood type for your planters is crucial. The right wood adds not only aesthetic beauty but also durability. Various factors influence your decision, like resistance to decay, weight, and appearance. Below, we’ll explore some of the best wood types to consider for outdoor Woodworking Plans Planter.
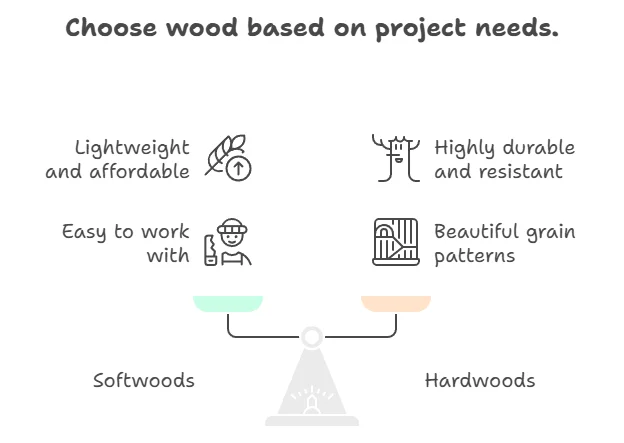
Softwoods vs. Hardwoods
When selecting wood for outdoor planters, you will typically choose between softwoods and hardwoods. Understanding their differences can help you make a better decision.
| Type | Pros | Cons |
|---|---|---|
| Softwoods | Lightweight, often more affordable, easy to work with | Less durable, may require more maintenance |
| Hardwoods | Highly durable, beautiful grain patterns, resistant to decay | Heavier, more expensive, harder to work with |
Best Wood Types for Outdoor Planters
Now let’s look at some of the best wood options available for your Woodworking Plans Planter:
Cedar
Cedar is a popular choice for outdoor planters due to its natural resistance to decay and insects. This softwood has a beautiful color that weathers gracefully over time. Cedar planters can last for many years without requiring much maintenance.
Redwood
Redwood shares many characteristics with cedar. It is resistant to warping and insects and has a lovely reddish hue. The downside is that redwood can be quite expensive, making it a premium option for a planter.
Pressure-Treated Pine
Pressure-treated pine is affordable and readily available. It undergoes a chemical treatment process to improve its resistance to decay and insects. However, it’s worth noting that the chemicals used in the treatment can leach into the soil and affect your plants, so lining your planter with landscape fabric can mitigate this issue.
Teak
Teak wood is known for its outstanding durability and resistance to water. It is an excellent choice for planters near water features or in humid environments. Its rich golden-brown color and natural oils make it resistant to rotting and pests. Teak is on the pricier side, though, so it’s best for those who want a long-lasting, high-quality option.
Mahogany
Mahogany offers deep color and a smooth finish. It’s durable and resistant to water damage, making it a good choice for outdoor décor. Mahogany requires a bit more maintenance than cedar or redwood, but its stunning appearance makes it worth considering.
Other Considerations
When choosing wood for outdoor planters, consider the following:
- Style: Think about the color and grain patterns you prefer. The wood type should complement your home and garden style.
- Weight: Heavier woods can be challenging to move, especially when filled with soil and plants.
- Maintenance: Some woods require regular staining or sealing to extend their lifespan.
- Sustainability: Consider using responsibly sourced wood or looking for reclaimed wood to minimize environmental impact.
Where to Find Woodworking Plans for Planters
If you’re interested in crafting your outdoor planters, many resources provide excellent Woodworking Plans Planter. Websites like Woodworkers Source offer detailed plans and instructions tailored to wood types. Additionally, Ana White’s site features a variety of DIY outdoor planter projects.
Choosing the right wood type for your outdoor planters is essential for both functionality and aesthetics. By identifying your needs and preferences, you can select a wood that will thrive in your outdoor environment while enhancing the overall beauty of your garden. Take the time to research and plan, and your outdoor space will flourish!
Step-by-Step Guide to Building Your First Planter
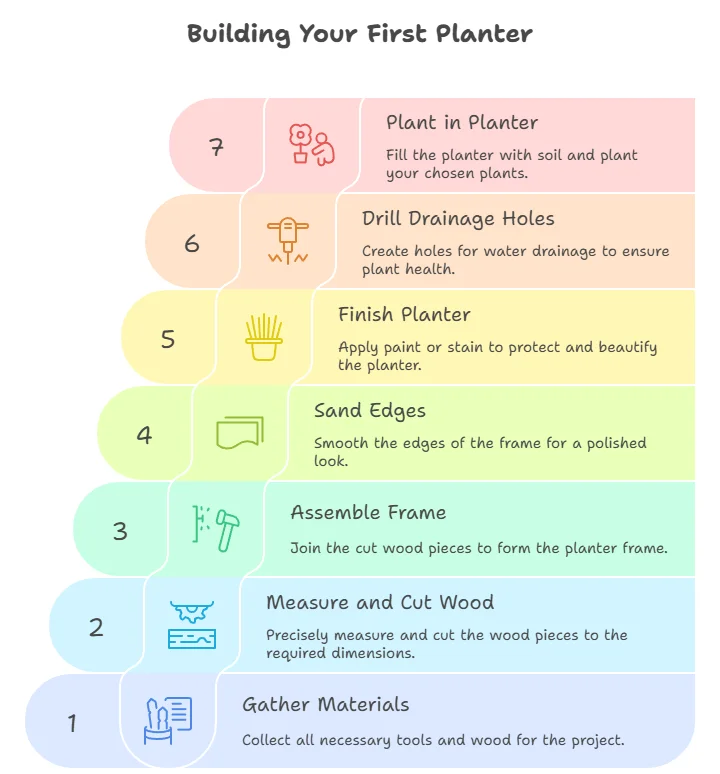
Building your first planter can be an exciting and rewarding project. Not only do you create a space for growing beautiful plants, but you also develop your woodworking skills along the way. Follow this step-by-step guide to constructing a simple yet sturdy planter from scratch.
Gather Your Materials
Before you start, it’s essential to gather all your materials and tools. Here’s a quick list of what you’ll need:
- Wood (Cedar or Pine recommended)
- Wood screws
- Wood glue
- Sandpaper (120 and 220 grit)
- Exterior wood paint or sealant (optional)
- Drill
- Saw (hand saw or power saw)
- Measuring tape
- Square
- Pencil
Measure and Cut Your Wood
Start by determining the size of your planter. A good beginner size is 2 feet long, 1 foot wide, and 1 foot deep. You can adjust the dimensions to suit your needs. Using your measuring tape, mark the wood pieces you will cut:
- Two pieces for the length (24 inches)
- Two pieces for the width (12 inches)
- Four pieces for the height (12 inches)
- One piece for the base (24 inches by 12 inches)
Once marked, carefully cut the pieces using a saw. Aim for clean straight cuts, as this will make assembly much easier.
Assemble the Planter Frame
Now it’s time to bring your pieces together. First, lay the base piece down flat. Position the four side pieces on the edges of the base, making sure they are flush with the edges. Use your square to ensure that the corners are right angles. Pre-drill holes in the side pieces where the screws will go, and join them to the base. Use wood screws and glue for extra strength.
Once the base and the sides are securely attached, take the two length pieces and place them at each end, connecting the sides together. Repeat the pre-drilling and screwing process for these pieces.
Sand the Edges
Once your planter is assembled, take sandpaper and smooth down any rough edges or surfaces. Start with 120 grit sandpaper and finish with 220 grit for a nice, smooth finish. This is crucial, as it prevents splinters and makes the planter safer to handle.
Optional: Finish Your Planter
To enhance durability and aesthetics, you may choose to paint or seal your planter. A protective layer helps it withstand the elements if placed outdoors. Ensure the finish is suitable for outdoor wood projects. Follow the manufacturer’s instructions when applying paint or sealant.
Drainage Holes
Good drainage is essential for healthy plants. To create drainage holes, drill several holes in the base of the planter. This step prevents water from collecting at the bottom, which can lead to root rot. A good rule of thumb is to place about four evenly distributed holes.
Planting in Your New Planter
Once your planter has dried completely, it’s ready for planting. Fill the planter with a good quality potting soil, leaving about an inch of space at the top. Plant your flowers, vegetables, or herbs as desired. Water them gently, and ensure they receive adequate sunlight!
Resources for Woodworking Plans
If you’re looking for more detailed Woodworking Plans Planter or to explore additional planter designs, check out the following resources:
Building your own planter can be an enjoyable, fulfilling experience. Not only do you grow plants, but you also cultivate new skills and creativity. Dive into woodworking with this simple project, and watch your efforts bloom!
Creative Design Ideas for Unique Woodworking Planters
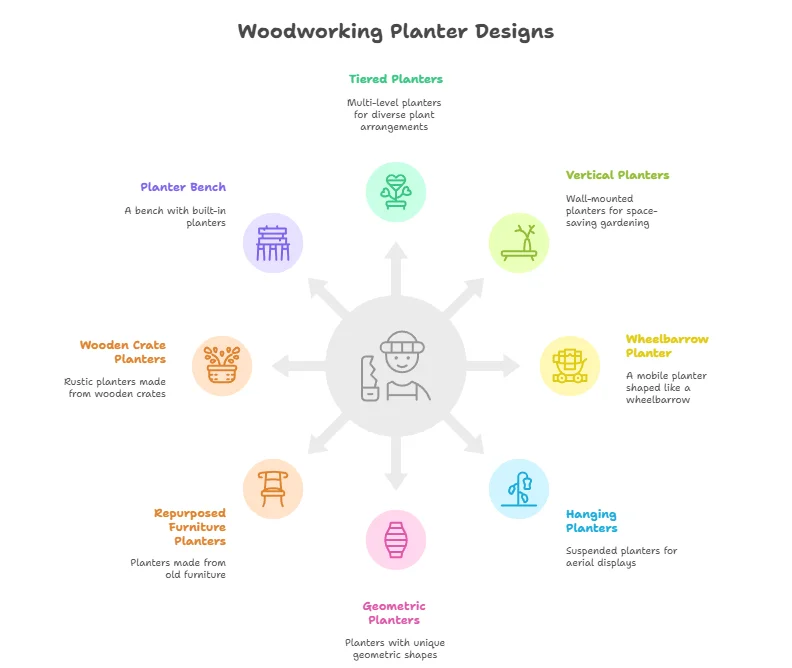
Woodworking can be a fulfilling hobby that not only nurtures your creativity but also enhances your outdoor space. If you’re looking to combine both, unique planter can be an excellent avenue. Here are some creative design ideas that can inspire your next woodworking project.
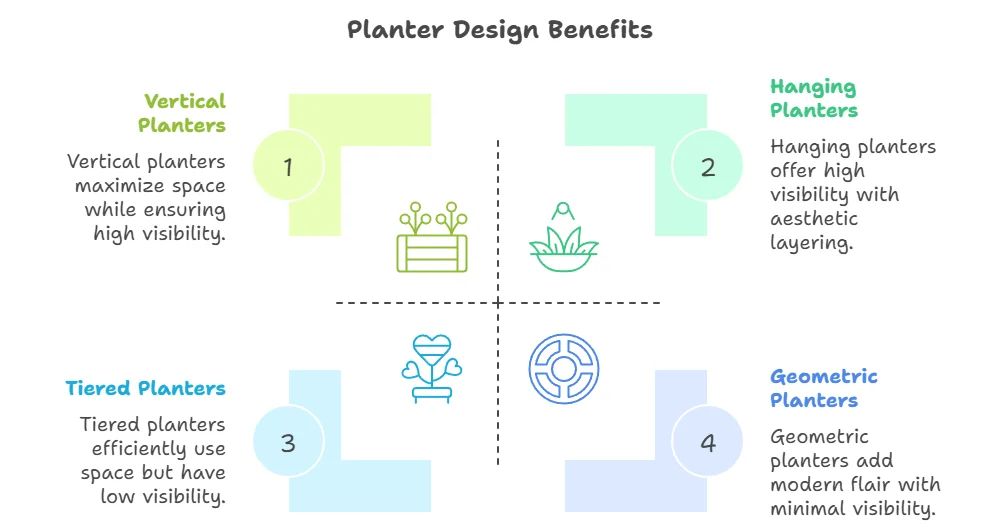
1. Tiered Planters
Tiered planters are perfect for maximizing space and showcasing multiple plant varieties. You can build a simple wooden frame with shelves that elegantly stagger the pots, allowing for drainage and sunlight exposure. Consider using reclaimed wood for a rustic look, or paint the tiers in vibrant colors to add a playful touch to your garden.
2. Vertical Planters
Vertical gardening is gaining popularity, especially in urban settings where space is limited. A vertical planter can be created by stacking wooden boxes or using pallets. This not only saves space but also serves as a unique focal point. Add hooks for hanging herbs or small flowering plants, and make sure to secure the structure properly to avoid toppling over.
3. Wheelbarrow Planter
Give new life to an old wheelbarrow by transforming it into a charming planter. Simply fill the wheelbarrow with soil, and plant flowers or herbs in the basin. This design adds a touch of whimsy to any garden while also keeping things simple. Use exterior-grade wood varnish to protect your planter from the elements, ensuring it lasts for seasons to come.
4. Hanging Planters
Hanging planters make a stunning display, especially when used in patios or balconies. You can create a wooden frame that supports pots suspended by sturdy ropes. This design allows for easy watering and can be arranged at different heights to create depth and interest. Choose lightweight pots to reduce strain on the support structure.
5. Geometric Planters
For those who love modern design, geometric planters are a great choice. Use tools to cut and assemble geometric shapes such as hexagons or triangles. These can look sleek when painted in monochromatic tones or natural finishes. They can also serve as unique centerpieces if arranged in groups.
6. Repurposed Furniture Planters
Repurposing old furniture into planters can add character to your garden. An old dresser, for instance, can become a quirky planter when you remove the drawers and add soil. You can also paint the furniture to match your garden theme. Be creative, and don’t be afraid to show off your artistic flair!
7. Wooden Crate Planters
Wooden crates are versatile and can easily be transformed into rustic planters. Stack multiple crates for a multi-tiered effect or place them side by side for a more organized look. They can fit snugly in corners or serve as pathways in larger gardens. You’ll find that adding plants in crates can also help with drainage issues.
8. Planter Bench
A planter bench is a brilliant two-in-one solution for those who need seating and gardening space. This structure includes a bench on top, with planter boxes built into the sides. It’s a smart use of space and can serve as functional garden art. Customize the design to reflect your personal style!
Building unique planter can be a fun and engaging project. Not only will you enhance the beauty of your surroundings, but you’ll also nurture your love for woodworking. For more inspiration and plans, websites like Wood Magazine and Ana White offer a wealth of resources you can explore.
Don’t hesitate to mix different styles! The beauty of woodworking is that you can let your imagination run wild. Embrace your creativity, and soon you’ll have unique planters that are not only functional but also showcase your personality!
| Planter Type | Design Benefits |
|---|---|
| Tiered Planters | Maximizes spacing and showcases plants. |
| Vertical Planters | Saves space and provides great visibility. |
| Wheelbarrow Planter | Whimsical vintage vibe. |
| Hanging Planters | Creates a layered look. |
| Geometric Planters | Modern flair for minimalists. |
So gather your materials, roll up your sleeves, and get creative with your planter! Transform your outdoor space with beautifully designed planters that reflect who you are.
Common Mistakes to Avoid When Following Woodworking Plans
Woodworking is a rewarding hobby that allows you to create beautiful pieces for your home or garden. However, even experienced woodworkers can encounter pitfalls when following Woodworking Plans Planter. Avoiding common mistakes can help ensure that your projects turn out as envisioned. Here are some common mistakes you should steer clear of to enhance your woodworking experience.
Neglecting to Understand the Plans
One of the biggest mistakes is not fully understanding the woodworking planter. Before you begin, take the time to read through the entire plan. Note any specific measurements, types of wood needed, and the tools required for the project. If you’re unclear about any steps, look for additional resources or ask for clarification.
Skipping Tools and Materials Preparation
It’s easy to get excited and jump right into the project, but skipping the preparation of your tools and materials can lead to errors. Gather and prepare everything you need, including:
- Measuring tape
- Saws
- Sandpaper
- Wood glue and clamps
- Proper types of wood
By ensuring everything is ready, you can work more smoothly and efficiently.
Ignoring Safety Precautions
Safety should always be your priority when working with tools. Many new woodworkers overlook safety measures, which can lead to accidents. Always wear appropriate protective gear, such as:
- Safety goggles
- Ear protection
- Dust mask
- Gloves (when necessary)
Be familiar with your tools and their operating procedures to minimize risk.
Inaccurate Measurements
Accurate measurements are crucial in woodworking. Mistakes in measuring can lead to pieces not fitting together correctly. Always use precise tools like a measuring tape or a square, and double-check your measurements before cutting. A small error can lead to bigger problems later.
Rushing the Project
Woodworking requires patience. Rushing through a project not only increases the chances of making mistakes but can also affect the quality of your work. Take your time, especially with difficult cuts or assembling complicated parts. Enjoy the process and the satisfaction of creating something uniquely yours.
Not Following Grain Direction
Wood has a grain that can affect how it is cut and finished. Not paying attention to the grain direction can lead to splintering and uneven finishes. When cutting your pieces, ensure that the blade cuts with the grain for a smoother finish, which will enhance the final look of your project.
Overlooking Finishing Touches
The finishing touches can often make or break a project. Many woodworkers neglect this stage, either out of impatience or lack of knowledge. Proper finishing not only improves the visual appeal but also protects the wood from damage. Consider sanding the surfaces and applying a suitable stain or sealant.
Failing to Keep a Clean Workspace
A cluttered workspace can hinder your workflow and increase the likelihood of accidents. Make it a habit to keep your area organized and free of debris. Regularly clean up sawdust and scraps to ensure you have a safe and efficient working environment.
Not Seeking Help or Resources
Don’t hesitate to seek assistance when needed. There are numerous resources available online where you can find guidance and tips from fellow woodworkers. Websites like Wood Magazine and Woodworking Network provide excellent articles and community support.
By being aware of these common mistakes and taking steps to avoid them, you can achieve better results in your woodworking projects. Whether you’re crafting a simple planter or a sophisticated piece of furniture, good planning and attention to detail will lead to rewarding woodworking experiences.
For additional advice on specific Woodworking Plans Planter, check out Woodworker’s Source, where you can find a plethora of plans tailored to your needs.
Good luck, and enjoy your woodworking journey!
Conclusion
Creating beautiful and functional Woodworking Plans Planter can be a rewarding journey that enhances your outdoor space. By understanding the essential elements that make these plans effective, you set yourself up for success. You’ve learned how to choose the right wood types, ensuring durability against the elements while adding aesthetic appeal.
Following a step-by-step guide makes the process manageable, especially for beginners eager to craft their first piece. Remember, creativity is also key; unique designs can elevate your planters from simple pots to stunning garden features. Personal touches allows you to express your style while providing a home for your plants.
As you embark on your woodworking adventure, being aware of common mistakes can save you time and frustration. By avoiding miscalculations and oversights, you’ll enjoy a smoother building experience.
Ultimately, Woodworking Plans Planter are not just about function; they are an outlet for creativity, skill development, and personal expression. Whether you’re a seasoned woodworker or just starting out, the knowledge you’ve gained will help you craft planters that not only hold plants but also enhance your garden’s beauty. Now, gather your tools, choose your favorite design, and start building a planter that reflects your personality while providing a vibrant home for your plants. Happy woodworking!