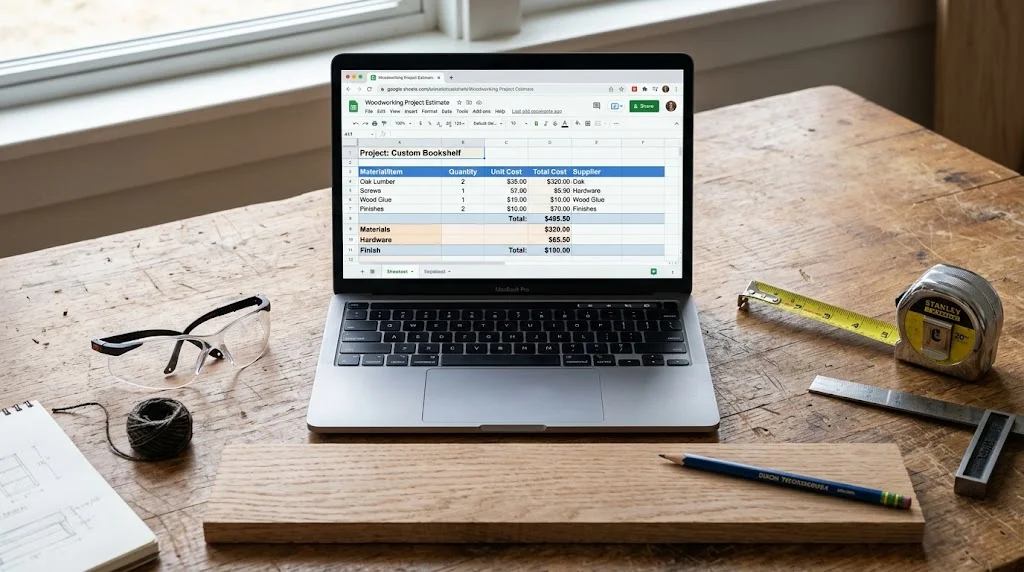
Creating your own woodworking estimate template is an essential skill for both hobbyists and professionals. It helps you calculate costs accurately, manage materials, and ensure you stay on budget throughout your projects. In this DIY guide, you will learn how to design a reliable estimate template that reflects your specific needs.
Understanding the Components of an Estimate Template
Your Woodworking Estimate Template DIY Tutorial should include several key elements. Here’s a breakdown of what to cover:
- Project Description: Briefly detail the project scope and objectives.
- Materials Needed: List all materials required, including wood types, fasteners, and finishes.
- Quantities: Specify the quantity of each item needed for accurate cost calculations.
- Cost Estimates: Include estimated costs for materials, labor, and any additional fees.
- Timeline: Outline the expected timelines for each phase of the project.
Steps to Create Your Own Woodworking Estimate Template
Follow these steps to create your personalized Woodworking Estimate Template DIY Tutorial:
Step 1: Choose the Right Tools
To create your estimate template, you can use software like Microsoft Excel or Google Sheets. These tools provide flexibility and functionality for calculations.
Step 2: Design the Layout
Your layout should be clear and easy to read. Start by creating sections for each component we discussed. Here’s a simple table structure you can use:
| Item | Quantity | Cost per Item | Total Cost |
|---|---|---|---|
| Wood Type | |||
| Fasteners | |||
| Finishes |
Step 3: Fill in Your Data
As you gather information about your project, fill in the table with quantities and costs. This will help you get a complete picture of your budget.
Step 4: Calculate Totals
Use formulae to calculate total costs automatically. For example, in Excel, you can multiply the quantity by the unit cost and sum the totals in the last column.
Step 5: Review Regularly
Once your template is set up, use it for various projects. Review and adjust it regularly to fit your growing experience and changing needs.
Tips for Using Your Woodworking Estimate Template
To ensure that your template remains effective and relevant, keep these tips in mind:
- Keep a log of project changes and their impact on costs.
- Do not forget to account for waste or unexpected expenses in your estimates.
- Look for bulk purchasing deals or discounts which can further decrease your costs.
Essential Tools for Accurate Woodworking Estimates
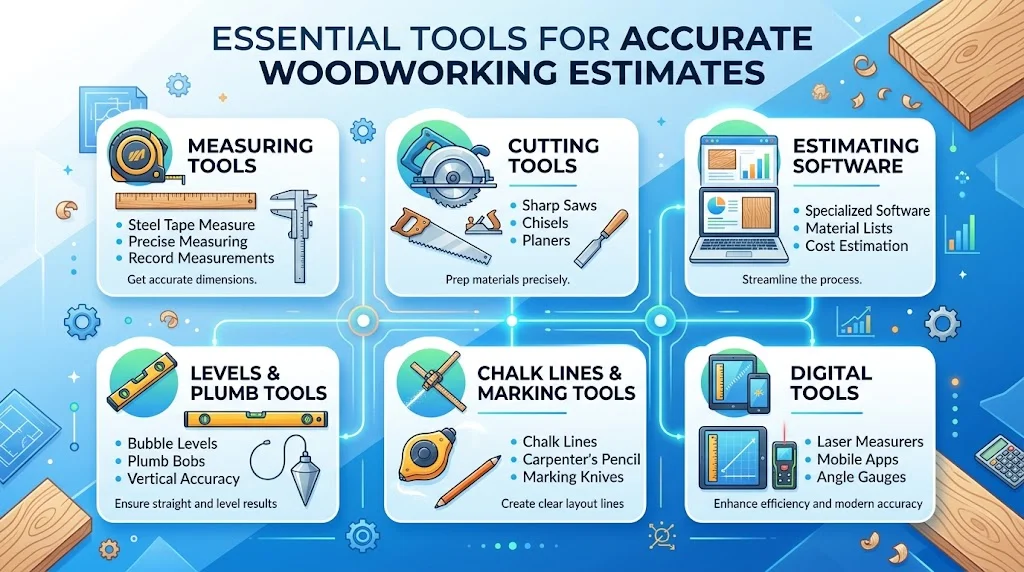
When embarking on a woodworking project, having accurate estimates is crucial for staying on budget and ensuring a successful outcome. To make the estimating process easier, you’ll need specific tools that help you gather the necessary data. These essential tools not only streamline your workflow but also improve the accuracy of your estimates, saving you time and money.
Measuring Tools
Measuring tools are fundamental in woodworking. They allow you to obtain precise dimensions, ensuring your materials fit together perfectly. Here are a few key measuring tools you should always have:
- Tape Measure: A reliable tape measure is indispensable. Opt for one that measures in both imperial and metric units, as this will help you work with different plans and materials.
- Square: A framing square or speed square ensures that your cuts are perfectly right-angled. This tool is essential for both measuring and marking angles.
- Calipers: Digital or dial calipers provide precise measurements for smaller components. They can be particularly useful when working with intricate designs.
Cutting Tools
Once you’ve gathered your measurements, it’s time to turn your estimates into action with cutting tools. Accurate cuts yield better fits, enhancing the overall quality of your project. The following cutting tools are essential:
- Circular Saw: Ideal for making straight cuts in large sheets of wood, a circular saw can save significant time compared to a manual saw.
- Jigsaw: Perfect for curved shapes and intricate designs, a jigsaw allows freedom in creativity while still relying on your estimates.
- Miter Saw: This tool is invaluable for making angled cuts, essential for frames and moldings.
Estimating Software
In today’s digital age, using estimating software can significantly boost your efficiency. Many applications come equipped with features tailored for woodworking projects, including:
- Cost Estimation: Powerful calculators can help you calculate materials and labor costs.
- Material List Generation: These tools can automatically generate a list of materials based on your design input.
- Visualizations: Some software offers 3D modeling, allowing you to visualize your project before starting.
One popular choice is Woodworker’s Source, which provides resources including templates for accurate estimates.
Levels and Plumb Tools
Leveling tools ensure that your project has the right orientation. Whether you’re constructing a table or mounting shelves, accurate leveling is critical. The most common leveling tools include:
- Bubble Level: Simple to use, a bubble level helps verify horizontal and vertical alignments.
- Laser Level: For larger projects, a laser level can project lines across wide areas, ensuring consistent height across multiple surfaces.
Chalk Lines and Marking Tools
Creating straight lines for cutting or drilling requires proper marking tools. Accurate markings are crucial for achieving precise cuts. Consider these tools:
- Chalk Line: A chalk line is excellent for marking long, straight lines. Simply snap the line for a quick guide.
- Pencil or Marker: Always have a fine-tip pencil or marker that can write on wood. This allows for detailed annotations on your measurements.
Digital Tools
Alongside physical tools, digital tools can also elevate your estimating process:
- Budgeting Apps: Apps like MySum allow you to track expenses and manage finances in real-time.
- Project Management Software: Programs like Trello help you organize tasks, set deadlines, and facilitate communication if you’re working with a team.
By utilizing the right tools, you will enhance your efficiency in woodworking estimates. These tools facilitate precise measurements, efficient cuts, and accurate predictions of costs, ultimately leading to successful projects. Explore these tools to discover what works best for your initiatives, and you’ll see how they can simplify the estimating process while boosting the quality of your work.
How to Customize Your Woodworking Estimate Template for Different Projects
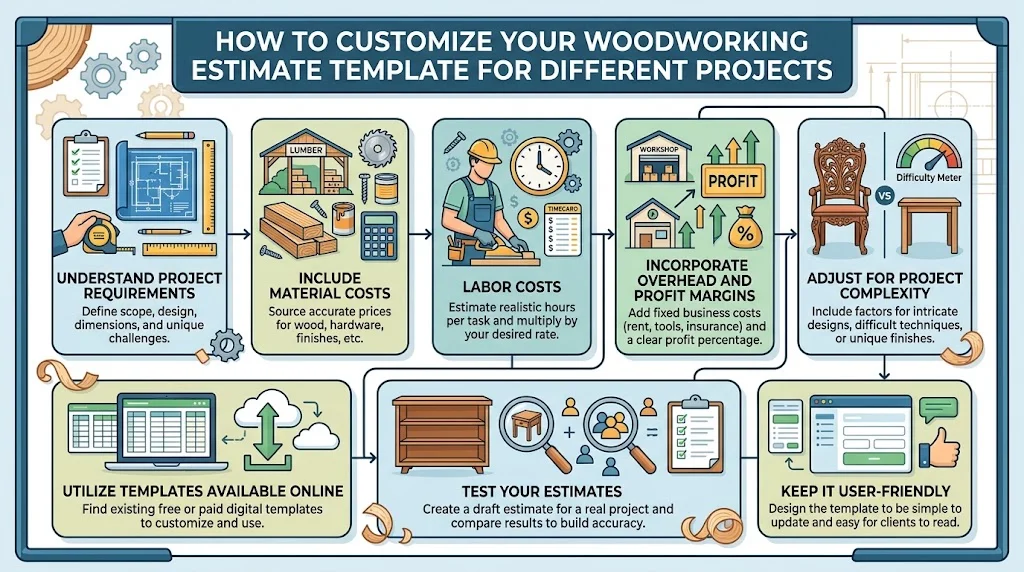
Customizing your Woodworking Estimate Template DIY Tutorial is essential to manage projects efficiently and keep your finances in check. Whether you are building furniture, cabinets, or entire structures, having a reliable estimate template will guide your pricing and help you avoid unexpected costs. Let’s explore how you can tailor your template to suit different woodworking projects.
Understand Your Project Requirements
The first step in customizing your Woodworking Estimate Template DIY Tutorial is to clearly define the scope of your project. Different projects will have unique materials, time frames, and labor requirements. Ask yourself:
- What type of woodworking project am I undertaking?
- What materials will I need?
- How much time will it take to complete this project?
By defining these elements, you will be better equipped to input accurate numbers into your estimate template.
Include Material Costs
Every woodworking project requires a variety of materials, which can vary widely in price. Here’s how to customize your template to reflect this:
- List Specific Materials: Instead of generic terms, use specific types of wood like oak, pine, or mahogany. This can impact the total cost significantly.
- Define Quantities: Mention how many boards, sheets, or pieces you will need. For example, “10 sheets of plywood” clarifies your needs better than just saying “plywood.”
- Consider Scrap and Waste: Add a line for estimated waste. It’s always a good idea to account for mistakes or irregular cuts.
Labor Costs
Labor is often one of the largest expenses in woodworking projects. When customizing your template:
- Hours Required: Estimate how long each phase of the project will take. For instance, building a table may require several hours for cutting, assembling, and sanding.
- Rate per Hour: Include your hourly rate or that of a hired worker. If you’re a DIY enthusiast, consider how much value your time holds.
Incorporate Overhead and Profit Margins
To ensure your business remains profitable, don’t forget to include overhead costs and your profit margin in the template:
- Fixed Overhead: Include costs such as rent, utilities, and equipment maintenance.
- Variable Costs: Factor in expenses that fluctuate with each project, like shipping fees or utility usage.
- Desired Profit Margin: Decide on a percentage to add to your total estimate. This ensures you earn what you deserve for your efforts.
Adjust for Project Complexity
Not every woodworking project is the same. Some require more skill than others. As you customize your estimate template:
- Skill Level: Assess how skilled the work needs to be. Complex designs or intricate joinery might require higher labor costs.
- Time Sensitivity: If a project needs a quick turnaround, you might need to increase your rates to accommodate for that urgency.
Utilize Templates Available Online
Many resources can help you create a Woodworking Estimate Template DIY Tutorial. Websites like Wood Magazine and Woodworker’s Source offer valuable insights and sample templates.
Test Your Estimates
Once you’ve customized your template, it’s wise to test it out. Start with a small project, keeping track of all costs. Once the project is complete, compare your estimate with the actual expenses. This will help you fine-tune your template for future endeavors.
Keep it User-Friendly
Your Woodworking Estimate Template DIY Tutorial should be simple to use. Revisit the format if you find it confusing or cumbersome. A clean and organized layout can help you and your clients understand the details better. Include sections for notes or adjustments to facilitate communication about changes that may occur during the project.
As you learn and grow in your woodworking journey, adjusting your estimate template will not only make you more efficient but can also enhance client satisfaction. With an accurate and customized estimate template, you can ensure a smoother project flow and improved financial results. For more DIY woodworking tips, consider checking resources at Ana White or Instructables for comprehensive guides tailored to your needs.
The Financial Benefits of Using a Woodworking Estimate Template in DIY Crafts
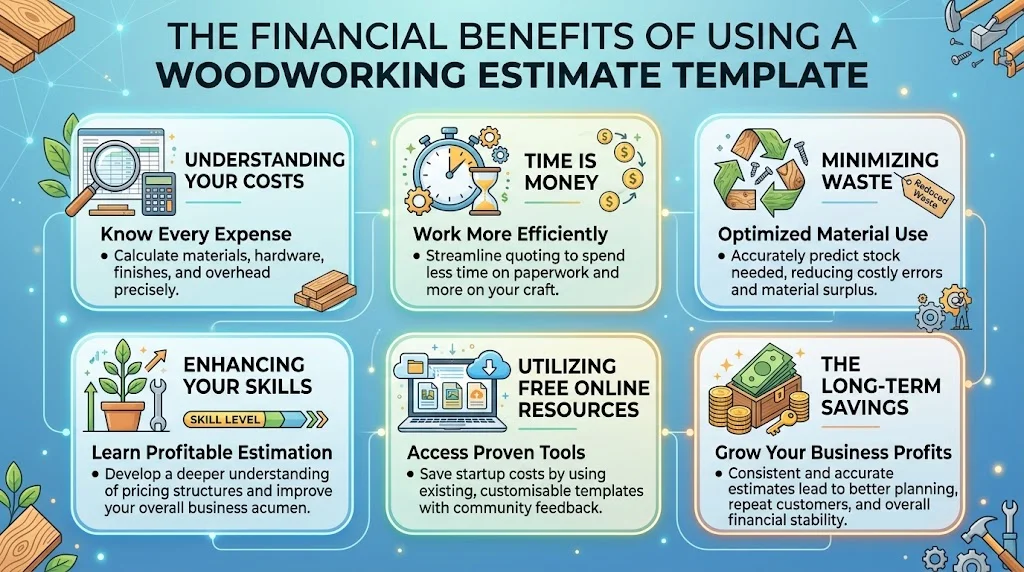
Engaging in DIY woodworking crafts is not just a fun hobby; it’s also an excellent way to save money. One of the smartest moves you can make before starting any project is to use a Woodworking Estimate Template DIY Tutorial. This handy tool helps you plan your costs effectively, ensuring you get the most out of your budget while maximizing your creativity. Here’s why utilizing a Woodworking Estimate Template DIY Tutorial can lead to significant financial benefits.
Understanding Your Costs
Knowing where your money goes is crucial in any DIY project. An estimate template allows you to break down your costs into manageable sections. Here’s a practical list of what you can include:
- Materials: Wood, screws, nails, and any other supplies.
- Tools: Rental or purchase costs for necessary equipment.
- Labor: If you plan to hire help, estimate the labor charges.
- Finishing: Stains, paints, and protective finishes.
By categorizing your expenses, you can see where to save and where to splurge. This level of detail helps prevent overspending and ensures all aspects of your project are accounted for.
Time is Money
Another financial advantage of using a Woodworking Estimate Template DIY Tutorial is saving time. When you clearly define your project requirements early on, you streamline your workflow. Here’s how:
- Clear Scope: Define project dimensions, designs, and materials.
- Efficiency: Anticipate any obstacles and prepare solutions in advance.
- Budget Monitoring: Avoid going off-budget by sticking to your initial plan.
By managing your time effectively, you not only save yourself headaches but also reduce any unexpected costs that come from last-minute changes or delays.
Minimizing Waste
Waste management is another area where financial benefits come into play. Using a Woodworking Estimate Template DIY Tutorial allows you to precisely calculate the amount of material needed for your project. Here’s why this is essential:
- Reduce Scrap: When materials are purchased in exact quantities, there’s less leftover scrap that simply adds to your costs.
- Recycle: If you have excess materials, you can plan other small projects or save them for future use.
Moreover, understanding the optimal amount of resources minimizes environmental impact and helps keep your workshop organized.
Enhancing Your Skills
Utilizing an estimate template equips you with skills that extend beyond a single project. Learning how to budget effectively can improve your overall DIY experience. The financial insights you gain can lead to more thoughtful spending in the future. Over time, you’ll develop a better sense of:
- Material Quality: Recognizing which materials provide the best value.
- Tool Selection: Understanding which tools you truly need versus those that are just “nice to have.”
- Project Scaling: Knowing how to adjust plans based on financial constraints.
These new skills not only enhance your future projects but also lead to smarter financial choices in other areas of your life.
Utilizing Free Online Resources
Many resources available online can help you create a Woodworking Estimate Template DIY Tutorial uniquely tailored to your needs. Websites like Woodworking Corner and Wood Magazine offer free templates and articles that guide you in developing your estimating skills. These educational tools can help refine your budgeting approaches while minimizing costs in your woodworking projects.
The Long-Term Savings
In the long run, the practice of using a Woodworking Estimate Template DIY Tutorial is an investment in both your skills and your finances. By consistently applying this tool to subsequent projects, you’ll notice:
- Increased Affordability: Completing projects within budget opens the door for even more creative ventures.
- Informed Decisions: You’ll make choices based on well-researched financial projections.
- Project Variety: Savings from one project can go toward funding new and exciting woodworking endeavors.
Adopting a Woodworking Estimate Template DIY Tutorial in your DIY crafts allows you to integrate financial responsibility with the joy of creating. Understanding your costs, minimizing waste, and enhancing your skills ensure you enjoy fulfilling and budget-friendly woodworking projects. Why not give it a try and unlock your creative potential today?
Common Mistakes to Avoid When Estimating Woodworking Projects
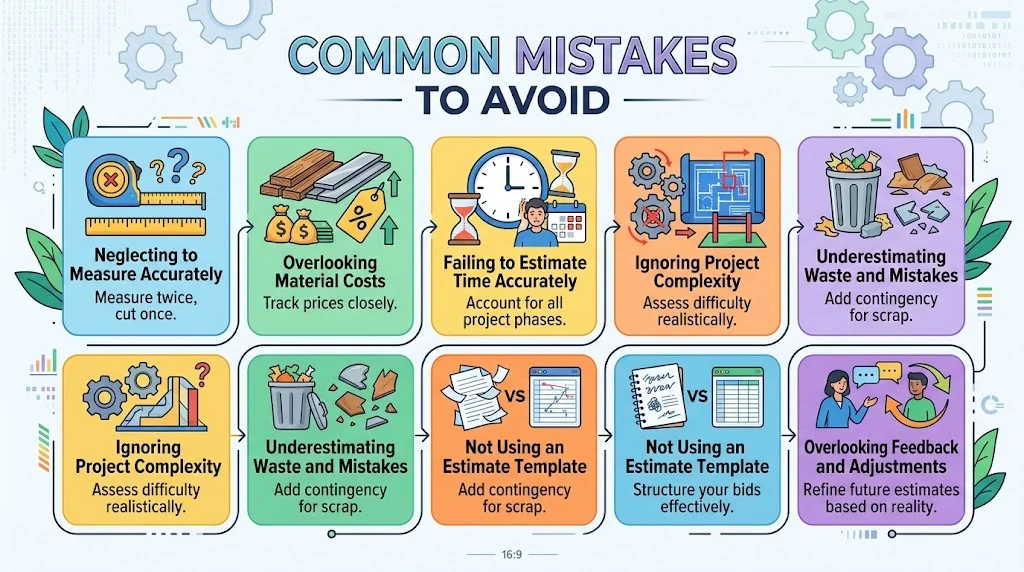
Estimating woodworking projects can seem daunting, but avoiding some common pitfalls can make the process much easier and more efficient. Below are several key mistakes to steer clear of when estimating your next creation.
Neglecting to Measure Accurately
One of the biggest mistakes is not measuring accurately. Ensure you have the right dimensions before you start. Use high-quality tools like tape measures and squares to get precise measurements. A small error in measurement can lead to significant issues down the line. Always double-check your numbers and keep a notepad handy for notes.
Overlooking Material Costs
When estimating costs, many DIY woodworkers forget to account for ***all*** materials. Consider the following:
- Wood types and their prices
- Hardware like screws, nails, or hinges
- Finishing materials like stains, paints, or sealants
- Tools or machinery rentals if necessary
By accounting for these factors, you’ll have a clearer picture of your project’s overall cost.
Failing to Estimate Time Accurately
Time estimation is just as crucial as financial estimation. It’s easy to underestimate how long a project will take. Here are some tips to improve your time estimation:
- Break down tasks. Create a step-by-step list of what needs to be done and estimate how much time each task will take.
- Factor in interruptions. We all get sidetracked; add some buffer time to accommodate any potential interruptions.
- Seek advice. Talk to experienced woodworkers to get their input on how long similar projects took them.
Ignoring Project Complexity
Each woodworking project varies in complexity, and this should reflect in your estimates. Be mindful of:
- Joint methods (butt joints vs. dovetail joints)
- Finishing techniques (staining versus painting)
- The number of pieces involved
Overestimating your skills can lead to delays and additional costs. Choose projects that align with your skill level or invest time in learning before you attempt complex designs.
Underestimating Waste and Mistakes
Woodworking is an art that often comes with trial and error. It’s wise to add a percentage to your material estimates to account for waste. Here’s a handy rule of thumb:
| Item | Estimated Waste Percentage |
|---|---|
| Softwood | 10-15% |
| Hardwood | 15-20% |
These estimates ensure that you have enough material to cover mistakes, which is especially important for large or intricate projects.
Not Using an Estimate Template
A Woodworking Estimate Template DIY Tutorial can streamline the estimating process and ensure nothing gets overlooked. It can help you detail materials, labor, and time requirements. There are many great resources online that offer free downloadable templates. Consider visiting Woodworking Talk for more information on estimating templates.
Overlooking Feedback and Adjustments
Once you’ve completed a project, it’s important to review your estimates versus your actual outcomes. This feedback will help you refine your estimating skills for future projects. Don’t hesitate to keep notes on what went wrong, what could be improved, or any surprises that popped up during your work.
By avoiding these common mistakes, you will create more accurate estimates and improve your woodworking experience immensely. Ultimately, careful planning and consideration will lead to more successful and satisfying projects. If you’re looking for more woodworking tips and resources, check out Wood Magazine for the latest insights and advanced DIY strategies!
Conclusion
As you embark on your woodworking projects, having a well-structured Woodworking Estimate Template DIY Tutorial can make a significant difference in your crafting experience. By creating your own template, you’re not only fostering a personalized approach to your projects but also ensuring that you account for every detail, which is key to successful woodworking. Remember, the essential tools you use for accurate estimates can streamline your process and enhance your efficiency, allowing you to focus more on the creative aspects of your work.
Avoiding common mistakes is crucial; even small oversights can lead to larger issues down the road. Stay vigilant about accuracy when estimating costs and time to prevent any surprises. Customizing your template for different projects ensures that you can adapt to various requirements and materials while maintaining the integrity of your work. It’s this flexibility that can help you grow as a woodworker, improving your skills and diversifying your projects.
The financial benefits of using a Woodworking Estimate Template DIY Tutorial should not be understated. By managing costs and time effectively, you can enjoy woodworking as a fulfilling hobby or a profitable venture. With careful planning and a tailored approach, you not only save money but also build confidence in your skills. Embrace the journey of DIY woodworking armed with a solid estimate template, and watch your projects flourish while staying budget-friendly. Your crafting experience will undoubtedly improve, leading to both satisfaction and success in your woodworking endeavors.