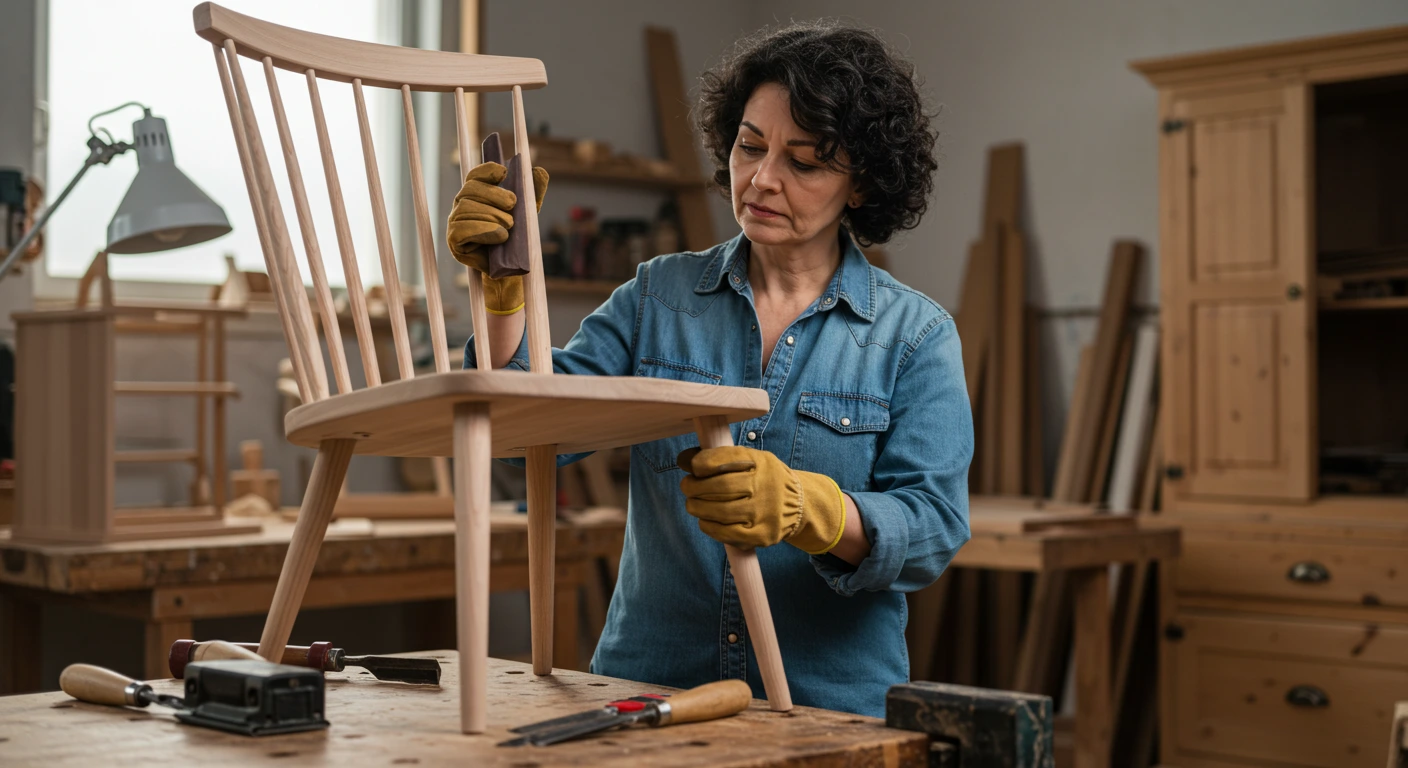
When embarking on a woodworking project, having effective woodworking chair plans is crucial for both seasoned craftsmen and beginners. Quality plans serve as a roadmap, guiding you through each step of the process while ensuring your final product is both functional and aesthetically pleasing. Here are some essential features to look for in woodworking chair plans.
Clarity and Precision
Effective woodworking chair plans must be clear and precise. This means they should include detailed diagrams and measurements. A good plan should specify dimensions in both imperial and metric units to accommodate different preferences. Additionally, the instructions should be easy to follow, using layman’s terms rather than complicated jargon. Clarity reduces the chances of mistakes, making the crafting process smoother and more enjoyable.
Materials List
Your woodworking chair plans should always include a comprehensive materials list. This list should detail every component needed for the build, from the main pieces of wood to screws, glue, finishes, and tools. Having a complete list helps you gather everything in one go, which streamlines the building process. Moreover, it minimizes the risk of starting your project and realizing halfway through that you’re missing critical items.
Step-by-Step Instructions
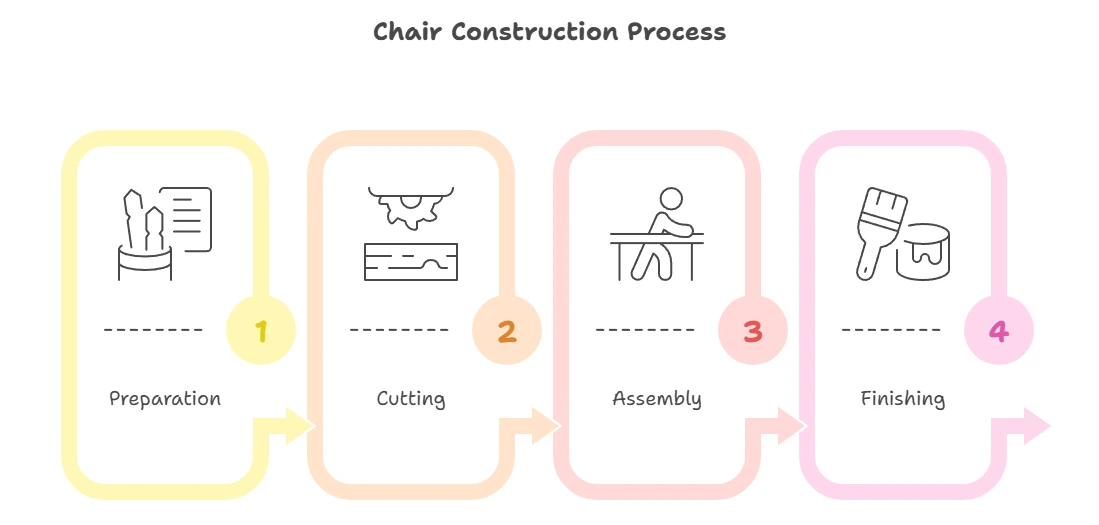
Step-by-step instructions are another hallmark of effective woodworking chair plans. These instructions should break the project into manageable parts. Usually, plans that separate tasks into stages like ‘cutting’, ‘assembling’, and ‘finishing’ are more effective. This format allows you to focus on one task at a time, reducing overwhelm and improving accuracy.
Example of Stage Breakdown
- Preparation: Gather materials and tools.
- Cutting: Accurately cut the wood as per the dimensions listed.
- Assembly: Assemble the chair frame using screws and other joinery methods.
- Finishing: Sand, stain, and apply any finishes as desired.
Joinery Techniques
A well-designed plan should specify the joinery techniques used in the chair’s construction. Joinery can greatly impact the durability and appearance of your chair. Common techniques include mortise and tenon joints, butt joints, and dowels. Knowing which techniques are included gives you insight into the complexity of the project and the level of skill required.
Design Options
Woodworking chair plans can vary significantly in style. Effective plans should provide a variety of design options to suit different tastes and purposes. Whether you’re looking for a rustic farmhouse chair or a sleek contemporary design, having multiple options allows for customization. Look for plans that also allow some flexibility in design, enabling you to make adjustments based on your personal preferences or available materials.
Difficulty Level
Understanding the difficulty level of your woodworking chair plans is essential. Plans may range from easy to advanced. If you are a beginner, it’s wise to select plans labeled as ‘easy’ or ‘beginner-friendly’. More complex plans might require advanced skills such as intricate joinery or specialized tools. Always assess your skill level before selecting a project to ensure a positive experience.
Visual Aids
Visual aids, including photographs and drawings, enhance understanding and facilitate the woodworking process. Quality plans will often include multiple viewpoints of the chair, highlighting critical areas like joinery and assembly points. Ensure that images show the project in various stages, as this aids in visualizing the end result and provides clarity throughout the build.
Adjustable Features
Some quality woodworking chair plans include adjustable features, which are great for creating a custom fit. Adjustable chair height, backrest angles, or seat depth can make your project more versatile and comfortable. If you plan to use your chair regularly, incorporating these elements can improve overall functionality and user satisfaction.
Recommendations for Resources
To find exceptional woodworking chair plans, consider visiting reputable woodworking websites like Wood Magazine, Popular Woodworking, or Woodworkers Source. These platforms not only offer quality plans but also provide community support, expert tips, and video tutorials. Effective woodworking chair plans should be clear, well-structured, and adaptable to your needs. They equip you with everything needed for a successful project, enriching your woodworking experience and resulting in a chair you’ll be proud to use.
Choosing the Right Materials for Your Chair Project
When embarking on a woodworking project, particularly for crafting chairs, one of the most crucial decisions involves selecting the right materials. The outcome of your project greatly depends on the woods and other materials you choose, as they influence not only the aesthetics but also the overall durability and comfort of the chair. Wood is a traditional choice for furniture making, and it’s widely available in many varieties. Hardwoods and softwoods present different characteristics, and understanding these distinctions is key to successful chair construction. Here’s a breakdown of some popular wood types suitable for chair making:
| Wood Type | Durability | Workability | Cost |
|---|---|---|---|
| Oak | Highly Durable | Moderate | Medium |
| Maple | Very Durable | Easy | Medium-High |
| Pine | Moderately Durable | Very Easy | Low |
| Cherry | Durable | Moderate | High |
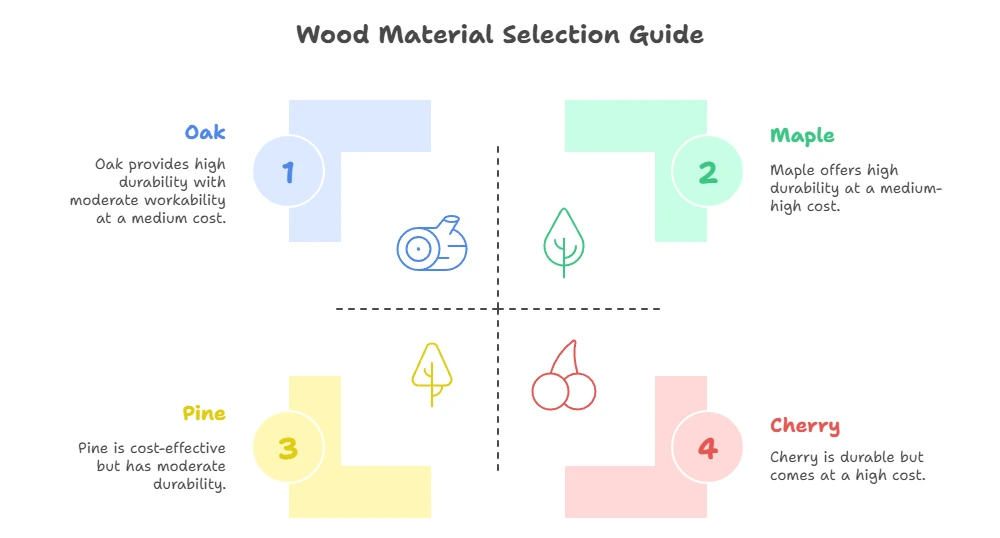
Choosing hardwoods is a great option for durability. Oak and maple, for example, have excellent strength and are resistant to wear, making them suitable for chairs that will see considerable use. Conversely, softwoods like pine are lighter and more affordable, ideal for beginner builders or projects requiring lighter materials. In addition to the type of wood, consider the finish. The right finish not only enhances the appearance of the wood but also protects it from scratches, stains, and moisture. Here are some popular finishes to explore:
- Oil Finishes: These penetrate deep into the wood to enhance its natural grain. Options like tung oil or Danish oil provide a warm sheen.
- Polyurethane: This provides a hard, protective layer perfect for chairs that withstand daily wear and tear.
- Lacquer: Fast-drying and available in various sheens, lacquer can give a professional finish, but it can be trickier to apply.
Hardware is another essential aspect that plays a vital role in your chair project. Selecting the right screws, hinges, or brackets ensures structural integrity. Here’s what to keep in mind when choosing hardware:
- Corrosion Resistance: For outdoor chairs, use stainless steel or galvanized materials to prevent rust and corrosion.
- Weight Capacity: Make sure the screws and connectors can support the load expected for the chair.
- Size Compatibility: Check that metal hardware sizes align with your wood dimensions for a secure fit.
Additionally, think about the upholstery materials for added comfort. While wood provides a sturdy structure, upholstered seating makes a chair comfortable for extended sitting. Here are some options:
- Foam Padding: Choose high-density foam for durability and comfort.
- Fabrics: Cotton and linen are breathable and easy to clean, while synthetics like polyester can offer durability.
- Leather: For an upscale look, leather offers elegance but tends to require more upkeep.
Assessing your budget is crucial as you make your selections. While it’s tempting to go for high-end woods and materials, often, a mix of affordable yet durable options yields a great result. You can find excellent resources and plans on websites that focus on woodworking, like Wood Magazine and Ana White.
As you move forward with your chair project, remember that each decision— from the wood you choose to the final upholstery— will hugely impact your chair’s quality and appearance. Taking the time to research and select the right materials will lead to a functional and beautiful piece of furniture that reflects your skills and aesthetic choices.
Step-by-Step Process for Building a Wooden Chair
Building a wooden chair can be a rewarding project, whether you’re a novice or an experienced woodworker. With a clear plan and the right materials, you can create a chair that not only serves a practical purpose but also adds charm to your space. Here are the essential steps to guide you through the process of crafting your wooden chair.
Gathering Necessary Materials and Tools
Before you start, make sure you have all the materials and tools ready. Here’s what you’ll need:
- Wood (choose hardwood for durability, such as oak or cherry)
- Wood screws and wood glue
- Sandpaper (medium and fine grit)
- Wood finish or paint (optional)
- Measuring tape
- Chisel
- Saw (a table saw or miter saw works well)
- Drill
- Clamps
Designing the Chair
Sketch out your chair design. Visualize the shape, size, and style you want. Determine the dimensions, and consider the type of joints you’ll use to connect the parts. A straightforward design could include four legs, a seat, a backrest, and support rails. For inspiration, you can visit Wood Magazine for various chair plans and styles.
Cutting the Wood
Once you have your design laid out, it’s time to cut your wood pieces. Following your measurements, cut the following parts:
- Four legs: typically 1.5”x1.5”x18” (adjust according to desired height)
- One seat: 1”x24”x24” (for a square seat)
- One backrest: 1”x24”x8” (height can vary)
- Two support rails: 1”x2”x22” (for side support)
- Two front and back rails: 1”x2”x22” each (for front and back support)
Sanding the Pieces
It’s essential to sand all your wood pieces thoroughly to ensure a smooth finish. Start with medium-grit sandpaper, and follow up with fine-grit sandpaper. This process will help prevent splinters and ensure that any finish you apply will adhere properly.
Assembling the Chair
Now comes the exciting part — assembly. Begin with the seat. Attach the legs to the corners of the seat using wood glue and screws. Here’s a step-by-step approach:
- Secure one leg to a corner of the seat with screws.
- Repeat for the other three legs.
- Attach the support rails between the legs for additional stability.
- Make sure everything is square and aligned properly before tightening. Use clamps to hold pieces in place as the glue dries.
Installing the Backrest
After assembling the seat and legs, it’s time to attach the backrest. Position it securely and use screws to attach it. Be sure to check that it’s at a comfortable angle for sitting.
Finishing Touches
Once assembled, you can apply your choice of wood finish or paint. Stain can enhance the natural beauty of the wood, while paint can give your chair a pop of color. Allow sufficient dry time as indicated on the product instructions.
Final Checks
Before you take a seat, check for stability. Rock the chair gently to see if it wobbles. Tighten any loose screws and add any additional support if needed. This process can be a great introduction to woodworking. You’ll undoubtedly enjoy your new chair and feel proud of what you’ve created. For more chair plans and woodworking tips, you can explore Ana White or Instructables.
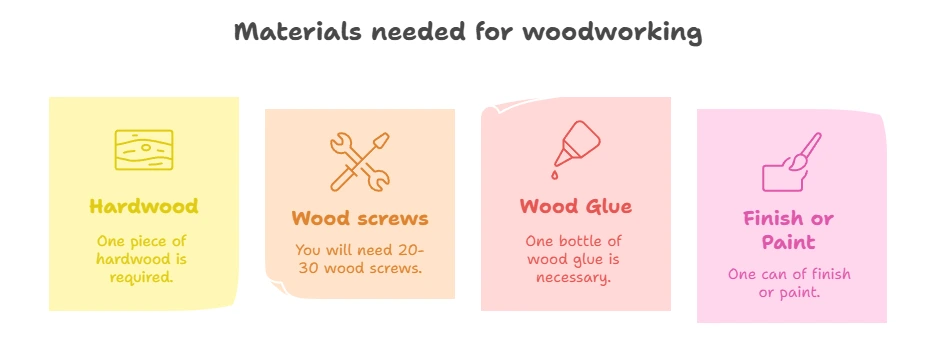
| Material | Quantity Needed |
|---|---|
| Hardwood | 1 piece |
| Wood screws | 20-30 |
| Wood Glue | 1 bottle |
| Finish or Paint | 1 can |
Now you’re ready to build your own wooden chair. With careful planning and execution, you’ll create a functional piece of furniture that you can cherish for years to come!
Common Mistakes to Avoid When Following Chair Plans
When tackling woodworking chair plans, avoiding common mistakes can make the process smoother and help you achieve remarkable results. Whether you’re a novice or a seasoned woodworker, understanding the pitfalls to avoid is essential for a successful project. Below are some key areas where many people stumble when following chair plans.
Not Reading Plans Thoroughly
One of the first mistakes is jumping straight into the project without reading the entire set of plans. Take the time to thoroughly understand the design, measurements, and materials required. Here’s what to focus on:
- Materials List: Verify you have everything needed before starting.
- Measurement Details: Pay attention to dimensions, as inaccuracies can lead to significant issues later.
- Step Breakdown: Note the sequence of steps as some are dependent on previous ones.
Using Incorrect Tools
Not using the right tools can hinder your woodworking chair project. Ensure you have all necessary equipment, including:
- Measuring tape
- Saw (hand saw or miter saw)
- Drill
- Screwdriver
- Sandpaper and finishing materials
Each tool has a specific purpose, and using the wrong one might damage your materials or lead to poor quality work. Consider investing in quality tools that fit your needs.
Ignoring Safety Measures
Safety should always be your priority. Many inexperienced woodworkers overlook essential safety precautions. Make sure to:
- Wear protective gear: Safety glasses and masks can help prevent injuries.
- Work in a clean, organized space: This minimizes the risk of accidents.
- Handle tools carefully: Always follow the manufacturer’s instructions when using power tools.
Overlooking Wood Grain Direction
Understanding and following the wood grain direction is crucial for both aesthetics and structural integrity. Cutting against the grain can lead to splintering and a rough finish. Here’s what you should do:
- Observe the grain patterns before making cuts.
- Plan your cuts to run with the grain where possible.
- Sand with the grain to avoid surface damage.
This helps ensure a beautiful and polished chair.
Not Allowing for Wood Expansion
Wood is a natural material that expands and contracts with humidity changes. Failing to account for this can lead to issues down the line. To manage this:
- Use expandable joinery systems.
- Leave space for movement when assembling.
- Consider the environment where the chair will be used or stored.
Failing to Test Fit Components
As you progress with your chair plans, it’s essential to test fit all components before final assembly. This can help catch any inconsistencies early on. Here’s how:
- Dry fit pieces together to ensure everything matches.
- Make adjustments as necessary before permanent assembly.
- Check for proper alignment and function of movable parts.
Neglecting Finishing Touches
Finishing touches can elevate your woodworking chair from good to stunning. Many beginners rush through this final step, but taking your time can make a world of difference.
- Sand all surfaces thoroughly to achieve a smooth finish.
- Choose appropriate stains, paints, or sealants.
- Apply finishes in a well-ventilated area, following manufacturer instructions.
By avoiding these common mistakes when following woodworking chair plans, you can save time, money, and frustration. Planning properly, understanding your tools, and paying attention to detail will help you create a reliable and beautiful chair. If you’re looking for more resources regarding woodworking projects, consider visiting Wood Magazine or Woodworkers Source for expert insights and plans.
Tips for Customizing Your Woodworking Chair Design
When it comes to woodworking, designing a custom chair can be an exciting project that allows you to express your creativity. However, personalizing your chair to suit your style and comfort requires careful consideration. Here are some tips to help you bring your woodworking chair design to life.
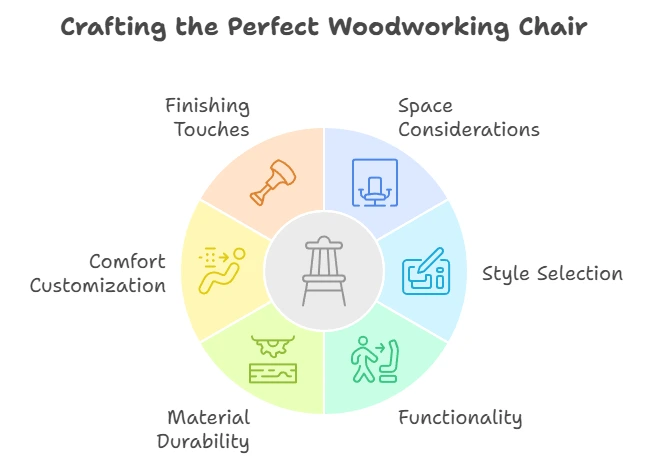
Consider Your Space
Before you start sketching your woodworking chair plans, think about where it will be used. Will it be in a cozy reading nook, around the dining table, or perhaps in a workshop? Understanding the purpose and location of your chair will guide your design choices. For example, if the chair is meant for outdoor use, utilize moisture-resistant wood like teak or cedar. Alternatively, for indoor settings, you may prefer softer woods like pine or hardwoods like oak or walnut.
Choose the Right Style
Woodworking chairs come in various styles, ranging from contemporary to traditional. To help choose the right aesthetic, consider the following:
- Functionality: Think about how the chair will be used and what style best complements its purpose. A dining chair may differ in design from a lounge chair.
- Personal Preference: Identify your favorite design elements. Do you lean towards a minimalist style, or do you prefer something ornate?
- Matching Existing Furniture: Ensure your chair design harmonizes with other pieces in your space. Check for compatible colors, materials, and shapes.
Select Durable Materials
Choosing the right materials is paramount for the longevity and durability of your chair. Here are a few tips on material selection:
| Material | Features | Best Uses |
|---|---|---|
| Mahogany | Strong, resistant to moisture | Elegant indoor furniture |
| Pine | Lightweight, easy to work with | Casual and rustic designs |
| Teak | Highly resistant to weather | Outdoor chairs |
| Oak | Durable and versatile | Heavy-duty chairs |
Customizing for Comfort
Comfort is key when designing your woodworking chair. To enhance comfort, consider these factors:
- Seat Height: Ensure the seat height is appropriate for the user. An average seat height of 17 to 18 inches works for most adults.
- Seat Depth: A depth of 16 to 18 inches offers a comfortable seating position for various body types.
- Backrest Angle: A tilted backrest can improve posture and comfort, especially for long sitting periods.
- Cushioning: Consider adding cushions covered in durable fabric for enhanced comfort, especially for dining chairs.
Details and Finishing Touches
Once the basic structure of your chair is complete, it’s time to focus on the details. Decorative elements can elevate your chair’s aesthetic. Think about:
- Carvings: Adding intricate designs or relief carvings can personalize your chair.
- Stains and Finishes: Choose a stain that highlights the wood’s natural beauty or a paint color that matches your interior.
- Joinery Techniques: Consider using dovetail, mortise and tenon, or lap joints for a sturdy, professional finish.
For additional inspiration and detailed woodworking chair plans, visit sites like Wood Magazine or Woodworker’s Source. Designing your woodworking chair can be a rewarding endeavor that results in a unique piece tailored to your needs. By considering the layout of your space, selecting suitable materials, focusing on comfort, and paying attention to details, you elevate your project from simple plans to a cherished creation. Happy woodworking!
Conclusion
Creating the perfect woodworking chair requires attention to detail and a thoughtful approach. By understanding the essential features of effective woodworking chair plans, you set yourself up for success right from the start. Choosing the right materials is crucial, as the quality of wood impacts not only the chair’s aesthetics but also its durability and functionality.
Following a clear, step-by-step process allows you to navigate the project with ease. Take each stage at a time, ensuring you measure accurately and assemble carefully. However, be mindful of common mistakes that can derail your progress. Overlooking details or rushing the process can lead to frustration, so take your time and double-check your work.
Customization is where your creativity shines. Feel free to alter the design to suit your personal style or the specific needs of your space. Whether it’s tweaking shapes, adding unique finishes, or incorporating ergonomic features, personal touches can transform a standard chair into a statement piece.
Woodworking is as much about the journey as it is about the end product. Engage with your project, learn from each step, and don’t hesitate to seek inspiration from other builders. With the right plans and a bit of patience, you can create a stunning wooden chair that adds beauty and functionality to your home. Happy building!