Exact dimensions, smart proportions, and a natural, no-nonsense build process for a nightstand that fits your bed, your room, and your life.
Of all the furniture in a bedroom, the nightstand does the most quiet, constant work. It holds your lamp, your book, your glasses, your phone charger, and somehow still needs to look good doing it. Yet nightstands are notoriously hard to shop for — either too tall for your bed, too shallow for a lamp base, or priced like they’re made of something far more exotic than a few boards of pine. That’s exactly why so many people turn to wooden nightstand plans with measurements instead of another frustrating trip to the furniture store.
Building your own nightstand isn’t just about saving money, though the savings are real. It’s about precision — getting the height exactly right relative to your mattress, the drawer depth exactly right for what you actually keep beside your bed, and the overall footprint exactly right for the space between your bed and the wall. Off-the-shelf furniture simply can’t offer that level of fit. A set of well-planned wooden nightstand plans with measurements can.
This guide walks through the entire process: the measurement principles that make a nightstand feel right the moment you reach for it in the dark, the wood and hardware choices that shape the final look, the tools you’ll need, and a full narrative walkthrough of the build itself. Whether you’re making one nightstand or a matching pair, you’ll come away with a clear, confident plan and the exact numbers to bring it to life.
Why Getting the Measurements Right Matters So Much
A nightstand might be one of the smallest pieces of furniture in your home, but it’s also one of the most physically interacted with — you reach for it half-asleep, set things down without looking, and lean on it more than you’d think. Small measurement mistakes become daily annoyances in a way they simply wouldn’t on a coffee table or bookshelf.
- Height relative to your mattress determines whether reaching for your phone or a glass of water feels natural or awkward
- Surface depth determines whether a lamp actually fits without hanging over the edge
- Drawer depth determines whether it can hold what you actually store there — glasses, chargers, a book, hand cream — without becoming a junk drawer overflow
- Overall footprint determines whether it fits comfortably in the gap beside your bed without crowding a doorway or closet
This is precisely the appeal of building your own: a set of wooden nightstand plans with measurements tailored to your actual bed and room means every one of these details gets solved correctly the first time, rather than compromised on because it was the closest match available in a showroom.
Standard Nightstand Dimensions: A Starting Reference
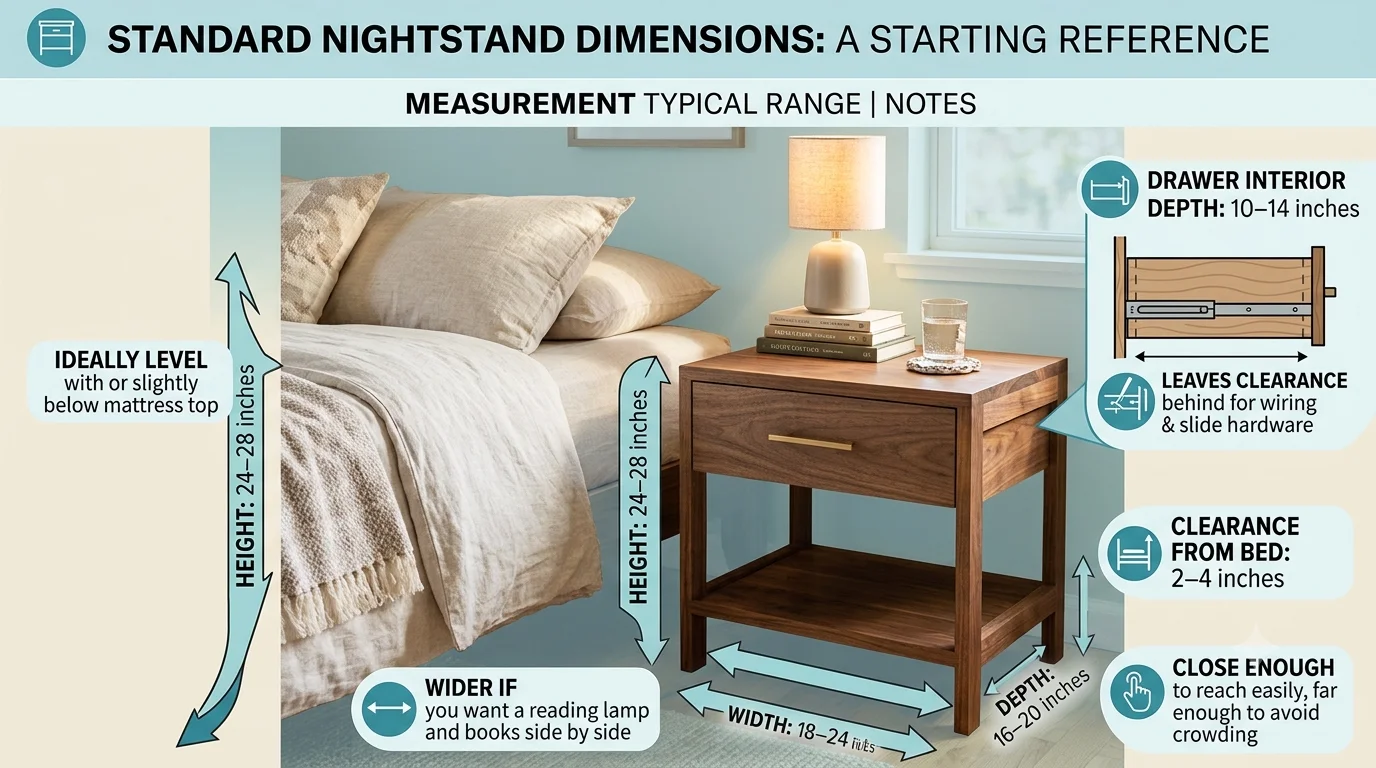
Before customizing anything, it helps to know the general ranges that most comfortable, functional nightstands fall into. Interior designers and furniture makers have converged on these figures for good reason — they work for the vast majority of bed heights and room layouts.
| Measurement | Typical Range | Notes |
|---|---|---|
| Height | 24–28 inches | Ideally level with or slightly below your mattress top |
| Width | 18–24 inches | Wider if you want a reading lamp and books side by side |
| Depth | 16–20 inches | Deep enough for a lamp base without overhang |
| Drawer interior depth | 10–14 inches | Leaves clearance behind for wiring and slide hardware |
| Clearance from bed | 2–4 inches | Close enough to reach easily, far enough to avoid crowding |
The Dimensions.com nightstand reference is a useful resource if you want to cross-check these figures against a wide range of commercial examples before finalizing your own plan.
Customizing Measurements to Your Actual Bed and Room
Standard ranges are a great starting point, but the real advantage of building your own comes from adjusting these numbers to your specific setup. A few measurements are worth taking directly, tape measure in hand, before you finalize your cut list.
Matching Height to Your Mattress
Measure from the floor to the top of your mattress, including any bedding you typically have on top. The ideal nightstand height sits anywhere from level with this measurement to about two inches below it — close enough that reaching over from a lying position feels natural, without the surface towering awkwardly above your sightline when sitting up.
Sizing for What You Actually Keep Bedside
Take a moment to look at what currently lives on your existing nightstand or bedside surface, and let that guide your surface and drawer sizing:
- Lamp-heavy setups benefit from at least 16 inches of depth to keep the lamp base fully supported without overhanging the edge
- Book stacks or e-readers do well with a slightly wider surface, 20–24 inches, so a lamp and reading material can coexist
- Charging stations and small electronics are best served by a drawer at least 3 inches tall internally, with a small routed cord-pass hole in the back panel
- Minimalists can comfortably go as narrow as 16–18 inches if the nightstand mainly holds a lamp and a phone
Measuring the Available Floor Space
Finally, measure the actual gap between your bed and the nearest wall or window. Subtract at least 2 inches for comfortable clearance, and use that number as your absolute maximum width — a nightstand that crowds a walkway becomes an obstacle rather than a convenience, no matter how nicely it’s built.
Choosing Wood and Hardware
With your measurements locked in, the next decision is material. Nightstands are small enough that even premium hardwood stays affordable, making this a great project to experiment with a nicer species than you might use on a larger piece.
Wood Options
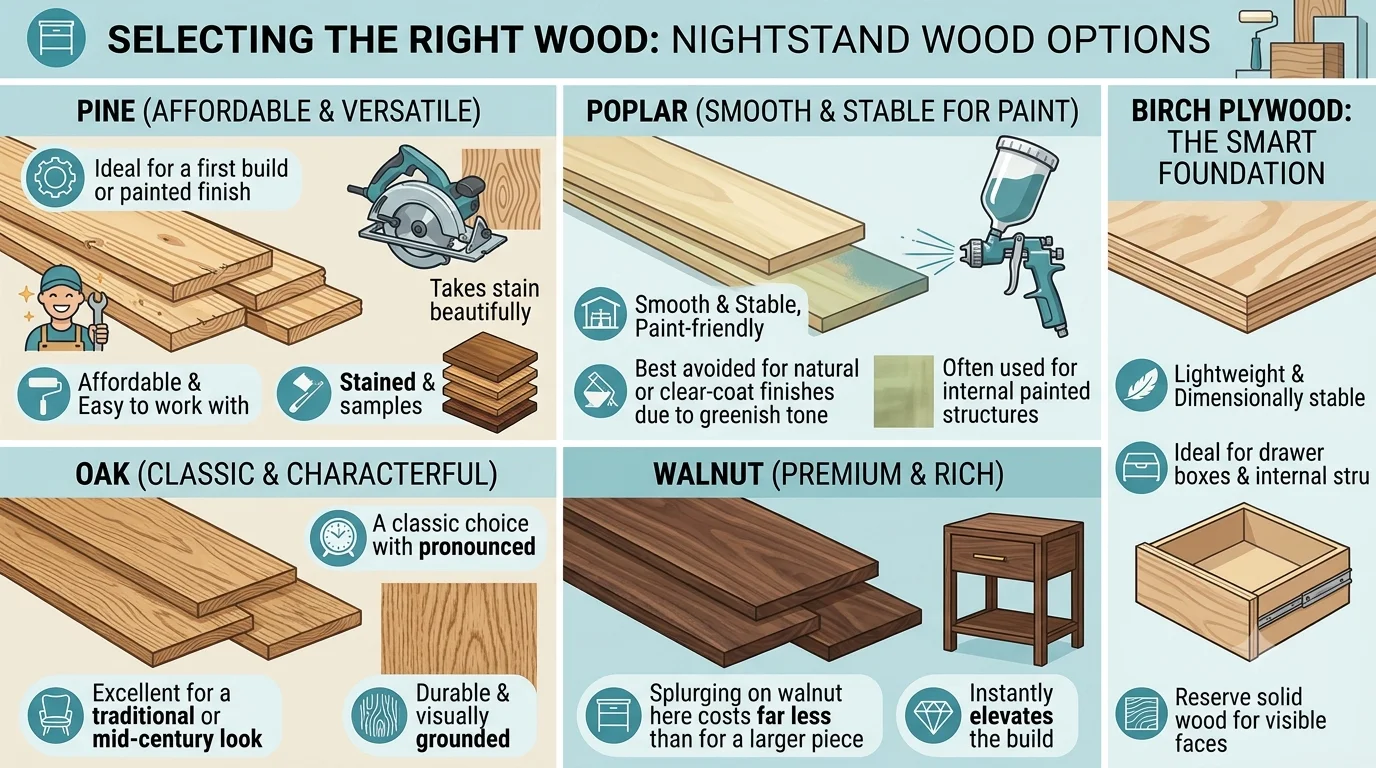
- Pine — affordable, easy to work with, and takes stain beautifully; ideal for a first build or a painted finish
- Poplar — smooth, stable, and paint-friendly, though its greenish tone means it’s best avoided for natural or clear-coat finishes
- Oak — a classic choice with pronounced grain, excellent for a traditional or mid-century look
- Walnut — a premium option with rich, dark tones; because a nightstand is small, splurging on walnut here costs far less than it would for a larger piece like a dresser
- Birch plywood — a smart choice for the drawer box and internal structure, keeping the piece lightweight and dimensionally stable while you reserve solid wood for visible faces
For a deeper comparison of wood species and their working properties, the Wood Database is an excellent, detailed reference worth bookmarking for this and future builds.
Hardware Worth Investing In
- Soft-close drawer slides — a small upgrade that makes a nightstand feel genuinely premium, especially since it’s used right beside your head at night
- Solid brass or matte black pulls — small hardware choices that have an outsized effect on the finished look
- Leveling feet — a nice addition if your bedroom floor isn’t perfectly flat, common in older homes
Tools and Materials Checklist
Because a nightstand is compact, it’s one of the most approachable furniture builds for someone working with a small tool collection or limited shop space.
Tools
- Circular saw or table saw for breaking down boards and panels
- Drill/driver for pilot holes, assembly, and drawer slide installation
- Pocket hole jig for strong, hidden frame joints
- Random orbital sander with 120, 180, and 220-grit sandpaper
- Tape measure, combination square, and marking pencil for accurate layout
- Clamps — at least four for holding joints during glue-up
- Drawer slide jig or simple spacer blocks for consistent, level slide installation
Materials
- Solid wood boards for the top, sides, and drawer front
- 1/2-inch plywood for the drawer box sides and back
- 1/4-inch plywood or hardboard for the drawer bottom and cabinet back panel
- Wood glue rated for furniture use
- 1 1/4-inch pocket hole screws or wood screws
- A pair of drawer slides sized to your drawer depth
- Wood stain and polyurethane, or primer and paint, depending on your finish direction
- Drawer pull or knob hardware
Design Decisions Before You Cut
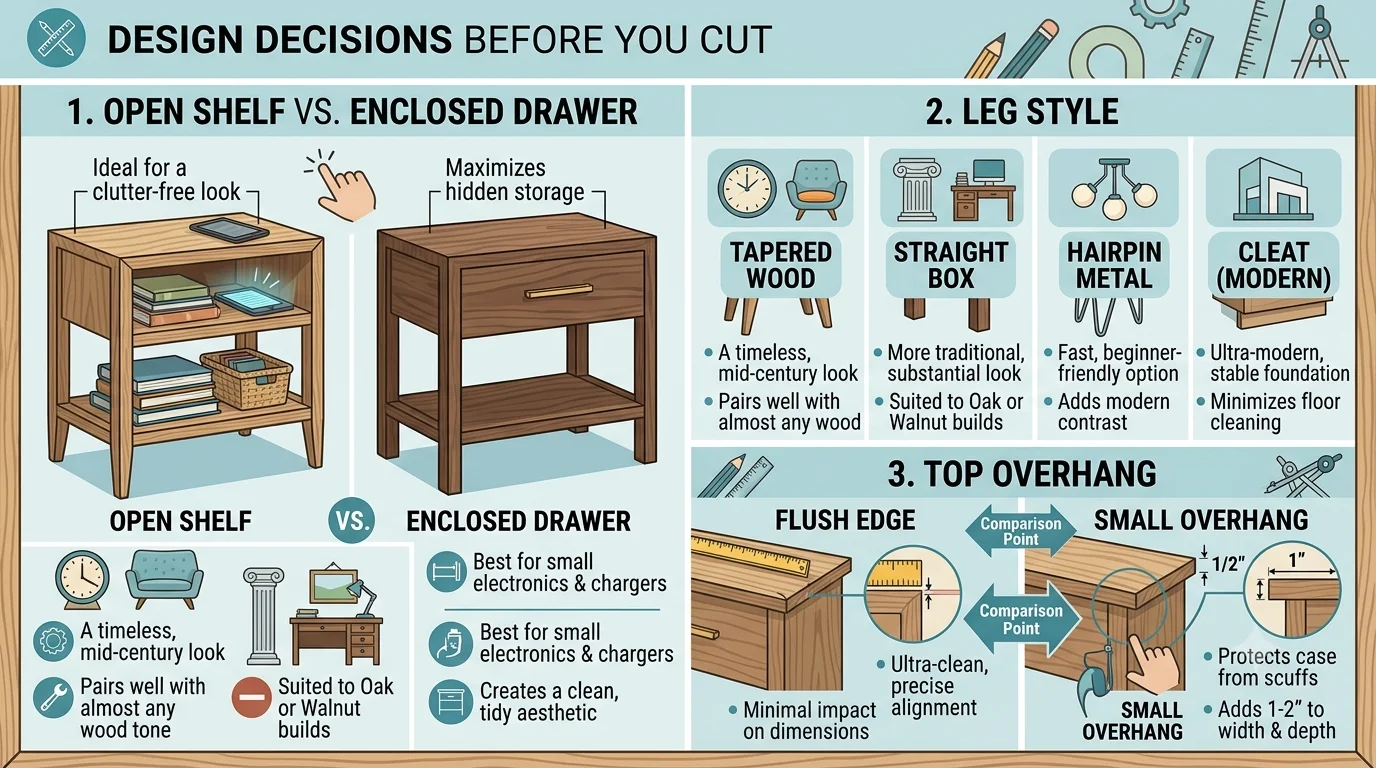
A few style and functionality choices are worth settling before cutting a single board, since they affect your cut list directly.
Open Shelf vs. Enclosed Drawer
Both styles work beautifully depending on your needs and your room’s aesthetic:
- A single drawer with an open shelf below is the most popular configuration, offering hidden storage for small items and open space for a stack of books or a basket
- Two stacked drawers maximize hidden storage, ideal for anyone who prefers a clutter-free surface and tidy interior organization
- Fully open shelving with no drawer is the simplest build and works beautifully in a minimalist or Scandinavian-styled bedroom
Leg Style
Leg choice shapes the overall silhouette more than almost any other single decision:
- Tapered wood legs — a timeless, mid-century-adjacent look that pairs well with almost any wood tone
- Straight box legs — a more traditional, substantial look, well suited to oak or walnut builds
- Hairpin metal legs — a fast, beginner-friendly option that adds a light, modern contrast to a wood body
Top Overhang
A small overhang of about half an inch to one inch beyond the cabinet body on all sides gives the top a more finished, furniture-store look compared to a flush edge, and also protects the cabinet sides from occasional bumps and scuffs.
Building the Nightstand: A Natural Walkthrough
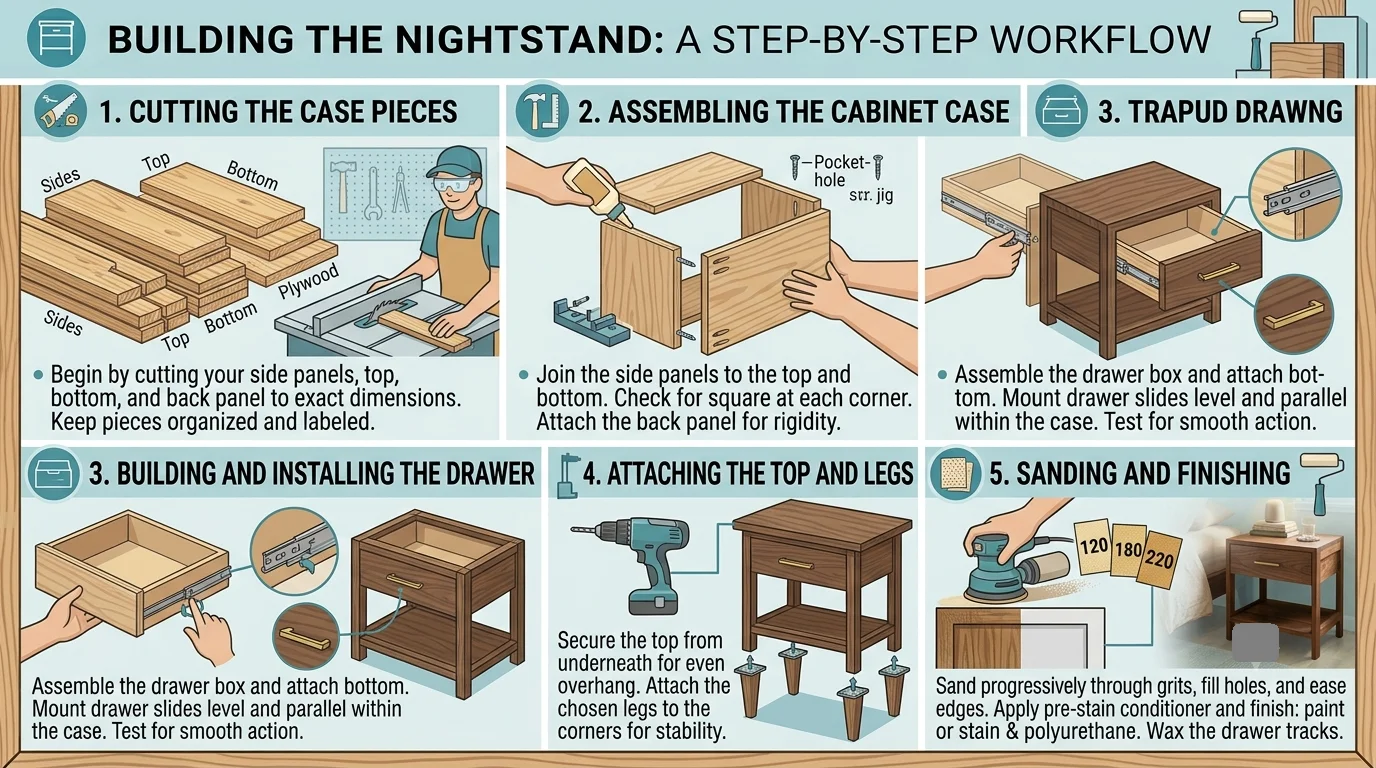
With dimensions and design decided, here’s how the build itself comes together, moving naturally from raw lumber to finished piece.
Cutting the Case Pieces
Begin by cutting your side panels, top, bottom, and back panel to the exact dimensions from your finalized measurements. If you’re using solid wood for the sides and plywood for the internal structure, this is the stage to keep both materials organized and clearly labeled, since it’s easy to mix up similarly sized pieces once cutting is underway.
Cut your drawer box pieces at the same time, sized to fit within the internal cavity of the cabinet with enough clearance on each side for your drawer slide hardware — typically about half an inch total, split evenly between both sides.
Assembling the Cabinet Case
Join the side panels to the top and bottom using pocket hole joinery, checking for square at each corner as you go. A cabinet that’s slightly out of square might still look fine sitting still, but it will cause the drawer to bind or rub unevenly once installed, so this step is worth taking slowly.
Once the main box is assembled, attach the back panel, which adds significant rigidity and keeps the whole structure from racking side to side. If you’re adding an open lower shelf, this is also the stage to install a support cleat or divider panel at the height determined by your original measurements.
Building and Installing the Drawer
Assemble the drawer box using glue and pocket screws or simple butt joints reinforced with screws, then attach the drawer bottom, which also helps square up the whole box. Mount your drawer slides to the inside of the cabinet case first, using a spacer block to keep both sides level and parallel, then attach the matching slide hardware to the drawer box itself.
Test the drawer action before attaching the drawer front, adjusting slide position slightly if the motion feels tight or uneven. Once it glides smoothly, attach the drawer front with screws from inside the drawer box, checking that the reveal — the small gap around the drawer front — is even on all sides for a clean, professional look.
Attaching the Top and Legs
Secure the top to the cabinet case from underneath with screws through the top edges of the side panels, positioning it for an even overhang on all visible sides. If you’re using separate legs rather than a solid base, attach mounting brackets or leg plates to the underside corners of the cabinet, positioned to keep the stance visually balanced beneath the case above.
Sanding and Finishing
Sand progressively through 120, 180, and 220-grit, paying special attention to the drawer front and top surface since these see the most direct light and touch. Fill any visible screw holes with wood filler matched to your finish plan, and ease sharp edges slightly with a light sanding pass for a more comfortable, finished feel.
Apply your chosen finish:
- For a stained, natural-wood look: apply a pre-stain conditioner on softer woods like pine to prevent blotching, then apply stain evenly with the grain, and seal with two to three coats of polyurethane or a hardwax oil.
- For a painted finish: prime thoroughly, then apply two thin, even coats of paint, sanding lightly with fine-grit paper between coats for a smooth, professional sheen.
Finally, install your drawer pull or knob, centered on the drawer front both vertically and horizontally, and give the drawer slides a final test now that the added weight of the finished front and hardware is in place.
Creative Variations to Personalize Your Build
Once you’re comfortable with the core build, there’s plenty of room to make it your own:
- Built-in charging shelf — a small routed cutout in the back panel of the drawer lets you keep a phone charging inside, out of sight
- Two-tone finish — a stained top paired with a painted case for contrast
- Floating nightstand design — wall-mounted rather than leg-supported, ideal for small rooms where floor space is especially tight
- Matching pair with subtle asymmetry — build two nightstands from the same plan but mirror the drawer or shelf orientation for visual interest across the bed
- Woven cane drawer front — swap a solid wood drawer front for a wood-framed cane panel for a light, textural look
Styling Your Finished Nightstand
Once built, a little intentional styling makes the piece feel complete rather than purely functional:
- Choose a proportional lamp — a lamp base roughly one-third the height of the nightstand keeps the overall silhouette balanced
- Leave breathing room — two or three objects on the surface reads as curated; more than that starts to feel cluttered
- Add one textural object — a small ceramic dish or woven coaster softens the hard lines of wood and lamp base
- Keep the drawer edited — since it’s now custom-built for what you actually use, resist letting it become a catch-all for unrelated clutter
- Consider a small stack of books — both functional and a nice textural, personal touch beside a lamp
Caring for Your Wooden Nightstand
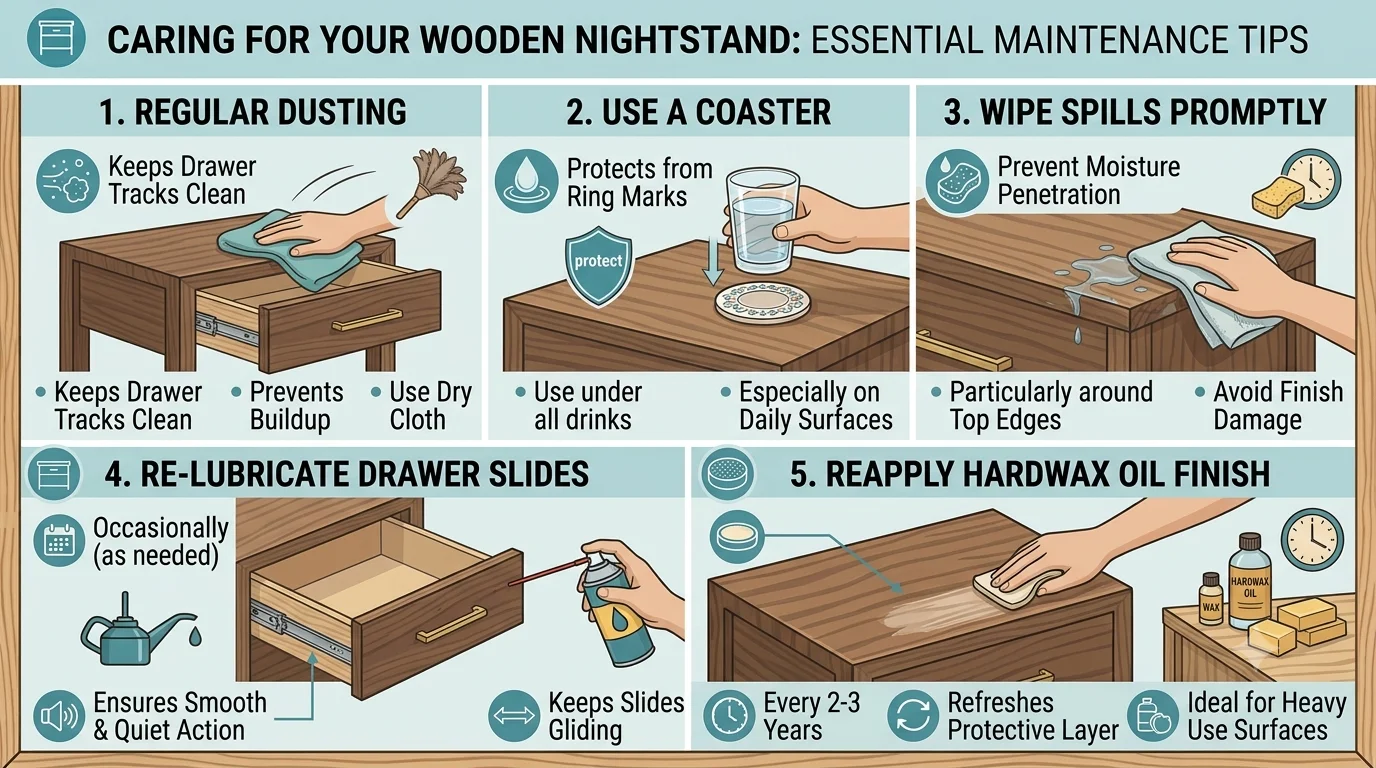
A well-built nightstand should last for decades with minimal upkeep. A few habits help preserve both function and finish:
- Dust regularly with a soft, dry cloth to keep the drawer track area free of debris that could affect slide action
- Use a coaster under glasses of water to protect the finish from ring marks, especially on a surface used every night
- Wipe up spills promptly to prevent moisture from penetrating the finish, particularly around the top edges
- Re-lubricate drawer slides occasionally if the action starts to feel less smooth over time
- Reapply a hardwax oil finish every couple of years if the surface sees heavy daily use
Frequently Asked Questions
What’s the ideal nightstand height compared to my mattress?
Aim for the nightstand surface to sit level with the top of your mattress, or up to two inches below it. This keeps reaching for items comfortable whether you’re lying down or sitting up in bed.
Do I need a table saw to build a nightstand accurately?
Not necessarily. A circular saw paired with a straightedge guide can produce clean, accurate cuts for a project this size, especially since most panels are relatively small and manageable compared to larger furniture builds.
How deep should the drawer be for typical bedside items?
An internal drawer depth of 10 to 14 inches comfortably holds glasses, a phone charger, hand cream, and a small book, while still leaving enough clearance behind for the drawer slide hardware.
Should I build one nightstand or a matching pair?
If your bed has open space on both sides, a matching pair creates a far more polished, intentional look than a single nightstand paired with a mismatched side table. Since you already have the cut list and jigs set up, building a second nightstand adds relatively little extra time.
How long does this build typically take?
For a first-time builder, expect one weekend for cutting and cabinet assembly, and a second weekend for drawer building, sanding, and finishing, largely due to drying time between coats. Experienced builders can often complete one nightstand in a single weekend.
Final Thoughts: Small Piece, Big Payoff
Few furniture projects offer as much return on effort as a well-planned nightstand. It’s small enough to complete in a weekend or two, forgiving enough for a first-time builder, and yet used so consistently that getting the details right — the height, the depth, the drawer size — makes a genuinely noticeable difference in daily life. That’s the real case for wooden nightstand plans with measurements: precision that off-the-shelf furniture simply can’t offer, paired with the satisfaction of building something that will sit beside your bed for years to come.
Take the time to measure your actual bed and room, choose a wood species and finish that fits your bedroom’s personality, and don’t rush the drawer fitting stage — it’s the detail most likely to be noticed every single night. Once it’s built, sanded, and finished, you’ll have a nightstand that fits your life exactly as well as it fits your room.