Woodturning is a captivating craft that allows you to create beautiful and functional pieces by shaping wood on a lathe. If you’re just starting out, finding the right inspiration is key. Here are some inspiring Wood Turning Projects for Beginners that are perfect to kickstart your craft and build your confidence.
Basic Wooden Bowls
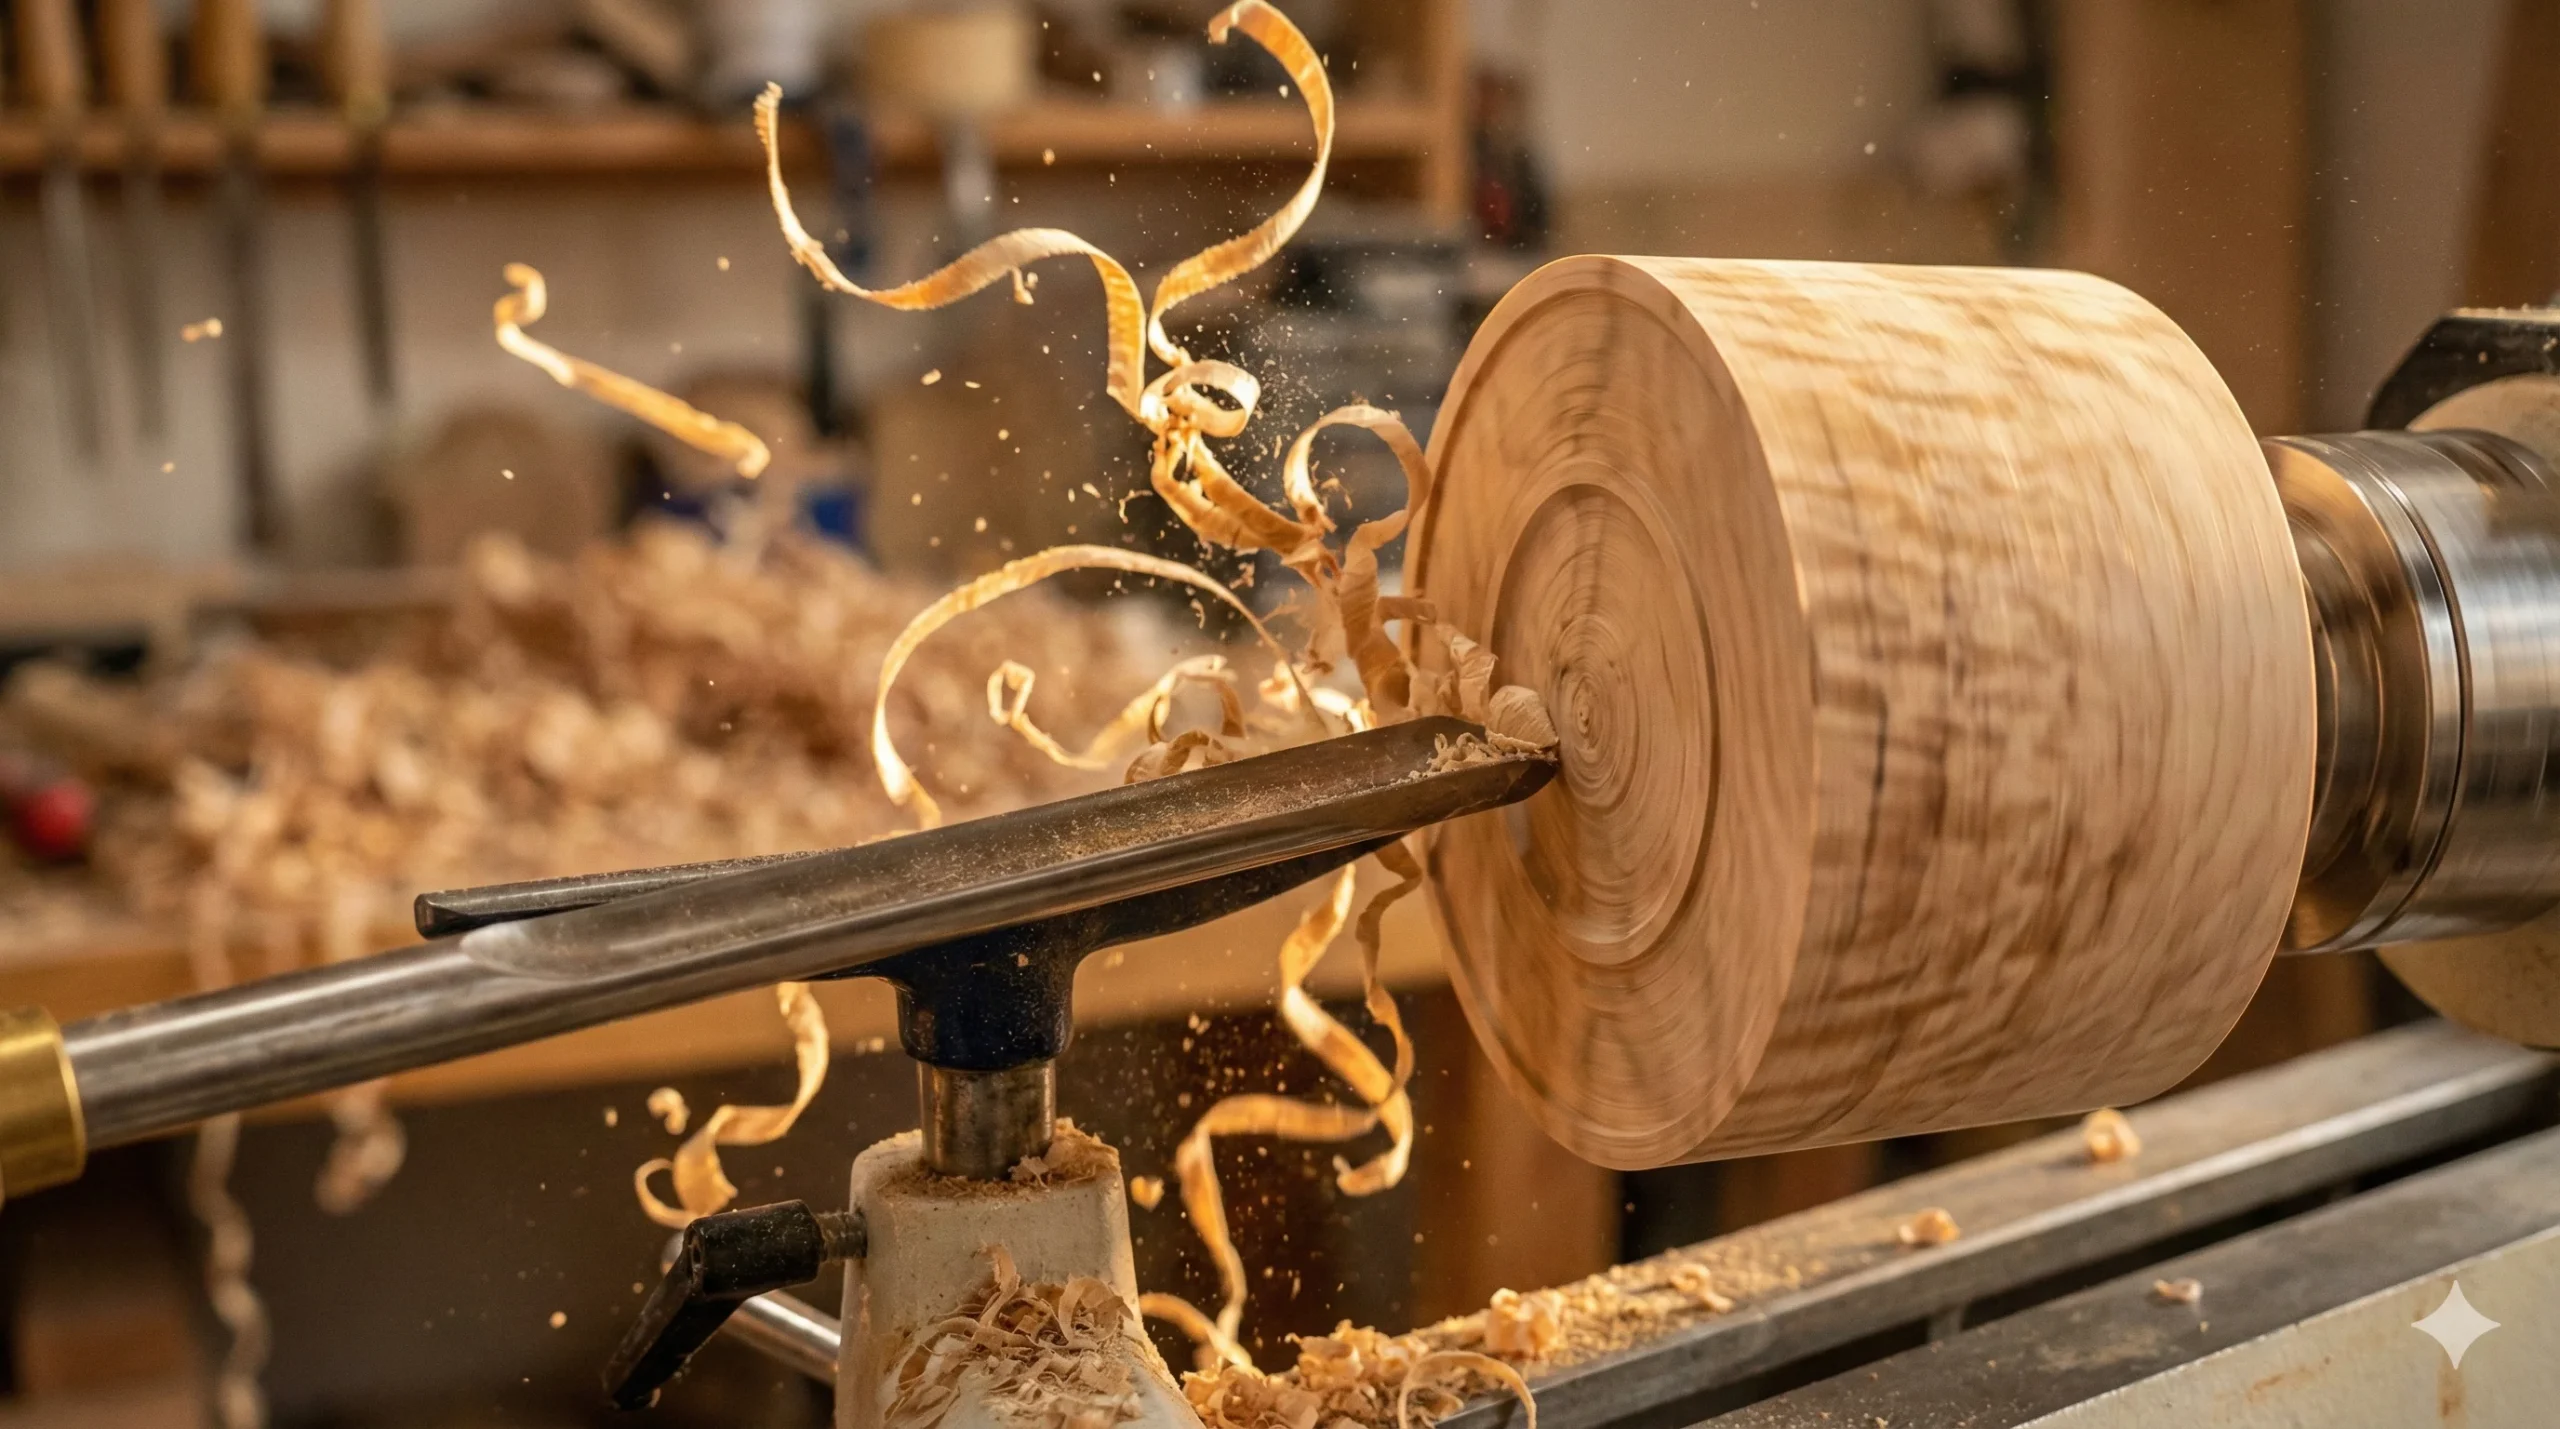
One of the easiest and most rewarding projects is turning wooden bowls. This project helps you learn the basics of woodturning—such as sharpening tools, centering wood, and using different cuts. You can start with a small bowl and gradually work your way up to larger sizes.
The steps to create a simple wooden bowl include:
- Select a piece of wood, preferably softwood like pine or a hardwood like maple.
- Mount the wood on the lathe securely.
- Use a bowl gouge to shape the outside of the bowl.
- Hollow out the inside using the proper gouging technique.
- Smooth the surfaces with sandpaper and finish with oil or varnish.
Spindle Turning Projects
Spindles can be an excellent way to master techniques used in wood turning. Consider turning candlesticks or plant stands as your first spindle projects. These items are both decorative and functional. Here are some simple spindle projects:
- Candlesticks: Create a pair to light up your dining table.
- Plant Stands: Design a stand that can hold your potted plants at an eye-catching height.
Whimsical Toys
Making wooden toys can unleash your creativity and bring joy to children. Toy projects can include spinning tops, simple cars, or even puzzles. These projects usually require less wood and help develop your precision skills. A popular choice for beginners is the spinning top:
- Choose a block of wood and mount it on the lathe.
- Shape the top to create a rounded tip and a flared body.
- Sand and finish the spinning top to give it a polished look.
Simple Wooden Pens
Crafting wooden pens is a fantastic way to combine practicality with artistry. Pen kits are widely available, making this project accessible. You will need a lathe, the pen kit, and some wood, typically made from beautiful hardwoods like walnut or mahogany.
The steps are straightforward:
- Drill a hole through the wooden blank for the pen kit.
- Mount it on the lathe and shape the outside to your desired form.
- Sand and finish your pen before assembling it with the kit.
Keychain Fobs
Keychain fobs can be a fun and quick woodturning project. They take minimal time and materials, making them perfect for beginners. You can customize them to match your style and even add engraving later on. Follow these steps:
- Select a wood blank, usually around 1 inch by 1 inch.
- Mount it onto the lathe and shape the keychain fob.
- Drill a hole for the key ring and finish the surface.
Additional Resources
To further enhance your skills and find more Wood Turning Projects for Beginners, consider these incredible websites:
These projects offer an excellent way to teach yourself the techniques of shaping wood while enjoying the creative process. Each project will refine your skills, boost your confidence, and allow you to create unique pieces.
Essential Tools for Successful Wood Turning
Wood turning is a rewarding hobby that allows you to transform raw wood into beautiful pieces of art and functional items. To embark on this creative journey, you need the right tools. Whether you are a complete novice or have some experience, understanding essential equipment can elevate your Wood Turning Projects for Beginners. Here is a look at the must-have tools that will help ensure your success in wood turning.
First and foremost, the lathe is the star of your workshop. A wood lathe spins the wood so you can shape it easily. When choosing a lathe, consider key features like power, size, and variable speed settings. A good starter lathe should have enough power to handle a range of projects. Popular brands such as Laguna Tools and JET Tools offer suitable options for beginners. Look for a lathe that allows you to grow as your skills improve.
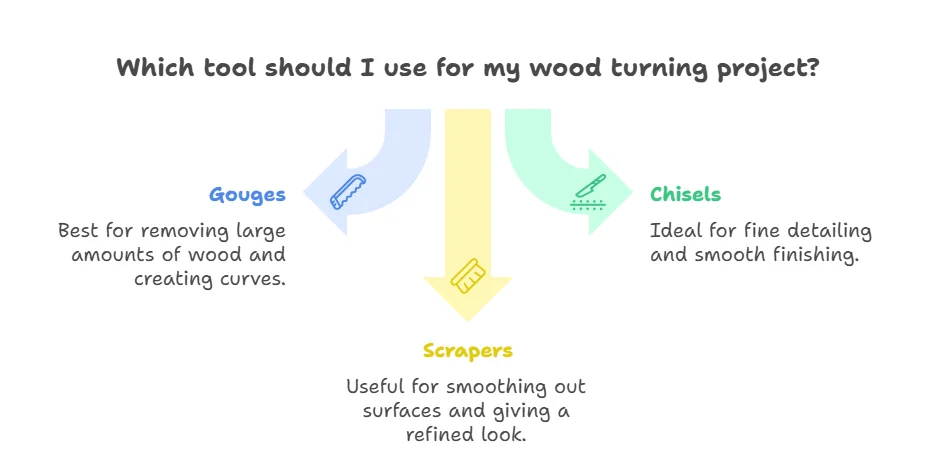
Next, invest in high-quality cutting tools. These are essential for shaping and detailing your wood pieces. Typical turning tools include:
- Gouges: Perfect for removing large amounts of wood and creating curves.
- Chisels: Ideal for fine detailing and smooth finishing.
- Scrapers: Useful for smoothing out surfaces and giving your projects a refined look.
Quality matters here, so consider brands like Rockler for reliable tools that can withstand repeated use.
Another critical tool is a sharpening system. Keeping your cutting tools sharp will significantly enhance your efficiency and the quality of your work. Options range from bench grinders to specialized sharpening jigs designed for woodturning tools.
The tailstock and headstock are two components of the lathe that help secure your wood piece. The tailstock is crucial for holding the wood firmly in place during turning, while the headstock provides the initial grip and power.
Safety Gear
Safety gear cannot be overlooked. A good pair of safety glasses is important to protect your eyes from wood chips and dust. Additionally, a dust mask will help you avoid inhaling fine particles created during turning. Consider investing in a full-face shield; this provides added protection against flying debris while you work.
Other helpful accessories for wood turning include:
- Calipers: Essential for measuring wall thickness and ensuring even cuts.
- Tool rests: Provide stability and control while using tools.
- Pen kits: Perfect for beginners to start with small, manageable projects.
One of the best things about wood turning is the variety of projects you can undertake. Looking for inspiration or additional tips? Websites like Wood Turning Tool Store and Woodworker’s Source provide fantastic resources.
Consider joining a local or online woodturning community. These groups offer a wealth of information, support, and camaraderie. Whether it’s sharing projects or troubleshooting problems, learning from fellow woodturners can significantly enhance your skills and enjoyment of the craft.
Step-by-Step Guide to Creating Your First Wood Turning Piece
Wood turning is an exciting hobby that allows you to create beautiful pieces of art from simple blocks of wood. If you are looking to start your first of many Wood Turning Projects for Beginners, the task might seem daunting. However, with the right guidance, you can create something remarkable.
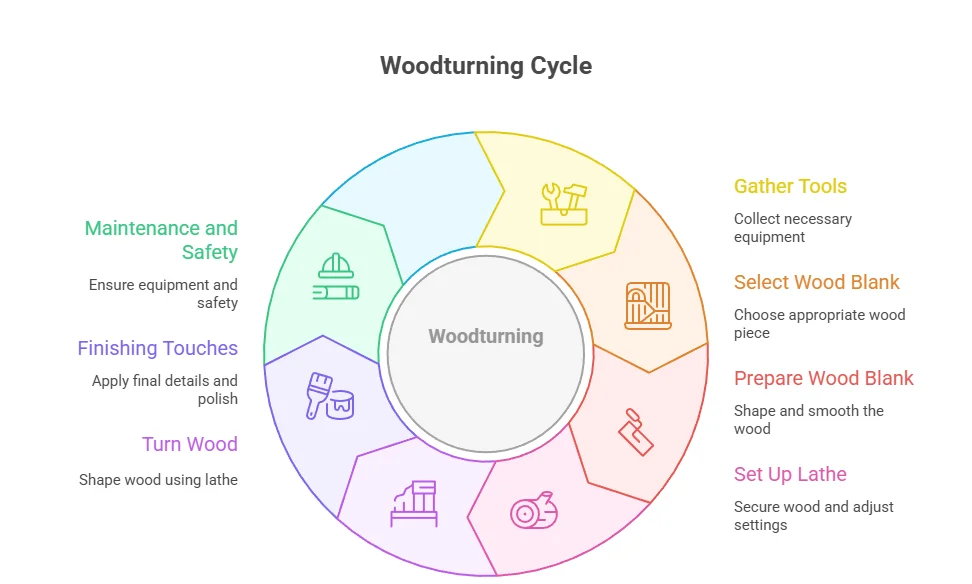
Gather Your Tools
Before beginning your wood turning project, it’s crucial to gather the necessary tools. Here’s what you will need:
- Lathe: This is the primary tool for turning wood.
- Wood tools: Engraving tools such as chisels, gouges, and scrapers.
- Safety equipment: Safety glasses, ear protection, and dust mask.
- Wood blank: A piece of wood that you will turn into your project.
- Faceplate: Used to attach the wood blank to the lathe.
Selecting Your Wood Blank
Choosing the right wood is essential for your project. For beginners, softwoods like pine or poplar are recommended. These woods are easier to work with and won’t damage your tools as quickly as hardwoods. Choose a wood blank that is at least 2 inches thick for added stability.
Preparing the Wood Blank
Once you have your wood blank, it’s time to prepare it:
- Inspect the wood: Check for cracks or defects that could affect your project.
- Cut the blank: If necessary, cut it to size with a saw.
- Attach the blank: Secure the wood blank to the faceplate using screws, ensuring it is centered.
Setting Up the Lathe
It’s important to set up your lathe properly to ensure safety and efficiency:
- Position the lathe on a stable surface.
- Ensure the tool rest is set at the appropriate height, about even with your elbow when you stand beside the lathe.
- Use the tailstock to add support to the opposite end of your wood blank if needed.
Turning the Wood
Turning the wood is the most exciting part of the process. Follow these steps:
- Start Slowly: Begin with a slow speed to get a feel for the lathe and wood.
- Engage the tool: Hold your chisel at a 45-degree angle to the wood and make light contact. Gradually increase pressure as you gain confidence.
- Shape the piece: Move the tool along the wood, shaping it into your desired design. Don’t rush this step.
Finishing Touches
After you’ve shaped your piece, it’s time to finish. Here are common finishing techniques you can use:
- Sanding: Start with a coarse grit sandpaper and move to finer grits to achieve a smooth surface.
- Sealing: Apply wood sealer or finish to protect your piece and enhance the wood’s natural beauty.
- Polishing: For an additional shine, use a wax polish or buffing compound.
Maintenance and Safety
Always keep safety in mind while working with a lathe. Make sure to wear your safety glasses and ear protection. Regularly maintain your tools by sharpening your chisels and cleaning your workspace to prevent accidents.
Starting with wood turning can lead to endless creative possibilities. Celebrate your successes and learn from your mistakes. Remember, practice makes perfect!
Common Mistakes to Avoid in Wood Turning Projects

Wood turning can be a rewarding hobby that combines creativity with craftsmanship. However, many beginners tend to make the same mistakes that can lead to frustration and wasted resources. By recognizing and avoiding these common pitfalls, you can enhance your skills more quickly, enjoy your projects, and produce better results.
Not selecting the right wood
One of the most common errors is underestimating the importance of selecting the right wood. Not all wood is suitable for turning. Soft woods such as pine can be easier to work with for beginners, while hardwoods like oak or walnut may require more advanced techniques. Consider beginning with softwoods to practice your skills before moving on to harder materials.
Not securing your workpiece
Another significant mistake is neglecting to properly secure your workpiece. Ensuring the wood is clamped tightly or mounted securely on the lathe is essential. Unsecured pieces can slip or break, leading to potential injury or damage to your project. Always double-check that your workpiece is correctly positioned before starting the lathe.
Not maintaining proper tool sharpness
Also, remember to maintain proper tool sharpness. Dull tools can cause tearing of the wood grain and result in a poor finish. Regularly sharpen your chisels and gouges using a sharpening stone or a grinder. This simple step can make a significant difference in the quality of your turnings.
Poor stance and grip
Your stance and grip while operating the lathe play a crucial role in your overall control. Beginners often overlook this aspect, leading to poor-quality cuts and even accidents. Be sure to stand comfortably with your feet shoulder-width apart and maintain a firm, stable grip on your tools. This position will help you achieve better control and finish in your woodworking projects.
Not applying cutting techniques
Several cutting techniques can lead to frustration if misapplied. For example, when making a cut, it’s essential to understand the difference between pushing and pulling the tool. Pushing can sometimes force the tool through the wood too quickly, risking splintering and tearing. Conversely, pulling can provide smoother cuts. Experiment with both techniques during practice sessions to find what works best for your style.
Not setting the right speed
Setting the right speed is crucial as well. Many beginners make the mistake of setting their lathe speed too high, which can cause vibration or damage. Start at a lower speed and gradually increase it as you become more comfortable with the process and the material you’re working on. The right speed will depend on the type of wood and the size of your project.
Neglecting safety gear
Neglecting safety gear can lead to severe injuries. Always wear eye protection and consider using a face shield when working with a lathe. These simple precautions can save your vision while preventing wood chips and debris from causing harm. Invest in a sturdy pair of gloves to protect your hands from sharp edges, but be mindful not to wear overly loose clothing that can get caught in the machinery.
Not having a clear plan
For those who are eager to get started, plan your projects ahead of time. Jumping in without a clear plan can lead to confusion and mistakes. Utilize Woodturners Association resources for project ideas and designs tailored for beginners. Having a blueprint will help you track your progress and ensure you stay focused on your goals.
Try to be patient with yourself as you learn. Wood turning requires practice, and it’s unlikely that your first project will be perfect. Engage with online communities or local woodworking clubs where you can ask for advice, share your work, and learn from the experiences of others. Websites like Instagram Woodturning offer rich inspiration and the chance to connect with fellow enthusiasts.
By taking the time to avoid these common mistakes, you will significantly improve your journey into wood turning. Remember, each project is an opportunity to learn, grow, and express your creativity.
Tips for Choosing the Right Wood for Your Projects

When diving into woodworking, one of the first and most crucial decisions you’ll make is choosing the right wood for your project. The type of wood you select can significantly influence the quality, durability, and appearance of your finished piece.
Understand Different Wood Types
Wood can generally be categorized into two main types: hardwoods and softwoods. Knowing the difference is essential for making informed decisions:
- Hardwoods: These come from deciduous trees and are known for their durability and resistance to wear. Common hardwoods include oak, walnut, and maple. They are ideal for projects that require strength and a fine finish.
- Softwoods: Sourced from coniferous trees, softwoods like pine, cedar, and spruce are typically easier to work with and less expensive. They are great for projects such as furniture or crafts where heavy wear and tear are not expected.
Consider the Project Requirements
Different projects call for different types of wood. Here are a few aspects to consider:
- Functionality: Think about how the piece will be used. If it will bear weight, opt for a strong hardwood.
- Finish: If you plan to stain or paint the wood, try samples first. Some woods take finishes better than others. For example, maple holds stain well, while pine can be blotchy.
- Weight: If you need a lightweight option for hanging items, softwoods may serve you better.
Evaluate the Wood’s Aesthetic Qualities
Wood not only serves a functional purpose but also plays a significant role in the visual appeal of your project. Consider the following:
- Grain Pattern: The grain pattern can add character to your project. Different woods showcase varied grain structures, from the straight grains of oak to the elaborate swirls of walnut.
- Color: The natural color of the wood impacts the overall aesthetics. Light woods like birch can give a modern look, while dark woods like mahogany offer a classic touch.
Choose Sustainable Options
In today’s eco-conscious world, it’s important to consider sustainability. Look for woods that are certified by organizations like the Forest Stewardship Council (FSC). This ensures the wood comes from responsibly managed forests. Choosing reclaimed wood is another excellent way to make a sustainable choice while adding character to your projects.
Assess Cost and Availability
The price varies significantly across different wood types. Generally, hardwoods are more expensive than softwoods. If you’re new to woodworking, you may want to stick with more affordable genres at first:
| Wood Type | Price Range (per board foot) | Typical Uses |
|---|---|---|
| Pine | $2 – $5 | Furniture, cabinetry, shelving |
| Oak | $5 – $10 | Flooring, furniture, cabinetry |
| Maple | $4 – $8 | Butcher blocks, cabinets, furniture |
| Walnut | $10 – $20 | Fine furniture, cabinetry, veneers |
Check the availability at your local lumberyard or online stores like Woodworker’s Source and Rockler.
Learn from the Community
Don’t hesitate to engage with the woodworking community. Whether you visit forums, join local groups, or follow online tutorials, you’ll find a wealth of knowledge. Fellow woodworkers can provide insights into their experiences with different wood types, helping you make informed choices for your projects.
The process of choosing the right wood should balance functionality, aesthetics, and environmental considerations. By taking the time to understand the different types available, you can select the best materials for your woodworking projects and enjoy the journey of creation. Happy woodworking!
Conclusion
Embarking on wood turning projects as a beginner can be an exciting and fulfilling journey. With the right inspiration from various Wood Turning Projects for Beginners tailored for novices, you can start shaping your imagination into tangible creations. Familiarizing yourself with essential tools is crucial, as they set the foundation for successful turning experiences. Utilizing a detailed step-by-step guide allows you to navigate the complexities of your first piece, ensuring that you feel confident throughout the process.
As you dive into this craft, being aware of common mistakes can save you both time and material. Learning about these pitfalls will help you refine your technique and enhance your skill set. Furthermore, choosing the right wood for your projects can significantly impact the quality of your work. Experimenting with different types will not only help you understand their unique properties but also inspire your creativity.
Remember, every craftsman starts somewhere, and each project is a stepping stone to becoming better. Patience and practice are essential, so embrace the learning process. The joy of wood turning lies not just in the finished piece but in the journey itself. Don’t hesitate to share your projects and seek feedback from fellow woodturners. Your passion for this craft will grow as you learn, and before you know it, you’ll have an impressive portfolio of unique, hand-crafted objects. Start turning, and let your creativity flourish!