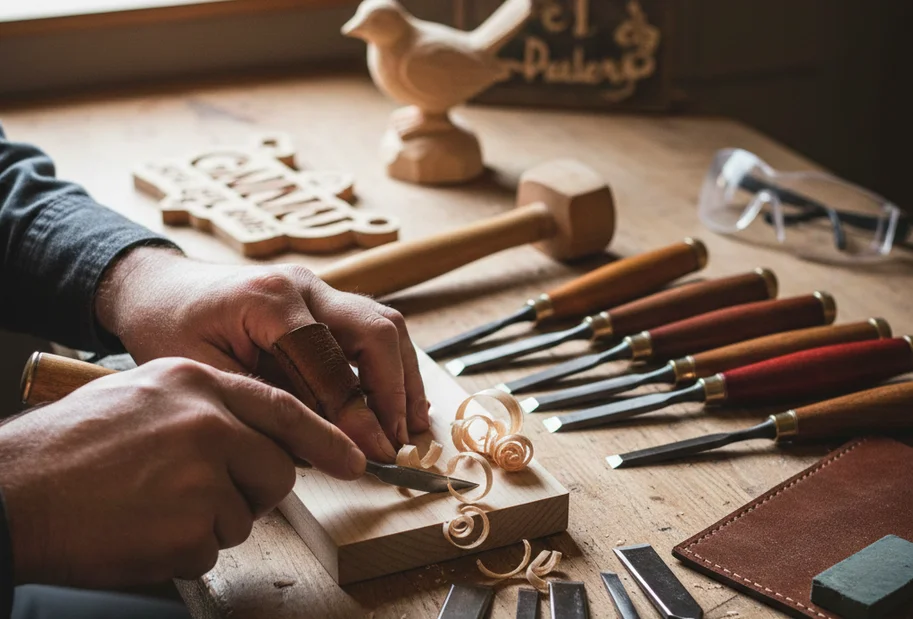
Wood Carving with Hand Tools is a rewarding craft that allows you to create unique pieces of art and functional items. Whether you are a beginner or looking to refine your skills, mastering various techniques is essential for achieving beautiful results.
Understanding Basic Hand Tools
To begin your journey in wood carving, you need to familiarize yourself with the essential tools. Hand tools are great for achieving precision and control. Here is a list of common tools that every woodcarver should consider:
- Carving Knives: These knives are essential for detailed work. They come in various shapes and sizes to help you make specific cuts.
- Chisels: Chisels help you remove larger sections of wood and create flat surfaces. They come in different widths and shapes, suitable for various tasks.
- Gouges: Used for making curves and hollows, gouges are vital for shape and design.
- Mallet: A mallet is used to strike chisels and gouges for more forceful, controlled cuts.
- Sharpening Tools: Keeping your tools sharp is crucial, so investing in a sharpening stone or a honing guide is necessary.
Choosing the Right Wood
The type of wood you choose can significantly affect your carving experience and the final product. Here are a few types of wood commonly used in hand carving:
| Type of Wood | Benefits | Considerations |
|---|---|---|
| Basswood | Soft, easy to carve, and smooth surface | Somewhat soft and susceptible to damage |
| Cherry | Beautiful grain, rich color, and durability | Harder than softwoods requiring sharper tools |
| Walnut | Strong, dark, and elegant finish | More expensive and more challenging to carve |
| Pine | Readily available, inexpensive, and lightweight | Knots can make it harder to carve smoothly |
Essential Carving Techniques
Once you have your tools and wood, it’s time to dive into various techniques. Here are a few essential methods to help you get started:
Straight Cuts
Use a carving knife to make straight cuts along the grain. This technique is foundational and trains you in controlling your tool.
Shaping
To shape your work, use chisels and gouges to remove excess wood. Work slowly and steadily, taking off small amounts at a time to maintain control.
Detailing
Detailing involves adding texture and fine features to your piece. This can include patterns, grooves, and ornamental details using finer knives and chisels.
Finishing
After your carving is complete, sand your piece to smoothen rough edges. It’s important to apply a finish like oil or varnish that protects your work while enhancing its natural beauty.
Safety Measures and Best Practices
Safety should be your priority when carving. Follow these best practices to prevent accidents and injuries:
- Always cut away from your body.
- Keep your tools sharp to reduce the chance of slipping.
- Wear safety goggles to protect your eyes from wood chips.
- Work in a well-lit area to clearly see your cuts.
Expanding Your Skills
To further master Wood Carving with Hand Tools, consider exploring the following resources: Books such as Woodcarving Illustrated provide excellent guidance. Additionally, websites like Woodcraft offer a range of tools and materials tailored for woodcarving. Joining a local carving club or online community can also propel your skills. These groups often host workshops and share valuable tips and tricks. With practice, patience, and creativity, you can master the art of Wood Carving with Hand Tools. Dive into this fulfilling craft; your journey awaits!
The Best Hand Tools for Beginning Wood Carvers
Starting your journey in wood carving can be both exciting and overwhelming. With countless tools available, it can be tough to know where to begin. Focusing on the right hand tools is essential for any beginner wood carver. Below, we explore a selection of the best hand tools, providing you with a solid foundation for your carving journey.
Essential Hand Tools for Beginners
When you’re new to wood carving, investing in the right tools can make your experience enjoyable and effective. Here’s a list of essential hand tools that will help you create beautiful wood carvings:
- Carving Knives: These are your primary tools for shaping and detailing wood. Look for a knife with a comfortable handle and a sharp blade.
- Gouges: Gouges come in various shapes and sizes. They are perfect for hollowing out and creating curves in your wood pieces.
- Chisels: Chisels are versatile tools used for cutting, shaping, and detailing. Choose chisels with a variety of edge shapes to expand your carving options.
- V-tools: A V-tool is excellent for making fine lines and details. It’s perfect for creating intricate patterns on your projects.
- Palestick: This handy tool helps support your work while you carve. It allows for better control and stability.
Choosing High-Quality Tools
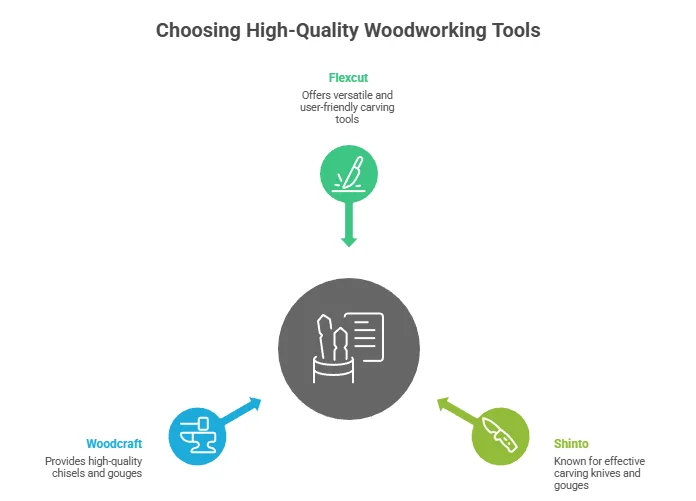
As a beginner, you might feel tempted to buy cheap tools to save money. However, high-quality tools perform better, make your job easier, and can last a lifetime if cared for properly. Here are a few brands recommended for beginners:
- Flexcut: Offers a wide range of versatile and user-friendly carving tools.
- Shinto: Known for their effective carving knives and gouges, Shinto tools are particularly good for beginners.
- Woodcraft: Provides a range of high-quality chisels and gouges suitable for novice carvers.
Consider visiting Woodcraft for a selection of quality tools for beginning wood carvers. This site features product reviews and user feedback, helping you make informed choices.
Maintenance Tips for Your Tools
Keeping your carving tools in excellent condition will enhance your carving experience. Here are some tips to maintain them:
- Sharpen Regularly: A sharp tool is safer and more effective. Invest in a good sharpening stone.
- Clean After Use: Remove any wood chips and dust from your tools after each session to avoid rust and damage.
- Store Properly: Keep your tools in a dry place. Using a protective case or leather roll can prevent damage.
Wood Selection for Beginners
Choosing the right wood is just as important as selecting your carving tools. Softwoods are ideal for beginners due to their ease of carving. Here are some recommended types:
| Wood Type | Characteristics |
|---|---|
| Pine | Soft, easy to carve, and widely available; good for beginners. |
| Basswood | Soft, light, and has a fine grain; makes intricate carvings easier. |
| Butternut | Lightly colored with a fine grain; soft and pleasant to work with. |
For more information on wood selection, visit The Wood Database. This website provides valuable insights into various types of wood and their carving potential.
Learning Resources
Getting started in wood carving can be greatly aided by learning resources. Here are a few platforms that offer guidance for beginners:
- YouTube: Browse tutorials and carving techniques from seasoned woodworkers.
- Woodworker’s Journal: Offers articles and tips specific to wood carving.
- Instructables: Find step-by-step projects to help develop your skills.
Equipping yourself with the right hand tools and resources will set you on the path to becoming a skilled wood carver. Remember to take your time, practice regularly, and enjoy the creative process. Happy carving!
Understanding Wood Types and Their Impact on Carving
When you embark on the journey of Wood Carving with Hand Tools, understanding the various types of wood is crucial. Different woods behave uniquely during carving and can yield drastically different results. It’s essential to select the right wood type based on your project’s requirements. Below, we’ll explore some popular wood types used in carving, their characteristics, and how they can impact your work.
Softwoods vs. Hardwoods
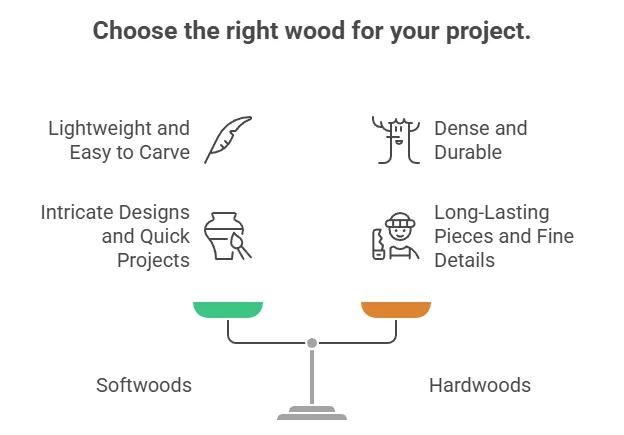
The first distinction to make is between softwoods and hardwoods. Softwoods generally come from coniferous trees and tend to be easier to carve. Hardwoods, on the other hand, are denser and come from deciduous trees. Here’s how they compare:
| Type | Characteristics | Best Uses |
|---|---|---|
| Softwoods | Lightweight, easier to carve, less durable | Intricate designs, quick projects |
| Hardwoods | Dense, durable, often more challenging to carve | Long-lasting pieces, fine details |
Popular Wood Types for Carving
Let’s take a closer look at specific wood types that are excellent for carving:
- Pine: A common softwood, pine is affordable and easy to work with. Its light color makes it great for beginners, but it can splinter, so be careful!
- Basswood: Known as one of the best carving woods, basswood is lightweight and soft, making it easy to carve. It accepts details well, which is why many carvers prefer it for intricate designs.
- Cedar: Cedar has a pleasant aroma and resists decay, making it ideal for outdoor projects. Its subtle grain pattern adds character, although its softness can be a drawback for very fine details.
- Oak: This hardwood is very durable and can result in beautiful finishes. However, oak is dense and can be tough on your tools, requiring well-maintained carving tools.
- Mahogany: A favorite among advanced carvers, mahogany is beautiful and relatively easy to carve compared to other hardwoods. It offers rich colors and finishes that bring life to any carving.
- Cherry: Cherry is another hardwood that adds a warm tone to projects. It’s easy to shape but requires sharp tools; otherwise, it could lead to messy results.
Understanding Wood Grain
The direction of the wood grain also plays a significant role in carving. Wood can have straight, interlocked, or wavy grains, which influence how easy or challenging it is to carve. Here are some important terms to understand:
- Straight Grain: Easier to carve and provides a cleaner cut.
- Interlocked Grain: Can create challenges as it may catch on tools and lead to unpredictable results.
- Wavy Grain: Offers unique looks but requires more skill to carve effectively.
Additional Considerations
When choosing the wood for your carving project, consider the following factors:
- Finish: Some woods finish better and take stains or paints well. This is important if you plan to enhance your project with a rich finish.
- Availability: Ensure the wood you choose is readily available in your area. Some specialty woods may be harder to find.
For more information on choosing the right wood for your carving projects, visit Wood Carving Illustrated or check out Wood Magazine for helpful tips and guides. Ultimately, your choice of wood can enhance or hinder your carving experience. By understanding the different types and their characteristics, you can make informed decisions that lead to beautiful, satisfying results in your wood carving endeavors.
Safety Considerations for Hand Tool Wood Carving

Wood Carving with Hand Tools is a rewarding hobby that unleashes your creativity while providing a tangible outcome. However, just like any art form, safety should always be your first priority. By keeping certain precautions in mind, you can enjoy your carving sessions without the risk of injury. Here’s what you need to know to ensure a safe and enjoyable wood carving experience.
Understanding Your Tools
Before you start carving, familiarize yourself with each hand tool. Whether it’s chisels, gouges, or knives, understanding how each tool functions can prevent accidents. Always inspect your tools to ensure they are in good condition; dull or damaged tools can cause slips and injuries.
- Chisels: Keep them sharp and use a proper grip.
- Gouges: Be mindful of the cutting edge direction.
- Knives: Always cut away from your body for safety.
Workspace Setup
A well-organized workspace can make a huge difference in your safety. Make sure your workspace is clear of clutter. This includes:
- Having ample light so you can see details.
- Stable surfaces to work on.
- All necessary tools within reach, minimizing unnecessary movements.
Additionally, consider using a carving vise to secure your wood. This not only provides better control but also keeps your hands away from the cutting edge. For more information on setting up a workspace, check out Woodcraft.
Protective Gear
Always wear appropriate protective gear. While it may seem unnecessary at first, taking this small step can save you from serious injuries. Key items to consider include:
- Cut-Resistant Gloves: Protect your hands from accidental cuts.
- Safety Glasses: Safeguard your eyes from flying wood particles.
- Apron: Wear an apron to shield your body from wood shavings and splinters.
Proper Technique
Adopting the right technique is crucial for safety. Here are some tips:
- Use Proper Posture: Sit or stand in a comfortable position to maintain control over your tools.
- Mind Your Hands: Always be aware of where your hands are relative to your cutting edge.
- Take Your Time: Rushing can lead to mistakes and injuries; focus on your work.
For detailed guidance on techniques, the Carving Magazine is a valuable resource.
First-Aid Preparedness
Accidents can still happen no matter how careful you are. Be prepared by keeping a first-aid kit nearby. Your kit should include:
- Adhesive bandages
- Antiseptic wipes
- Gauze and tape
Knowing basic first-aid procedures can help you respond quickly in case of an injury. For comprehensive first-aid resources, check out Red Cross.
Cleansing and Maintenance
After each session, clean your tools and workspace properly. This not only ensures your tools last longer but reduces the chances of accidental injuries in the future. Use a damp cloth to wipe off any debris and apply oil to metal parts to prevent rust. Organizing your tools at the end also contributes to a safer environment for your next carving session.
By adopting these safety considerations, you’ll be able to focus on the joy of Wood Carving with Hand Tools, rather than worrying about mishaps. Always remember that safety first helps keep the joy of carving alive and well. Happy carving!
Inspiring Projects for Wood Carvers: From Simple to Complex
Wood carving is an age-old craft that brings creativity to life through the manipulation of natural materials. Whether you’re a beginner or an expert carver, there are projects that can deepen your skills and expand your creative horizons. Here are some inspiring projects for wood carvers, ranging from the simplest to the more complex, that can ignite your passion for this craft.
Simple Projects for Beginners
If you’re just starting your journey in wood carving, it’s best to begin with simpler projects that allow you to practice basic techniques and build your confidence. Here are some ideas to get you started:
- Spoon Carving: Creating a simple wooden spoon is a great way to learn about tool control and cutting technique. It’s functional and gives you a real sense of achievement.
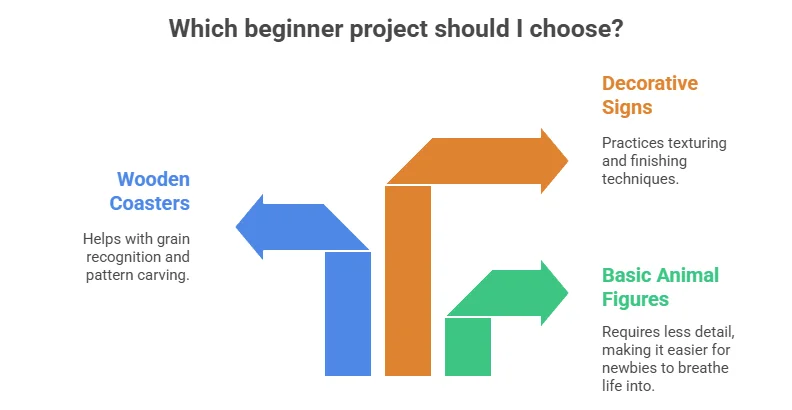
- Basic Animal Figures: Try carving small animals like birds or fish. These figures often require less detail, making them easier for newbies to breathe life into.
- Wooden Coasters: Carve simple design patterns into wooden discs for unique coasters. This project helps with grain recognition and pattern carving.
- Decorative Signs: Use your skills to carve out letters or simple designs onto wood for signage. This helps you practice texturing and finishing techniques.
These projects allow you to explore and have fun without feeling overwhelmed.
Intermediate Projects for Skill Development
Once you’ve honed your basic skills, you can move on to more intermediate projects that present greater challenges and learning opportunities. Consider trying:
- Wooden Toys: Carving simple toys like cars or dolls can help you learn about shaping and assembly while giving you a charming end product.
- Relief Carving: Create three-dimensional scenes by carving into a flat piece of wood. This will help you learn depth and perspective in your carvings.
- Jewelry Items: Carve pendants or cufflinks from blocks of wood. Such projects allow you to practice precision while producing wearable art.
- Bowls: Learning to carve bowls helps you understand how to use various tools effectively and improves your ability to deal with grain direction.
These projects challenge you while enhancing your skills.
Advanced Projects for Experienced Carvers
For those who are seeking to push their boundaries further, here are some complex projects that require finesse and a wider range of techniques:
- Life-sized Figurines: Carving full-bodied figures can test your skills in proportion, detail, and anatomical understanding, resulting in stunning final products.
- Custom Furniture: Engaging in projects like chairs or tables allows you to explore larger-scale projects that require structural integrity and aesthetic appeal.
- Intricate Sculptures: These works of art can represent anything from abstract shapes to human forms, allowing your imagination to run wild.
- Architectural Carvings: Work on decorative elements for doors or window frames. This project can involve complex patterns and traditional designs.
With advanced projects, your artistic expression has no limits, and you can truly shine as a wood carver.
Gather Inspiration and Learn More
There’s always more to discover in the world of wood carving. Several excellent resources can help you on your journey. Websites such as Woodcarving Illustrated provide tutorials, tips, and a community of fellow woodworkers. For videos, check out The Woodcarving Channel, which offers demonstrations that can be incredibly helpful. Whether you’re taking your first shavings or pushing your skills to the limit, the projects you choose will greatly influence your growth as a wood carver. Remember, the key is to enjoy the process of nurturing your skills while letting your creativity flourish!
Conclusion
Wood Carving with Hand Tools offers a gratifying and creative journey for artisans at any level. Mastering essential techniques, such as proper grip and carving angles, is pivotal to elevating your skills. As you begin your wood carving adventure, selecting the right hand tools—like chisels, knives, and gouges—can significantly affect the quality of your work and your overall experience. Each tool serves a unique purpose, and understanding their functions and benefits is key to successful projects.
The type of wood you choose plays an equally crucial role in your carving results. Different woods, from soft pine to hardwoods like oak and cherry, each present unique textures and characteristics. Choosing the right wood not only aids in achieving finer details but also enhances your project’s longevity. Safety is paramount in hand tool wood carving. By using proper techniques and protective gear, you can enjoy the process while minimizing risks. Familiarizing yourself with safe practices ensures a positive carving experience and encourages you to explore your creativity confidently.
As you gain proficiency, challenge yourself with inspiring projects that vary in complexity. Whether crafting simple spoons or intricate sculptures, every piece you create adds to your skillset. Remember, the joy of wood carving lies not just in the finished product but also in the journey of growth and exploration. Embrace the art of carving with hand tools, and let your imagination take flight.