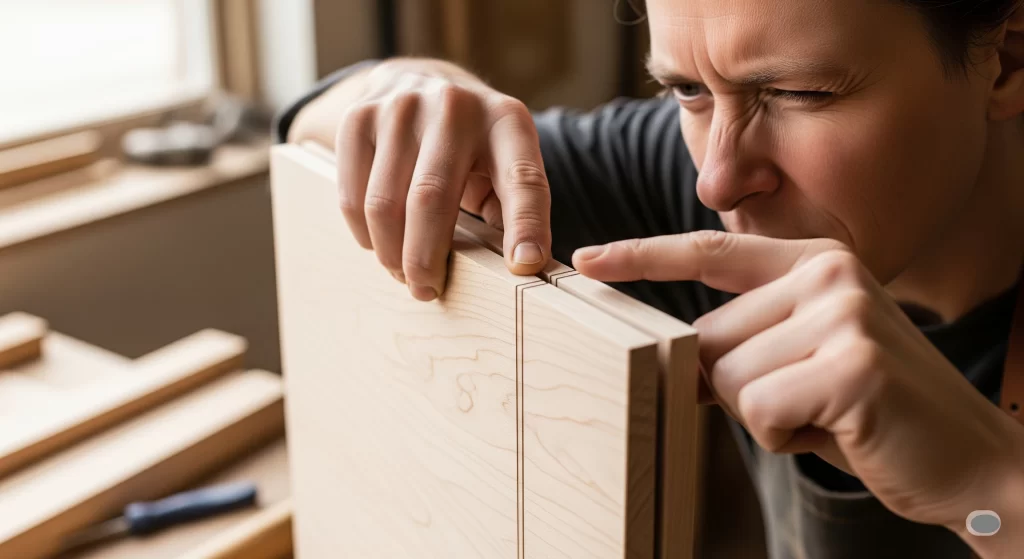
In woodworking, understanding the different types of joints and their strengths is crucial. One of the key aspects to consider is identifying what is the weakest joint in woodworking? Different joints serve various purposes, and selecting the right joint can significantly affect the durability and quality of your project.
The weakest joint is generally recognized as the butt joint. This joint involves simply placing two pieces of wood together end to end or edge to edge, without any interlocking features. While it is easy to create, the lack of mechanical support makes it inherently weak.
Reasons for Joint Weakness
Why the Butt Joint is Unreliable
Here are some reasons why the butt joint is often seen as unreliable:
- No interlocking features: Unlike dovetail or tenon joints, the butt joint does not engage the wood fibers securely. This makes it prone to separating under stress.
- Limited surface area: The surface contact area is minimal. When glued, this joint can still be susceptible to forces from different angles.
- Risk of movement: Changes in wood moisture can lead to warping. If the wood expands or contracts, the butt joint can easily break apart.
- Weak glue bond: If not clamped properly during the drying process, the glue bond may not develop its full strength.
The Miter Joint
Another weak joint is the miter joint. While it allows for cleaner edges and an aesthetically pleasing look, its structural integrity is compromised for the following reasons:
- End grain adhesion: Like the butt joint, a miter joint relies on gluing end grain, which has a reduced bonding area.
- Vulnerability to impact: Miter joints can easily break under impact as they do not provide any mechanical interlock.
Other Weak Joints
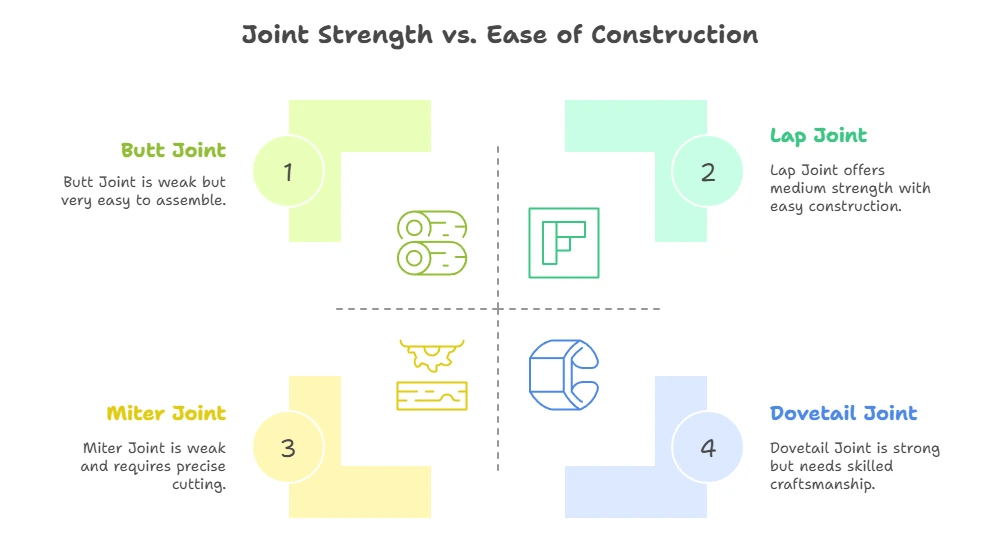
The lap joint, though stronger than the butt and miter joints, has its limitations. The joint’s strength depends significantly on how much wood overlaps. An insufficient overlap decreases its holding power.
A few more joints worth mentioning that often rank as weak are:
- Dowell joint: While dowels provide some mechanical support, if the holes are not drilled accurately, it can lead to weak connections.
- Finger joint: It can be reliable but may become weak if the wood expands, as it could compromise the structural integrity.
Stronger Joint Alternatives
In contrast, some stronger joints include:
- Dovetail joint: Famous for its resistance to being pulled apart, this joint interlocks each piece securely.
- Mortise and tenon joint: This is a classic joint that offers excellent strength and durability when constructed correctly.
- Box joint: This joint lends itself well to drawer construction and offers interlocking features that withstand sheer stress effectively.
When planning your woodworking project, it’s essential to factor in the joint’s strength and the expected stresses your project will endure. Here’s a comparison table to assist you in understanding the strengths and weaknesses of various joints:
| Joint Type | Strength | Weakness |
|---|---|---|
| Butt Joint | Low | Easy separation, limited surface area |
| Miter Joint | Low to Medium | End grain adhesion |
| Lap Joint | Medium | Weak with insufficient overlap |
| Dovetail Joint | High | Requires precision and skill to create |
| Mortise and Tenon | High | Time-consuming to construct |
Understanding what is the weakest joint in woodworking allows you to create more resilient pieces. By opting for stronger joints, you can improve the longevity and integrity of your woodworking projects. For more detailed information on woodworking techniques and projects, visit Wood Magazine and Popular Woodworking. Your choice of joints can transform your work from fragile to formidable. So, the next time you are planning a building project, ensure you understand which joints offer the stability you need!
Common Mistakes to Avoid When Creating Wood Joints
When working on woodworking projects, creating strong and lasting joints is essential. However, many beginners and even experienced woodworkers fall into common traps that can compromise the integrity of their joints. Avoiding these mistakes can help ensure your projects stand the test of time.
Choosing the Wrong Joint Type
One of the first mistakes woodworkers make is selecting an inappropriate joint type for the given application. Different joints are designed for various purposes. For instance:
- Butt Joint: Simple and easy to create, but weak without reinforcement.
- Mortise and Tenon Joint: Provides excellent strength for frame assemblies.
- Dovetail Joint: Ideal for drawers and cabinets, offering excellent resistance to pulling apart.
Understanding the load and stress that each joint will face is crucial for choosing the right one. Always think about where the joint will be used in the overall project before making a decision.
Neglecting Proper Alignment
Proper alignment during joint assembly is critical. Misaligned joints can lead to gaps and weaknesses that make the joint more susceptible to failure. Here are a few tips to ensure proper alignment:
- Use clamps to hold pieces in place while the adhesive sets.
- Double-check measurements before cutting.
- Visualize the assembly to identify potential alignment issues.
Taking these steps can prevent future problems and ensure your joints are strong and secure.
Forgetting to Measure Twice
The saying “measure twice, cut once” holds true in woodworking. Failing to take accurate measurements can lead to mistakes that are costly in time and materials. Here’s what to keep in mind:
- Always verify your measurements before cutting materials.
- Use a reliable measuring tool, such as a tape measure or a square.
- Mark your cuts clearly before starting.
These practices can save you from making unnecessary errors and wasted resources.
Ineffective Adhesive Use
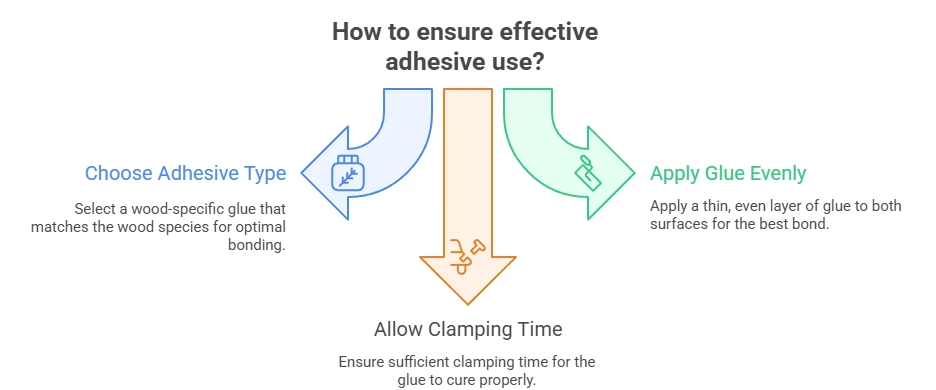
Choosing the right adhesive is vital for ensuring a strong bond. Many woodworkers mistakenly use too little adhesive or apply it incorrectly. Here are some key points to consider:
- Type of Adhesive: Choose a wood-specific glue that suits the wood species you are using.
- Application: Apply a thin, even layer of glue to both surfaces for optimal bonding.
- Clamping Time: Allow enough time for the glue to cure. Check the manufacturer’s instructions for best results.
By paying attention to these details, you can significantly improve the strength of your joints.
Overlooking Wood Movement
Wood is a natural material that expands and contracts with humidity changes. Ignoring the potential for wood movement can lead to joint failure. Here are ways to account for this aspect:
- Use glue sparingly and install joints that allow slight movement, like a tongue and groove joint.
- Consider applying finish treatments that can seal the wood and lessen moisture impact.
Being mindful of wood movement will help you create stable and lasting joints.
Failing to Sand Surfaces Appropriately
Not properly sanding the surfaces of the joints can hinder adhesive bonding. Make sure to:
- Sand surfaces until smooth to improve adhesion.
- Remove all dust before applying adhesive.
- Use the right grit sandpaper for the wood type.
Effective sanding practices can enhance the overall quality of your joints.
Ignoring Safety Practices
Safety should never be compromised in woodworking. Be sure to use protective gear, such as goggles and gloves, and keep your workspace organized to minimize accidents. Neglecting these can lead to serious injuries that will set back your woodworking goals. By avoiding these common mistakes when creating wood joints, you will not only enhance the strength and durability of your projects but also enjoy the woodworking process more. For further tips and guidance, consider visiting reputable woodworking sites like Wood Magazine and Woodworking Network.
Strengthening Wood Joints: Techniques and Tips
Wood joints are essential in woodworking projects, providing the foundation for strength and durability. While there are many types of joints, not all are equally strong. Understanding how to strengthen these connections can enhance your woodworking creations significantly. Below are techniques and tips to effectively strengthen wood joints.
Common Wood Joint Types
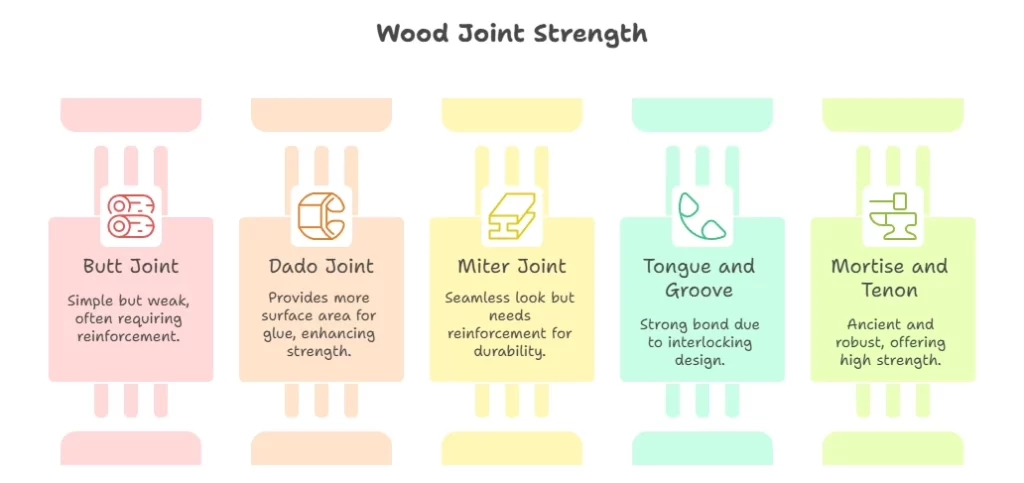
Before diving into strengthening wood joints, it’s crucial to understand the common types of wood joints used in woodworking:
- Butt Joint: The simplest joint where two pieces of wood meet at a right angle. Often considered weak.
- Dado Joint: A groove cut into one piece of wood to fit another, providing more surface area for glue.
- Miter Joint: Cut at a 45-degree angle for a seamless look, but can be weak without reinforcement.
- Tongue and Groove: Features a protruding “tongue” on one piece and a “groove” on another, creating a strong bond.
- Mortise and Tenon: An ancient and strong joint where a tenon on one piece fits into a mortise on another.
Techniques to Strengthen Wood Joints
Improving the strength of wood joints involves various techniques. Here are some of the most effective:
- Use Quality Glue: Choosing the right adhesive is vital. Wood glue, like PVA (Polyvinyl Acetate), is a popular choice due to its strength and ease of use. Applying ample glue can significantly enhance joint strength; however, avoid over-applying, as this can lead to messiness. Always allow adequate drying time as recommended by the manufacturer for optimal results.
- Incorporate Dowels: Dowels offer additional strength and alignment for joints, especially butt and miter joints. By drilling matched holes into both pieces and inserting dowels, you ensure an accurate fit that enhances durability.
- Face Nails or Screws: Using screws or nails can provide additional support. For best results, pre-drill to avoid splitting the wood. Use screws that are appropriately sized for your joint and material.
- Reinforce with Corner Braces: Corner braces, also known as brackets or L-braces, can be added to joints in frames or structures. They help to distribute weight and prevent racking, making the joint more robust.
- Employ the Right Joint Design: Choose the right joint design based on the application. For example, use mortise and tenon joints for tables or furniture that require strength. It is essential to consider how the joint will be used and the stresses it will face.
Tips for Effective Joint Construction
Building strong joints requires attention to detail. Consider the following tips:
- Fit is Key: Ensure your pieces fit together as snugly as possible. Gaps can weaken a joint.
- Surface Preparation: Sand surfaces to be glued to create a smooth bond. Avoid using highly polished surfaces, as they may not hold glue as effectively.
- Clamping: Use clamps to secure the joint as it dries. This ensures a tight bond and proper alignment.
- Test Your Joints: Do a dry-fit before gluing to ensure everything fits well and adjust if necessary.
Resources for Further Learning
If you want to expand your woodworking skills, consider exploring the following resources:
By implementing these techniques and tips, you can significantly improve the strength of your wood joints. Whether you are a novice or an experienced woodworker, understanding how to effectively construct and reinforce joints will enhance the quality and longevity of your projects.
The Impact of Wood Types on Joint Durability
When it comes to woodworking, the type of wood you choose has a significant impact on the durability of joints. Different species of wood possess unique physical and mechanical properties that influence their behavior when joined together. Understanding these differences can help you make informed choices and ensure the longevity of your projects.
Some woods are naturally more resilient to stress, moisture, and changes in temperature, while others may be prone to warping or splitting. Below are key factors to consider regarding how wood types affect joint durability:
Density and Strength
The density of wood plays a crucial role in the strength of joints. Denser woods tend to be stronger and provide better support for joints. Here’s a quick look at common hardwoods and softwoods:
| Wood Type | Density (lbs/ft³) | Joint Strength |
|---|---|---|
| Oak | 50-55 | Excellent |
| Pine | 35-40 | Good |
| Maple | 43-48 | Very Good |
| Birch | 43-53 | Good |
| Cedar | 38-44 | Fair |
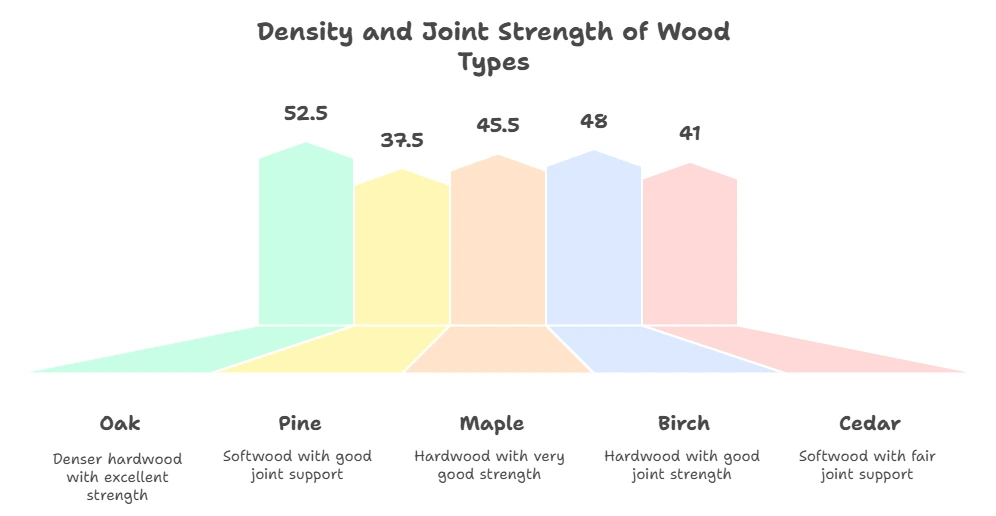
As indicated, oak and maple are excellent choices for joints requiring high strength, while cedar may not hold joints as well due to its lower density.
Moisture Resistance
Moisture can severely compromise the integrity of wood joints. Some woods are naturally resistant to moisture, making them ideal for outdoor projects or areas with high humidity. It’s important to consider moisture resistance, especially for joint durability. Here’s a list of moisture-resistant woods:
- Teak
- Ipe
- Cypress
- Mahogany
These woods contain natural oils or chemical compounds that make them less susceptible to decay and joint failure. Therefore, if you’re working on projects like garden furniture or outdoor structures, consider using these types of wood.
Grain Orientation
The direction of the grain in wood affects how joints perform. For instance, end-grain joins do not typically provide as much strength as face grain joins. This is why most woodworkers prefer to align the grain direction to enhance joint strength. Below are some tips for aligning grain:
- Always position the grain of adjoining pieces in the same direction.
- Avoid “cross-grain” joints, as they can lead to weaknesses.
- Make use of dowels or biscuits to reinforce joints where grain direction is not aligned.
Wood Treatments and Finishes
Applying the right finishes to wood can also enhance the durability of joints. Traditional oils like linseed or tung oil can help seal looseness and prevent moisture ingress. Additionally, certain modern wood treatments bolster natural resistance. Here are a few options for treatments:
- Stains: For color enhancement while offering some protection.
- Sealants: To block moisture penetration.
- Varnishes: To form a durable outer layer while retaining flexibility.
Understanding how different types of wood interact with these finishes can lead to better, longer-lasting joints.
Choosing the Right Wood For Your Joint Type
The choice of wood is vitally important for the type of joint you’re using. Here are some common joints and recommended woods:
| Joint Type | Recommended Woods |
|---|---|
| Mortise and Tenon | Oak, Maple |
| Dowel | Birch, Hard Maple |
| Box Joint | Pine, Oak |
| Lap Joint | Plywood, Maple |
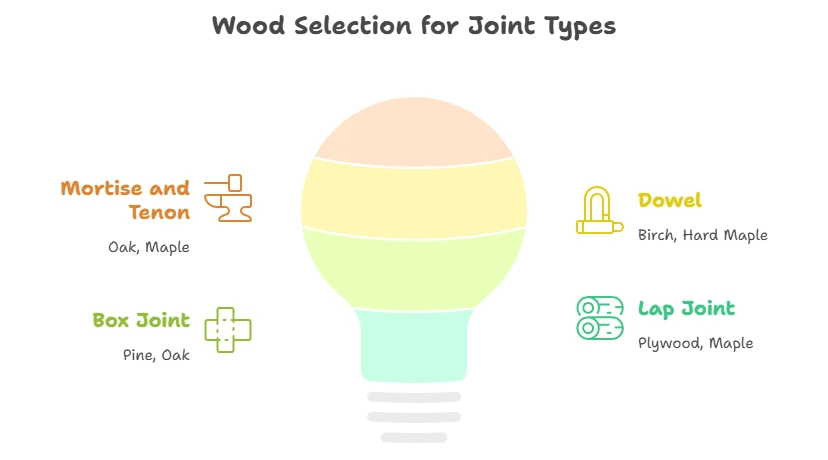
The type of wood you select not only affects the aesthetics of your project but also determines the durability and strength of the joints you create. For more information on wood types and their properties, you can explore resources such as Wood Magazine or Woodworkers Source. By choosing the right wood and understanding its characteristics, you can ensure that your woodworking projects remain strong and lasting for years to come.
Comparing Wood Joints: Which is the Strongest for Your Project?
When it comes to woodworking projects, choosing the right joint can significantly affect both the strength and longevity of your work. Understanding various wood joints can help you make the best choice for your specific project. Below is a closer look at several popular wood joints and how they compare in terms of strength.
Types of Wood Joints
Different wood joints serve unique purposes, so selecting the right one depends on various factors, including the type of project, the required strength, and the aesthetics. Here are some commonly used joints:
- Butt Joint: This is one of the simplest joints. Two pieces of wood are simply joined at their ends without any additional shaping. While easy to make, the butt joint is often considered weak because there is no interlocking surface.
- Screw Joint: By using screws, this joint can provide additional strength to the butt joint. However, the screws can weaken the wood if they are not placed correctly.
- Dado Joint: A dado joint involves making a groove in one board for another piece to fit into. This joint provides a large surface area for gluing, which enhances its strength.
- Lap Joint: In this joint, two pieces of wood overlap one another. It’s often used in framing, and while it is stronger than a butt joint, it can still lack stability without additional support.
- Mortise and Tenon Joint: This traditional joint features a mortise hole and a protruding tenon that fits into it. It’s highly regarded for its strength and is often used in furniture making.
- Finger Joint: Created through interlocking “fingers” cut into each piece of wood, this joint provides a substantial gluing surface, making it very strong.
- Dovetail Joint: Known for both strength and beauty, the dovetail joint interlocks the two pieces of wood, making it ideal for drawers and fine cabinetry.
Strength Comparison of Wood Joints
When evaluating the strength of each type of joint, it’s essential to consider stress factors like load types and direction. Use the following table to understand how these joints stack up against each other:
| Joint Type | Strength Rating | Notes |
|---|---|---|
| Butt Joint | Low | Simple, but lacks durability. |
| Screw Joint | Medium | Raises strength but can damage wood. |
| Dado Joint | High | Offers large surface area for gluing. |
| Lap Joint | Medium | Strong but may require bracing. |
| Mortise and Tenon Joint | Very High | Excellent for load-bearing structures. |
| Finger Joint | High | Creates a large gluing surface. |
| Dovetail Joint | Very High | Strong and visually appealing. |
Which Joint is Right for Your Project?
The choice of wood joint depends significantly on your project’s needs. For example:
- If you’re building cabinets or furniture that require aesthetics and strength, consider using a dovetail joint or a mortise and tenon joint.
- For simple projects like basic frames or boxes, a dado joint or a finger joint could work well.
- If you are in a pinch, a butt joint reinforced with screws can be a quick solution for less demanding applications.
Ultimately, your woodworking project’s requirements will guide you to the most suitable joint. Proper craftsmanship and understanding of these various wood joints will ensure you select a strong joint appropriate for your specific woodworking needs. For more detailed information about woodworking joints, consider checking resources like Fine Woodworking or Woodworker’s Source.
Conclusion
Understanding the weakest joint in woodworking is crucial for any woodworker. By identifying vulnerabilities within different joints, you can better prepare for both common mistakes and potential failures in your projects. Avoiding missteps, such as using inadequate glue or improper joint fitting, will set you on a path toward building robust structures.
Utilizing strengthening techniques, like adding reinforcements or selecting suitable fasteners, can significantly enhance the durability of your wood joints. Don’t forget the importance of wood type; various species have unique attributes that affect joint longevity. For instance, softer woods might not hold joints as securely as harder varieties.
When comparing joints, consider which one will hold best under the conditions of your specific project. Factors like load-bearing requirements and environmental influences should shape your choices. Each joint you create should align with the overall function and aesthetics of your woodworking endeavor. By merging careful planning, knowledge of materials, and skilled execution, you can craft joints that not only withstand the test of time but also elevate the beauty and functionality of your work. Armed with this understanding, you’re ready to tackle any woodworking challenge that comes your way.