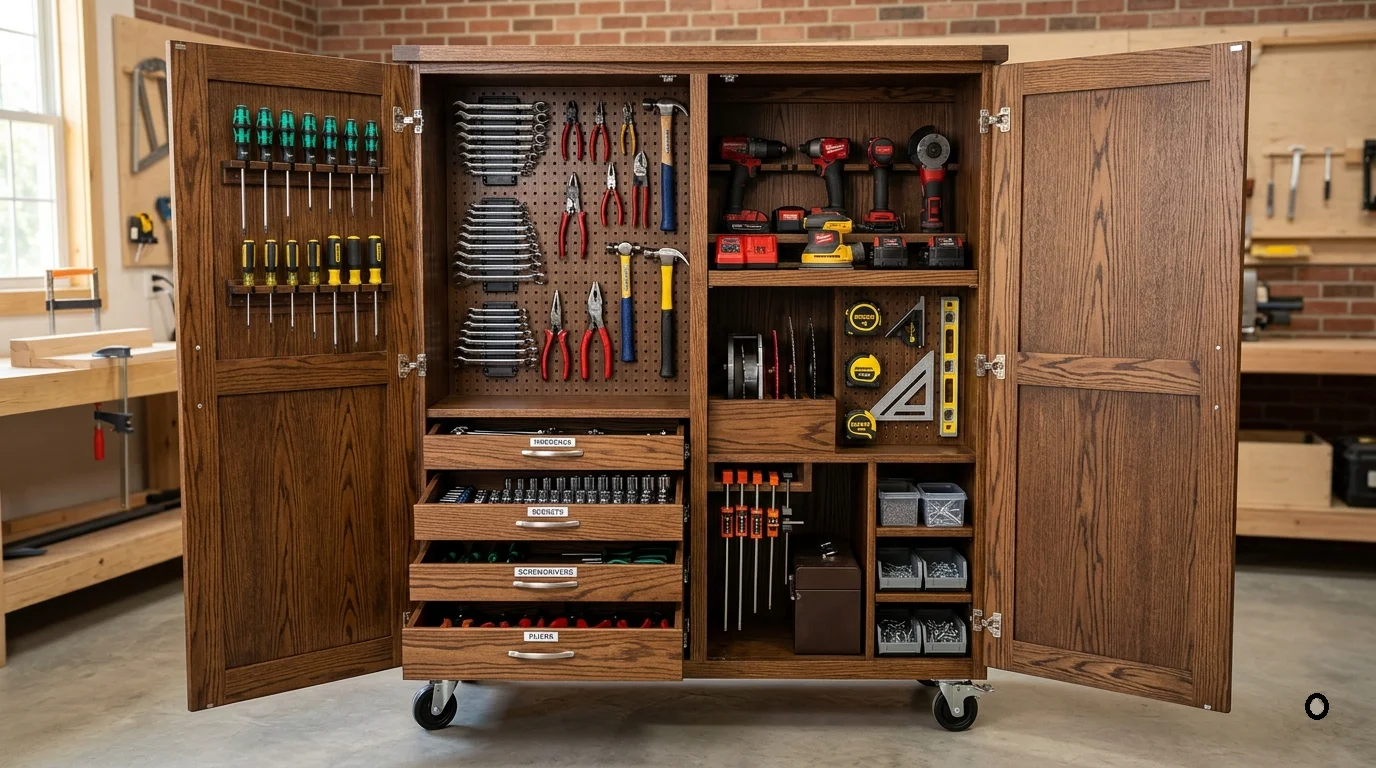
Creating a tool storage cabinet is an exciting project that not only helps you organize your tools but also adds a personal touch to your workspace. Whether you’re a seasoned DIY enthusiast or a beginner, having detailed plans can make the whole process smoother and more enjoyable. Let’s dive into the steps to create your own Tool Storage Cabinet Plans Step by Step effectively.
Step 1: Decide on the Design
Before you start building, it’s essential to decide on the design of your cabinet. Consider the following:
- Size: How much space do you have? Measure the area where the cabinet will go.
- Type of Tools: What tools will you store? Ensure your cabinet can hold everything.
- Style: Do you prefer a simple shelving unit or one with doors?
Step 2: Create a Materials List
Once you’ve decided on the design, make a list of all the materials you will need. Here’s a basic list to get you started:
- Wood (plywood, hardwood, etc.)
- Screws and nails
- Wood glue
- Sandpaper
- Paint or varnish (optional)
Step 3: Draw Your Plans
Creating a detailed drawing of your tool storage cabinet is crucial. This step provides a clear vision of the assembly process. Include the following dimensions:
| Component | Dimensions (inches) |
|---|---|
| Top Panel | 48 x 24 |
| Side Panels | 72 x 24 |
| Back Panel | 72 x 48 |
| Shelves | 24 x 22 |
Adjust the measurements based on your tools and space.
Step 4: Cut the Pieces
With your plans ready, it’s time to cut the wood pieces according to your measurements. Always remember:
- Double-check your measurements before cutting.
- Use a saw appropriate for the type of wood you are using.
- Wear safety gear like goggles and gloves.
Step 5: Assemble the Cabinet
Now, it’s time to put the pieces together.
- Attach the Side Panels: Use wood glue and screws to secure them to the top panel.
- Attach the Back Panel: This adds stability to the cabinet.
- Install the Shelves: Decide on the height and secure them using brackets or wood glue.
- Finish with Doors (if desired): Use hinges to attach doors for added protection.
Step 6: Finish Off Your Cabinet
After assembly, it’s time to ensure that your tool storage cabinet looks as good as it functions. Here are some tips:
- Sand the surfaces to remove any rough edges.
- Apply paint or stain to match your workspace.
- Add labels to drawers or shelves for quick access to tools.
Step 7: Organize Your Tools
It’s time to put your cabinet to work! Organize your tools inside your new cabinet by categorizing them. You might want to group them by type, frequency of use, or size. This will streamline your projects in the future.
For more inspiration and creative ideas for tool storage solutions, check out Wood Magazine and Family Handyman.
Creating your tool storage cabinet is a rewarding task that enhances your workspace’s efficiency. With these detailed plans, you can construct a custom cabinet that meets your specific needs while also enjoying the satisfaction of a DIY project. Happy building!
Essential Features to Include in Your Tool Storage Cabinet
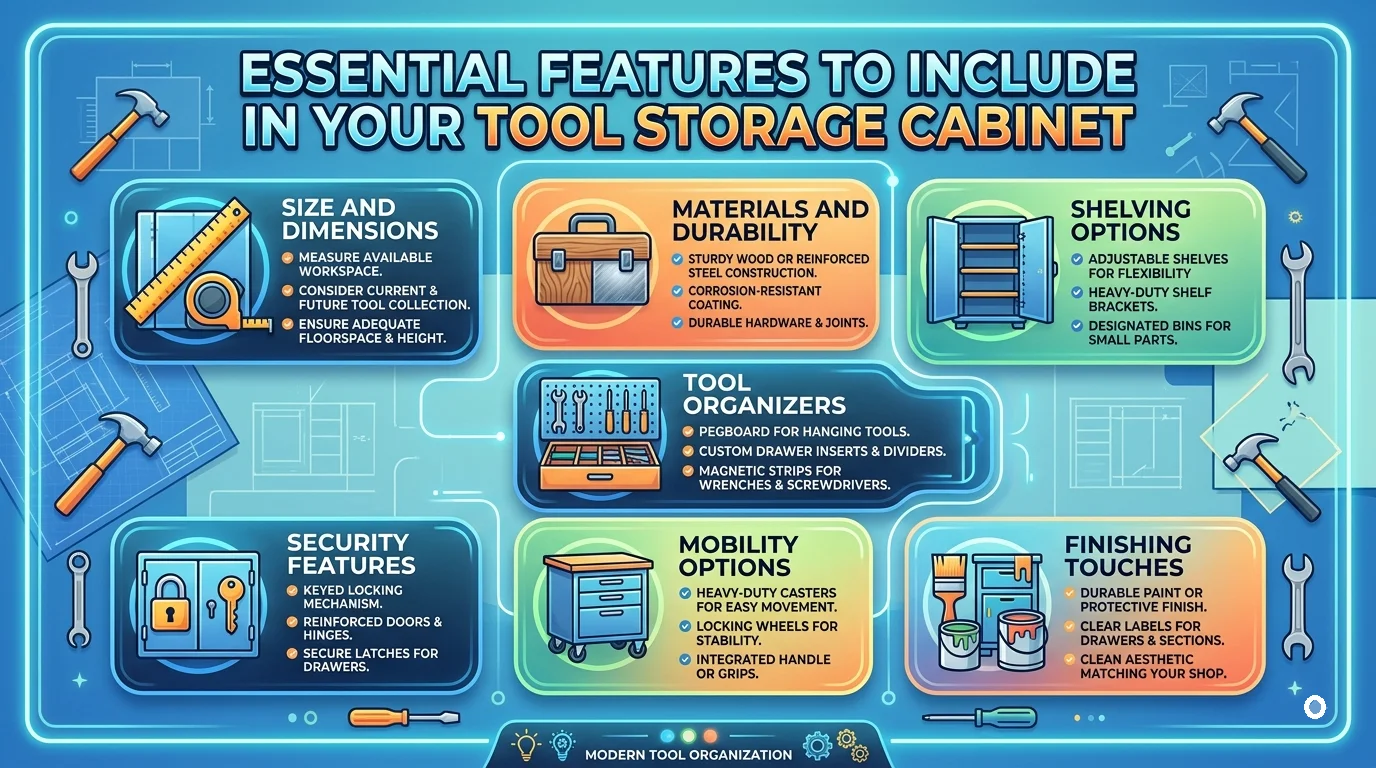 When planning to build a tool storage cabinet, there are essential features that guarantee both functionality and organization. These features ensure that your workspace remains tidy and that you can easily access tools when needed. Let’s explore these must-have elements step by step.
Size and Dimensions
The first step in your planning stage is to determine the right size for your tool storage cabinet. Consider the following:
- Available Space: Measure the area where you plan to place the cabinet. Ensure that it fits comfortably without making the space feel cramped.
- Storage Needs: Take stock of your tools. Are they small hand tools, power tools, or a combination? This will significantly influence the size of your cabinet.
- Accessibility: Ensure you can easily reach tools without any awkward bending or stretching.
Materials and Durability
Choosing the right materials is crucial for longevity. Here are popular choices:
- Wood: A classic choice that offers beauty and strength. Plywood is a popular option for cabinet making due to its durability and resistance to warping.
- Metal: Steel cabinets provide excellent durability and security, making them ideal for heavy tools.
- Plastic: Lightweight and often weather-resistant, this choice works for lightweight and less valuable tools.
Shelving Options
Effective shelving is key to maximizing your storage. Consider individual shelving styles:
- Fixed Shelves: Great for heavier tools as they distribute weight evenly.
- Adjustable Shelves: These provide flexibility, allowing you to modify space based on your current storage needs.
- Drawers: Use drawers for storing smaller tools and items, which can help keep them organized and secure.
Tool Organizers
Tool organizers can significantly enhance your tool storage cabinet’s functionality. Below are common organizer styles:
- Tool Holders: Magnetic strips or pegs for hanging tools can save shelf space and keep everything visible.
- Bins and Baskets: Use these for items like screws, nails, and other small tools. They can easily slide in and out, allowing you to find what you need quickly.
- Clear Containers: These can help you find tools at a glance, reducing search time and frustration.
Security Features
Security is paramount, especially for expensive tools. Here are essential features to consider:
- Locking Mechanisms: Ensure that your cabinet has quality locks. Even a simple latch can provide a degree of security.
- Reinforced Doors: Strong doors deter theft and keep your tools secure from damage.
Mobility Options
If you frequently move tools, consider adding wheels or casters to your cabinet. This provides mobility and makes it easier to reconfigure your workspace. Ensure the wheels lock to keep your cabinet stable when in use.
Finishing Touches
Don’t overlook the aesthetics and functionality of your tool storage cabinet:
- Paint or Finish: A good finish not only enhances the cabinet’s appearance but also protects the material.
- Labels: Label shelves and bins to help quickly identify where tools are stored, creating an organized system.
- Work Surface: If space allows, consider including a flat top which can double as a work surface.
These essential features into your Tool Storage Cabinet Plans Step by Step will ensure that you have a functional, organized, and aesthetically pleasing workspace. For more detailed guidance on building your tool storage cabinet, visit Wood Magazine for expert tips and plans. Happy building!
Choosing the Right Materials for Your Tool Storage Project
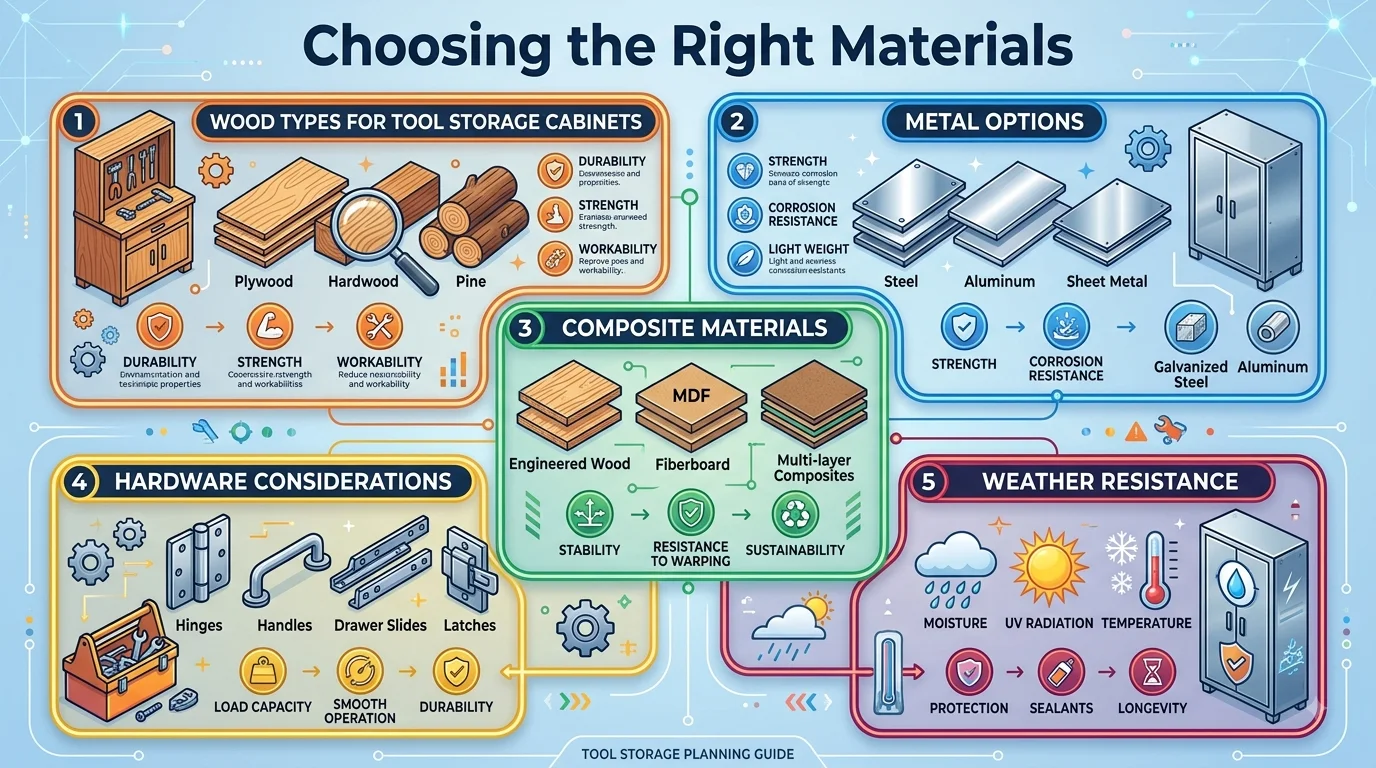
When embarking on a tool storage cabinet project, making the right choices regarding materials is crucial to ensure durability, functionality, and aesthetics. The right materials not only determine the strength and longevity of your cabinet but also affect how well it meets your needs. Here are some essential materials to consider, along with their benefits and drawbacks.
Wood Types for Tool Storage Cabinets
Wood is a popular choice for tool storage cabinets due to its versatility and aesthetics. Here are some common types of wood to consider:
- Pine: Affordable and lightweight, pine is easy to work with and perfect for beginners. However, it may dent or scratch easily.
- Birch: Sturdy and resistant to damage, birch provides a smooth finish and is great for a polished look.
- Maple: Hard and durable, maple can withstand heavy loads, making it ideal for a robust storage cabinet.
- Oak: Known for its strength and attractive grain, oak is great for creating a long-lasting cabinet but can be more expensive.
Metal Options
If you prefer a more modern look and extra strength, consider metal for your tool storage cabinet. Here are a few options:
- Steel: Known for its strength and durability, steel can withstand heavy usage. Additionally, it is resistant to fire and moisture.
- Aluminum: Lightweight and resistant to rust, aluminum is ideal if you want a cabinet that can be easily moved. However, it may not be as strong as steel.
Composite Materials
Composite materials combine the best of both worlds: affordability and strength. Some popular composites include:
- Plywood: Made of multiple layers of wood, plywood offers excellent strength and a smooth surface for finishing.
- MDF (Medium Density Fiberboard): This is cost-effective and easy to work with but may not be as strong as solid wood options. It is best used for indoor cabinets.
Hardware Considerations
No matter what materials you choose for the cabinet, the hardware (like hinges, drawer slides, and locks) is essential for functionality. Here are a few types of hardware to consider:
- Heavy-Duty Hinges: Ensure that your cabinet doors swing open easily and can support the weight without sagging.
- Ball-Bearing Drawer Slides: These allow for smooth operation of drawers, ensuring they can hold heavy tools without sticking.
- Locks: If you plan to store expensive tools, consider investing in high-quality locks for added security.
Weather Resistance
If your tool storage cabinet will be in a garage or outdoor area, consider the impact of the environment on your materials. Here are some weather-resistant options:
| Material | Weather Resistance | Best Uses |
|---|---|---|
| Steel | Highly resistant (when treated) | Outdoor cabinets |
| Aluminum | Corrosion resistant | Wet weather areas |
| Plywood | Moderately resistant (when sealed) | Indoor and outdoor use |
Choosing the right materials for your tool storage cabinet project is crucial for both function and longevity. By considering factors like strength, aesthetics, hardware, and weather conditions, you can build a cabinet that meets your needs effectively. For more comprehensive woodworking plans, you might want to visit Wood Magazine for inspiration and expert tips.
Whether you’re a DIY enthusiast or a professional, making informed material choices equips you with the tools you need for a successful project. Don’t rush the decision; take the time to weigh the pros and cons of each option as well as your own specific needs.
Additionally, check out Family Handyman for detailed project ideas and Tool Storage Cabinet Plans Step by Step guidance tailored to tool storage solutions.
Common Mistakes to Avoid When Building Tool Storage Cabinets
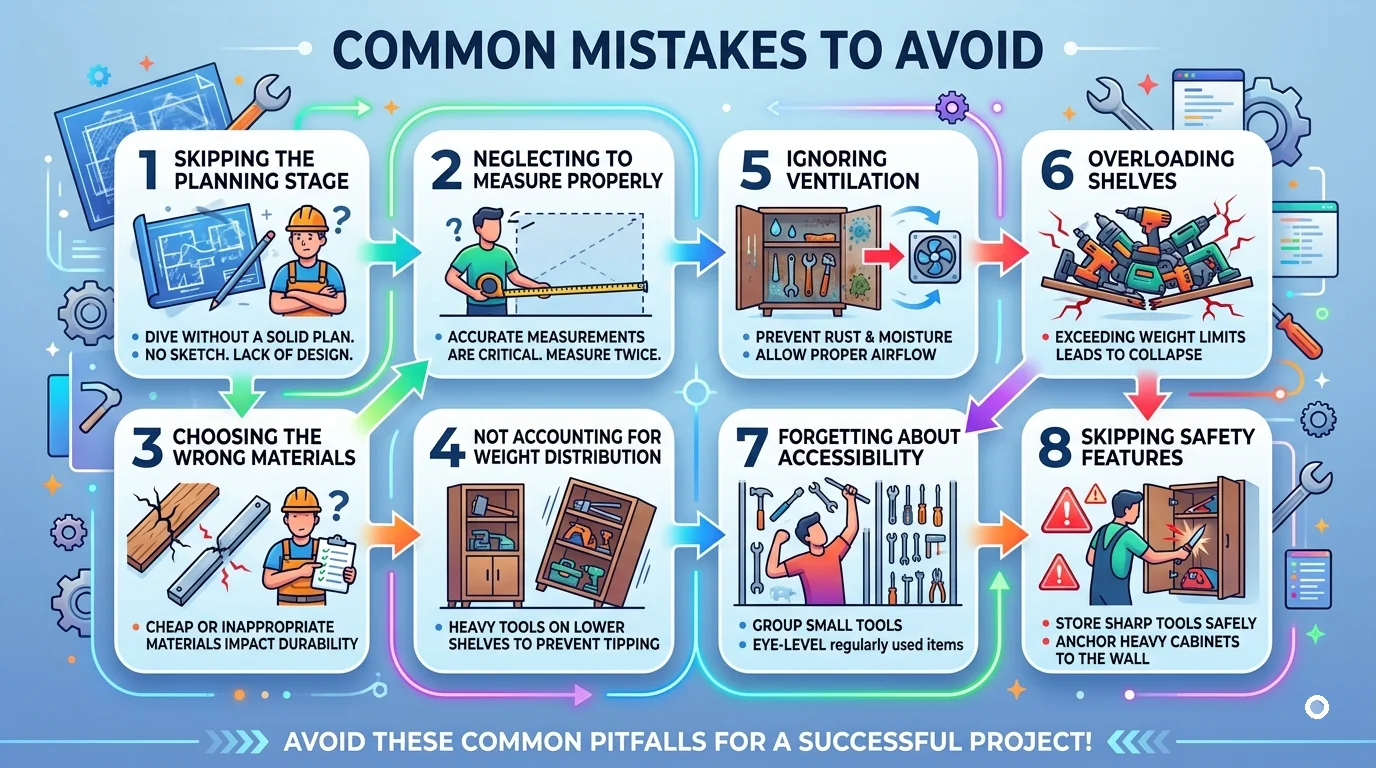
Building a tool storage cabinet is a rewarding project, but it comes with its share of challenges. Avoiding common mistakes can save you time, money, and frustration. Here are some pitfalls to watch out for as you embark on creating your tool storage cabinet.
Skipping the Planning Stage
One of the biggest mistakes is diving into the project without a solid plan. Take your time to sketch out your design and list the materials needed. Consider the size of your space and the types of tools you’ll store. Having a well-thought-out plan ensures that you have everything you need to create a functional and organized tool storage cabinet.
Neglecting to Measure Properly
Accurate measurements are critical in custom projects. Use a tape measure and be sure to measure twice. Things to keep in mind include:
- Wall space available for the cabinet.
- Dimensions of your tools to ensure a proper fit.
- Allowing for future tool purchases.
Not measuring correctly can lead to a cabinet that is either too small or overly large for your needs.
Choosing the Wrong Materials
Another common mistake is selecting inappropriate materials. While it might be tempting to go for cheaper options, the quality of the materials directly impacts durability and functionality. Consider the following materials:
| Material | Pros | Cons |
|---|---|---|
| Particleboard | Affordable; light weight | Less durable; susceptible to water damage |
| Plywood | Strong; good for heavy tools | More expensive than particleboard |
| Metal | Highly durable; secure | Heavy; can be costly |
Choosing the right material will ultimately make a difference in the longevity of your cabinet, so be sure to weigh your options carefully.
Not Accounting for Weight Distribution
When building your cabinet, it’s essential to think about how you plan to store your tools. Heavy tools should be placed in lower shelves to prevent tipping. Additionally, ensure that the cabinet doors and shelves are designed to handle the weight. A well-planned weight distribution can extend the life of your tool cabinet.
Ignoring Ventilation
If you plan to store tools that are sensitive to moisture, don’t overlook ventilation. Proper air flow can prevent rust and damage. Consider adding small vents or leaving gaps in your design for airflow. This step is particularly important in garages or basements where air may be stagnant.
Overloading Shelves
As a general rule, don’t overload your shelves. Each shelf has a weight limit, and exceeding it can lead to sagging or even collapse. Make sure to check the weight limits of the materials you’re using and design your cabinet around these constraints.
Forgetting About Accessibility
Designing a beautiful, spacious cabinet means nothing if you cannot easily access your tools. Organize your tools in a way that makes sense for your workflow. Use drawers or bins to group smaller tools and keep regularly used items at eye level. This setup minimizes hassle and maximizes productivity.
Skipping Safety Features
Don’t neglect safety features. Ensure sharp tools are stored safely, out of reach of children. Incorporate soft-close hinges on doors to prevent pinching fingers. If the cabinet is heavy or tall, consider anchoring it to the wall for additional stability.
By avoiding these common mistakes, your tool storage cabinet project can be both successful and enjoyable. With careful planning and attention to detail, you will create a valuable asset for your workshop. For more detailed plans and tutorials, check out Wood Magazine and Popular Woodworking.
Innovative Organization Tips for Maximizing Tool Storage Efficiency

Having a well-organized tool storage system can be a game changer for any DIY enthusiast or professional handyman. When tools are neatly arranged, you can save time and reduce frustration. Here are some innovative organization tips to maximize your tool storage efficiency.
Utilize Vertical Space
One of the best ways to enhance tool storage is by taking advantage of vertical space. This can be achieved by using:
- Wall-mounted racks: Install pegboards or wall racks to display frequently used tools. Not only are these items easy to reach, but they also allow for quick visual inventory.
- Shelves: Add shelves above workbenches or in garages to store larger tools or supplies. Just remember to secure heavy items lower down to prevent accidents.
- Slatwall panels: These panels can be customized with hooks and shelves, offering a flexible solution for hanging and storing various tools.
Drawer Organizers
When storing smaller tools, drawer organizers can make a huge difference. Here’s how to use them effectively:
- Label everything: Use labels for each section or drawer. It saves time when you know exactly where each tool is stored.
- Custom dividers: Consider using adjustable dividers to create specific areas for each tool type, such as wrenches, pliers, and screwdrivers.
- Clear containers: Store small items like nails, screws, or washers in clear containers. This gives you easy visibility and access to what you need without rummaging through the drawer.
Implement Smart Storage Solutions
Smart storage solutions are not just for tech-savvy individuals. Here are some ideas:
- Magnetic strips: Install magnetic strips on walls or inside cabinets to hold metal tools like scissors and screwdrivers. This keeps them off surfaces and easy to grab.
- Overhead storage: Use overhead racks in your garage or workshop to store items that you don’t use every day.
- Tool chests on wheels: A mobile tool chest allows you to bring your tools directly to your work area, particularly useful for large projects.
Optimize Tool Placement
Efficient organization is as much about the placement of your tools as it is about storage. Here’s what to consider:
- Accessibility: Store frequently used items at eye level or within easy reach. Less commonly used tools can go higher or further back.
- Grouping: Keep similar tools together to create a more intuitive storage system. For example, group all cutting tools or all measuring tools in one area.
- Function-based arrangement: If you have multiple activities, like woodworking or plumbing, create zones in your tool storage for each type of work.
Seasonal Rotation
Think about rotating your tools based on the seasons. This is particularly useful for gardening tools, snow removal, or home improvement tasks. Here’s how:
- Store off-season tools: Clear out seasonal tools that are not being used and store them separately. This keeps your workspace clutter-free.
- Dedicated bins: Use labeled bins for different seasons. For instance, have a bin for garden tools and one for winter equipment.
Digital Inventory Management
Today’s technology can help you manage tools more effectively:
- Apps: Use inventory management apps to keep track of what you have. This could help prevent duplicate purchases.
- Photographic record: Take pictures of your arrangement to help maintain order or to remind yourself of how things are stored post-cleanup.
Implementing these innovative organization tips can significantly enhance your tool storage efficiency. Not only will you find what you need faster, but you’ll also enjoy a more organized and functional workspace. For more information and resources, you might want to check out Popular Mechanics or Family Handyman.
Conclusion
Creating your own tool storage cabinet opens up a world of possibilities for organizing your workspace effectively. By following the detailed guide to crafting your cabinet plans step by step, you ensure that every aspect of your design serves a purpose and fits your specific needs. Including essential features—like adjustable shelves, sturdy hardware, and user-friendly access—will transform your cabinet from a simple storage solution into a highly functional piece of furniture.
Choosing the right materials is just as important as the design itself. Selecting durable woods or metals will guarantee longevity while considering weight limits and flexibility can make your project even more successful. Avoid common mistakes such as underestimating dimensions or overlooking the need for ventilation, as they can save you time, effort, and resources in the long run.
Innovative organization tips will not only maximize the space within your cabinet but also enhance the overall efficiency of your tool storage. Whether it’s using hooks for hanging tools, color-coding sections, or implementing clear labeling, small enhancements can lead to significant improvements in accessibility and order.
By approaching your tool storage cabinet project with careful planning and creativity, you can create a space that is both visually appealing and highly functional. The time invested in this project will pay off by keeping your tools well-organized, easily accessible, and ready for your next DIY adventure. You have the power to take control of your workspace—start building your ideal tool storage cabinet today!