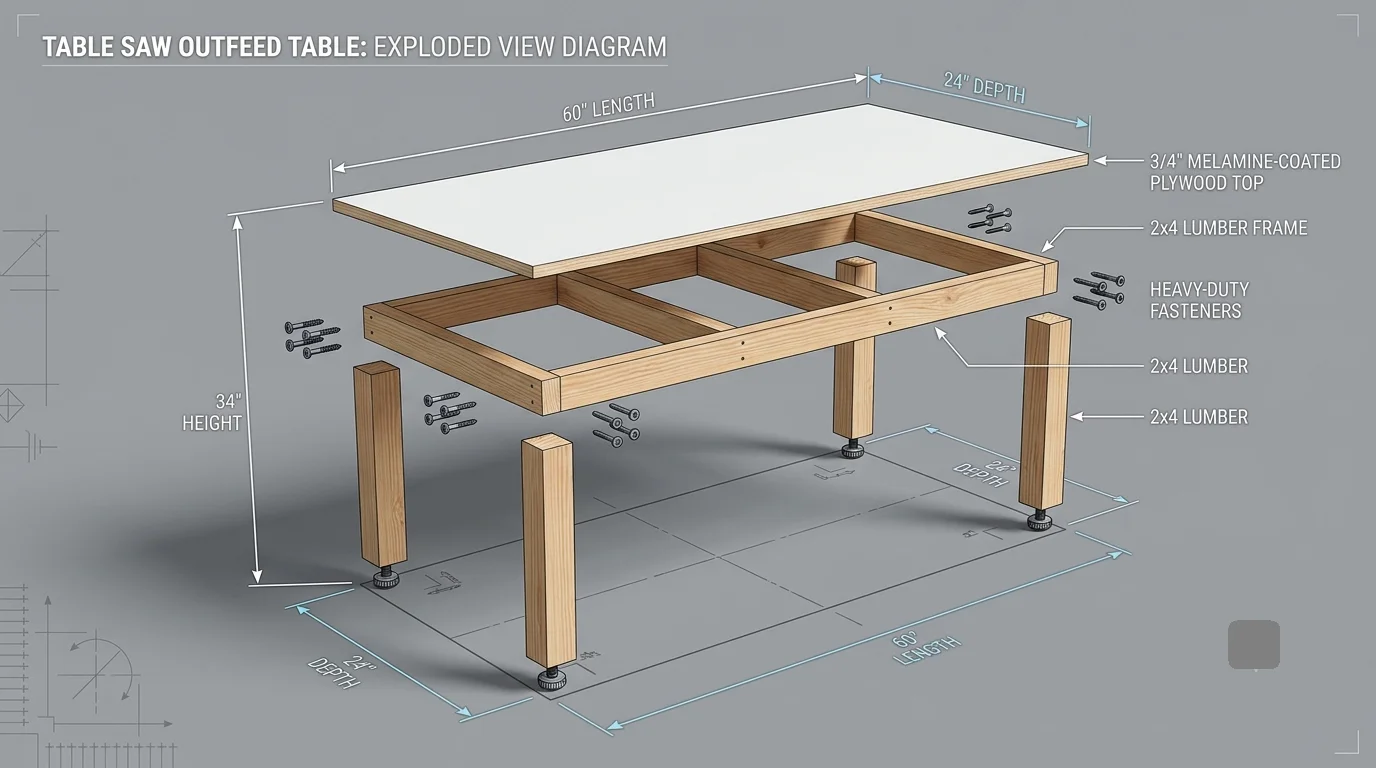
When working wood, you know that maintaining safety and precision is crucial. One tool that helps achieve both is a sturdy outfeed table for your table saw. This additional workspace not only increases cutting accuracy but also supports larger materials that might otherwise tip or fall. Let’s explore the essential features, plans, and measurements needed to create an effective Table Saw Outfeed Table Plans with Measurements.
Optimal Dimensions for Your Outfeed Table
The dimensions of your outfeed table will largely depend on the size of your table saw and your workspace. Here are some recommended measurements:
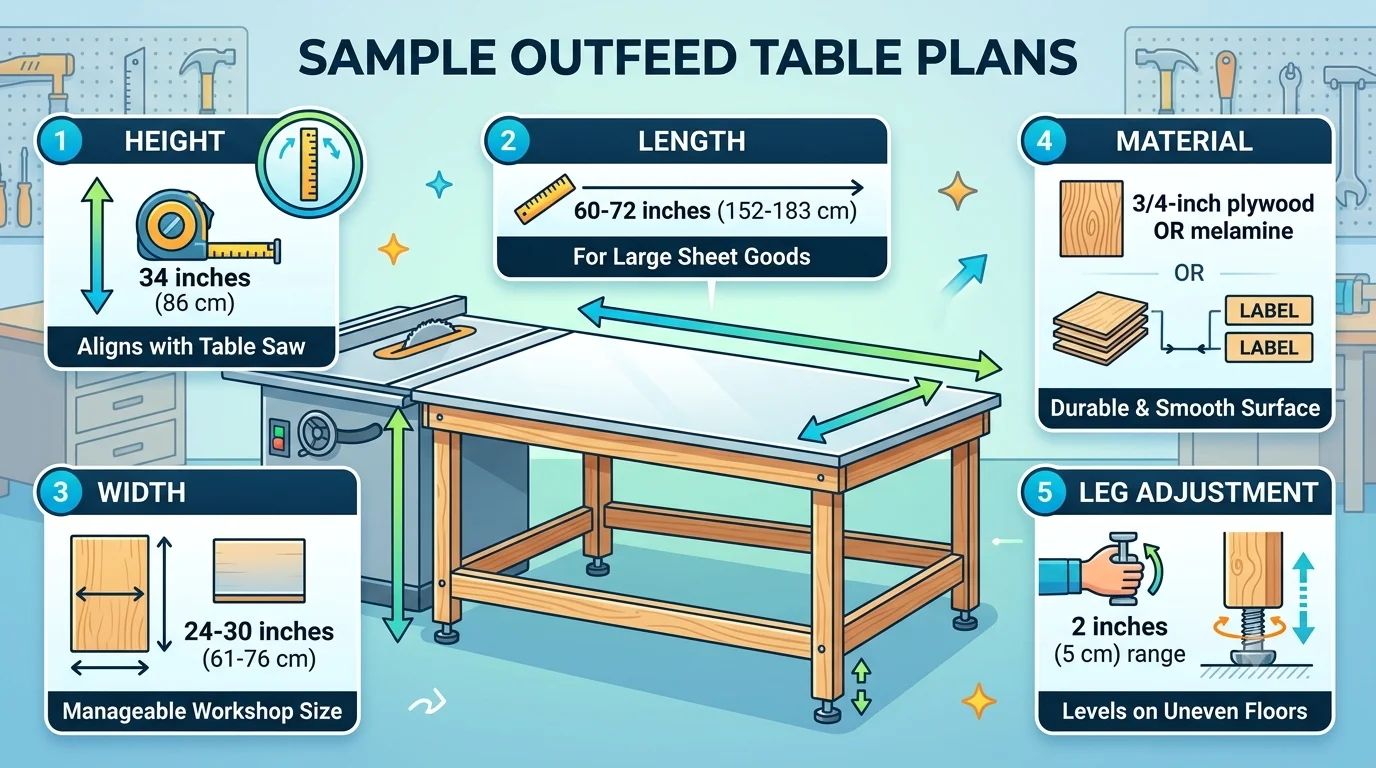
- Height: Ideally, the outfeed table should be the same height as your table saw. This standard height is often around 34 inches (86 cm).
- Length: A length of 60 to 72 inches (152 to 183 cm) is advisable, as it accommodates most sheet goods like plywood, providing ample support during cuts.
- Width: A width of 24 to 30 inches (61 to 76 cm) offers enough space for stable support, while still being manageable in most workshops.
Material Choices for Durability
Choosing the right materials is essential for building a robust outfeed table. The most common materials include:
- Plywood: A 3/4-inch (19 mm) plywood is a great option due to its sturdiness and smooth surface.
- Melamine: This material creates a slick, low-friction surface which is beneficial when sliding large panels.
- Hardwood: If aesthetics matter, solid hardwood can be used for the tabletop, but keep in mind it may need more maintenance.
Essential Features to Consider
Your outfeed table should incorporate certain critical features to enhance functionality:
- Foldability: If workspace is limited, consider designs that allow the table to fold away when not in use.
- Extension Capability: Having the ability to extend the table can prove invaluable for longer cuts.
- Adjustable Legs: Legs that can be adjusted help accommodate uneven floors, ensuring stability during work.
- Integrated Storage: Building drawers or shelves into the design can provide convenient storage for tools and accessories.
Sample Outfeed Table Plans
To bring your vision to life, here’s a simple plan for a table saw outfeed table:
| Feature | Measurement |
|---|---|
| Height | 34 inches (86 cm) |
| Length | 60-72 inches (152-183 cm) |
| Width | 24-30 inches (61-76 cm) |
| Material | 3/4-inch plywood or melamine |
| Leg Adjustment | 2 inches (5 cm) range |
For detailed plans and illustrations, check out resources like Wood Magazine or Popular Woodworking.
Assembly Tips
Once you have your measurements and materials ready, assembling your outfeed table is the next step. Here are some quick tips:
- Flat Surface: Ensure the tabletop is leveled perfectly with your table saw.
- Secure Joints: Use wood glue and heavy-duty screws for a stable and lasting structure.
- Test Stability: Before heavy usage, check that the table can support the weight of your materials without wobbling.
Building a table saw outfeed table is an excellent project that enhances your woodworking capabilities. With thoughtful planning and consideration of its essential features, your workshop will become a safer and more efficient space. Don’t forget to refer to woodworking websites for additional plans and community support, creating an informative and collaborative atmosphere for all woodworkers!
Step-by-Step Guide to Building Your Own Outfeed Table
Building your own outfeed table is a rewarding project that enhances your workshop’s functionality. It provides essential support for large workpieces, making cuts easier and safer. Follow this step-by-step guide to create a sturdy outfeed table tailored to your needs.
Gathering Required Materials
Before you begin constructing your outfeed table, gather the following materials:
- 3/4″ plywood for the tabletop
- 2″x4″ lumber for the frame and legs
- Wood screws
- Wood glue
- Table saw for cutting
- Measuring tape
- Square
- Drill
Planning Your Table Dimensions
The measurements of your outfeed table will depend on your specific setup. A common size is 30″ high and 60″ wide. Here’s a simple plan with standard measurements:
| Dimension | Measurement (Inches) |
|---|---|
| Height | 30 |
| Width | 60 |
| Depth | 24 |
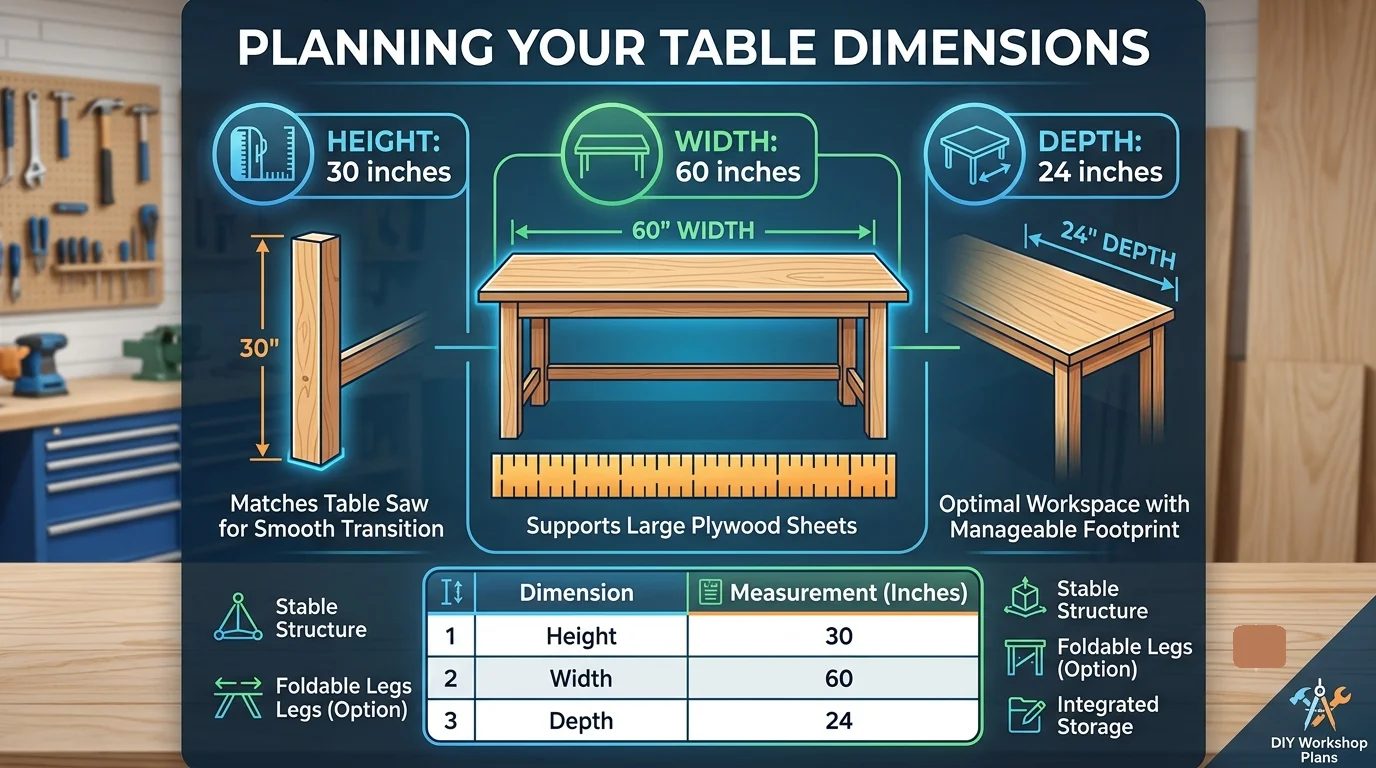
Customize these dimensions based on your preference and available space. The height should ideally match the height of your table saw to ensure smooth transitions for your workpieces.
Cutting Your Materials
Using your table saw, cut the plywood to the specified dimensions. Make one piece for the tabletop using the width and depth measurements. Then, cut the 2″x4″ lumber for the frame and legs:
- 4 pieces at 30″ for the table legs
- 2 pieces at 60″ for the long edges of the frame
- 2 pieces at 24″ for the short edges of the frame
Assembling the Frame
Start by building the frame. Lay the two long 60″ pieces parallel and connect them with the two shorter 24″ pieces to form a rectangle. Use wood screws and wood glue to secure the joints, ensuring a stable structure. Use a square to keep the corners at 90 degrees.
Attaching the Legs
Next, attach the legs to each corner of the frame. Position the legs flush against the inside edges of the frame for stability. Secure each leg with screws. This step is crucial for maintaining the strength of your outfeed table as it holds large pieces of wood.
Installing the Tabletop
Once the frame and legs are in place, it’s time to install the tabletop. Center the 60″x24″ plywood on top of the frame and secure it with screws from below. Make sure the screws do not protrude above the surface of the plywood. This will provide a smooth work surface for your projects.
Common Mistakes to Avoid When Designing Outfeed Tables
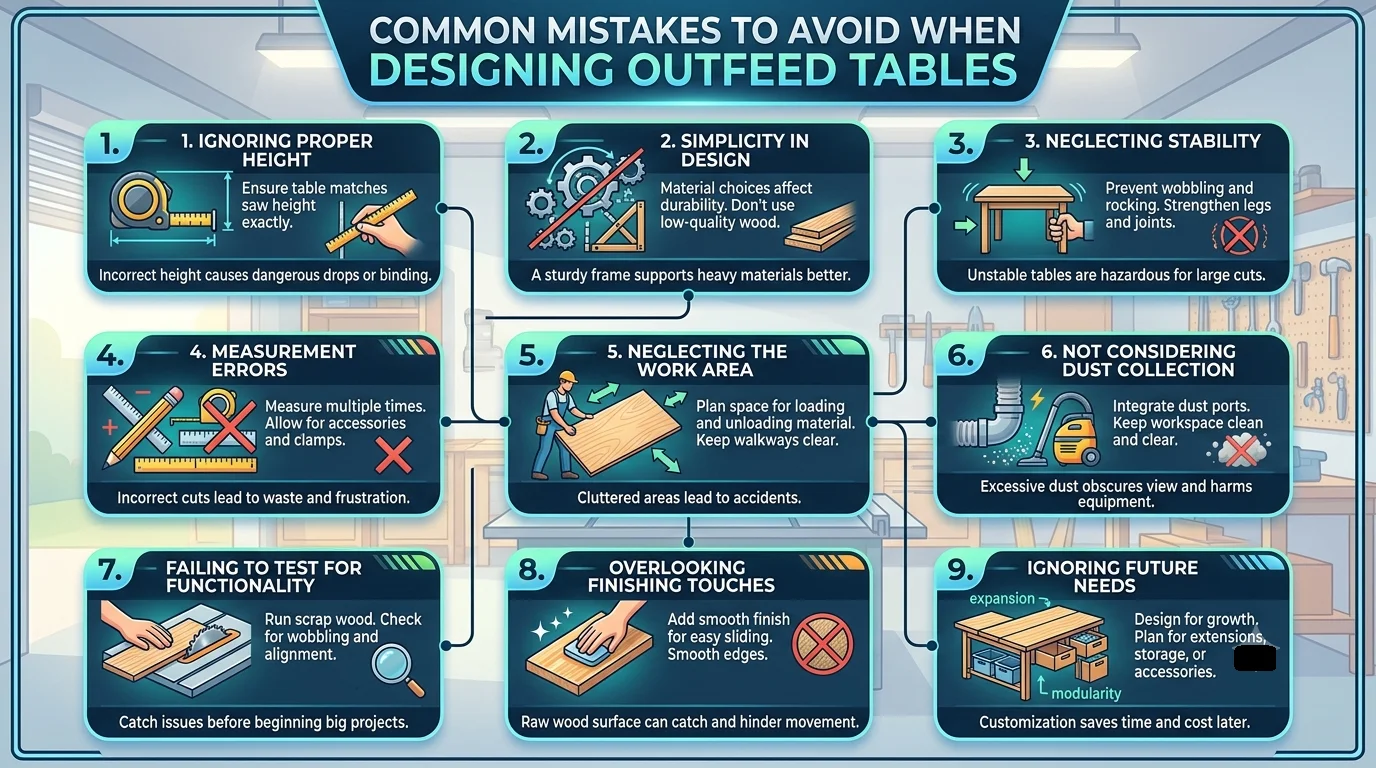
Designing an outfeed table for your table saw can greatly improve your woodcutting efficiency. However, many enthusiasts and professionals alike often make mistakes in the design process. Avoiding these errors will not only enhance your woodworking experience but also ensure safety and usability. Here are some common mistakes to watch out for when designing outfeed tables.
Ignoring Proper Height
One of the biggest mistakes is not considering the height of the outfeed table. Ideally, the table’s height should match the height of your table saw. If the table is too high or too low, it can lead to inaccurate cuts and safety hazards. To determine the correct height, measure from the floor to the top of your saw blade and make adjustments accordingly to the outfeed table.
Simplicity in Design
While it might be tempting to create a simple, functional outfeed table, over-simplifying the design often leads to problems. Factors like material choice can impact the durability and effectiveness of your outfeed table. Using high-quality plywood or MDF will provide a solid surface without warping. Additionally, consider features like fold-down sides or integrated storage to enhance functionality.
Neglecting Stability
Stability is key in any woodworking setup. An outfeed table that can wobble or shake can lead to dangerous situations. Ensure that your outfeed table has a stable base. You can achieve this by reinforcing legs and using proper joinery. Consider adding a weight to the base or using a wider footprint for improved stability.
Measurement Errors
Accurate measurements are vital for an effective outfeed table. Common measurement mistakes include:
- Not accounting for the thickness of the materials used
- Failing to double-check measurements before cutting
- Not allowing extra space for clamps or accessories
Always take the time to measure twice before cutting. It’s a simple step to avoid frustration and wasted materials.
Neglecting the Work Area
The workspace around the outfeed table is just as important as the table itself. If your work area is cluttered or cramped, it can lead to accidents. Make sure there is enough space for you to maneuver large sheets of wood safely. Position the outfeed table where you have ample space to load and unload materials easily.
Not Considering Dust Collection
Woodworking generates a lot of dust, and it can accumulate quickly on your outfeed table, obscuring your view and potentially harming your equipment. If possible, integrate a dust collection system into your outfeed table design. Installing a dust port nearby can help keep things clean while you work. For more information on dust collection systems, check out Wood Magazine.
Failing to Test for Functionality
After building your outfeed table, it is essential to test its functionality before using it on a project. Run some scrap wood through the table saw and observe how the outfeed table handles the wood. Look for any wobbling and test for accuracy in cuts. Make adjustments as needed to ensure you have a dependable setup.
Overlooking Finishing Touches
Many people finish their outfeed tables with a coat of paint or lacquer. While this can enhance aesthetics, don’t forget to consider the surface’s texture. A smooth surface is ideal for sliding wood through, but make sure it isn’t too smooth that the wood slips. Adding a non-slip surface can help maintain control over wood pieces.
Ignoring Future Needs
When designing your outfeed table, it is crucial to consider your future needs. Your projects may evolve, requiring a larger or more versatile table. Designing your table with extensions or modular capabilities can save you time and effort down the line. Think about what additional features you would want long-term, such as storage compartments, or adjustable heights.
Comparing Materials for Table Saw Outfeed Tables: Which is Best?
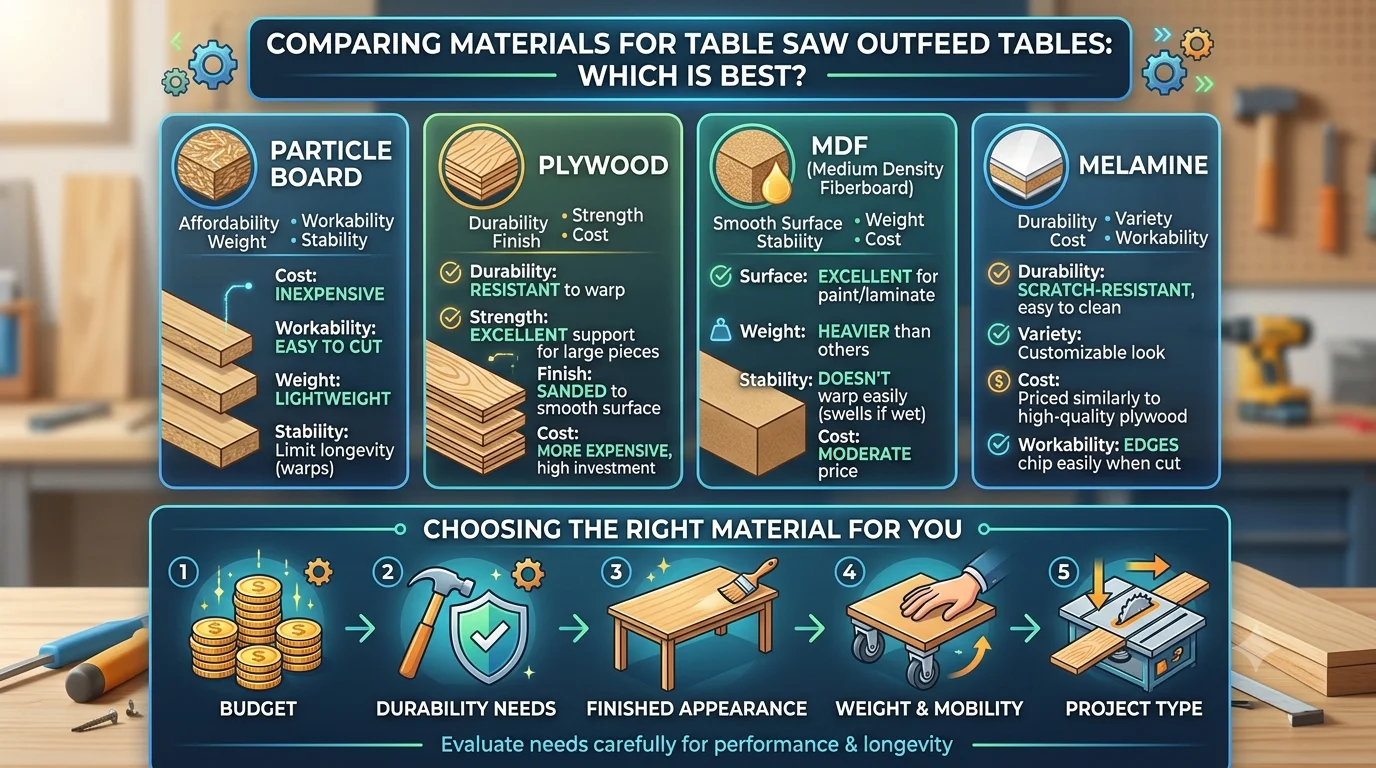
Building a table saw outfeed table is a great way to enhance your woodworking setup. A well-designed outfeed table helps support long workpieces, reducing the risk of accidents and improving efficiency. One of the critical decisions you’ll face when building your outfeed table involves choosing the right materials. This decision not only affects the performance and durability of the table but also influences its overall cost and ease of assembly. Let’s take a look at several popular materials and evaluate their benefits and drawbacks.
Particle Board
Particle board is a common choice for many woodworkers due to its affordability and availability. It is made from wood chips and adhesives, pressed together into sheets. Here are the highlights:
- Cost: Inexpensive, making it a great choice for budget-conscious DIYers.
- Workability: Easy to cut and shape, allowing for straightforward assembly.
- Weight: Lightweight, which can be an advantage for moving your table around the workshop.
- Stability: Particle board can warp if exposed to moisture, which may limit its longevity.
For woodworking conversations about particle board, check out Wood Magazine.
Plywood
Plywood is another excellent option. It consists of thin layers of wood veneer glued together, forming a strong, durable sheet. Here’s what you need to know:
- Durability: Plywood is more resistant to warping and moisture than particle board.
- Strength: Provides excellent support for larger workpieces, making it ideal for heavy-duty use.
- Finish: Plywood surfaces can be sanded to a smooth finish, providing an aesthetically pleasing look.
- Cost: Generally more expensive than particle board, but the added durability often justifies the investment.
For detailed insights on plywood uses, you can visit Woodworker’s Source.
Medium Density Fiberboard (MDF)
MDF is made from wood fibers combined with wax and resin, compressed into dense sheets. When considering MDF, keep the following in mind:
- Smooth Surface: MDF has a very smooth finish, making it excellent for painting or laminating.
- Weight: Heavier than both particle board and plywood, which may be a concern if mobility is needed.
- Stability: MDF doesn’t warp easily, but it can swell if it gets wet.
- Cost: Moderate price point, generally between particle board and plywood.
Melamine
Melamine boards have a particle board or MDF core, coated with a durable plastic laminate. They are gaining popularity among woodworkers. Advantages include:
- Durability: The melamine finish is scratch-resistant and easy to clean.
- Variety: Available in many colors and textures for a customizable look.
- Cost: Priced similarly to higher-quality plywood, but not as strong.
- Workability: Can be harder to work with since edges can chip easily when cut.
You can find more about melamine products at Wood Magazine.
Choosing the Right Material for You
When selecting material for your outfeed table, it’s essential to consider the following factors:
- Your budget
- Weight and mobility needs
- Durability requirements
- Finished appearance
Ultimately, the best material will depend on your specific needs and preferences. Take your time to weigh each option carefully before making a decision. Building an outfeed table can drastically improve your woodworking experience, and the right material can make all the difference. By knowing the strengths and weaknesses of each material, you can confidently create a table that works for your shop.
Tips for Optimizing Your Workshop with an Effective Outfeed Table Setup
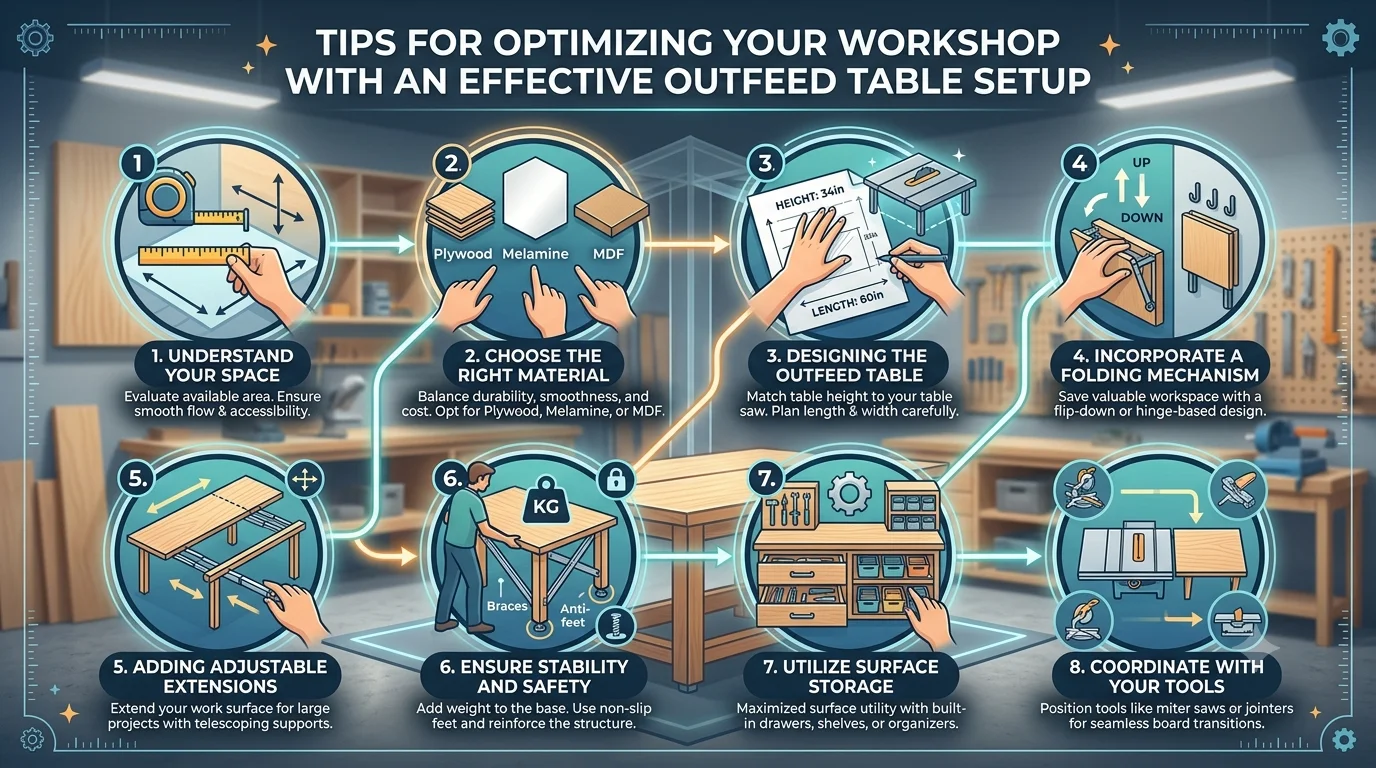
When working with a table saw, it’s crucial to have an effective outfeed table setup to maximize your workshop’s efficiency. An outfeed table provides a stable surface for long boards and heavy materials as they exit the saw, helping to prevent accidents and ensuring accurate cuts. Below are some tips to optimize your workshop with an effective outfeed table setup.
Understand Your Space
Before you dive into building or buying an outfeed table, take a good look at your workshop space. You want to ensure your table fits comfortably and provides the best accessibility. Evaluate the following:
- Available space: Measure the area around your table saw.
- Height: The outfeed table should be level with your saw to ease material movement.
- Workspace flow: Arrange the table to facilitate smooth transitions for board handling.
Choose the Right Material
The material you use for building your outfeed table can significantly impact its durability and functionality. Consider these options:
- Plywood: Lightweight and easy to work with, making it an excellent choice for a DIY outfeed table.
- Melamine: This offers a smooth surface that helps prevent material from sticking during cuts.
- MDF: Provides a dense and flat surface, but may be prone to warping if not sealed.
Designing the Outfeed Table
Your outfeed table design should be stable and versatile. Here are key aspects to incorporate:
- Height: Standard table saw height is around 34 inches. Match this for your outfeed table.
- Length: A good length ranges from 4 to 8 feet, depending on your space and projects.
- Width: A width of 30 inches is adequate for holding most materials securely.
Incorporate a Folding Mechanism
If your workspace is limited, consider adding a folding mechanism to your outfeed table. This feature allows the table to be stored away when not in use, freeing up valuable workshop space. You can use:
- Pivoting legs: These can easily fold down to store the table.
- Hinges: Attach the table to the wall for vertical storage.
Adding Adjustable Extensions
For greater flexibility, consider adding adjustable extensions to your outfeed table. This feature allows you to cater to various project sizes easily. Extensions can be made using:
- Sliders: Smooth sliding rails for swift adjustment.
- Telescopic supports: These extend and retract to accommodate various lengths.
Ensure Stability and Safety
Safety should always be a priority in your workshop. There are several ways to ensure your outfeed table remains stable during use:
- Weight: Adding weight to the base can increase stability.
- Anti-slip mats: Placing mats under the feet can prevent unwanted movement.
- Secure the structure: Incorporate braces to ensure the table doesn’t wobble.
Utilize Surface Storage
Maximize your outfeed table’s utility by incorporating storage solutions. Use the space underneath effectively. Consider:
- Drawers: Store frequently used tools and accessories.
- Shelves: Use for larger items that need quick access.
Coordinate with Your Tools
For ease of workflow, align your outfeed table with other tools in your workshop. Consider arranging nearby tools like your miter saw or jointer, ensuring that transitions for board handling and cutting remain seamless. A well-coordinated workshop promotes productivity and reduces the risk of accidents.
For further insights into woodworking solutions, visit Wood Magazine for comprehensive guides and plans.
By focusing on these recommendations, you’ll ensure that your workshop is optimized with an effective outfeed table setup, improving both safety and productivity. Planning is essential when creating a feature that supports your projects. Take the time to design something that suits your needs and enhances your woodworking experience.
For additional resources on woodworking and table saw projects, check out Woodworker’s Journal.
Conclusion
Creating a functional and effective outfeed table for your table saw can significantly enhance your woodworking experience. By understanding the essential features and incorporating precise plans and measurements, you lay the groundwork for a structure that complements your workspace. Following a step-by-step guide to building your own outfeed table empowers you to customize it to your needs, ensuring it meets the demands of your projects.
It’s crucial to be aware of common mistakes that can undermine your design efforts. By steering clear of these pitfalls, you will save time and resources while maximizing efficiency. As you explore materials for your outfeed table, remember that the right choice can greatly influence durability and safety. Whether you opt for plywood, MDF, or hardwood, each has its benefits and drawbacks, so consider your specific woodworking style and budget when making a decision.
Optimizing your workshop with a well-planned outfeed table setup can drastically improve your workflow. Ensuring that your table integrates seamlessly within your workspace will not only make your projects easier but also enhance creativity and productivity. Whether you are a seasoned woodworker or just starting, investing time and effort into crafting a reliable outfeed table will pay dividends in the quality and ease of your woodworking tasks. Your journey toward a streamlined and enjoyable woodworking experience begins with the right outfeed table.