Woodworking can seem daunting, especially for beginners, but taking on simple Step by Step Woodworking Projects can pave the way for success. With a mixture of creativity and practicality, anyone can create beautiful wooden pieces for their home or as gifts. This guide outlines the basics of starting woodworking projects, focusing on clear, detailed steps for beginners.
Getting Started with Woodworking
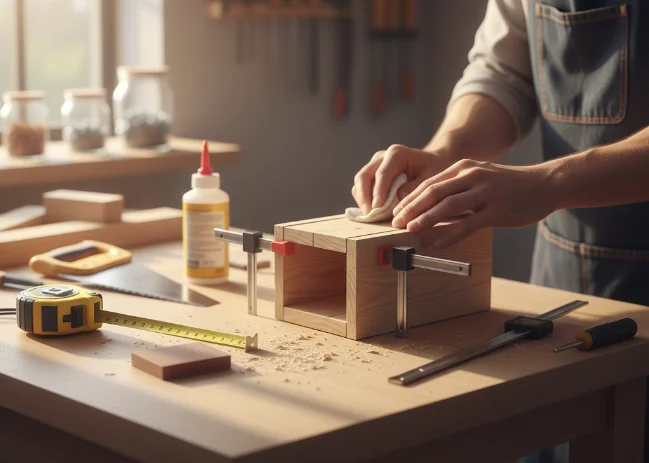
Before you begin any woodworking project, gathering the right tools and materials is key. You don’t need a lot of fancy equipment to start. Here’s a basic list of essential tools for beginners:
- Measuring Tape: To ensure all your cuts are accurate.
- Saw: A handheld saw or circular saw is great for beginners.
- Drill: For creating holes or driving screws.
- Sandpaper: To smooth out edges and surfaces.
- Wood Glue: A strong adhesive for joining pieces of wood.
- Clamps: To hold pieces together while the glue dries.
Once you have your tools ready, it’s time to pick a project!
Simple Step-by-Step Woodworking Projects
Here are three easy woodworking projects to get you started:
1. Wooden Birdhouse
A birdhouse is a classic beginner’s project that’s both fun and practical. Follow these steps:
- Materials Needed: Untreated wood (cedar or pine), wood screws, nails, and paint (optional).
- Cut the Pieces: Cut six pieces of wood to create the base, four walls, and the roof. Common dimensions are a 6×6-inch base, with 8-inch walls.
- Assemble: Start by attaching the walls to the base using wood screws. Secure the corners with additional screws or nails.
- Add the Roof: Attach the roof pieces at an angle and secure them in place.
- Paint and Decorate: Paint the birdhouse to your liking, making sure to use non-toxic materials.
For more detailed plans and inspiration, visit Wood Magazine.
2. Simple Bookshelf
Building a small bookshelf is another great way to get comfortable with woodworking tools:
- Materials Needed: Plywood or hardwood, wood screws, wood glue.
- Measure and Cut: Cut two side panels, a top, a bottom, and three shelves. Each shelf should be slightly shorter than the width of the side panels.
- Mark for Shelves: Use a measuring tape to mark where each shelf will sit on the side panels.
- Assemble the Frame: Attach the top and bottom pieces to the side panels first, forming the outer frame.
- Insert the Shelves: Use wood glue or screws to secure the shelves at the marked points.
Gain further insights on building bookshelves by visiting Family Handyman.
3. Rustic Picture Frame
A picture frame can be a wonderful personal touch to any space. Here’s how to create one:
- Materials Needed: Reclaimed wood, wood glue, clamps.
- Cut to Size: Cut four pieces of wood for the frame based on the size of your picture.
- Join the Corners: Apply wood glue to the corners and clamp them until dry.
- Finish Up: Sand the edges and apply a natural oil or stain for a rustic look.
Explore more creative ideas for picture framing at Ana White.
Safety Tips for Woodworking
While woodworking is enjoyable, safety should always be your first priority. Here are some key safety tips:
- Always wear protective eyewear to guard against dust and splinters.
- Keep your workspace clean and organized to avoid accidents.
- Use tools according to their intended purpose and ensure they are in good condition.
- Ask for help if you’re unsure about using a specific tool or technique.
Essential Tools for Successful Woodworking Projects
Woodworking can be a delightful and rewarding hobby or profession, whether you are crafting furniture, building cabinets, or creating decorative pieces. To embark on your woodworking journey successfully, you need the right set of tools. Below, we will explore essential tools that can elevate your Step by Step Woodworking Projects, ensuring precision, safety, and efficiency.
Hand Tools
Saws
Every woodworker needs a variety of saws for different cuts. The most common types include:
- Hand Saw: Ideal for straight cuts in wood.
- Saber Saw (Jigsaw): Excellent for curves and detailed cuts.
- Circular Saw: Best for cutting large sheets of wood quickly.
Chisels
Chisels are essential for shaping wood and removing small pieces. Look for a set that includes various sizes to handle different tasks.
Clamps
Clamps hold your workpieces in place while you cut, drill, or glue them. Different types of clamps include:
- Bar Clamps: Great for large projects.
- C-Clamps: Perfect for securing smaller pieces.
- Pipe Clamps: Versatile for various projects.
Power Tools
Drill
A cordless drill is invaluable for drilling holes and driving screws. It saves time and offers the convenience of mobility.
Router
Routers are fantastic for shaping edges, hollowing out wood, and creating intricate designs. A plunge router provides the versatility needed for various projects.
Table Saw
The table saw is the heart of many woodworking shops. It allows for precision cutting of large pieces and is perfect for making repeatable cuts.
Orbital Sander
Sanding is crucial for finishing projects. An orbital sander helps you achieve a smooth surface without leaving swirl marks.
Measuring and Marking Tools
- Tape Measure: A reliable tape measure is necessary for all your woodworking projects. Look for one with both imperial and metric markings.
- Square: A carpenter’s square is essential for checking right angles and ensuring your cuts are accurate.
- Marking Gauge: Marking gauges help you scribe lines for cutting. They ensure you maintain consistent measurements across your projects.
Safety Gear
- Eye Protection: Always wear safety glasses to protect your eyes during cutting and sanding. Flying debris can cause serious injury.
- Ear Protection: Noisy power tools can damage your hearing. Invest in a good pair of earplugs or earmuffs.
- Dust Mask: Wood dust can be harmful if inhaled. Wearing a dust mask will help keep your lungs safe while woodworking. Consider a respirator for heavy sanding jobs.
Storage and Organization Tools
Keeping your workspace tidy is essential for productivity and safety. Utilize the following to organize your tools:
- Toolbox/Workbench: Invest in a sturdy toolbox or create a custom workbench to store your tools securely.
- Magnetic Tool Holders: Great for hanging tools and keeping them easily accessible.
- Drawer Organizers: Use these for smaller items like screws, nails, and bits.
Where to Buy Tools
When starting your woodworking journey, knowing where to purchase quality tools is essential. Some reputable retailers include:
- Woodcraft – A comprehensive source for woodworking tools and supplies.
- Rockler – Known for their high-quality woodworking tools and accessories.
- Amazon – Offers a wide range of woodworking tools with customer reviews to guide your choices.
Equipping yourself with these essential tools will set you on the right path for successful woodworking projects. Remember to prioritize safety and practice regularly to enhance your skills. With determination and the right tools, you’ll be crafting beautiful wood pieces in no time!
Common Mistakes in DIY Woodworking and How to Avoid Them
Woodworking is a rewarding hobby that allows you to create beautiful pieces of furniture and decor. However, even the most skilled woodworkers make mistakes. Recognizing these common pitfalls and learning how to avoid them can save you time, money, and frustration. Here are some key mistakes to watch out for and strategies to get you back on track.
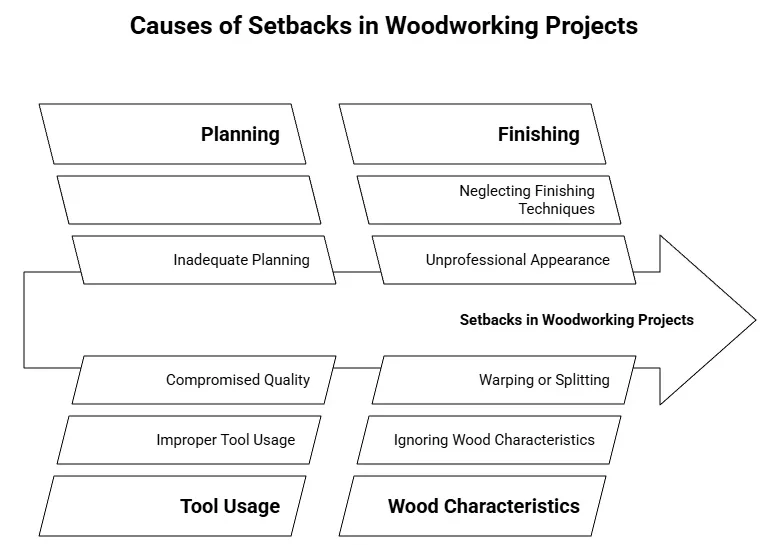
Inadequate Planning
One of the most frequent errors in DIY Step by Step Woodworking Projects is jumping into a project without thorough planning. Without a solid plan, you may waste materials, time, and effort.
- Detailed Sketches: Always start with clear, detailed sketches of your project. This helps you visualize the final product and identify potential challenges early on.
- Material Checklist: Create a list of necessary materials and tools before starting your project. This ensures that you have everything you need on hand, reducing interruptions.
- Project Timeline: Estimate how long the project will take, and include buffer time. Woodworking often takes longer than you expect!
Poor Measurements
Accurate measurements are crucial in woodworking. A small mistake here can lead to major issues later.
- Double-Check Measurements: Always measure twice and cut once. It’s a simple rule, yet it’s easy to forget in the moment.
- Use Good Tools: Invest in high-quality measuring tools such as a tape measure and woodworking square. Accurate tools are essential for precision.
- Mark Clearly: Use a fine pencil or marking tool to make clear, visible cuts on the wood.
Improper Tool Usage
Every tool has its purpose, and using the wrong tool can lead to accidents and subpar results.
- Read Manuals: Always refer to the manual or user guide for your tools. Familiarizing yourself with each tool’s features ensures you use them correctly.
- Wear Safety Gear: Safety gloves, goggles, and hearing protection are essential. Protect yourself while working to avoid injuries.
- Practice Makes Perfect: Spend some time getting comfortable with new tools on scrap wood before starting on your actual project.
Neglecting Finishing Techniques
The final finish on your woodworking project is as important as the building phase. Neglecting this aspect can diminish the overall look of your work.
- Surface Preparation: Sand your wood thoroughly. This helps stains and finishes adhere properly, resulting in a more professional appearance.
- Choosing the Right Finish: Research different types of finishes. Options like oil, varnish, and polyurethane each have unique properties. Choose one that fits your project’s needs.
- Application Techniques: Use appropriate brushes or cloths to apply your finish. Follow instructions on the label for the best results.
Ignoring Wood Characteristics
Each type of wood has its own unique properties, and ignoring these can lead to problems down the road.
- Know Your Wood: Learn about the different types of wood and their characteristics. For example, hardwoods are more durable but harder to work with compared to softwoods.
- Acclimate Your Wood: Allow your wood to acclimate to your workspace’s temperature and humidity before starting. This helps prevent warping.
- Understand Grain Directions: Cutting against the grain can cause splintering. Familiarize yourself with the grain to make clean cuts.
Rushing the Process
Patience is key in woodworking. Rushing through any step can lead to mistakes.
- Take Breaks: If you feel frustrated, take a break. This will help you approach the project with a fresh mindset.
- Focus on Quality: Prioritize quality over speed. Taking your time to do things right can greatly enhance the final product.
- Enjoy the Journey: Remember that woodworking is a craft. Enjoy each step of the process, from concept to completion.
To alleviate some of these common mistakes in DIY woodworking, consider checking out resources from trusted woodworking websites. You can find valuable information on tools and techniques that can elevate your woodworking skills. For expert advice, visit Wood Magazine and for detailed project ideas, explore Popular Woodworking. With careful planning and attention to detail, you can create beautiful pieces and enjoy the woodworking process without unnecessary headaches. Keep these common pitfalls in mind, and you will be well on your way to becoming a successful DIY woodworker.
Creative Woodworking Projects to Enhance Your Home Decor
Transforming your living space doesn’t always require expensive furniture or professional help. You can enhance your home decor with creative woodworking projects that add both beauty and functionality. Whether you’re a beginner or an experienced woodworker, there are many simple DIY projects that you can tackle at home. Let’s explore some ideas to elevate your home decor.
One great way to start is with Wood Magazine, a fantastic resource that offers detailed plans and inspiration. Here are some creative woodworking projects you can try:
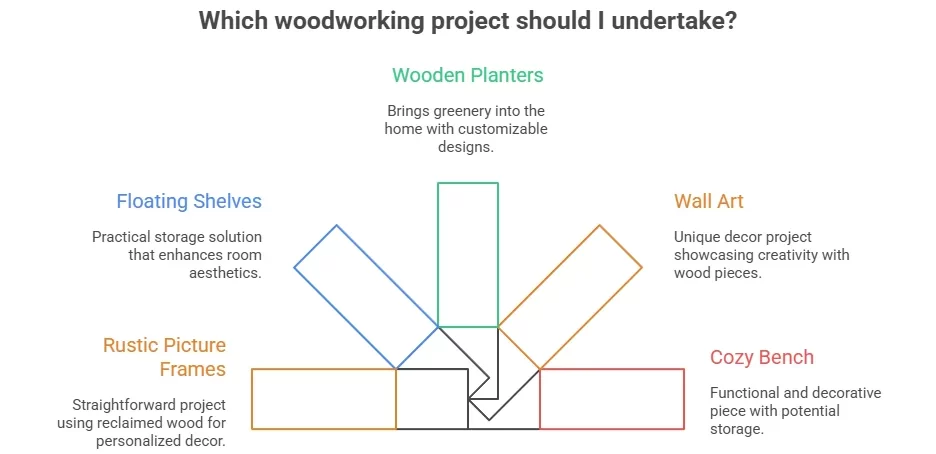
- Rustic Picture Frames: Create personalized picture frames using reclaimed wood. This project is straightforward and allows you to choose the size and design that fits your home. Sand the edges for a polished look, and you’ll have a beautiful display for your favorite memories.
- Floating Shelves: Shelves can enhance any room’s decor while providing practical storage solutions. Build your own floating shelves using wood planks and brackets. Paint or stain them to match your room’s aesthetics and watch as they instantly elevate your space.
- Wooden Planters: Bringing greenery into your home can brighten up any environment. Build simple wooden planters to house your favorite plants. Customize the size and shape to fit your style, and feel free to paint them for a vibrant touch.
- Wall Art: Create unique wall art using different wood pieces. Arrange various shapes and sizes to form an eye-catching design that showcases your creativity. This project is excellent for personalizing your decor and making a bold statement.
- Cozy Bench: A wooden bench can serve both function and decor. Build a simple bench for your entryway or living room. You can even add storage space inside to keep things organized.
Tips for Successful Woodworking Projects
The projects above require basic woodworking tools but deliver significant rewards. To make the process even smoother, here are some tips for successfully completing Step by Step Woodworking Projects:
- Plan Ahead: Before you start, sketch out your design and gather all necessary materials. A clear plan will help streamline your efforts.
- Invest in Quality Tools: Good tools make a huge difference. Ensure you have a decent saw, drill, and sanding tools for better accuracy and finish.
- Measure Twice, Cut Once: This old saying rings true. Always double-check your measurements before cutting to avoid mistakes.
- Finish with Care: Take your time when sanding and finishing your projects. A smooth finish enhances the overall appearance of your work.
Another excellent source for woodworking ideas is Instructables. This community-driven site features countless projects and tutorials, making it easy to find step-by-step instructions for whatever you want to create. Consider browsing the site for inspiration, as it offers projects that range from furniture to décor pieces.
When choosing a woodworking project, think about how it will fit into your existing home decor. Whether you prefer a modern or rustic style, tailor your projects accordingly. You can create a cohesive look by matching your woodworking pieces with your home’s color palette. In addition to enhancing your home, woodworking projects can provide a great sense of accomplishment. As you complete each project, you’ll gain confidence and skills. The experience can also be therapeutic, allowing you to let go of stress while concentrating on creating something beautiful.
For those looking to dive deeper, consider enrolling in local woodworking classes or workshops. Hands-on experience can greatly improve your skills and introduce you to new techniques. Plus, you may even meet fellow woodworkers to share ideas and projects with. Enhancing your home decor through woodworking can be a fulfilling journey. With a wide range of projects available, you’re sure to find the right ones to express your personal style. Explore various resources like Popular Woodworking and Family Handyman for more ideas and detailed guides to fuel your creative woodworking journey. Remember, the goal is to have fun while adding character and charm to your space. Each project completed not only beautifies your home but also creates a warm and inviting atmosphere. So, grab your tools, choose a project, and start transforming your home today.
How to Choose the Right Wood for Your Woodworking Projects

Woodworking projects can range from simple shelves to complex furniture pieces, and the type of wood you choose can significantly impact both the aesthetics and functionality of your projects. Knowing how to choose the right wood is crucial for success in woodworking. Here are some essential factors to consider.
Understand Wood Types
There are two main categories of wood: hardwood and softwood. Understanding the differences between them will help you select the right material for your project.
- Hardwood: Comes from deciduous trees. It is generally denser and more durable. Examples include oak, maple, and cherry.
- Softwood: Comes from coniferous trees. It is usually lighter and easier to work with. Examples include pine, cedar, and fir.
Consider the Project Purpose
The purpose of your project will help determine the right wood. Ask yourself:
- What will the item be used for?
- Will it be in a high-traffic area?
- Will it be exposed to moisture?
For high-traffic items, hardwoods like oak or maple are excellent choices. For outdoor projects, weather-resistant woods like cedar or teak can offer durability.
Grain and Aesthetics
The appearance of wood can vary greatly, so consider the grain and color:
- Fine-grain woods: Such as maple or walnut, offer a smooth finish, making them suitable for fine furniture.
- Coarse-grain woods: Like oak, provide a rustic look that is perfect for decorative projects.
Keep in mind that the same species of wood can present different visuals based on its cut. Always view samples before buying.
Cost and Availability
Wood prices can vary widely based on type, quality, and location. It’s advisable to create a budget before selecting your materials. Here’s a general price list for common woods:
| Wood Type | Price Range per Board Foot |
|---|---|
| Pine | $2 – $5 |
| Oak | $3 – $10 |
| Maple | $4 – $12 |
| Walnut | $8 – $15 |
Consider visiting local lumber yards or checking online marketplaces to compare prices and get the best deals.
Sustainability
Choosing eco-friendly wood is not just a trend; it’s essential for environmental health. Look for certified woods, such as those labeled by the Forest Stewardship Council (FSC). Sustainable practices not only ensure forests are preserved but also often provide higher quality wood.
Testing the Wood
Never settle for just seeing a piece of wood online or in a catalog. Whenever possible, physically inspect the wood. Here’s what to check:
- Flexibility: Bend the wood slightly to test its durability.
- Tooth: Run your hand along the grain to feel for splinters.
- Moisture Content: A moisture meter can help you avoid warped pieces.
In-person inspection allows you to ensure that the wood meets your specifications and project needs. Now that you understand various types of wood, purposes, aesthetics, costs, sustainability, and testing methods, you’re well-equipped to make a choice that fits your project. Using the right wood not only enhances your craftsmanship but elevates the final piece’s value.
For more inspiration and detailed woodworking project guides, consider visiting Wood Magazine or Woodworking Network. Every woodworking project begins with a thoughtful choice of wood. With careful consideration, you can create beautiful, lasting pieces that you’ll be proud of for years to come.
Conclusion
Embarking on Step by Step Woodworking Projects can be an immensely rewarding experience, especially for beginners looking to unleash their creativity. Understanding the essential tools, from saws to sanders, sets the foundation for success. With the right equipment in hand, you minimize common pitfalls that often lead DIY enthusiasts astray. Being aware of common mistakes—like overlooking measurements or not choosing appropriate wood—is crucial in ensuring that your projects turn out as envisioned.
Moreover, exploring creative woodworking projects not only adds a personal touch to your home decor but also enhances your skills as you experiment with different techniques. Each piece you create can tell a story, transforming your living space into a reflection of your personality and style.
Choosing the right type of wood is equally important. Each wood species offers its own set of advantages, from durability to aesthetics. Familiarize yourself with the options available to ensure your projects not only meet functional needs but also look beautiful. As you continue on your woodworking journey, remember that practice and patience are key. Embrace every mistake as a learning opportunity and enjoy the process of creating with your own hands. With each step, you’ll become more confident in your abilities, ready to tackle even more ambitious projects in the future. Whether you’re making a small shelf or a custom dining table, the satisfaction of seeing your hard work come to life is unparalleled. So gather your tools, choose your wood, and get started on your next project today!