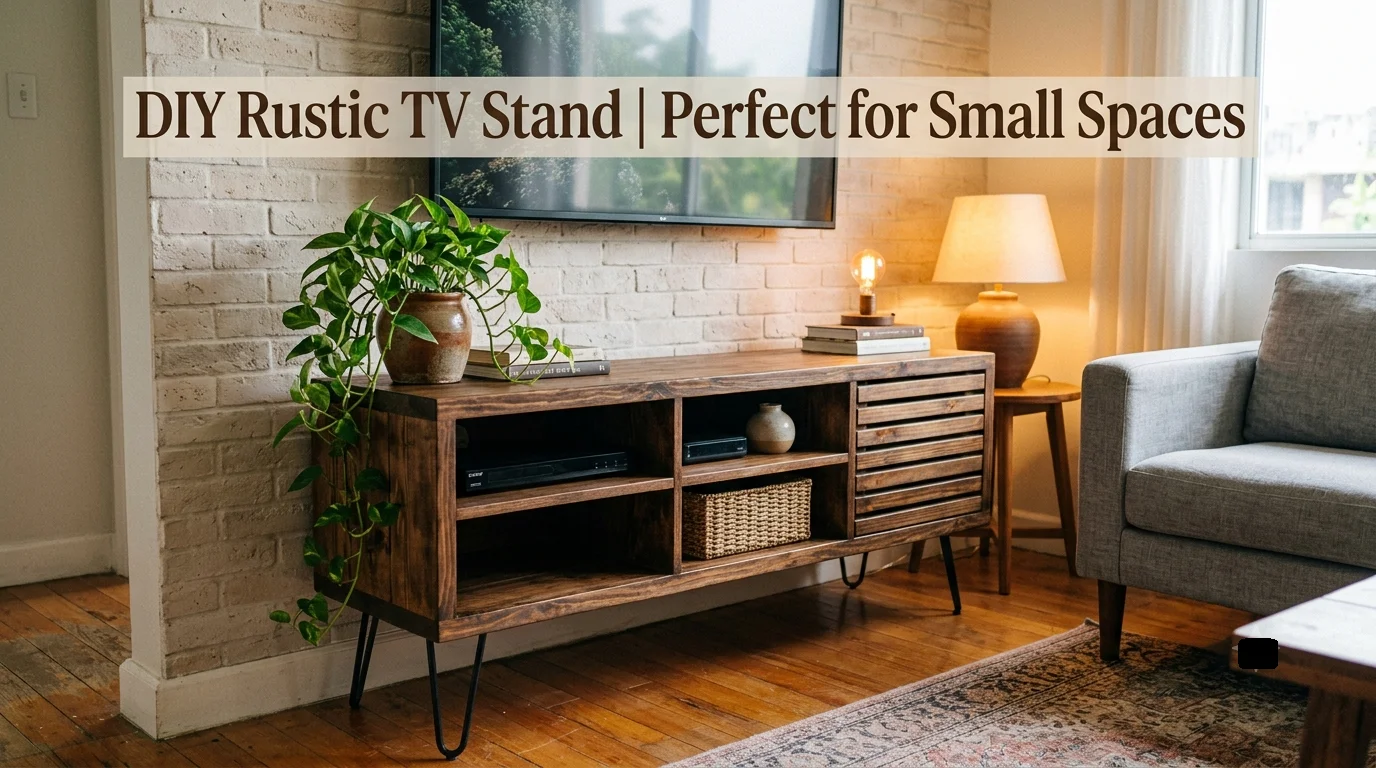
A practical, achievable guide to building a warm, reclaimed-wood-style media console that fits your apartment, studio, or cozy living room — without swallowing the space whole.
There’s a particular kind of frustration that comes with furniture shopping for a small living room. Every TV stand at the store seems built for a sprawling suburban den — six feet wide, boxy, with none of the warmth you’re actually looking for. Meanwhile, the pieces that do have character, the reclaimed-wood, hairpin-leg, farmhouse-style consoles that look so good in photos, rarely come in a size that makes sense for a compact apartment or a cozy reading nook. That gap is exactly where rustic TV stand plans for small spaces come in.
Building your own rustic TV stand isn’t just a way to save money, although it certainly does that. It’s a way to get precisely the dimensions your room actually needs, in a style that most furniture retailers simply don’t stock at smaller scales. A compact, handmade console built from warm-toned wood, blackened metal accents, and a slightly weathered finish brings texture and personality into a room without demanding much floor space at all.
This guide covers the full journey: why rustic style works so well in small rooms, how to choose the right wood and dimensions, the tools you’ll need, the design choices that separate a “cute DIY attempt” from a genuinely beautiful finished piece, and a complete narrative walkthrough of the build itself. By the end, you’ll be ready to turn a blank corner of your living room into the visual anchor of the whole space.
Why Rustic Style Is Perfect for Small Living Rooms
It might seem counterintuitive — rustic furniture is often associated with big farmhouse kitchens and sprawling cabins, not studio apartments. But in practice, rustic TV stand plans for small spaces work beautifully precisely because rustic style leans on warmth and texture rather than bulk to make an impression.
- Warm tones visually soften small rooms — unlike stark white or glossy black furniture, warm wood tones tend to recede rather than dominate, making a room feel cozy instead of cramped.
- Natural material variation adds interest without adding size — the grain, knots, and texture of real or reclaimed-look wood give the eye something to appreciate, so a small piece doesn’t read as an afterthought.
- Open, airy leg structures keep sightlines clear — many rustic designs use slim tapered or hairpin legs rather than a solid box base, which keeps the floor visible and the room feeling larger.
- Rustic pairs with almost anything — it sits comfortably alongside mid-century, boho, modern, or traditional decor, so it won’t box you into a single design direction down the line.
The result is a piece that feels substantial and characterful without ever feeling heavy — exactly what a small room needs.
Planning Dimensions for a Small-Space TV Stand
The single most important decision in any small-space build is getting the dimensions right before you touch a saw. Buy or cut the wrong size, and even the most beautiful rustic finish won’t save the piece from feeling wrong in the room.
Sizing Relative to Your TV
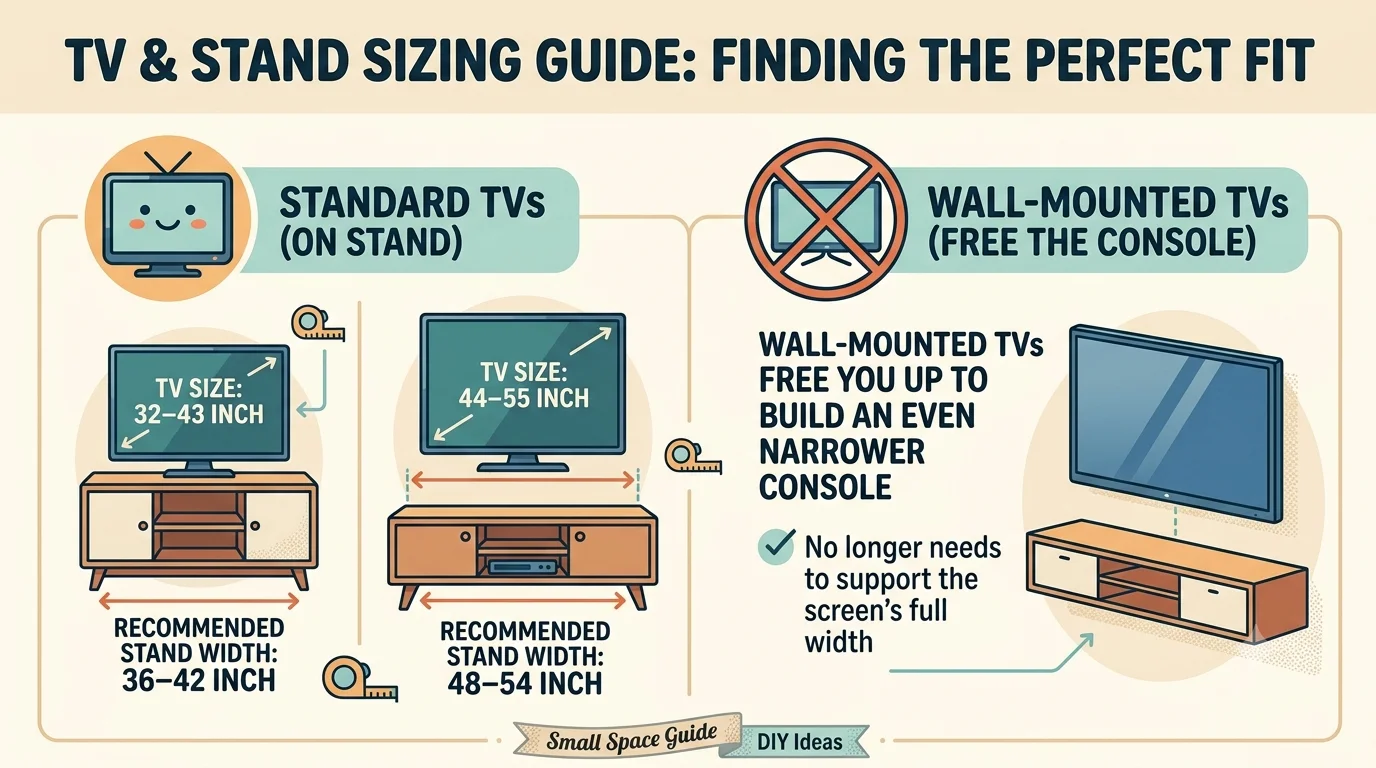
A general rule of thumb is that your stand should be roughly the same width as your TV, or slightly wider — usually no more than a few inches beyond each edge of the screen. For small spaces, this actually works in your favor:
- 32–43 inch TVs pair well with a stand in the 36–42 inch range
- 44–55 inch TVs pair well with a stand in the 48–54 inch range
- Wall-mounted TVs free you up to build an even narrower console, since the stand no longer needs to support the screen’s full width
Depth and Height Considerations
For small rooms, shallow depth matters just as much as width. Most rustic TV stands run 14 to 18 inches deep — enough to hold a media box or soundbar without eating into your walking space. Height typically sits between 18 and 24 inches, low enough to keep sightlines to the TV comfortable from a couch or floor cushion, which is especially important in compact living rooms where seating is often closer to the screen than in larger homes.
Choosing the Right Wood for a Rustic Finish
The material you choose shapes everything about the final look of your rustic TV stand plans for small spaces. Thankfully, rustic style is forgiving — imperfections like knots, mineral streaks, and slight color variation are features, not flaws.
- Reclaimed barn wood delivers the most authentic rustic texture, with existing weathering, nail holes, and patina built in. It’s often available through local reclaimed building material exchanges or salvage yards.
- Pine boards are the most budget-friendly and widely available option, with a soft, pale grain that stains beautifully into warm honey or walnut tones.
- Cedar brings a naturally reddish tone and pleasant aroma, along with strong resistance to warping — a nice option if the piece will sit near a window with fluctuating light and humidity.
- Furniture-grade plywood with a rustic wood veneer is a smart hybrid choice for the main box structure, keeping the piece lightweight and stable while you reserve solid, characterful boards for visible surfaces like the top and front slats.
For guidance on choosing kiln-dried versus green lumber, and understanding moisture content before you build, the Woodworkers Guild of America’s lumber basics guide is a genuinely useful primer, especially if this is your first solid-wood build.
Tools and Materials Checklist
One of the best parts of building your own rustic TV stand plans for small spaces is that the rustic aesthetic actually reduces the precision demands compared to a sleek modern build. A few visible saw marks or slightly uneven grain only add to the character.
Tools
- Circular saw or miter saw for breaking down boards to length
- Drill/driver for pilot holes and assembly
- Pocket hole jig for strong, hidden joints in the frame
- Random orbital sander with 100, 150, and 220-grit sandpaper
- Wire brush attachment (optional) for adding texture to soft-grain woods like pine, a classic technique for accentuating grain lines before staining
- Tape measure, square, and pencil for layout
- Clamps — at least four for holding joints during glue-up
Materials
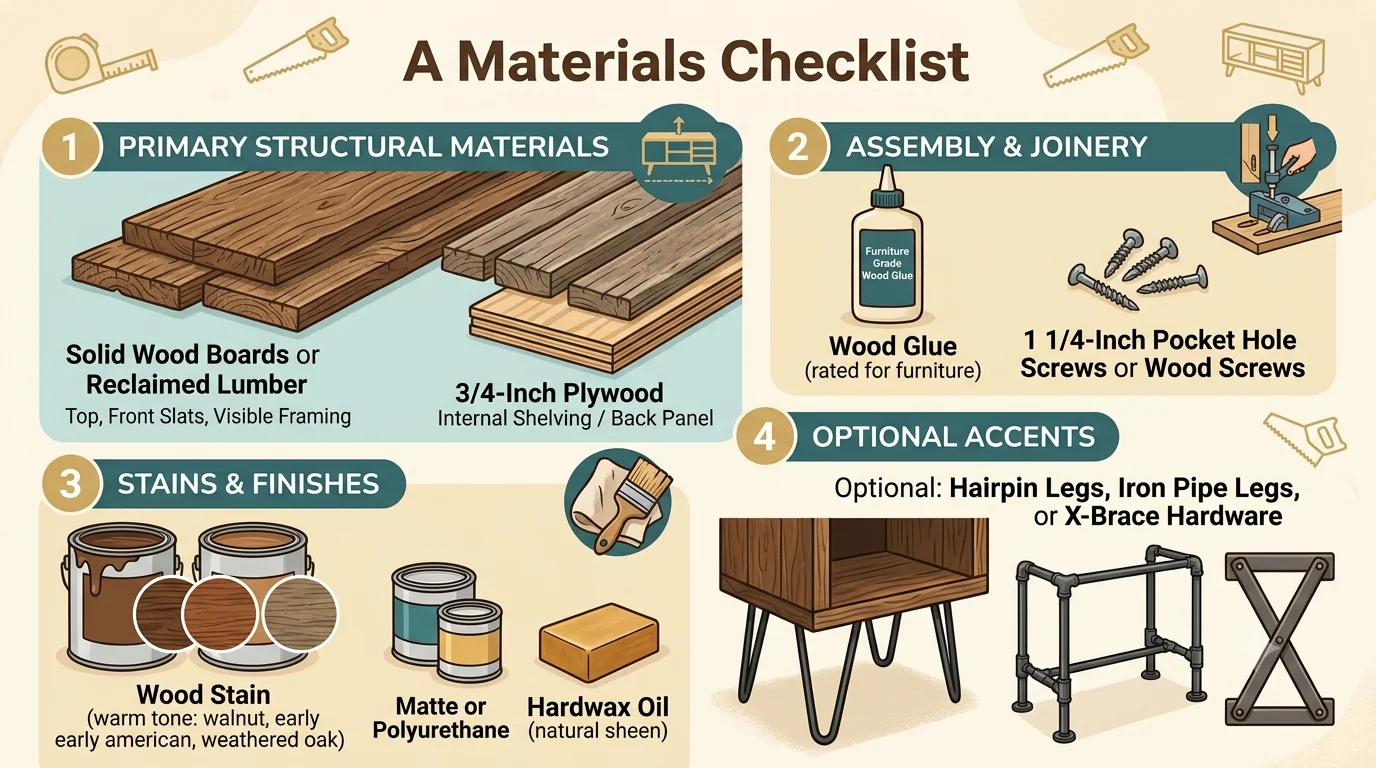
- Solid wood boards or reclaimed lumber for the top, front slats, and visible framing
- 3/4-inch plywood for internal shelving or a back panel, if included
- Wood glue rated for furniture use
- 1 1/4-inch pocket hole screws or wood screws
- Wood stain in a warm tone (walnut, early american, or weathered oak are popular rustic choices)
- Matte or satin polyurethane, or a hardwax oil finish for a more natural rustic sheen
- Optional: black metal hairpin legs, X-brace hardware, or iron pipe legs for an industrial-rustic hybrid look
Design Decisions That Define the Rustic Look
Before cutting anything, it’s worth thinking through a handful of design choices that will shape the entire personality of the finished piece.
Open Shelving vs. Closed Storage
Small spaces almost always benefit from open shelving over closed cabinet doors. Open shelves keep the piece visually light, let you display or access media equipment easily, and — critically for small rooms with limited natural light — avoid creating another dark, boxy shape in the room.
- Open lower shelf — great for baskets, books, or a router/streaming box
- Slatted front instead of solid panel — adds classic rustic texture while keeping the piece from feeling heavy
- One small closed cubby — if you want to hide cords or a cable box, a single small compartment strikes a nice balance
Leg Style
Legs do more visual work than people expect. For small spaces in particular, the right leg style can make a piece feel larger or smaller than its actual footprint:
- Splayed tapered wood legs — classic mid-century-meets-rustic look, and the outward angle visually opens up the space beneath the stand
- Black hairpin legs — a popular contrast against warm wood tones, and their thin profile keeps the piece feeling light
- Chunky turned legs — deliver a more traditional farmhouse feel, best suited to slightly larger small-space rooms rather than the tightest studio apartments
Finish and Color Direction
Rustic doesn’t mean dark by default. In small, light-starved rooms, a lighter weathered or whitewashed finish can keep the space feeling open, while a deep walnut tone works beautifully in rooms with good natural light where you want the stand to serve as a grounding, cozy anchor point.
Building the Stand: A Natural Walkthrough
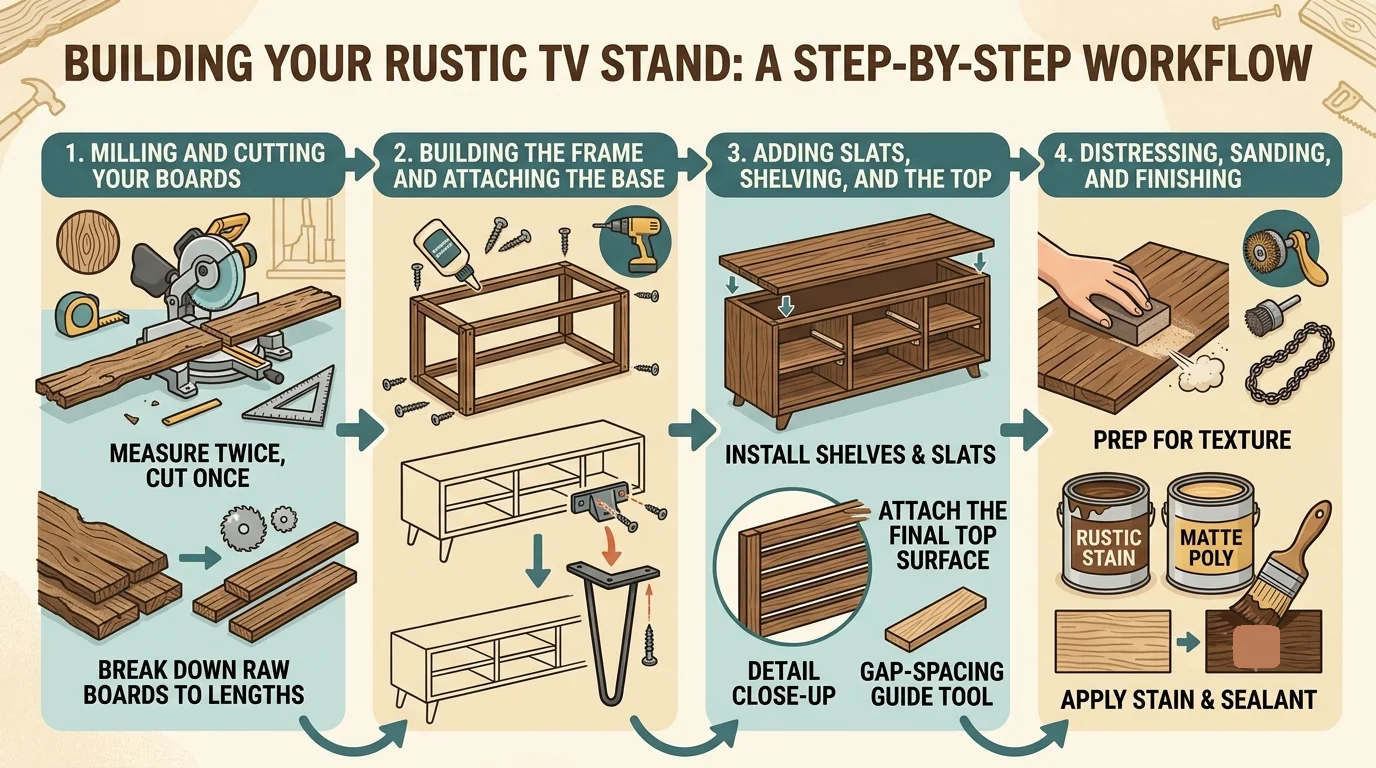
With dimensions, materials, and style decided, here’s how the actual build comes together — not as a rigid checklist, but as a flow from raw boards to finished piece.
Milling and Cutting Your Boards
Start by cutting your boards to the lengths needed for the top, the front slats, the side panels, and any internal shelving, referencing the cut list you built from your final dimensions. If you’re working with reclaimed lumber, this stage also involves checking each board for embedded nails or debris and giving everything an initial rough sanding pass to knock down old, rough surfaces before final shaping.
Dry-fit your top boards side by side to check for gaps or unevenness before any glue goes down — small variations in reclaimed or rough-sawn lumber are common, and it’s far easier to swap a board now than after assembly.
Building the Frame and Attaching the Base
The frame is what gives your stand its structural integrity, and pocket hole joinery makes this stage approachable even for a first-time builder. Assemble the side panels and stretchers into a simple box or open frame, checking for square as you go — a small combination square at each corner catches misalignment before it becomes a permanent wobble.
Once the frame is square and solid, attach your chosen legs. For hairpin or metal legs, this means mounting a bracket plate to the underside of the frame at each corner, positioned symmetrically and set slightly inward from the edges for a balanced, confident stance. For wood legs, this typically involves pocket-hole or dowel joinery directly into the frame corners.
Adding Slats, Shelving, and the Top
If your design includes a slatted front or open shelf, this is where those details come together. Space slats evenly using a scrap block as a consistent spacer, which keeps the rhythm of the gaps clean and intentional rather than eyeballed and uneven. Secure the top boards from underneath with screws through the frame so no fasteners are visible on the finished surface, and add any internal shelf using cleats attached to the inside of the frame for a clean, floating appearance.
This is also the moment to step back and check the whole piece is level and stable on the actual floor where it will live, since even a beautifully built stand can wobble if the floor itself has a slight slope.
Distressing, Sanding, and Finishing
Rustic style embraces texture, and this stage is where you lean into it. A wire brush run along the grain of softer woods like pine raises the grain and deepens the texture beautifully once stain is applied, mimicking the look of naturally weathered wood. Light distressing with a chain, the back of a hammer, or coarse sandpaper along edges and corners adds believable wear in the spots that would naturally see it over years of use — just use a light hand, since a little goes a long way.
Once texture work is done, sand progressively through 100, 150, and 220-grit to remove any sharp edges while preserving the character you’ve built in. Apply a pre-stain conditioner if you’re working with pine, which prevents blotchy, uneven color absorption, then apply your stain in the direction of the grain, wiping excess after a few minutes for an even tone. Finish with two to three coats of a matte or satin polyurethane, or a hardwax oil for an even more natural, low-sheen rustic look, sanding lightly with fine-grit paper between coats.
Creative Variations Worth Trying
Once the fundamentals click, there’s plenty of room to make your build distinctly your own:
- Live-edge top slab — a single live-edge board as the top instantly elevates the rustic factor
- Two-tone finish — a dark walnut top paired with a whitewashed base for contrast
- Black iron pipe legs — an industrial-rustic hybrid that pairs especially well with exposed brick or concrete floors
- Woven basket inserts — swap solid shelving for open cubbies sized to hold woven storage baskets
- Cord management channel — a routed groove or small drilled hole along the back edge keeps cables tidy, a small detail that makes a big daily difference
Styling Your Finished Rustic TV Stand
The build is only half the equation — how you style the finished piece determines whether it reads as intentional design or an afterthought.
- Balance the TV visually — a low, wide piece of art or a mirror above the TV keeps the wall from feeling top-heavy
- Layer in warm-toned accessories — woven baskets, ceramic vases, or a small stack of books soften the hard lines of the TV screen
- Keep the surface breathing room — resist the urge to fill every inch; two or three styled objects beside the TV read as curated, not cluttered
- Add a plant — a trailing plant on one side introduces organic movement that pairs beautifully with rustic wood tones
- Use lighting intentionally — a small warm-toned lamp or LED strip beneath the stand adds ambiance for movie nights without needing overhead lighting
Caring for Your Rustic TV Stand Over Time
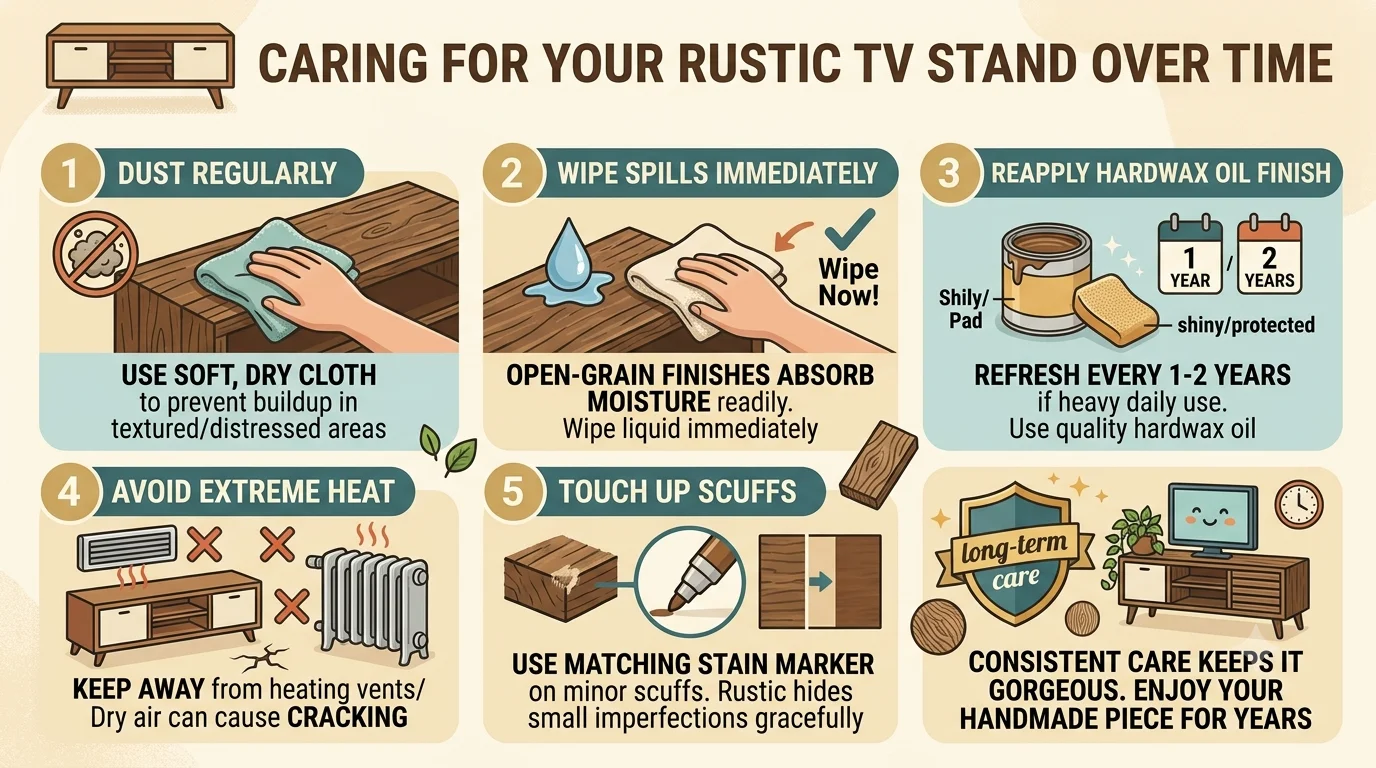
Rustic furniture is forgiving by design, but a few habits keep it looking its best for years:
- Dust regularly with a soft, dry cloth to prevent buildup in textured or distressed areas
- Wipe spills immediately, especially on open-grain finishes that can absorb moisture more readily than glossy surfaces
- Reapply a hardwax oil finish every year or two if the piece sees heavy daily use
- Avoid placing directly beside heating vents or radiators, which can dry out solid wood over time and encourage cracking
- Touch up minor scuffs with a matching stain marker rather than refinishing the whole piece — rustic style hides small imperfections gracefully
Frequently Asked Questions
Can I really fit a rustic-style TV stand in a small apartment without it feeling bulky?
Yes, and it often works better than sleek modern alternatives. Open leg structures, slatted fronts, and warm wood tones tend to visually recede rather than dominate a room, so a well-proportioned rustic stand frequently feels lighter in a small space than a solid, boxy modern equivalent.
Do I need reclaimed wood to get an authentic rustic look?
Not at all. New pine or cedar boards, combined with a wire-brushed texture, light distressing, and the right stain, can achieve a very convincing rustic look without the extra cost and hunting involved in sourcing true reclaimed lumber.
What’s the easiest leg option for a first-time builder?
Black hairpin legs are the most beginner-friendly choice. They require no additional woodworking — simply attach a mounting bracket to the underside of the frame and screw the legs in directly — while instantly adding a clean, on-trend contrast to warm rustic wood tones.
How do I keep cords and cable boxes from ruining the look?
A small drilled cord-pass hole toward the back of the top, paired with one enclosed cubby or a lower shelf angled away from direct sightlines, keeps most cable clutter out of view without requiring a fully enclosed cabinet.
How long does a build like this usually take?
For a first-time builder, plan for one weekend to cut, assemble, and dry-fit the frame, and a second weekend for distressing, staining, and finishing, largely due to drying time between coats. Builders with some experience often complete the full project in a single weekend.
Final Thoughts: A Small Piece With Serious Presence
A small living room doesn’t have to mean small personality. That’s the real promise behind rustic TV stand plans for small spaces — a build that respects your square footage while still delivering the warmth, texture, and character that off-the-shelf furniture so rarely offers at compact sizes. By choosing the right dimensions for your room, leaning into warm wood tones and honest texture, and taking your time through the finishing stages, you’ll end up with a piece that looks like it was custom-built for your space — because it was.
Whether you go with reclaimed barn boards, budget-friendly pine, or a hybrid plywood-and-solid-wood approach, the result is the same: a media console with real soul, sized perfectly for the room you actually live in. Grab your boards, pick your stain, and give your small space the anchor piece it’s been missing.