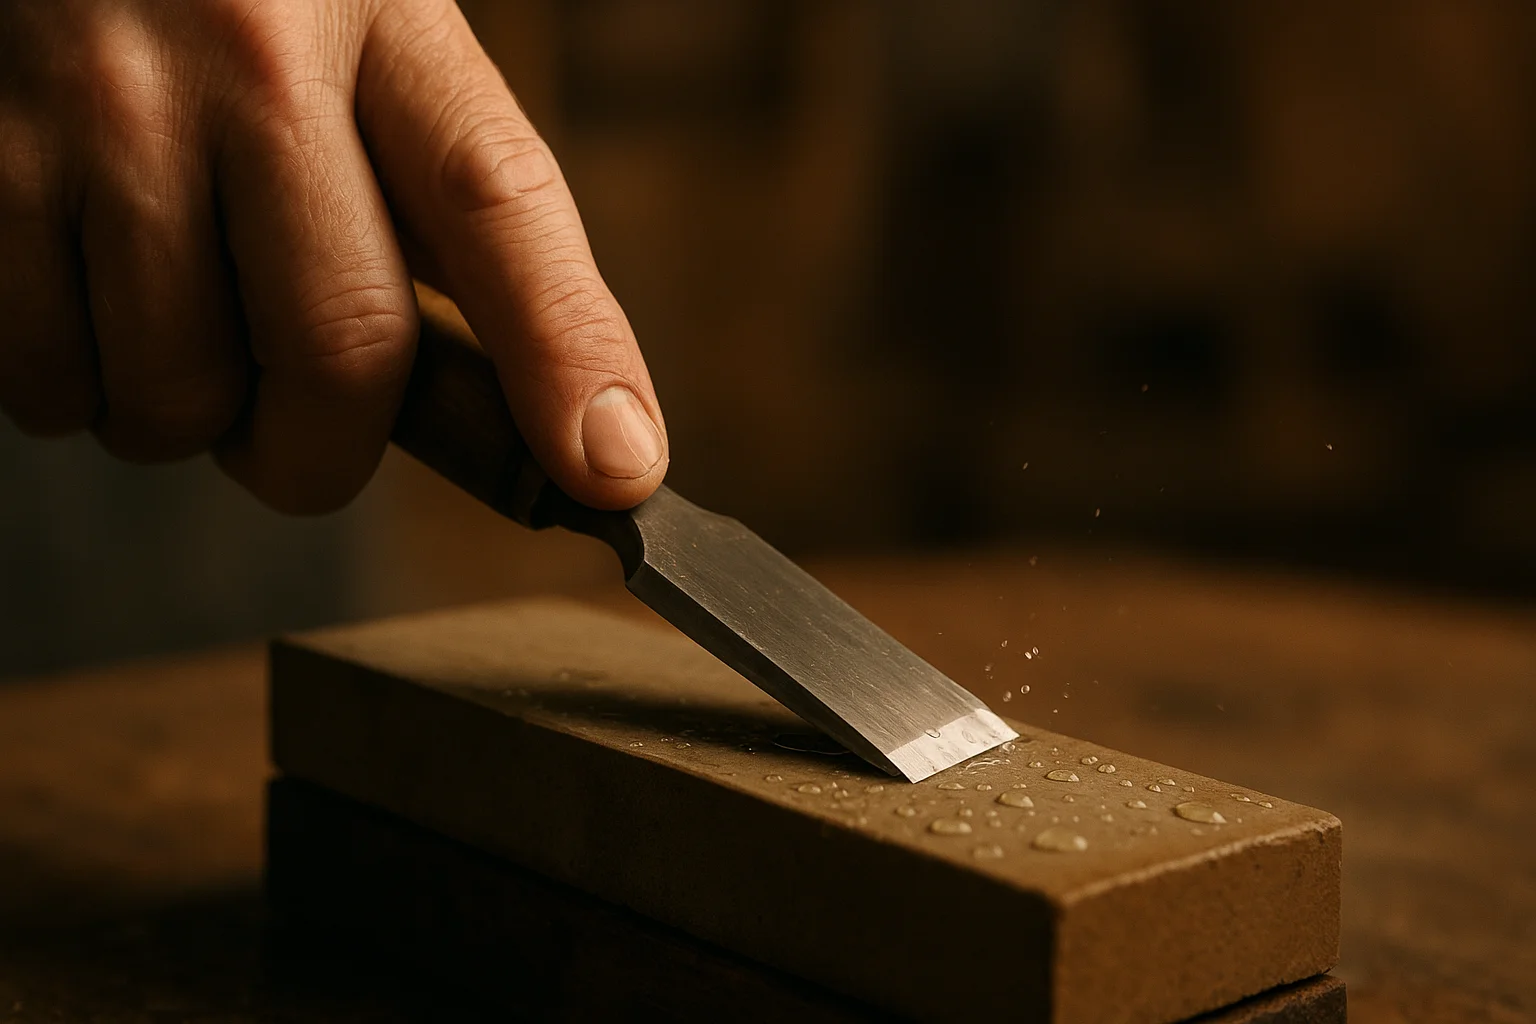
Sharp woodworking tools are vital for any craftsman or hobbyist. Dull tools can make tasks frustrating and unsafe. Learning how to sharpen woodworking tools can enhance your skills and provide smoother cuts. Here’s a step-by-step guide on techniques for sharpening woodworking tools.
Understanding the Tools That Need Sharpening
Before you begin, it’s important to know which tools benefit from sharpening. Common tools include:
- Chisels
- Plane blades
- Saws
- Gouges
- Knife blades
Each tool has its own sharpening requirements, so ensure you understand the specific needs of each before proceeding.
Gather the Right Equipment
Having the right tools for sharpening makes the process much easier. Here’s a list of equipment you might need:
- Water stones: Great for achieving a fine edge.
- Oil stones: Versatile, can be used for various tool types.
- Diamond plates: Durable and quick for dull tools.
- Honing guide: Helps maintain the correct angle while sharpening.
- Leather strop: Perfect for achieving a razor-sharp finish.
Step-by-Step Sharpening Techniques
Now, let’s dive into the sharpening process. Here’s a simple guide you can follow:
1. Prepare the Tool
Clean the tool thoroughly. Remove any rust and debris. This will help you achieve a better sharpening result. Check for any chips or damage that may need addressing before sharpening.
2. Set the Angle
Most woodworking tools should be sharpened at an angle between 20 to 30 degrees. Use a honing guide to set this angle accurately. This ensures a consistent edge across the length of the blade.
3. Start with Coarse Grit
If your tool is very dull, start with a coarse grit stone or diamond plate. Apply even pressure and use circular or figure-eight motions. Focus on maintaining the angle throughout the process.
4. Progress to Finer Grit
Once a good edge is formed with coarse grit, it’s time to switch to a finer grit stone. This helps smooth out any rough edges created in the initial sharpening. Use the same technique, applying even pressure.
5. Hone the Edge
After your tool reaches the desired sharpness, hone the edge on a leather strop. This removes any micro-burrs left on the edge and creates a polished finish. A few light strokes should suffice.
6. Test the Sharpness
To ensure your tool is sharp, test it on a piece of scrap wood. It should cut cleanly and smoothly without requiring excessive force. If it doesn’t, repeat the sharpening process as needed.
Regular Maintenance
To keep your woodworking tools in the best condition, regular maintenance is essential. Here are some tips:
- Store tools properly to prevent damage and dulling.
- Sharpen frequently, based on usage frequency.
- Use protective covers for blades when storing.
By incorporating these techniques into your woodworking routine, you can enhance your projects and enjoy a more efficient crafting experience.
Additional Resources
For more detailed information on sharpening techniques, check out these useful links:
The Importance of Regular Tool Maintenance in Woodworking
Regular tool maintenance is essential in woodworking, primarily for ensuring the longevity and performance of your tools. Over time, tools can accumulate dirt, rust, and dull edges, which negatively impacts their efficiency. By implementing routine care and attention, you can enhance your woodworking projects’ quality while also promoting safety in your workspace.
Understanding the Benefits of Tool Maintenance
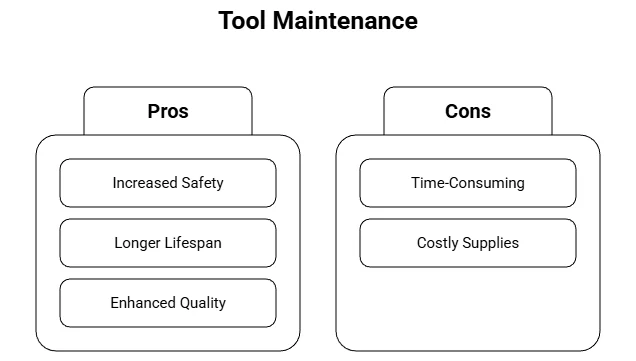
Maintaining woodworking tools comes with numerous benefits, which include:
- Improved Performance: Sharp and clean tools cut more efficiently, allowing for precise and smooth finishes.
- Increased Safety: Dull tools can slip and cause injuries. Regular maintenance reduces the risk of accidents.
- Longer Lifespan: Proper care extends the life of your tools, saving you money in the long run.
- Enhanced Quality: Well-maintained tools help achieve better craftsmanship in your woodworking projects.
How to Maintain Your Woodworking Tools
Maintaining your tools doesn’t have to be complicated. Here are some practical steps you can follow:
1. Regular Cleaning
Cleaning is the first step in proper tool maintenance. Always wipe down your tools after each use to remove sawdust and debris. A simple cloth dampened with mineral spirits works wonders for removing pitch and resin.
2. Sharpening Edges
Woodworking tools, such as chisels and planes, require regular sharpening. Dull tools can create rough cuts and increase the effort needed to perform tasks. Sharpening not only improves performance but also enhances your tools’ lifespan.
| Tool Type | Recommended Sharpening Method |
|---|---|
| Chisels | Horizontal stone whetstone or oil stone |
| Saws | File and saw set |
| Planes | Grinding wheel followed by honing |
3. Lubrication
Tools that have moving parts, such as saw blades and drill bits, need lubrication to function effectively. Use machine oil to keep parts moving smoothly, reducing friction and wear. Make it a habit to oil your tools before extended periods of non-use.
4. Preventing Rust
Rust can severely damage your tools, especially if they are stored in damp conditions. To prevent rust:
- Store tools in a dry, climate-controlled environment.
- Use rust inhibitors or a thin layer of oil on metal surfaces.
5. Proper Storage
How you store your tools also affects their longevity. Ensure they are stored in a well-organized manner, reducing the chances of damage. Use toolboxes or racks and make sure each tool has its designated space. This not only protects them but also aids in efficiency during your woodworking sessions.
Assessing Your Tools Regularly
Make it a habit to assess your tools at regular intervals. Check for any signs of wear or damage, including loose handles, cracks, or severe dullness. Addressing these concerns early can prevent bigger issues down the line.
The Bottom Line
Regular tool maintenance is crucial for any woodworking enthusiast or professional. By keeping your tools clean, sharp, and well-lubricated, you not only ensure improved efficiency and quality in your work but also enhance safety in your shop. Make these practices a routine part of your woodworking lifestyle for the best results.
Comparing Manual vs. Electric Sharpening Methods for Woodworking Tools

When it comes to sharpening woodworking tools, you have two main options: manual and electric methods. Each method has its own advantages and disadvantages, and the best choice can depend on your specific needs and preferences. Let’s dive deeper into both methods to help you make an informed decision.
Manual Sharpening Methods
Manual sharpening techniques typically include whetstones, sharpening stones, and honing guides. These methods provide you with complete control over the sharpening process.
Advantages of Manual Sharpening:
- Precision: Manual sharpening allows for targeted adjustments, which is crucial for maintaining the desired angle of your tool’s edge.
- Cost-Effective: Whetstones and sharpening stones can be less expensive than electric sharpeners, making them budget-friendly options.
- Enhanced Skill Development: Regular practice with manual methods can improve your overall skill in tool maintenance.
Disadvantages of Manual Sharpening:
- Time-Consuming: Manual sharpening typically takes more time compared to electric methods.
- Physical Effort: You may require more physical strength, especially for thicker blades.
- Less Consistency: Variations in pressure or angle might lead to an uneven edge if not done carefully.
To sharpen your tools manually, you will usually follow these steps:
- Choose the right whetstone or sharpening stone. Different grits serve different purposes.
- Wet the stone (if required) and hold your tool at the correct angle, usually around 20 degrees.
- Gently push the tool across the stone, applying even pressure.
- Switch to a finer grit for honing, if needed.
Electric Sharpening Methods
Electric sharpeners use a motorized system to grind and hone your tools, speeding up the sharpening process significantly.
Advantages of Electric Sharpening:
- Speed: Electric sharpeners save you time, making them an excellent choice for those with tight schedules.
- Consistency: These machines offer a uniform sharpening angle, which can lead to a sharper, more reliable edge.
- Less Physical Strain: Electric sharpeners require minimal effort, making them easier for those with limited strength.
Disadvantages of Electric Sharpening:
- Costs: Initial investments can be higher, depending on the quality of the machine.
- Less Control: With electric methods, it’s easier to overheat the blade, potentially damaging it.
- Need for Maintenance: Electric devices can require regular upkeep, such as replacing the grinding belts.
You’ll typically use the following steps when sharpening with an electric sharpener:
- Plug in the sharpening machine and select the appropriate grit setting.
- Hold your tool against the sharpening wheel, allowing the machine to guide the angle.
- Check your progress frequently to avoid over-sharpening.
Making the Right Choice for Your Needs
Your choice between manual and electric sharpening methods should be influenced by a few key factors:
- Frequency of Use: If you sharpen tools often, an electric sharpener may be worth the investment.
- Skill Level: Beginners might benefit from the guidance provided by electric tools, while advanced users may prefer the control of manual sharpening.
- Tool Types: Certain tools may perform better with specific sharpening methods.
For more in-depth guidance on sharpening methods, you can explore resources at Wood Magazine or check out Lee Valley Tools for product recommendations.
Whether you choose manual or electric methods, the goal is to keep your woodworking tools sharp for the best performance. Take the time to experiment with both methods, allowing you to determine the best fit for your skills and projects.
Essential Tools and Equipment for Optimal Tool Sharpening
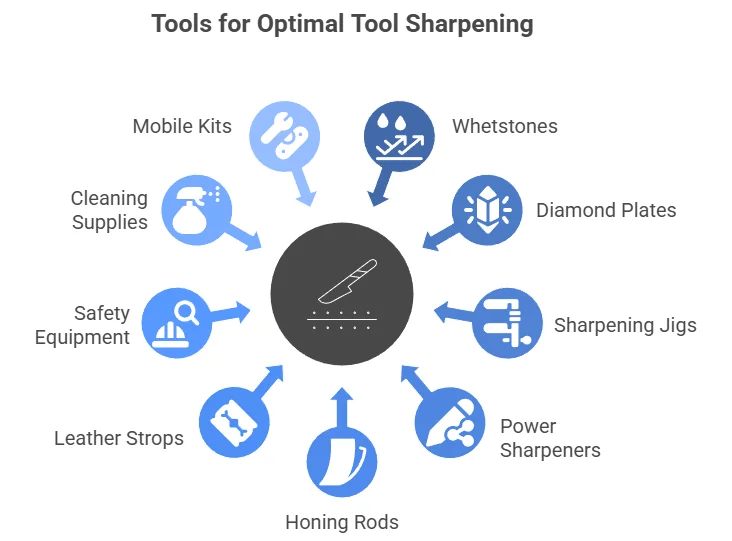
To keep your woodworking tools in top shape, the right equipment for sharpening is crucial. A well-maintained tool not only works better but also enhances safety and efficiency in your workshop. Here’s a look at the essential tools and equipment that can assist you in sharpening your woodworking tools effectively.
Whetstones
Whetstones, or sharpening stones, are a timeless option for sharpening. They come in various grits, offering versatility depending on how dull your tools are.
- Coarse Grit (1000-2000): Ideal for reshaping the edge of extremely dull tools.
- Medium Grit (3000-6000): Great for honing a blade that requires finer sharpening.
- Fine Grit (8000 and above): Used for a mirror finish, perfect for chisels and plane blades.
Diamond Plates
Diamond plates are another highly effective tool for sharpening. They contain a layer of diamond grit that makes them incredibly durable and efficient.
- Pros: Fast cutting and no need for water or oil to lubricate.
- Cons: Generally more expensive than whetstones.
Sharpening Jigs
A sharpening jig is essential for achieving consistent angles and edges. These tools hold the blade securely and allow you to sharpen at a set angle.
- Angle Guide: This ensures you sharpen at the correct angle, which is typically between 25 to 30 degrees for most woodworking tools.
- Felt-lined supports: Provides stability and prevents scratches on your tools.
Power Sharpeners
If you’re looking for speed and efficiency, consider power sharpeners. These devices use motors to spin different grits for you, allowing you to sharpen quickly and with minimal effort.
- Belt Sanders: Good for large blades and rough sharpening.
- Bench Grinders: Versatile and ideal for a variety of tool types, from chisels to plane blades.
Honing Rods
Honing rods, often made from ceramic or steel, are used to refine the edge after sharpening. They help to align the blade’s edge and can quickly restore a sharp edge.
Leather Strops
Using a leather strop can give your tools a razor-sharp finish. The leather, when charged with honing compound, buffs the edge of your tools, adding fine polish and sharpness.
Safety Equipment
Don’t forget that ensuring your safety is essential while working with sharpening tools. Here are some items to consider:
- Safety Glasses: Protect your eyes from dust and sparks, especially when using power tools.
- Hearing Protection: When using power sharpeners, protect your ears from noise.
Cleaning Supplies
After sharpening, clean your tools to ensure longevity. Use:
- Mineral Spirits: Effective for removing gunk and resin.
- Brushes: To clean debris off sharpening tools and the blades themselves.
Mobile Tool Sharpening Kits
If you work on location or prefer portability, consider a mobile sharpening kit. These kits often include essential items like compact whetstones, a small honing rod, and even a small jig.
Practice and Technique
Regardless of the tools you select, sharpening takes practice. Learn different techniques and understand your tools’ needs. Ensuring that you sharpen properly will save your tools from unnecessary wear and enhance their performance.
Common Mistakes to Avoid When Sharpening Woodworking Tools
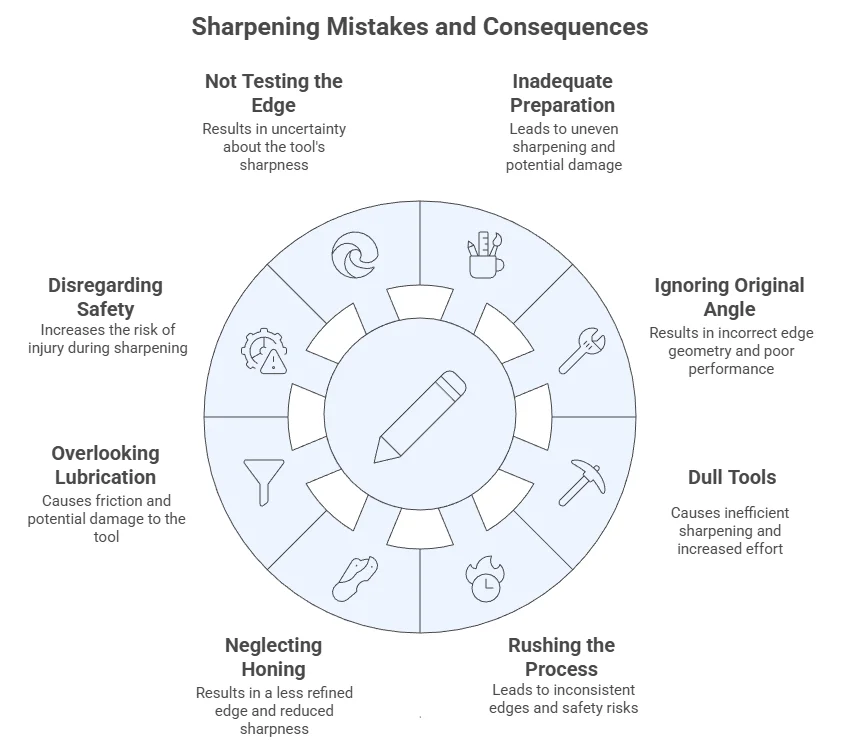
Sharpening woodworking tools is essential for achieving precise cuts and maintaining efficiency in your projects. However, many woodworkers make common mistakes that can hinder the sharpening process and ultimately impact their work. Here are some pitfalls to avoid when sharpening your woodworking tools.
Inadequate Preparation
Before you even begin sharpening, ensure that your workspace is clean and organized. An untidy space can lead to distractions and accidents. Moreover, not having the right tools within reach can waste valuable time. Gather the necessary equipment such as sharpening stones, honing guides, and safety gear before you start.
Ignoring the Tool’s Original Angle
One of the most critical aspects of sharpening is maintaining the original bevel angle of your tools. Many beginners make the mistake of arbitrarily changing the angle, which can lead to poor cutting performance and blade damage. Always check the recommended angle for each specific tool. For instance:
- Chisels: Usually sharpened to a 25 to 30-degree angle.
- Plane Blades: Typically sharpened to 25 degrees, unless specified otherwise.
- Saws: Will vary based on type, but generally, a 20-degree angle is common.
Using Dull or Damaged Sharpening Tools
It may seem obvious, but using dull sharpening tools can lead to frustrating results. Always inspect your sharpening stones and accessories for wear and tear. If they are damaged, it’s better to replace them. Dull tools can create more problems, requiring more time and effort for minimal results.
Rushing the Process
Sharpening requires patience and attention to detail. Rushing can result in uneven edges and a poorly sharpened tool. Take your time and work slowly, progressing through each grit of your sharpening system. This patience ensures that you achieve the best edge on your tools and ultimately leads to better performance in your woodworking projects.
Neglecting the Honing Step
Many woodworkers skip the honing step after sharpening, thinking that it is unnecessary. However, honing is crucial for achieving that razor-sharp edge. Honing removes the small burr created during sharpening and polishes the blade, resulting in a smoother cut. Consider including a honing step in your routine to enhance your tool’s cutting efficiency.
Overlooking Lubrication
When using certain sharpening tools, lubrication is vital. Failing to use oil or water on your sharpening stones can lead to heat buildup and premature wear of the stone and the blade. Use a few drops of oil or water according to the type of stone you’re using, ensuring that the sharpening process remains smooth and efficient.
Disregarding Safety Precautions
Your safety should always come first. Make sure to wear suitable protective gear, such as gloves and safety glasses, to protect your hands and eyes from debris. Always read and follow the manufacturer’s instructions when using any sharpening tool, which can help in preventing accidents.
Not Testing the Edge
After sharpening, never assume your tool is ready for use without testing the edge. A quick test can save you from frustration later on. For chisels, make a small cut into a soft piece of wood. For plane blades, check on a scrap piece to ensure it’s slicing cleanly. Testing your tools immediately gives you a sense of their performance.
By avoiding these common mistakes, you can sharpen your woodworking tools effectively and enjoy a more pleasant woodworking experience. As a final tip, consider visiting Wood Magazine for more guides and tips on maintaining your tools.
Always remember that sharpening is a skill that improves with practice. As you become more familiar with your tools and their subtleties, you’ll find that avoiding these common pitfalls will lead to quicker, safer, and sharper results.
Conclusion
Sharpening woodworking tools is not just about achieving a sharp edge; it’s a vital part of maintaining the quality and longevity of your tools. By employing the techniques we’ve discussed, such as using sharpening stones, honing guides, and strops, you can ensure your tools perform at their best. Regular maintenance prevents dulling and damage, allowing you to create smoother cuts and better finishes in your projects.
When considering whether to use manual or electric sharpening methods, think about your specific needs, the tools you use most often, and your level of skill. Both methods have their benefits and can be effective, but personal preference plays a significant role in choosing the right approach.
To optimize your sharpening process, having the right essential tools, like a quality sharpening stone and a dependable honing guide, is crucial. These tools will enhance your skills and save you time and effort in the long run.
Moreover, being aware of common mistakes, such as applying too much pressure or neglecting to maintain a consistent angle, can greatly improve your sharpening experience. As you gain more experience, you’ll find that how to sharpen woodworking tools becomes second nature, leading to consistently excellent results.
Ultimately, a commitment to regular sharpening and maintenance will keep your woodworking tools in prime condition, allowing your creativity and skills to shine through in every project you undertake. Remember, a sharp tool is not just safer but also a key to achieving craftsmanship that speaks volumes.