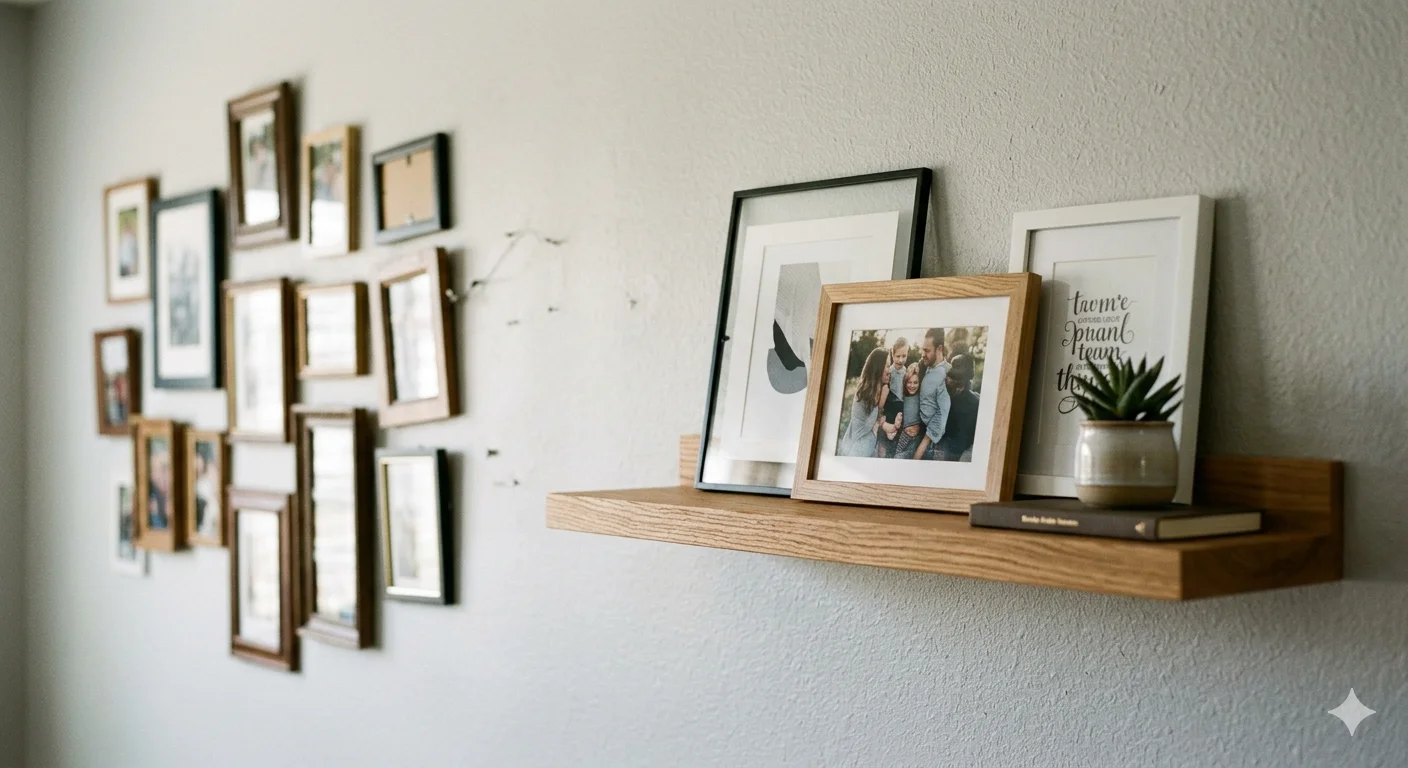
Creating wooden picture ledges is a wonderful way to display your favorite photos and artwork while adding character to your living space. With a few tools and some easy steps, you can make beautiful, functional ledges that will look great in any room. This guide will walk you through the process of How to Make Wooden Picture Ledges.
Materials Needed
- Wood boards (choose a type like pine, oak, or cedar)
- Saw (miter or circular)
- Screws or nails
- Wood glue
- Sandpaper
- Paint or wood stain (optional)
- Measuring tape
- Level
- Drill
Step 1: Measure and Cut Your Wood
Begin by determining the length of your picture ledges. Decide where you want to place them and measure the wall width. Once you have your desired length, mark your wood board accordingly. Using the saw, cut the wood to your measured lengths. Make sure to wear protective eyewear while cutting.
Step 2: Create a Ledge Profile
For your wooden ledge to effectively support your pictures, you need to create a ledge profile. This involves cutting a groove into the board where the pictures will rest. Mark a line about 2 inches from the edge of the board. Cut along this line using a straight saw, ensuring that the depth remains consistent.
Step 3: Sand the Edges
After cutting, use sandpaper to smooth any rough edges. It’s essential to do this step carefully; rough edges can snag on your photographs or decorative items. Sanding also helps your wood finish look neat and professional.
Step 4: Attach a Support Backing
To ensure stability, attach a backing board to your wooden ledge. This board should be slightly shorter than your ledge and will help support the weight of the items placed on it. Use wood glue and screws to attach the backing securely.
Step 5: Finishing Touches
Now it’s time to add paint or wood stain if desired. Using a brush or a cloth, apply an even coat to the wood surface. If you want a natural look, consider just sealing the wood with a clear varnish instead. Allow your chosen finish to dry completely before proceeding.
Step 6: Install the Ledges
Once your ledges are dry, it’s time to install them. Use your measuring tape and level to mark where the ledges will go on the wall. Drill holes where you need to attach, using screws that are appropriate for your wall type (drywall, plaster, etc.). Secure the ledge to the wall and double-check that it’s level before fully tightening the screws.
Step 7: Display Your Pictures
After installation, you can start displaying your favorite pictures and artwork. Arrange them in a way that feels balanced and visually pleasing. This is your chance to get creative!
Additional Tips
- Consider varying the length of the ledges for a unique look.
- Use brackets for added support if displaying heavier items.
- Experiment with different finishes to match your decor.
Essential Tools and Materials for Crafting Picture Ledges
Creating wooden picture ledges can be a rewarding DIY project that adds a personal touch to your home decor. To get started, it’s essential to have the right tools and materials at your disposal. Here’s a breakdown of what you need to craft beautiful and functional picture ledges.
Essential Tools
Having the right tools is crucial for a successful woodwork project. Here’s a list of essential tools that will make the process easier and ensure your wooden picture ledges are built to last:
- Measuring Tape: Accurate measurements are vital. Invest in a good quality measuring tape to ensure everything fits perfectly.
- Square: A carpenter’s square helps you check right angles, which is critical for alignment.
- Saw: A miter saw or a circular saw is ideal for making precise cuts at different angles. If you’re cutting straight, a hand saw can also suffice.
- Drill: A power drill will come in handy for making holes for screws. Consider using a drill with a selection of drill bits to match your project needs.
- Screwdriver: You’ll need a screwdriver to secure the pieces together. A cordless screwdriver can speed up the process.
- Sander: To achieve a smooth finish on your wood, a power sander or sandpaper will be needed. This prevents splinters and enhances the appeal of your ledges.
- Paintbrush/Roller: If you plan to paint or stain your picture ledges, have a brush or roller ready to apply a smooth, even coat.
Required Materials
Now that you have your tools, let’s gather the materials needed for constructing wooden picture ledges. Here’s a list to guide you:
- Wood: Choose a type of wood that suits your style. Popular choices include pine for a natural finish or hardwoods like oak for durability.
- Screws: Make sure you select the right screws that will hold the weight of the items you plan to display. Wood screws are a good choice.
- Wood Glue: This can add extra strength to your joints. Consider using wood glue alongside screws for better durability.
- Finish: Decide whether you want to paint, stain, or leave the wood natural. A good quality wood stain or paint can enhance the beauty of your ledge.
- Wall Anchors: When installing your ledge, especially if it’s going to hold heavier items, wall anchors will ensure that the screws hold firmly in place.
Understanding Dimensions
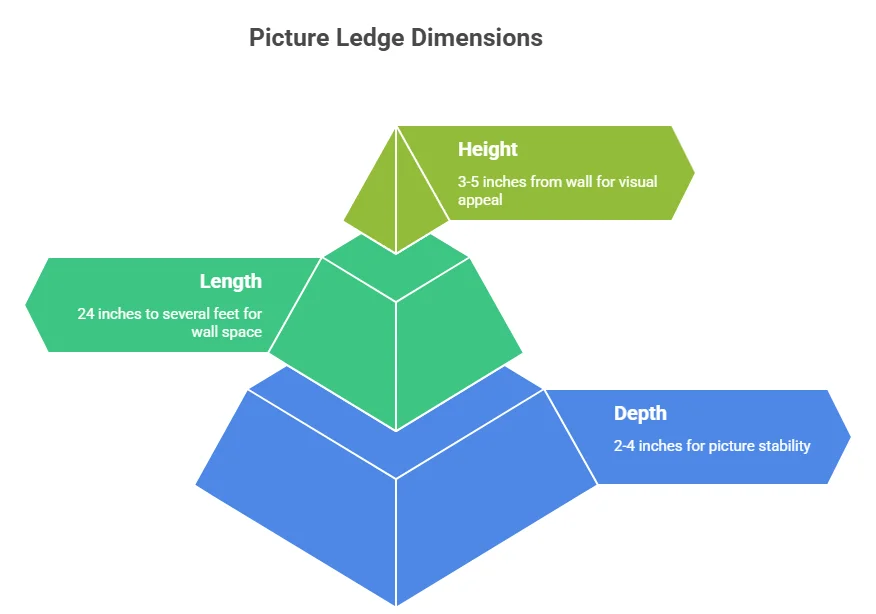
When constructing wooden picture ledges, it’s essential to know the standard dimensions for best results. A typical picture ledge is around 2-4 inches deep and can range from 24 inches long to several feet, depending on your wall space.
| Dimension | Recommendation |
|---|---|
| Depth | 2-4 inches |
| Length | 24 inches to several feet |
| Height (from wall) | 3-5 inches |
Safety Gear
Don’t forget about safety while working on your wooden picture ledges. Always wear protective eyewear and dust masks when cutting or sanding wood. Gloves are also recommended to protect your hands from splinters and cuts.
Where to Find Resources
You can find additional resources, tutorials, and materials for your project on sites dedicated to DIY crafting. Consider visiting Wood Magazine for professional tips and techniques, or The Spruce Crafts for crafting ideas. With the right tools and materials in hand, you’re well on your way to crafting stunning wooden picture ledges that can enhance the aesthetics of your living space. Remember to work carefully and take your time to enjoy the creative process.
Creative Ways to Style Your Wooden Picture Ledges
Wooden picture ledges are an incredible way to showcase your favorite photographs, artwork, and decorative items. Not only do they add an elegant touch to any space, but they also offer flexibility in styling. You can easily change the decor as your tastes evolve. Here are some creative ways to style your wooden picture ledges, allowing you to display your personality and creativity.
Layering is Key
One of the most effective ways to create visual depth is through layering. Begin with larger frames at the back of the ledge. Then, gradually layer smaller frames or decor items in front. This technique creates a stunning three-dimensional effect. Consider using:
- Larger canvas prints or framed artwork
- Medium-sized frames for family photos
- Small decorative items, such as candles or vases
Mixing and Matching Frames
Using a variety of frame styles can make your ledge visually exciting. You can mix materials, colors, and sizes. For example, combine rustic wooden frames with sleek metal ones. This contrast can add character and uniqueness to your display. Try incorporating:
- Vintage frames
- Modern acrylic frames
- Bold colored frames
Plants
Bringing greenery into your display not only adds life but also enhances the aesthetics. Small potted plants or succulents can breathe freshness into your wooden picture ledges. Make sure to choose plants that require minimal sunlight if the ledge is positioned in a less sunny spot. Here are some excellent plant options:
- Succulents
- Cacti
- Small ferns
Utilizing Decorative Objects
To create a dynamic display, don’t hesitate to intersperse your frames with decorative objects. Unique finds from flea markets or handcrafted items can spark conversations. You can use:
- Small sculptures
- Bookends
- Ceramic pieces
Color Coordination
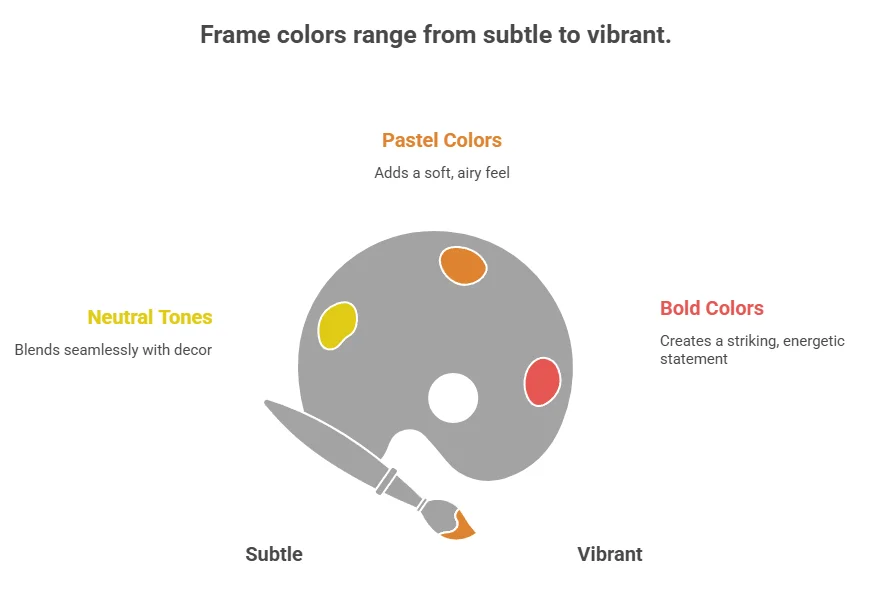
Color plays a significant role in creating a cohesive look. Choose frames and decor items that complement the color scheme of the room. You can opt for monochromatic looks for a sophisticated vibe or play with vibrancy for a lively atmosphere. Here’s a simple method to create a color palette:
| Color Scheme | Frame Colors |
|---|---|
| Neutral Tones | White, Black, Gray |
| Pastel Colors | Light Blue, Soft Pink, Mint Green |
| Bold Colors | Bright Red, Electric Blue, Zesty Yellow |
Seasonal Themes
Don’t be afraid to change your display with the seasons. You can rotate your decor items to reflect different holidays or seasons. For example, during fall, add small pumpkins or autumn leaves. In spring, use flowers or Easter-themed items. This habit keeps the display fresh and exciting.
Personal Touches
Your wooden picture ledges are the perfect place to showcase your personality. Consider displaying memorable tickets, postcards, or even handwritten notes alongside your photos. These personal touches invite warmth and nostalgia into your space. These styling ideas can transform your wooden picture ledges into captivating displays. Whether you opt for a minimalist look or an eclectic arrangement, the key is to have fun while showcasing what you love. To learn more about styling wooden picture ledges effectively, visit Homedit or Apartment Therapy.
Common Mistakes to Avoid When Building Picture Ledges
Creating wooden picture ledges can be a fun and rewarding project, allowing you to display your favorite photos and artwork. However, there are common mistakes that can hinder your efforts and lead to unsatisfactory results. To help you achieve the best outcome, here are some key pitfalls to avoid when building your picture ledges.
Incorrect Measurements
One of the most critical mistakes is not measuring accurately before cutting your wood. It can be tempting to eyeball dimensions, but this often leads to poorly fitting pieces. Always use a tape measure to get precise measurements of the space where you plan to install the ledges. Make sure to measure the length, width, and depth of the space, allowing for any overhang or clearance needed when displaying items.
Choosing the Wrong Wood Type
Different types of wood can affect both the appearance and durability of your ledges. Pine is commonly used due to its affordability and ease of handling, but it may dent or scratch easily. Hardwoods like oak or maple provide better durability but can be more challenging to work with. Ensure you select wood that matches your desired aesthetic while considering how much wear and tear it will face. Consult sources like Wood Magazine for guidance on selecting the right wood.
Neglecting the Finish
A common oversight is forgetting to properly finish the wood. Simply painting or staining the ledges may seem adequate, but applying a protective coat is essential. Finishes help preserve the wood, enhancing its lifespan and keeping it looking beautiful. Use polyurethane or a similar product to safeguard against scratches, stains, and moisture. You can find helpful finishing tips on websites like Woodworker’s Source.
Improper Mounting Techniques
How you mount the ledge can significantly affect its stability and safety. Relying solely on nails or glue is often insufficient for holding heavy frames or objects. Instead, use wall anchors and screws for secure installation. Here’s a list of mounting supplies you may need:
- Wall anchors (if you’re mounting on drywall)
- Screws appropriate for the weight of your ledges
- Level to ensure the ledge is even
And remember, always check that your wall studs are located properly for added support.
Overlooking the Height
Another mistake is selecting an inappropriate height for the picture ledges. Placing your ledges too high or too low can make displaying your photos awkward. As a rule of thumb, the center of your displayed items should be at eye level when standing. This ensures visibility and creates a more inviting display.
Rushing the Process
It’s easy to get excited and rush through the construction or installation process. However, taking your time to plan, measure, cut, and finish will set you up for success. Be sure to double-check all your work and allow sufficient drying times for paints and finishes. A carefully constructed ledge will not only look professional but also stand the test of time.
Ignoring Weight Capacity
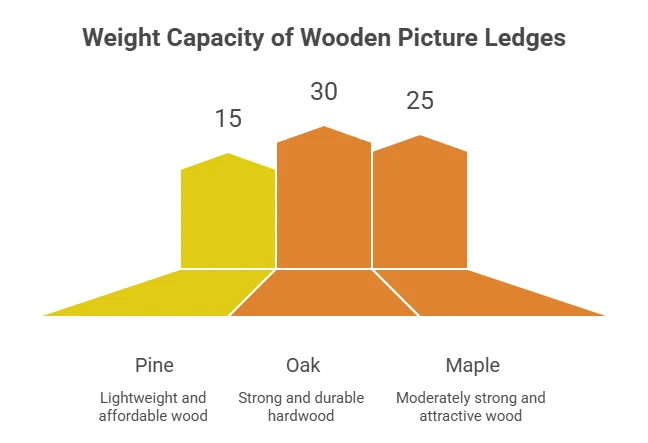
Another common mistake is not considering the weight capacity of your wooden picture ledge. It’s essential to acknowledge how much weight it can safely hold without risk of bending or breaking. Be mindful of the weight of the frames or decor you intend to place on the ledges.
| Type of Wood | Weight Capacity (per linear foot) |
|---|---|
| Pine | 15 lbs |
| Oak | 30 lbs |
| Maple | 25 lbs |
Taking these common mistakes into account will significantly enhance the success of your wooden picture ledge project. By carefully measuring, selecting the right materials, ensuring proper mounting, and more, you can create a beautiful and functional display piece in your home. For more insights on woodworking projects, visit Wood Magazine to explore tutorials and tips.
Maintenance Tips for Long-Lasting Wooden Picture Ledges
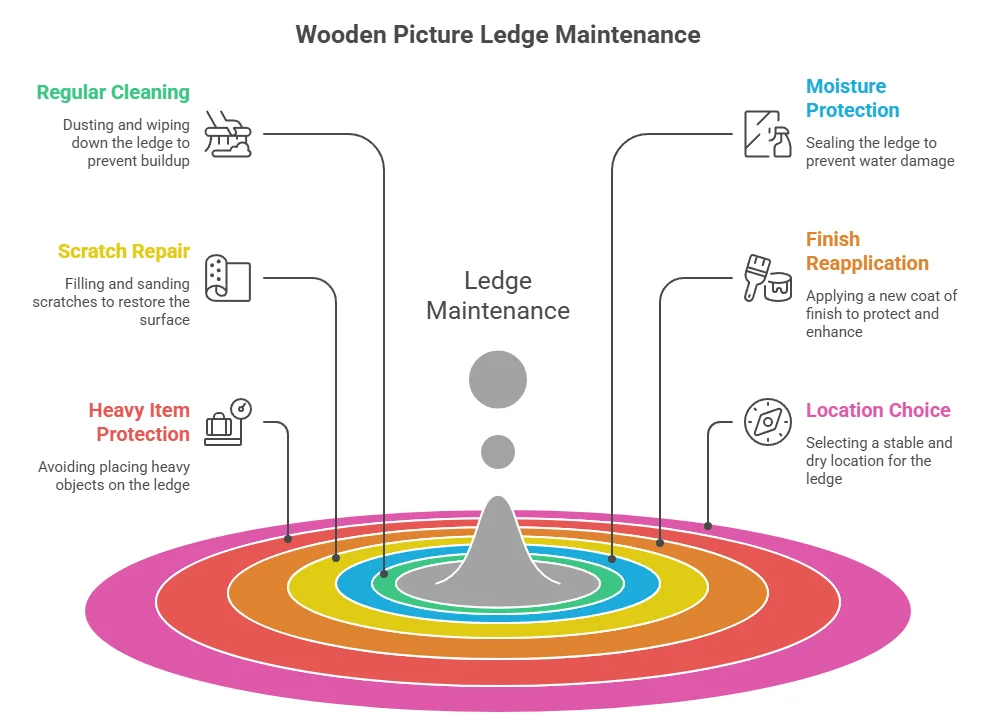
Wooden picture ledges add charm to any room, offering a stylish way to display photos, artwork, and decorations. To keep these beautiful structures looking their best and functioning well, proper maintenance is essential. Here are some practical tips to ensure your wooden picture ledges stand the test of time.
Regular Cleaning
Dust and dirt can accumulate on wooden picture ledges, making them appear dull and uninviting. Regular cleaning will help maintain their beauty. Use a soft, dry cloth to wipe the surface weekly. For deeper cleaning, follow these steps:
- Mix a solution of mild soap and water.
- Use a soft cloth dampened with the soapy water to gently clean the ledge.
- Dry the surface immediately with another soft cloth to prevent water damage.
Protecting from Moisture
Wood is sensitive to moisture. If you live in a humid environment, consider taking preventive measures to protect your wooden picture ledges. Here are some tips:
- Apply a wood sealer to create a barrier against moisture absorption.
- Avoid placing the ledges in high-moisture areas like bathrooms or near windows where condensation might occur.
- Ensure that any plants displayed above the ledge have proper drainage to prevent water from dripping onto the wood.
Repairing Scratches and Dents
Even the most well-cared-for wooden picture ledges can acquire scratches or dents over time. Addressing these imperfections promptly can keep your ledges looking fresh:
- For minor scratches, use a mixture of equal parts vinegar and olive oil to gently rub into the scratch, restoring some of the shine.
- For deeper scratches, consider using a wood filler that matches the color of the ledge. Apply the filler with a putty knife and sand it down to ensure a smooth finish.
Reapplication of Finish
Depending on the traffic and usage, you may need to reapply the wood finish every few years. A fresh coat enhances the appearance and provides protection. Here’s a simple process:
- Remove all items from the ledge.
- Clean the surface as previously described.
- Sand any rough spots lightly with fine-grit sandpaper.
- Apply a suitable wood finish or varnish following the manufacturer’s instructions.
Protecting from Heavy Items
While wooden picture ledges are designed to hold decorative items, it’s crucial to be mindful of weight limits. Overloading can lead to bending or even breaking. Here are some tips:
- Keep the weight evenly distributed across the ledge.
- Consider using picture hangers or adhesive strips for lighter items to reduce the load on the ledge itself.
- Regularly check for any signs of stress or weakness.
Choosing the Right Location
The placement of your wooden picture ledges can significantly impact their longevity. Follow these guidelines for ideal placement:
- Avoid direct sunlight, which can fade finishes and warp wood.
- Keep them away from heat sources such as radiators or fireplaces.
- Ensure they are mounted securely to avoid accidents.
Conclusion
Creating wooden picture ledges not only adds a touch of elegance to your home decor but also provides a practical way to display your favorite photos and artwork. By following the step-by-step guide and utilizing the essential tools and materials outlined, you can craft stunning ledges that are both functional and visually appealing.
Take the time to style your wooden picture ledges creatively. Mixing frames, adding decorative elements, and incorporating varied heights can breathe life into your display, making it a focal point in any room. However, be mindful of the common mistakes to avoid, like improper measurements or neglecting to secure the ledges properly. By steering clear of these pitfalls, you ensure that your finished project not only looks great but is also safe and lasting.
Ongoing maintenance is key to keeping your wooden picture ledges in prime condition. Simple tasks, such as occasional dusting and checking for stability, can make a world of difference in their longevity. By giving your picture ledges the care they deserve, you can enjoy the beautiful display of your cherished images for years to come.
With all this in mind, you are now well-equipped to embark on your project. Gather your materials, unleash your creativity, and transform your walls into a canvas of your experiences and memories. Happy crafting!