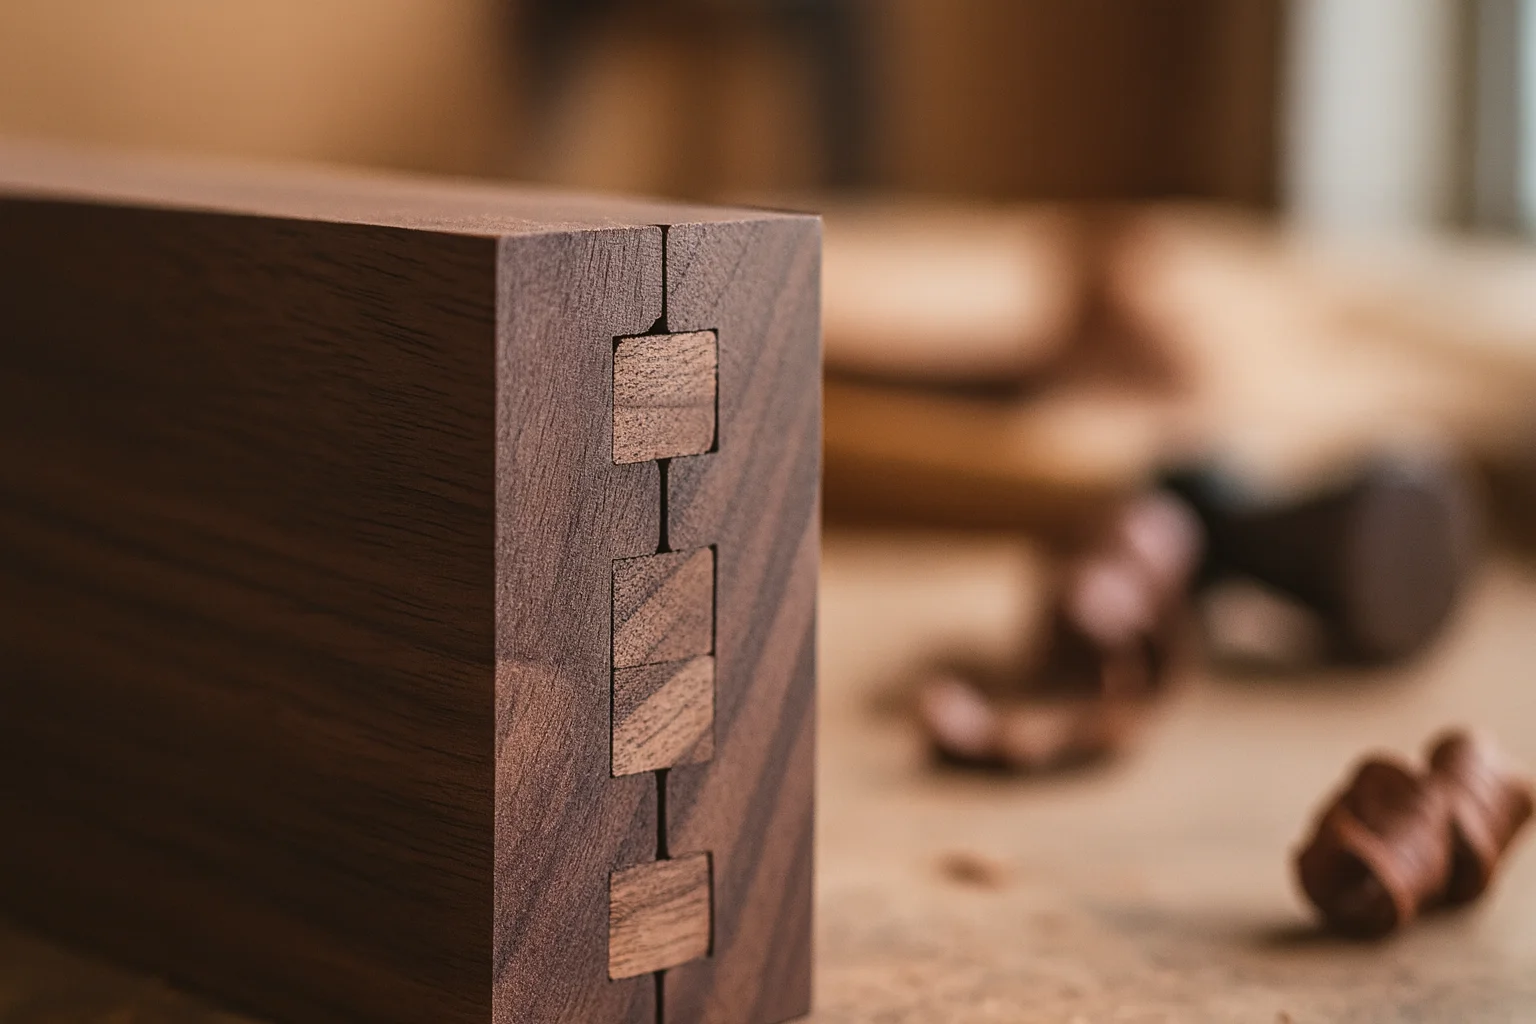
Dovetail joints are a hallmark of fine woodworking, valued for their strength and aesthetic appeal. Creating these joints with precision is vital for ensuring the durability and beauty of your projects. Here are several techniques that will help you craft accurate How to Make Dovetail Joints, whether you are a beginner or an experienced woodworker.
Understanding Dovetail Joint Basics
Before you start cutting, it’s essential to understand the basic components of a dovetail joint. A dovetail joint features interlocking “tails” and “pins” which provide a strong mechanical bond. Getting these parts right is key to good alignment and strength.
Tools You Will Need
Having the right tools makes building dovetail joints easier. Here are some essential tools:
- Marking Gauge: For accurate layout lines.
- Bevel Gauge: To transfer angles easily.
- Chisels: A set of sharp chisels is crucial for clean cuts.
- Saw: A dovetail saw is specially designed for cutting the tails and pins.
- Drill: Helpful if you plan to add dowels for added strength.
Layout and Marking
The first step in making accurate dovetail joints begins with careful layout. Here’s how to ensure precision:
- Prepare Your Wood: Choose a good quality hardwood for durability. Make sure your pieces are square and flat.
- Use Your Marking Gauge: Set your marking gauge to half the thickness of the wood. Run the gauge along the edges to establish a reference line for your cuts.
- Draw Your Tails: Start by drawing the shape of the tails on one board. Number your tails for reference.
Cutting the Tails
Now it’s time to cut the tails. Follow these steps to ensure they are accurate:
- Position the Workpiece: Secure the wood in a vise. This helps keep it steady while you saw.
- Make Smooth Cuts: Using your dovetail saw, cut along the lines carefully. Make sure to keep your cuts straight and don’t rush.
- Chisel Out the Waste: Use a chisel to remove the waste wood between the tails. Clean up the cuts as well to improve appearance.
Cutting the Pins
After the tails are complete, it’s time to create the pins on the second piece of wood:
- Transfer the Tails: Fit the tail board into the pin board. Trace around the tails with a sharp pencil.
- Cut the Pins: Use a dovetail saw to cut along the pencil lines. Ensure you maintain the same angle as the tails.
- Chisel the Pins: Just as you did with the tails, chisel out the waste wood between the pins carefully.
Assembling the Joint
With both the tails and pins cut, it’s time to assemble your dovetail joint.
- Check the Fit: Before gluing, test the fit. Both pieces should fit snugly without gaps.
- Apply Wood Glue: Use a good quality wood glue. Apply it to both the pins and tails before joining.
- Clamp the Joint: Use clamps to hold the joint together while the glue dries. This ensures a strong bond.
Once the glue has dried, you can make any final adjustments. Sand down any rough edges and ensure that the joint is flush with the surface of the wood. Consider using a wood finish to enhance the natural beauty of the wood. Creating dovetail joints can be a rewarding experience, providing both structural integrity and aesthetic appeal to your woodworking projects. For more detailed guides and woodworking resources, check out Wood Magazine or Popular Woodworking. Experiment with different techniques and find what works best for you. With practice, you’ll find that you can produce dovetail joints that are both precise and beautiful.
Tools You Need for Making Perfect Dovetail Joints
Creating perfect dovetail joints can elevate your woodworking projects, adding both strength and aesthetic appeal. Whether you’re a seasoned woodworker or just starting out, having the right tools is essential for making these joints successfully. Here’s a guide to the tools you need to master the art of How to Make Dovetail Joints.
Hand Tools
- Dovetail Saw: A high-quality dovetail saw is crucial. It features a thin blade for precise cutting and a fine tooth count for clean edges.
- Chisels: You will need a set of chisels, preferably with a width ranging from ¼ to 1 inch. Chisels are essential for cleaning out the waste between the pins and tails.
- Marking Gauge: This tool helps you lay out your cuts with accuracy. A marking gauge ensures that your joints are consistently sized.
- Square: A good quality combination square is vital for checking angles and ensuring that your cuts are square.
Power Tools
- Table Saw: A table saw can speed up the process of cutting dovetails by creating precise cuts for your boards.
- Router: A router can be used alongside a dovetail jig to create beautiful, consistent dovetail joints quickly and with minimal effort.
Measuring and Layout Tools
- Tape Measure: A reliable tape measure will help you measure your wood accurately before making any cuts.
- Pencil: Always choose a sharp pencil for marking. Fine lines will help you stay precise while cutting.
You might also consider investing in a specialized dovetail jig. This device simplifies the process by guiding your cuts, ensuring uniformity and speed. Although a jig may require an upfront investment, it can save you time and effort in the long run.
Additional Accessories
- Clamps: Proper clamps are indispensable to hold your wood pieces securely in place while you work on them.
- Sandpaper: A selection of sandpaper is necessary for smoothing any rough edges after cutting your dovetail joints.
Gathering all these tools sets you up for success in creating dovetail joints. However, tools alone do not guarantee perfect joints. Skill and practice are also key. As you become more familiar with your tools, you’ll develop a better feel for making these joints.
Tool Cost Matrix
| Tool | Estimated Price Range |
|---|---|
| $30 – $150 | |
| $20 – $100 | |
| $10 – $40 | |
| $100 – $300 | |
| $50 – $200 |

The prices can vary depending on the brand and quality of the tools you select. It’s wise to invest in quality tools that suit your level of experience. Wood Magazine offers great insights into selecting and using dovetail joints. As you embark on your woodworking journey, consider joining forums or local woodworking groups where you can share your experiences and learn from others. You will find a community of artisans eager to share tips and techniques. For more detailed guides and video tutorials, check out Woodworker’s Journal. Mastering dovetail joints is a rewarding endeavor. With the right tools, patience, and practice, you can create projects that amaze and last for generations.
Common Mistakes to Avoid When Crafting Dovetail Joints
Crafting dovetail joints can be an immensely rewarding experience, whether you’re a seasoned carpenter or just starting out. However, there are several common pitfalls that many woodworkers encounter during the process. By understanding these mistakes ahead of time, you can significantly improve your results and enjoy a smoother woodworking experience. Here are some mistakes to avoid when crafting How to Make Dovetail Joints.
Not Measuring Accurately
One of the most crucial steps in creating dovetail joints is accurate measurement. If you miscalculate your dimensions, it can lead to joints that don’t fit properly. Here are some tips for precise measurements:
- Use a reliable measuring tool: A caliper or a high-quality tape measure can help ensure that your measurements are spot-on.
- Double-check your work: Before cutting, always take a second look at your measurements to avoid errors.
Choosing the Wrong Wood Type
Not all types of wood are suitable for dovetail joints. For example, softwoods may not hold the joint as securely as hardwoods. Additionally, you should consider the grain pattern, as this can affect your cuts. Opt for wood varieties such as oak, maple, or walnut, which provide strength and durability.
Ineffective Marking Techniques
When you begin laying out your dovetail joints, using the wrong marking technique can lead to improper cuts. Here’s How to Make Dovetail Joints by marking effectively:
- Use a marking gauge: This tool allows you to create clean, accurate lines that will guide your cuts.
- Sharp marking tools: Ensure your pencil or knife is sharp for clear visibility during cutting.
Overlooking Tail and Pin Reversal
It’s essential to keep track of which side of the wood is which when crafting dovetail joints. Confusing the tails and pins can lead to mismatches and frustration. Always label your parts before cutting, and refer back to your plans as needed.
Improper Cutting Technique
Your cutting technique can make or break the quality of your dovetail joints. Here are some common mistakes to avoid:
- Incorrect saw angle: Maintain a consistent angle to ensure straight cuts.
- Rushing through cuts: Take your time to avoid making careless mistakes.
Neglecting Test Joints
Failure to practice with test joints can set you back significantly. Use scrap pieces of wood to make practice cuts. This step allows you to refine your technique without wasting valuable materials. Plus, it can give you a better feel for your tools before starting on the final piece.
Not Using an Appropriate Dovetail Template
Dovetail templates are designed to help you achieve consistent results. If you skip this step, you may find yourself struggling to create uniform joints. Choose a template based on your project needs and familiarize yourself with its use for more precise outcomes.
Tools to Consider for Perfect Dovetail Joints
| Tool | Purpose |
|---|---|
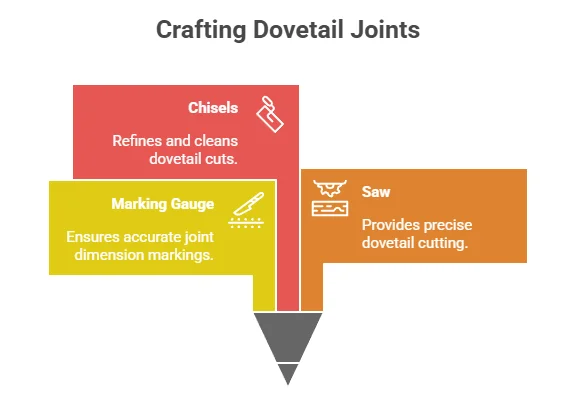
| Marking Gauge | For accurate marking of joint dimensions |
| Saw | For precise cutting of dovetails |
| Chisels | For cleaning and refining cuts |
Forgetting to Dry Fit
Before final assembly, ensure that you dry fit the joints. This step allows you to identify any discrepancies or fit issues before applying glue or screws. If the joints don’t fit perfectly during the dry fit stage, take the time to adjust them as needed.
Not Considering the Grain Direction
When crafting dovetail joints, the direction of the wood grain can have significant effects on the strength of your joints. To enhance durability, ensure that the grain is oriented in the right direction, especially when planning for tension and compression forces. By steering clear of these common mistakes, you can improve your woodworking skills and create beautiful, strong dovetail joints. For further tips and tutorials, check out Popular Woodworking and Wood Magazine.
The Historical Significance of Dovetail Joints in Carpentry
Dovetail joints have a rich history that is deeply rooted in the world of carpentry and woodworking. These intricate joints not only display remarkable craftsmanship but also provide exceptional strength and durability. Understanding the historical significance of dovetail joints offers insight into their evolution and enduring popularity in furniture making and cabinetry through the centuries. Historically, dovetail joints have been employed as far back as ancient Egypt, where they were used in furniture and storage boxes. Artisans recognized that these joints could withstand significant stresses, making them ideal for various applications.
The unique interlocking design allows for a mechanical grip that doesn’t rely solely on glue or fasteners. This was particularly important in times when wood glues were still developing. During the Middle Ages, dovetail joints became a hallmark of fine cabinetry. Craftsmen admired the aesthetics and functionality that these joints provided. They began to incorporate them into more complex furniture pieces, enhancing the decorative aspects of items while maintaining structural integrity. The use of dovetail joints continued to flourish in the Renaissance period, as the artistry of woodworking gained prominence in Europe. In examining the specific types of dovetail joints, we can see the various ways they adapted over time:
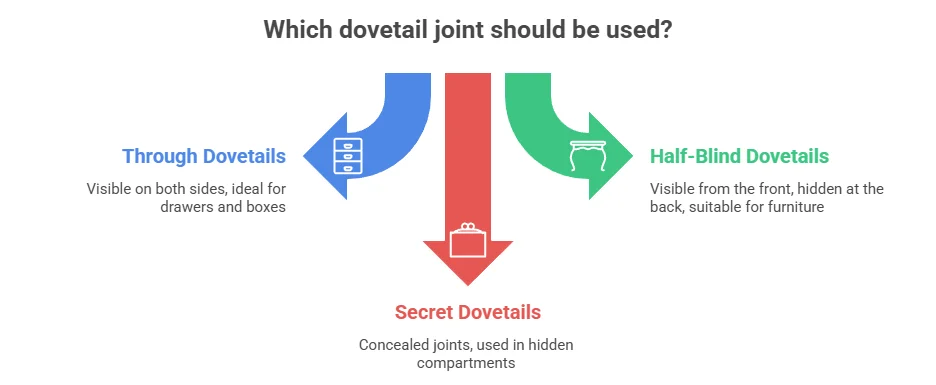
- Through Dovetails: This type is visible on both sides and is often used in drawers and boxes.
- Half-Blind Dovetails: Commonly found in furniture, they are visible from the front but hidden at the back, providing a cleaner aesthetic.
- Secret Dovetails: These joints are cleverly concealed and provide an element of surprise, often found in hidden compartments.
The craftsmanship of dovetail joints requires precision and skill, leading to the rise of specialized woodworking guilds during the 17th and 18th centuries. As the demand for fine furniture grew, so did the importance of dovetailing techniques. Artisans took great pride in their ability to create seamless, intricate joints, often leading to intricate patterns that were purely decorative. During the Industrial Revolution, the advent of machine-made furniture posed a challenge to traditional woodworking methods. However, the unique characteristics of dovetail joints survived the transition due to their superior strength.
Many manufacturers began integrating dovetail joints into their production lines, realizing that these traditional techniques could elevate their products above mass-produced alternatives. Today, dovetail joints remain a symbol of quality craftsmanship in woodworking. Modern carpenters and enthusiasts often use them to pay homage to their ancestral methods while ensuring that their work is functional and enduring. There are numerous resources available for those looking to learn more about How to Make Dovetail Joints and their historical significance. For example:
- Woodworking Network offers insights into contemporary woodworking techniques.
- Popular Woodworking covers a wide range of topics, including traditional joinery methods.
- WOOD Magazine provides tutorials and tips for both novice and experienced woodworkers.
Learning how to create dovetail joints can enhance your woodworking skills. Many craftsmen and hobbyists take classes or follow online tutorials to master the art of dovetailing. The skills required traverse a wide range from precise measurements to the correct handling of tools, each crucial for achieving flawless joint integrity. Moreover, the aesthetic appeal of dovetail joints makes them a preferred choice in high-end cabinetry. The way they display craftsmanship and commitment to quality often adds value to furniture pieces. Some modern cabinets and drawers boast visible dovetail joints as a badge of honor, demonstrating the maker’s skill and attention to detail.
The historical journey of dovetail joints is a testament to human creativity and craftsmanship. From their early use in ancient construction to their place in contemporary woodworking, dovetails have remained a preferred choice for those looking to combine aesthetic beauty with functional strength. As you explore woodworking techniques, consider integrating dovetail joints into your projects. The historical significance behind them not only aids in understanding their practical application but also connects you to generations of artisans who have perfected this timeless craft.
Step-by-Step Guide to Mastering Different Types of Dovetail Joints
Dovetail joints are revered in woodworking for their strength and aesthetic appeal. Learning How to Make Dovetail Joints can elevate your furniture-making skills and enhance the quality of your woodworking projects. Here’s a step-by-step guide to mastering different types of dovetail joints.
Understanding Dovetail Joints
Dovetail joints are characterized by their interlocking design, which provides excellent tensile strength. They come in various forms, including through dovetail, half-blind dovetail, and sliding dovetail. Each type serves different purposes and can be chosen based on your project needs.
Tools You Will Need
Before you start making dovetail joints, gather the essential tools:
- Marking gauge
- Pare knife
- Chisels
- Saw (dovetail saw or coping saw)
- Router (optional)
- Clamps
- Sandpaper
Step-by-Step Guide to Making Different Types of Dovetail Joints
1. Through Dovetail Joint
This traditional joint is visible from both sides. It is often used in drawer construction and box-making.
- Mark the Tail Board: Using a marking gauge, draw a line to indicate the thickness of the joint. Mark the tails and pins using your desired angle, typically around 10-12 degrees.
- Cut the Tails: Using a dovetail saw, carefully cut along the marked lines. Ensure your cuts are straight and clean.
- Mark the Pin Board: Align the tail board with the pin board. Mark the outline of the tails onto the pin board.
- Chisel Out the Pins: Using a chisel, remove material from the pin board to create space for the tails.
- Assemble: Join the two pieces, ensuring a snug fit. Optionally, glue the joint for added strength.
2. Half-Blind Dovetail Joint
This joint is commonly used in furniture where the joint is hidden, like drawer fronts that connect to the sides.
- Mark the Tail Board: Begin by marking the tail board just like in a through dovetail joint.
- Cut the Tails: Carefully cut the tails using your saw, making sure to stop at the line where the joint will end.
- Mark the Pin Board: Align the tail board with the pin board. This time, mark only the depth of the joint without going through the board.
- Chisel the Pins: Use a chisel to remove the waste around the pins. Work slowly to achieve a clean fit.
- Assemble the Joint: Dry fit the pieces first, then apply glue if desired before clamping them together.
3. Sliding Dovetail Joint
This type serves as a shelf support and is strong and stable.
- Prepare the Dovetail Slot: Start by making a groove in the receiving piece where the dovetail will slide into.
- Mark the Dovetail: Draw the dovetail shape on the end of your shelf or drawer.
- Cut the Dovetail: Use a saw to cut along the lines while ensuring the shoulders are clean.
- Test the Fit: Insert the dovetail into the slot to check for a proper fit.
- Finalize: Once satisfied, glue the dovetail if necessary and clamp it until dried.
Tips for Perfecting Your Dovetail Joints

- Practice Makes Perfect: Start with softer woods to practice your cutting and fitting skills.
- Take Your Time: Rushing can lead to mistakes. Take time on each cut for precision.
- Use Quality Tools: Investing in sharp, quality tools makes a significant difference in the outcome of your joints.
To learn more about dovetail joints and woodworking techniques, visit Wood Magazine or Popular Woodworking for in-depth articles and resources. Mastering dovetail joints can significantly improve your woodworking projects. By following these steps and practicing frequently, you’ll soon become proficient in creating strong, beautiful dovetail joints. Happy woodworking!
Conclusion
Creating dovetail joints is a rewarding skill that combines artistry and practicality in your woodworking projects. By employing precise techniques and using the right tools, you can achieve immaculate results that enhance both the strength and beauty of your pieces. Understanding common mistakes, like misaligning joints or using improper fitting, can save you time and frustration, enabling you to work more efficiently. Dovetail joints hold a significant place in the history of carpentry, symbolizing craftsmanship and durability. They have been used for centuries, from antique furniture to modern cabinetry, demonstrating their timeless appeal and functionality.
By mastering different types of dovetail joints, you not only pay homage to this rich tradition but also expand your woodworking repertoire. Whether you are a beginner or an experienced woodworker, following a step-by-step guide can simplify the learning process. Each type—be it through dovetail, half-blind dovetail, or sliding dovetail—offers unique benefits that can elevate your projects. Embracing this craft can lead to improvements in your skills and a greater appreciation for the art of woodworking. As you continue your journey with How to Make Dovetail Joints, remember that practice is key. The more you create, the more expertise you’ll develop. By staying patient and dedicated, you will be able to produce beautiful, lasting joints that reflect your progress as a craftsman. So gather your tools, refine your techniques, and let the beauty of dovetail joints inspire your next project.