
Creating your own Wooden Rocking Chair is an exciting project that combines craftsmanship with the warmth of natural materials. To start, having the right tools and materials is crucial for ensuring a smooth process and a beautiful final product. Below is a comprehensive list of the essential tools and materials you’ll need to bring your rocking chair design to life.
Essential Tools
Gathering the right tools will make the building process efficient and enjoyable. Here is a list of essential tools:
- Measuring Tape: This helps you take accurate measurements of wood and dimensions of your design.
- Square: A framing square ensures your angles are precise, contributing to the chair’s stability.
- Saw: You will need a circular saw or a miter saw for cutting wood pieces accurately.
- Drill: A power drill is essential for drilling holes for screws and other connections.
- Screwdrivers: An assortment of screwdrivers will help you assemble all components.
- Sander: A power sander or hand sander is important for smoothing the wood surfaces.
- Clamps: Clamps are vital for holding pieces in place while glue sets or during assembly.
- Wood Glue: This provides strong adherence for joints in your rocking chair.
- Paint or Stain Brushes: Use brushes to color or finish your rocking chair after assembly.
Material Requirements
Choosing the right wood and materials is important for the durability and appearance of your rocking chair. Here is a list of materials you might consider:
- Wood: Select a sturdy hardwood like oak, maple, or cherry for longevity. Each wood type has its unique grain and color.
- Plywood: This can be used for the seat or backrest and provides good structural stability.
- Wood Finish: Opt for a high-quality wood stain or paint to protect the chair and enhance its beauty.
- Screws and Nails: Ensure you have different sizes for assembling various parts of the chair.
- Upholstery Material: If you plan to add cushions, select fabric that complements your design.
Planning Your Rocking Chair
Before diving into building, planning your How to Make A Wooden Rocking Chair design can make construction much easier. You can find many templates and styles online. Websites like Wood Magazine or Pinterest offer myriad ideas to inspire your design.
Step-by-Step Process Overview
Once you’ve gathered your tools and materials, you can begin the building process. Here’s a quick overview of the steps you’ll typically follow:
- Make precise measurements and cuts on your wood according to your design.
- Build the chair structure starting with the legs, seat, and backrest.
- Assemble the rocking parts by attaching them securely with screws and wood glue.
- Sand all surfaces to ensure a smooth finish and round off any sharp edges.
- Apply the wood finish of your choice to protect and beautify your rocking chair.
- If desired, add cushions by sewing fabrics and attaching them securely to the seat.
Maintenance Tips
Once your rocking chair is completed, keeping it in good condition is essential. Regular cleaning with a soft cloth and periodic refinishing will help maintain its beauty and structure.
For detailed plans and additional guidance, consider checking out Woodworker’s Source or Rockler Woodworking and Hardware. These resources can guide you with tips and even materials.
Step-by-Step Guide to Crafting Your Own Rocking Chair
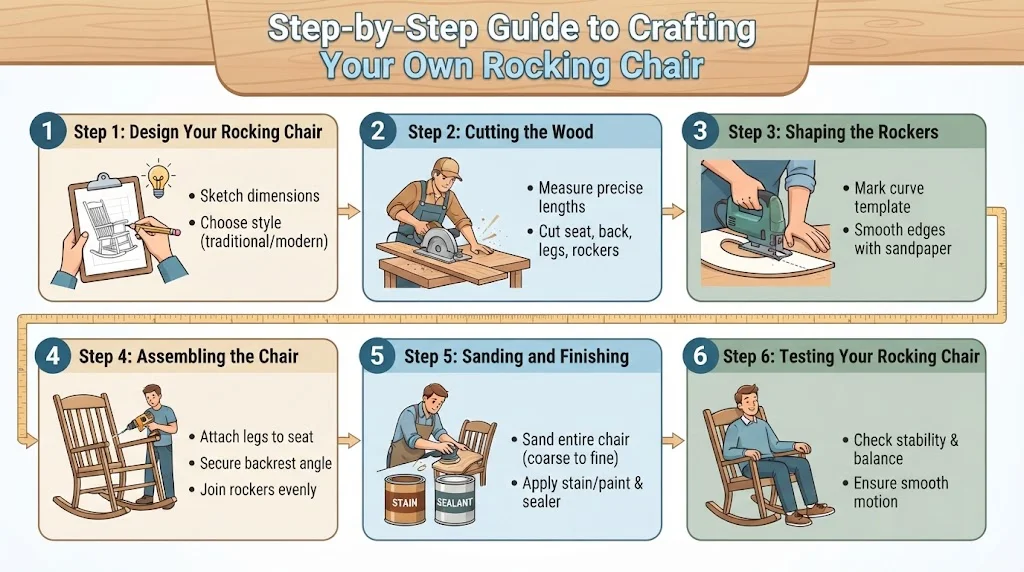
Crafting your own wooden How to Make A Wooden Rocking Chair is a rewarding project that allows you to create a piece of furniture that is both functional and beautiful. With some basic tools and materials, you can build a rocking chair that suits your style and home décor. This guide will take you through the steps needed to make your own rocking chair, ensuring you have everything you need for this satisfying woodworking adventure.
Materials and Tools Needed
Before you begin, gather the following materials and tools:
Materials:
- Wood (oak, pine, or birch)
- Wood glue
- Wood screws
- Sandpaper (various grits)
- Wood finish or paint
Tools:
- Saw (circular saw or jigsaw)
- Drill
- Screwdriver
- Clamp
- Tape measure
- Pencil
Step 1: Design Your Rocking Chair
Start by sketching your How to Make A Wooden Rocking Chair design. Decide on the dimensions and style, whether traditional or modern. Make sure that your design incorporates a comfortable seat and appropriately shaped rockers. A typical rocking chair has a seat height of about 18 inches and a back height of around 30–36 inches.
Step 2: Cutting the Wood
Using your saw, cut the wood pieces according to your design:
- Seat: One piece
- Backrest: One piece
- Legs: Four pieces
- Rockers: Two curved pieces
Take your time with this step to ensure each piece is accurate. Precision in cuts will make assembly much easier.
Step 3: Shaping the Rockers
The rockers are vital for the smooth motion of your chair. Mark the curve you want on each rocker and use a jigsaw to cut along the line. Smooth the edges with sandpaper to eliminate any rough spots and to enhance the rocking motion.
Step 4: Assembling the Chair
Now, it’s time to put the pieces together. Follow these tips for assembly:
- Attach the legs to the seat using wood screws and glue for added strength.
- Secure the backrest to the rear legs, ensuring it’s at a comfortable angle for lounging.
- Attach the rockers to the bottom of the legs, spaced evenly to support the chair’s weight.
Step 5: Sanding and Finishing
Once your rocking chair is assembled, sand the entire chair thoroughly. Start with coarse sandpaper to remove any noticeable imperfections, then move to finer grits for a smooth finish. Once sanded, wipe off dust with a damp cloth.
Now you can apply the wood finish or paint of your choice. Allow each coat to dry completely before applying additional coats for the best appearance. A well-finished rocking chair will not only look great but also last for years to come.
Step 6: Testing Your Rocking Chair
Before using your rocking chair, it’s important to test its stability and safety. Sit in the chair and rock gently to ensure the structure is solid. If anything feels loose, reinforce with additional screws or glue as necessary.
Finishing Touches: Staining and Sealing Your Rocking Chair
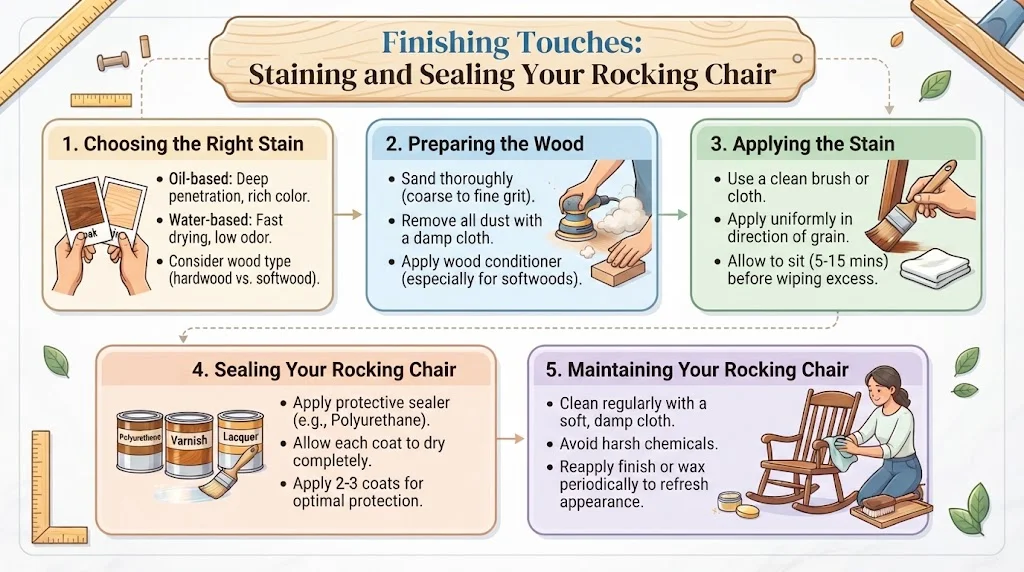
After building your wooden How to Make A Wooden Rocking Chair, the finishing touches are crucial to enhance its beauty and longevity. Staining and sealing are two essential processes that not only add aesthetic appeal but also protect the wood from wear and environmental factors. Here’s how to get started on these important steps to ensure your rocking chair looks great and lasts for years.
Choosing the Right Stain
The first step in finishing your rocking chair is selecting the stain that suits your style. You can choose between oil-based and water-based stains. Each has its own characteristics:
- Oil-based Stain: Penetrates deeply into the wood, enhancing the natural grain. It typically takes longer to dry but provides a rich finish.
- Water-based Stain: Dries quickly and has less odor. It’s easier to clean up and is less likely to yellow over time, making it ideal for light-colored woods.
Consider the type of wood you’re using for your rocking chair. Hardwoods like oak or walnut may require different stains compared to softwoods like pine. Look at sample boards in your local hardware store to see how the stain interacts with the wood grain.
Preparing the Wood for Staining
Proper preparation is key to achieving a flawless finish. Start by sanding the surface of your rocking chair with fine-grit sandpaper. Make sure to:
- Remove any dust or debris after sanding with a damp cloth.
- Ensure all edges and corners are smooth.
- Consider using a wood conditioner, especially if you are staining softwoods. This helps the stain absorb evenly.
Let the wood conditioner dry according to the manufacturer’s recommendations before applying the stain.
Applying the Stain
When you’re ready to apply the stain, follow these steps for a beautiful finish:
- Use a paintbrush or a clean cloth to apply the stain. Work in small sections to maintain control.
- Apply the stain uniformly in the direction of the wood grain.
- Allow the stain to sit for about 5 to 15 minutes before wiping off excess with a clean cloth. This will create a more vibrant color.
- For a deeper color, consider applying multiple coats. Ensure each coat dries completely before adding another layer.
Keep in mind that the final color may appear darker once the finish is applied, so test it on a scrap piece of wood first.
Sealing Your Rocking Chair
Once the stain has dried completely, it’s time to seal the wood. Sealing protects against moisture, scratches, and temperature changes. You have several options for sealers:
- Polyurethane: Offers great durability and protection. Choose either oil-based or water-based for different finishes.
- Varnish: Provides excellent protection against UV rays and is available in gloss, satin, or matte finishes.
- Lacquer: Dries quickly and provides a hard, protective coating, but may require more skill to apply evenly.
After selecting your sealer, here’s how to apply it:
- Stir the sealer gently. Avoid shaking, as this can create bubbles.
- Use a clean brush or spray gun for application, working in thin layers.
- Allow each layer to dry before lightly sanding with fine-grit sandpaper. This helps the next coat adhere better.
- Apply at least two to three coats for optimal protection.
Maintaining Your Rocking Chair
To keep your rocking chair looking its best, clean it regularly with a soft, damp cloth. Avoid harsh chemicals that could damage the finish. If the finish starts to wear, don’t hesitate to reapply another coat of sealer to refresh its appearance.
Creative Designs and Styles for Wooden Rocking Chairs
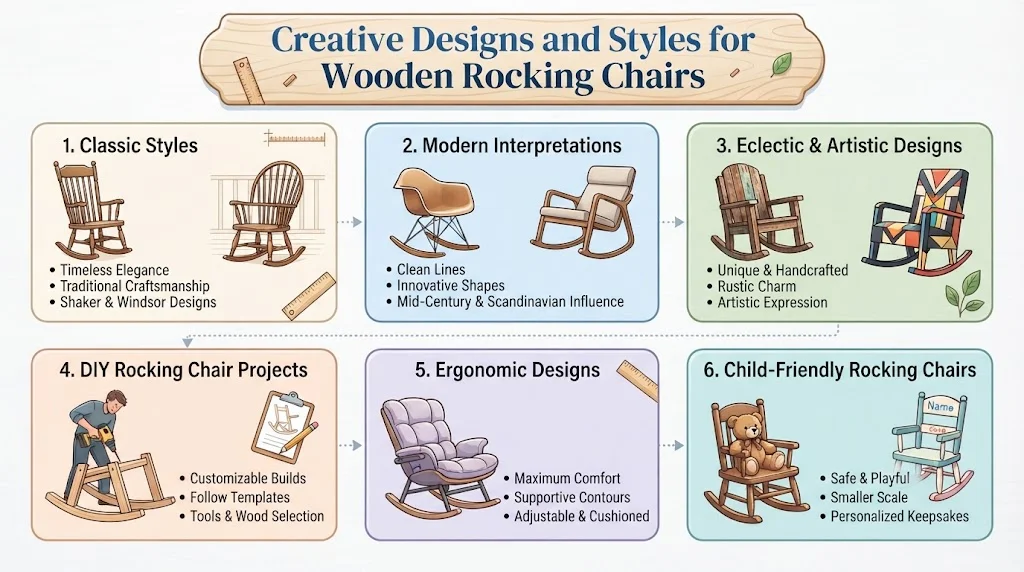
Wooden Rocking Chair projects are not only functional but also serve as stunning decor pieces that can enhance the style of any home. With various creative designs, every woodworking enthusiast can find a style that complements their personal taste. Here’s a deep dive into the diverse styles and creative designs for wooden rocking chairs.
Classic Styles
Classic wooden rocking chairs often feature highly refined craftsmanship. They highlight traditional woodworking techniques that can add a touch of nostalgia to your living space. Two popular classic designs include:
- Shaker Rocking Chair: Known for its simplicity and functional design, the Shaker rocking chair usually comes with a minimalist profile. It features a tall backrest, a comfortable seat, and typically has curved rockers for a smooth rocking experience.
- Windsor Rocking Chair: This design boasts a distinctive spindle back and is often crafted from different kinds of wood. Its charm lies in its rustic elegance and can add a classic touch to any porch or living room.
Modern Interpretations
For those who appreciate contemporary aesthetics, modern wooden rocking chairs offer clean lines and innovative designs. These creations often mix materials, blending wood with metal or fabric. Here are some notable modern styles:
- Mid-Century Modern Rocking Chair: This design embraces organic shapes and functional forms. Often made with molded plywood, these chairs can be colorful and add a pop of personality to your space.
- Scandinavian Rocking Chair: Characterized by its minimalist aesthetic, this style incorporates light woods such as birch or pine. With its gentle curves, it promotes comfort and simplicity.
Eclectic and Artistic Designs
Woodworkers and furniture designers often experiment with various artistic styles, leading to unique rocking chairs that stand out.
- Art Deco Rocking Chairs: These often feature bold geometric patterns and luxurious wood finishes. They offer a sense of opulence that can elevate your interior decor.
- Rustic Rocking Chairs: Utilizing reclaimed wood or distressed finishes, rustic rocking chairs exude warmth and charm, making them perfect for cozy settings.
DIY Rocking Chair Projects
If you’re feeling inspired, you might consider making your own rocking chair. DIY projects can be tailored to fit your design preferences. Here are some tips to get you started:
- Choose Your Wood: Consider durable options like oak or maple for strength and beauty.
- Find a Design You Love: There are many online resources and templates to help you brainstorm your design.
- Gather Your Materials: Beyond the wood, you might need screws, wood glue, sandpaper, and finishes to highlight the wood’s beauty.
- Treat the Wood: Use a suitable stain or sealant to protect your chair and enhance its look.
Ergonomic Designs
Comfort is key for any rocking chair. Ergonomic designs are specifically tailored for longer periods of sitting without discomfort. These styles often have supportive contours and cushioned seating.
- Reclining Rocking Chairs: These feature adjustable backs and plush cushioning, ensuring maximum comfort.
- Sling Rocking Chairs: Combining a wooden frame with fabric seating, these chairs provide a flexible seating option while maintaining an attractive silhouette.
Child-Friendly Rocking Chairs
When creating a space for children, wooden rocking chairs can make an inviting addition. Options include:
- Miniature Rocking Chairs: These are designed for kids, combining safety and playfulness in their design.
- Personalized Rocking Chairs: Often achieved through painting or engraving, these can become cherished keepsakes for your children.
Common Mistakes to Avoid When Making a Wooden Rocking Chair
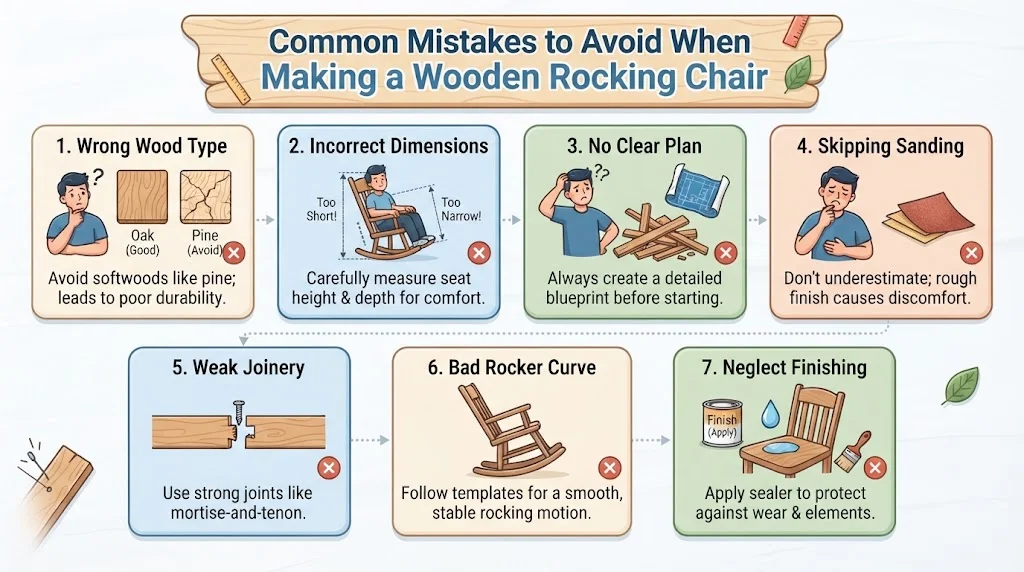
Creating a Wooden Rocking Chair can be a fulfilling project, but many novice woodworkers often encounter common pitfalls. Avoiding these mistakes will help you craft a beautiful rocking chair that is both functional and sturdy. Below are the key missteps to watch out for during your construction process.
Not selecting the right type of wood
One significant error is not selecting the right type of wood. Different woods have varying properties affecting their strength, durability, and appearance. Hardwoods like oak or maple are ideal for rocking chairs since they offer excellent durability and a refined finish. Opting for softwoods such as pine may result in a less robust chair that can wear down over time. It’s essential to balance quality with your budget, but investing in the right wood will lead to a better final project.
Failing to choose the right dimensions
Another mistake is failing to choose the right dimensions. Rocking chairs are designed for comfort, which requires careful measurement of your materials. Standard seat height is around 17 to 18 inches, and the depth should be 20 inches for optimal comfort. Be sure to take accurate measurements and adjust your design accordingly. A chair that is too low or too high can be uncomfortable and impractical.
Not having a clear plan
Not having a clear plan is a frequent issue among DIYers. Before starting your project, create a detailed plan or blueprint. This should include the dimensions, angles, and types of joinery you plan to use. Clear planning can save time and reduce material wastage. Following a well-laid-out plan helps maintain focus and ensures you don’t skip important steps in construction.
Underestimate the importance of sanding
Sometimes, woodworkers underestimate the importance of sanding. Skipping this step can lead to a rough, unfinished surface that feels uncomfortable. Smooth surfaces are not only visually pleasing, but they also prevent splinters and enhance the overall finish. Take your time sanding the surfaces, edges, and corners to achieve a polished look.
Using the wrong joinery methods
Another common misstep is using the wrong joinery methods. For a Wooden Rocking Chair, it’s crucial to use strong and appropriate joints, such as mortise-and-tenon or dowel joints. These connections provide strength and stability, ensuring your chair can support weight effectively. Avoid using butt joints, which are weaker and might not stand up over time. Investing time in learning about joinery types can significantly improve the longevity of your chair.
Pay attention to the rocking motion
It’s essential to pay attention to the rocking motion as well. Many builders overlook the curve of the rockers, which can directly impact the functionality of the chair. The rocker’s length and curve need to be designed to achieve a smooth rocking motion. Not enough or too much curve can result in an uncomfortable or unstable experience. It’s ideal to create or follow templates that guide the rocker’s shape for stability and comfort.
Neglect the finishing process
Additionally, some makers neglect the finishing process. The finish you choose can affect both the appearance and protection of your chair. Using a wood sealer, stain, or varnish is crucial to maintain the wood’s integrity against wear and tear and environmental elements. Take time to apply multiple coats and allow proper drying between each to ensure durability.
| Mistake | Consequence | Solution |
|---|---|---|
| Wrong wood type | Less durability | Select hardwoods like oak |
| Poor measurements | Uncomfortable design | Ensure proper dimensions |
| Lack of planning | Increased errors | Create a detailed blueprint |
| Skipping sanding | Rough finish | Spend time sanding surfaces |
| Incorrect joinery | Weak structure | Use strong joints like mortise-and-tenon |
| Improper rocker shape | Unstable rocking | Follow template guidelines |
| Poor finishing | Reduced lifespan | Apply appropriate finishing products |
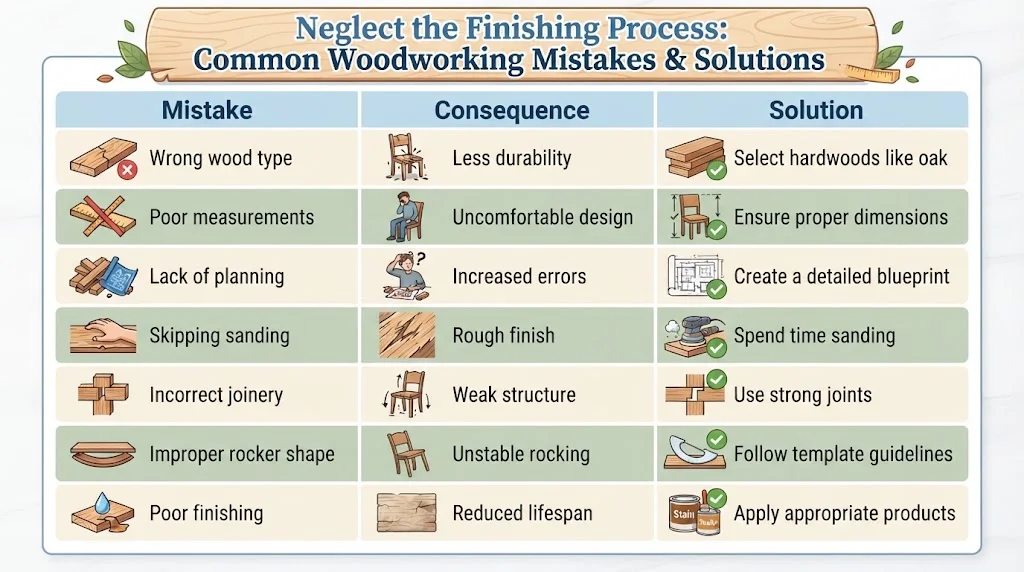
Becoming aware of these common mistakes can elevate your woodworking skills significantly. By taking the time to understand each aspect before diving into your project, you can create a rocking chair that’s not only beautiful but also a treasured piece of furniture for years to come. For further assistance, consider checking out resources at Wood Magazine and Woodworker’s Journal for tips and guides tailored to both amateurs and experienced woodworkers.
Helpful Resources
For further tips and detailed instructions, you can check out resources like the Wood Magazine or the Woodworking for Beginners. These sites offer a wealth of information that can help you refine your woodworking skills and expand your project possibilities.
Building your own Wooden Rocking Chair is a fulfilling task that combines creativity and craftsmanship. With the right materials, tools, and steps outlined in this guide, you’re well on your way to creating a beautiful rocking chair that you can enjoy for years. Whether for relaxation or to enhance your home décor, your handmade rocking chair will be a treasured piece of furniture.
Conclusion
Creating your own Wooden Rocking Chair is a rewarding project that combines craftsmanship with personal expression. By gathering the right tools and materials, you’ve set the foundation for success. Following a step-by-step guide can help you navigate the building process with ease, ensuring each piece fits perfectly and functions well.
As you embark on this journey, staying aware of common mistakes is crucial. By avoiding pitfalls like incorrect measurements or poor joints, you can save time and resources, leading to a more enjoyable building experience. Once your rocking chair is shaped and assembled, the finishing touches will elevate your project to the next level. Staining and sealing not only enhance the beauty of the wood but also protect it for years to come.
Moreover, exploring creative designs and styles allows you to make a rocking chair that truly reflects your personality. Whether you prefer a classic look or something more modern, the potential for customization is limitless. Each chair you create can be a unique piece of art, tailored to fit your aesthetic.
By tapping into your creativity and following these practical steps, you can master the craft of making a Wooden Rocking Chair. With a little patience and dedication, not only will you end up with a beautiful piece of furniture, but you’ll also gain a sense of accomplishment that comes with building something by hand. Now, gather your tools and let the journey of creating your very own rocking chair begin!