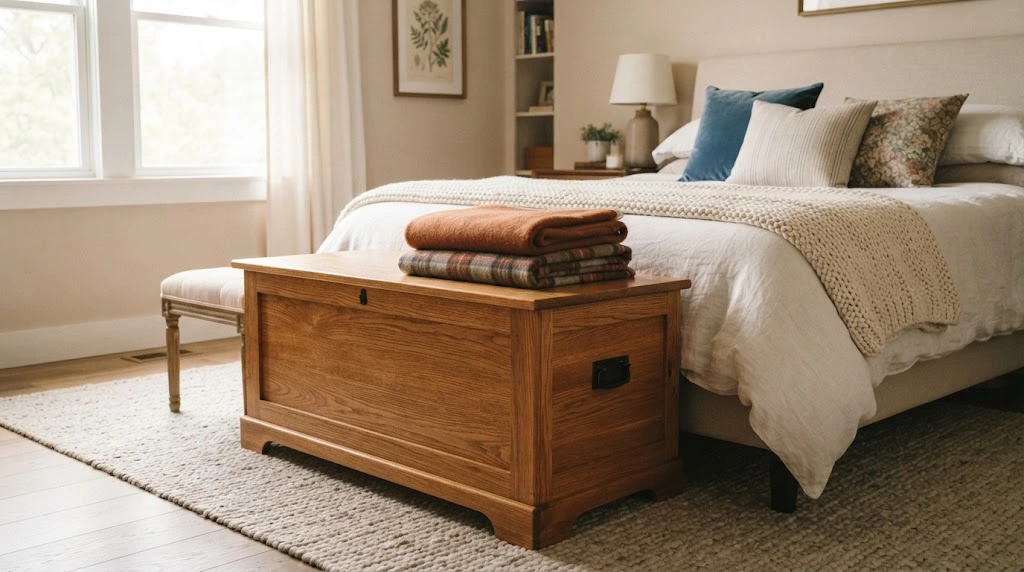
Creating your own wooden blanket chest can be a rewarding project that infuses your home with charm and functionality. Before you get started, there are several key considerations to keep in mind to ensure your design is not only beautiful but also practical and durable.
Material Selection
The first consideration is the type of wood you want to use. Different woods have varying strengths, appearances, and costs. Some popular choices include:
- Oak: This hardwood is known for its strength and durability, making it a great option for heavy use.
- Pine: A cost-effective softwood, pine is lightweight and easy to work with, ideal for beginners.
- Cherry: Cherry wood offers a rich color and finishes beautifully, though it can be on the pricier side.
Choose a wood that fits your budget and matches your design aesthetic. Remember that each wood type responds differently to stains and finishes, so consider testing samples.
Design Dimensions
When designing your blanket chest, you need to consider its size. Here are some dimensions to consider:
| Size | Recommended Dimensions |
|---|---|
| Small | 36″ W x 18″ D x 18″ H |
| Medium | 42″ W x 20″ D x 20″ H |
| Large | 48″ W x 24″ D x 24″ H |
Think about where you plan to place the chest. Measure the space you have available and choose dimensions that will fit well while providing enough storage for your needs.
Functionality Features
Think about how you want to use your blanket chest. Will it mainly store blankets, or do you plan on using it as a coffee table or additional seating? Consider incorporating features like:
- Hinged Lid: A hinged lid allows easy access to the contents inside.
- Storage Compartments: Dividers can help organize different items such as toys, throws, or books.
- Casters: Adding wheels can make your chest easier to move around as needed.
By designing for functionality, your blanket chest will serve you well for years to come.
Finish and Aesthetics
The finish of your wooden blanket chest will affect its durability and appearance. Here are some finish options to consider:
- Staining: Stains can enhance the natural beauty of the wood while offering some protection.
- Paint: A painted finish can add a pop of color and pattern to your chest.
- Sealers: Clear sealers protect the wood from moisture and scratches while allowing the wood grain to shine through.
Choose a finish that complements your existing décor and provides the desired level of protection.
Safety Considerations
Safety is crucial, especially if children will be using the blanket chest. Consider the following:
- Soft-Close Hinges: These can prevent fingers from getting caught when the lid closes.
- Rounded Edges: Selecting a design with rounded corners can help minimize injuries.
- Ventilation Holes: These are important to prevent moisture buildup inside the chest.
Ensuring safety will help you enjoy your wooden blanket chest without worry.
These considerations into your design will help you create a beautiful and practical wooden blanket chest tailored to your needs. For more tips and inspiration on building your own furniture, you can check out resources like Woodworking Network and Wood Magazine.
Essential Tools and Materials for Building a Blanket Chest
Building a wooden blanket chest is a rewarding project that combines craftsmanship with functionality. To ensure your success, it’s crucial to gather the right tools and materials before you start. Below is a detailed guide to help you prepare for this woodworking project.
Essential Tools

Having the proper tools will make your project easier and more enjoyable. Here’s a list of essential tools you should have:
- Measuring Tape: Accurate measurements are vital for a well-fitting chest.
- Square: A combination square helps ensure your corners are true, which is necessary for a sturdy build.
- Chop Saw: Ideal for making precise cross-cuts in your wood pieces.
- Drill: Use a power drill with various bits for drilling holes and driving screws.
- Router: This tool is useful for creating decorative edges and grooves in the wood.
- Sander: A handheld sander helps achieve a smooth finish, which is especially important for a piece that will be used for storage.
- Clamps: They are essential for holding pieces together while the glue dries. Bar clamps or pipe clamps work well.
- Paintbrushes: If you plan to finish or paint your chest, a set of quality paintbrushes will help achieve a smooth application.
Necessary Materials
The materials you choose will affect the durability and appearance of your blanket chest. Here’s what you’ll need:
- Wood: Choose solid hardwood like oak, maple, or cherry for longevity. Plywood can be used for the interior or hidden parts.
- Wood Glue: A strong adhesive will hold your joints together. Look for wood glue that’s waterproof for added durability.
- Wood Screws: Select screws that are appropriate for your wood thickness. Pre-drilling holes can help prevent splitting.
- Finish: Decide whether you’ll use paint, stain, or a clear coat. Your choice of finish impacts the final look and durability.
- Hardware: You’ll need hinges for the lid, and consider a latch or lock for security. Decorative hardware can add to the aesthetic.
Workspace Setup
A well-organized workspace is essential for efficiency. Here are some tips for setting up your work area:
- Choose a quiet and spacious area with good lighting.
- Ensure you have a flat surface for measuring and cutting your wood.
- Keep your tools organized and within reach to avoid wasting time searching for them.
- Always prioritize safety by wearing goggles and a dust mask while working.
Safety Precautions
Working with wooden materials and tools requires safety awareness. Follow these precautions:
- Wear safety goggles to protect your eyes from wood chips and dust.
- Use ear protection if you’re working with loud power tools.
- Keep first aid supplies nearby in case of minor accidents.
- Ensure tools are in good condition and safe to use before starting your project.
With the right tools and materials, you’re well-equipped to embark on your journey to create a beautiful wooden blanket chest. Each element plays a crucial role in the project’s success, from your workspace setup to the final finishing touches. Get ready to bring your craftsmanship to life!
Step-by-Step Guide to Crafting a Wooden Blanket Chest
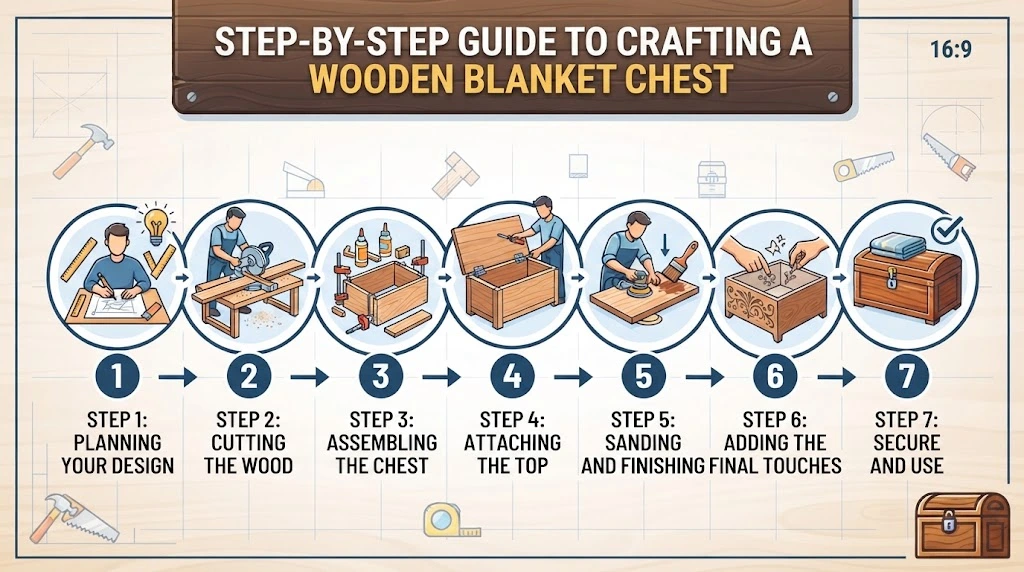
If you’re looking to create a beautiful, functional piece of furniture, a wooden blanket chest is an excellent choice. This DIY project not only enhances your living space but also provides storage for blankets, toys, or keepsakes. Below is a straightforward step-by-step guide to help you craft your own wooden blanket chest, ensuring you achieve great results.
Materials You Will Need
- 1x pine or oak boards (select your preferred wood)
- Wood screws
- Wood glue
- Sandpaper (80 and 220 grit)
- Wood finish or paint
- Hinges
- Essential tools (saw, drill, screwdriver, measuring tape)
Step 1: Planning Your Design
Before diving into building, first sketch your design. Consider dimensions that suit your space. A standard blanket chest might measure about 36 inches long, 18 inches wide, and 18 inches high. You can customize these dimensions based on personal preference.
Step 2: Cutting the Wood
Once you have your design, cut the wooden boards according to your measurements. You’ll need pieces for the top, bottom, sides, and a back. Typically, these sections include:
| Piece | Dimensions |
|---|---|
| Top | 36″ x 18″ |
| Bottom | 36″ x 18″ |
| Sides (2) | 18″ x 18″ |
| Back | 36″ x 18″ |
Step 3: Assembling the Chest
Begin assembling your chest by attaching the sides to the bottom. Use wood screws for a sturdy hold, ensuring everything is square. Add wood glue to the joints for extra strength. Attach the back piece next, followed by the front. Make sure the structure is secure and level.
Step 4: Attaching the Top
Once the body of the chest is complete, it’s time to attach the top. Position it carefully and mark where the hinges will go. Attach the hinges to the top, allowing it to swing open. Make sure to allow enough room for the lid to lift without obstruction.
Step 5: Sanding and Finishing
Sanding is crucial for a smooth finish. Start with 80-grit sandpaper to remove any rough edges, then switch to 220-grit sandpaper for a finer finish. Take your time to ensure all surfaces are polished, especially the corners and edges.
After sanding, it’s time to apply your chosen wood finish or paint. For a natural look, consider using a clear varnish. If you prefer color, select a paint that complements your décor. Make sure to follow the manufacturer’s instructions for best results.
Step 6: Adding the Final Touches
After drying, add any decorative touch you desire. Some might prefer to add a fabric liner inside, while others might add stencils or carvings on the exterior. This personal touch can make your blanket chest truly unique.
Step 7: Secure and Use
Ensure everything is securely fastened. Check that the lid operates smoothly and the chest is stable. Your beautiful wooden blanket chest is now ready to showcase in your home and serve its purpose.
For more detailed woodworking instructions or inspiration, visit Wood Magazine or check out DIY Network. They provide an array of woodworking projects that can improve your skills and inspire new creations.
Crafting a wooden blanket chest can be both satisfying and rewarding. Not only do you end up with a beautiful piece of furniture, but you also gain a sense of accomplishment from building it yourself. Happy woodworking!
Finishing Touches: Staining and Sealing Your Blanket Chest

After constructing your wooden blanket chest, the next phase is to enhance its appearance and durability through proper staining and sealing. This vital step not only protects your furniture but also ensures it complements your home’s decor. Below are the essential tips to effectively stain and seal your blanket chest.
Choosing the Right Stain
Start by selecting a stain that matches your desired finish. There are a few types of stains to consider:
- Oil-Based Stains: These penetrate deeply into the wood, providing rich color and a durable finish.
- Water-Based Stains: These dry quickly and are easier to clean up, but might not penetrate the wood as deeply as oil-based options.
- Gel Stains: Great for vertical surfaces, gel stains offer a rich color without requiring as much penetration.
When selecting your stain, consider the wood type of your blanket chest. Different woods absorb stain differently, affecting color and finish. For instance, oak tends to soak in more stain than pine.
Preparing the Surface
Proper preparation is key to achieving a beautiful finish. Follow these steps:
- Sand the Surface: Start with medium-grit sandpaper (around 120 grit) to eliminate any rough spots and imperfections. Move to a fine-grit sandpaper (220 grit) for a smoother finish.
- Clean the Dust: After sanding, wipe the surface with a damp cloth or tack cloth to remove dust and debris. A clean surface is crucial for even stain absorption.
Applying the Stain
Now, it’s time to apply the stain. Here’s a simple method to achieve a great finish:
- Use the Right Tools: A clean, lint-free cloth or a foam brush works well for applying stain. Make sure to avoid using paintbrushes that can leave bristles behind.
- Test on Scrap Wood: Before applying the stain to your chest, try it on a scrap piece of wood to see how the color turns out.
- Apply Evenly: Working with the grain of the wood, apply the stain evenly. If you prefer a darker tone, apply a second coat after the first coat dries.
Sealing the Finish
Once your stain has dried thoroughly, sealing your blanket chest is the next step to protect its finish. Here are common sealing options:
- Polyurethane: This provides a robust and durable finish, ideal for furniture. It comes in both water- and oil-based options, each offering unique characteristics.
- Shellac: Great for a natural look, shellac dries quickly but isn’t as moisture-resistant as polyurethane.
- Varnish: This is a timeless choice that offers excellent protection against scratches and moisture.
Applying the Sealant
Follow these tips for an effective seal:
- Choose Your Applicator: A clean brush or foam applicator works best to apply the sealant smoothly.
- Apply Evenly: Just like with the stain, apply the sealant in the direction of the grain, ensuring full coverage.
- Sand Between Coats: Lightly sanding between coats with very fine sandpaper (320 grit) helps the next layer adhere better and results in a smoother finish.
Final Considerations
Once you have completed the staining and sealing, allow ample time for the final coat to cure fully according to the product instructions. This is key to ensuring your blanket chest is both stunning and durable.
Creative Uses for a Wooden Blanket Chest Beyond Storage
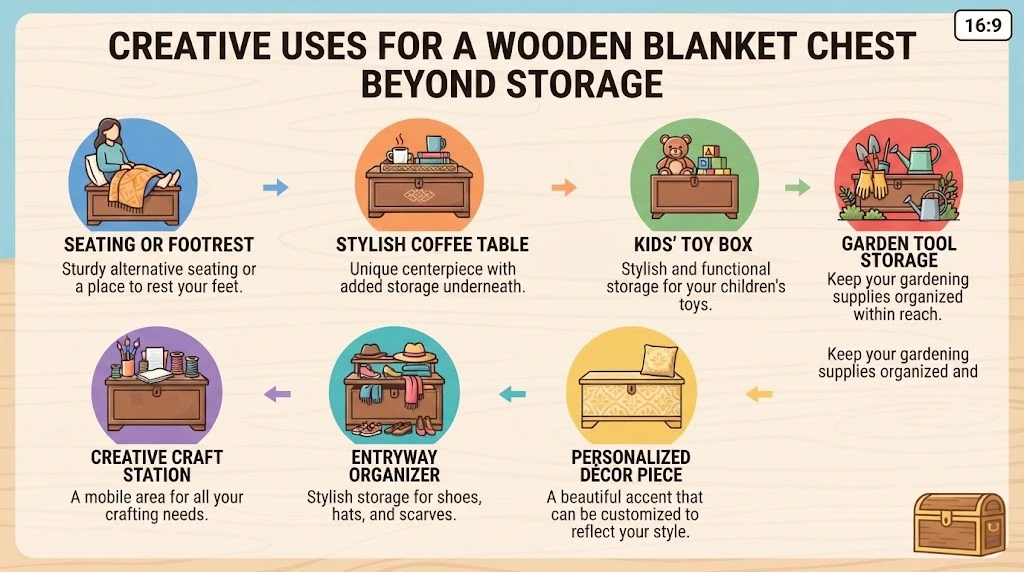
When you think of a wooden blanket chest, you might envision it purely as a storage solution for cozy throws and bedding. However, this versatile piece of furniture can serve far more creative purposes in your home. Let’s explore some innovative ways to use a wooden blanket chest beyond just storing your blankets.
Seating or Footrest
One of the most practical uses for a wooden blanket chest is as extra seating or a footrest. In a living room or near your bed, it can provide a comfortable place for guests to sit or a convenient spot to prop your feet up while relaxing. With its sturdy build, it can easily handle the weight of multiple people, making it an excellent alternative to traditional seating options.
Stylish Coffee Table
You can transform your blanket chest into a unique coffee table. By placing a decorative tray on top, you can hold books, magazines, or even candles. This multifunctional setup not only adds charm to your living area but also keeps everything tidy and easy to reach. Plus, you can lift the lid for additional storage when needed.
Kids’ Toy Box
If you have children, a wooden blanket chest can double as a toy box. It’s a practical solution to keep toys stored away while also being a stylish addition to your child’s room. You can encourage your kids to help clean up by making the storage process easy and accessible.
Garden Tool Storage
Put your wooden blanket chest to work in your garden! It can become a handy storage unit for tools, gloves, and pots. Keeping your gardening supplies organized ensures you can find everything you need quickly, making gardening less frustrating and more enjoyable. Just make sure the chest is treated to withstand outdoor conditions.
Creative Craft Station
For the crafty individuals out there, a blanket chest can be converted into a mobile craft station. Store your supplies—papers, paints, and tools—inside and place it wherever you’re working. The flat top can serve as a work surface, and you can easily tuck it away when you’re done. This setup keeps your crafting area neat while allowing you the flexibility to create anywhere.
Entryway Organizer
A wooden blanket chest can make a stylish entryway feature. Use it to store shoes, hats, and scarves, helping keep your entryway clutter-free. This setup allows your guests to sit while they remove their shoes, adding a practical and welcoming touch to your home.
Personalized Décor Piece
Don’t underestimate the power of a wooden blanket chest as part of your home décor. A beautifully crafted chest can be a stunning accent piece. You can personalize it by painting it, staining it, or applying decals. By adding custom cushions on top, it becomes not just a storage chest but a lovely piece of art that reflects your style.
| Use | Description |
|---|---|
| Seating/Footrest | Sturdy alternative seating or a place to rest your feet. |
| Coffee Table | Unique centerpiece with added storage underneath. |
| Kiddie Toy Box | Stylish and functional storage for your children’s toys. |
| Garden Tool Storage | Keep your gardening supplies organized and within reach. |
| Craft Station | A mobile area for all your crafting needs. |
| Entryway Organizer | Stylish storage for shoes, hats, and scarves. |
| Decor Piece | A beautiful accent that can be customized to reflect your style. |
As you can see, a wooden blanket chest is much more than just a place for blankets. With a little creativity, you can repurpose this charming piece of furniture to suit your lifestyle and home needs. From serving as extra seating to enhancing your garden, the possibilities are endless.
For more ideas on home decor and furniture repurposing, check out HGTV and Better Homes & Gardens.
Conclusion
Creating a wooden blanket chest is not just about practicality; it’s an opportunity to express your creativity and craftsmanship. By carefully considering your design choices, you can create a piece that seamlessly fits into your home’s aesthetic. The proper tools and materials lay a solid foundation, ensuring that your building process goes smoothly and yields a sturdy chest.
Following the step-by-step guide helps simplify what might seem like a daunting task, turning it into an enjoyable project. As you take time with your construction, don’t forget about the finishing touches. Staining and sealing enhance the natural beauty of the wood, providing both appeal and durability. These elements are vital not just for aesthetics but also for protecting your chest, allowing it to withstand the test of time.
Beyond storing blankets, think imaginatively about how you can utilize your wooden blanket chest. It can serve as a coffee table, a seat for guests, or even a creative display for cherished items. The versatility of your creation opens up endless possibilities, making it a functional and beautiful addition to your space.
As you embark on this woodworking journey, remember that each step contributes to a treasured heirloom. Whether you cherish it for its beauty or practicality, your wooden blanket chest will be a source of pride for years to come. Embrace the process, enjoy the craft, and create something that reflects your unique style and needs.