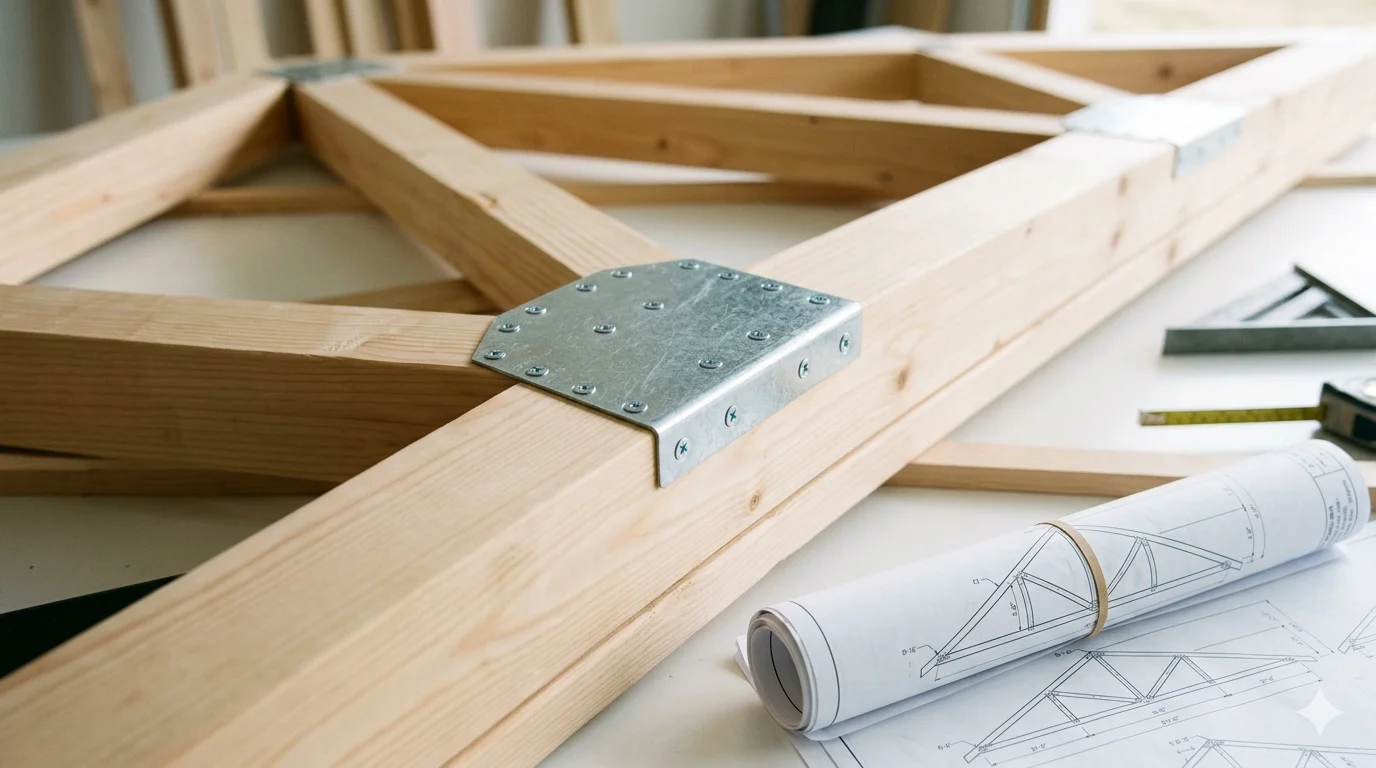
Building wooden roof trusses can be a rewarding DIY project. Whether you’re constructing a garage, a shed, or an extension to your home, learning How to Build Wooden Roof Trusses DIY is essential. This guide will walk you through each step to create sturdy, strong wooden roof trusses that will support your structure beautifully.
Gather Your Materials
Before you start, make sure you have all the necessary materials. Here’s a quick list of what you will need:
- Wood beams (2×4 or 2×6 lumber works well)
- Wood screws or nails
- Wood glue
- Plywood (for gussets)
- Measuring tape
- Saw (circular saw or miter saw)
- Square
- Clamps
- Level
- Safety equipment (goggles, gloves)
Determine the Truss Design
First, you need to choose a design that suits your needs. Common designs include:
- King Post Truss
- Queen Post Truss
- Fink Truss
- Howe Truss
Consider factors like the span of the roof, the load it will carry, and your design preferences. You can find free design plans online that can help guide you.
Measure and Cut Your Wood
After deciding on the design, measure your wood beams according to your truss specifications. Precision is important. Use your measuring tape and square to ensure clean lines. Cut the beams with your saw. Always remember to wear safety goggles when cutting to protect your eyes.
Assemble the Truss
Now it’s time to assemble your truss. Here’s a step-by-step breakdown:
- Lay out your pieces: Arrange the cut wood pieces on a flat surface according to your design.
- Attach gussets: Use plywood cut into triangles (gussets) at the joints to strengthen your truss. Secure them with wood glue and screws or nails.
- Secure joints: Use clamps to hold everything in place while you work. It’s crucial the joints are tight to maintain structural integrity.
- Check for level: Use a level to ensure each truss is straight. Adjust as necessary before moving on.
Install the Trusses
Once your trusses are assembled and dried, it’s time for installation. Position the trusses at equal intervals along the top of the walls. Secure them with screws or nails. Remember to check each truss for level again during the installation process. This will help ensure that everything is aligned properly.
Inspections and Final Touches
Once all trusses are in place, inspect every connection and joint. Make sure everything is tight and secure. You may also want to cover the trusses with plywood to provide additional support before adding your roof sheathing.
Essential Tools and Materials for Constructing Wooden Roof Trusses
When embarking on a DIY project for Building Wooden Roof Trusses DIY, having the right tools and materials is vital to ensure success. Understanding the fundamentals will help you create sturdy structures that will support the weight of your roof. Here’s what you’ll need to get started.
Essential Tools
Before you begin constructing wooden roof trusses, gather the following essential tools. These tools will help you achieve precision and efficiency in your project:
- Measuring Tape: Accurate measurements are crucial. A long measuring tape will help ensure precise cuts and alignment.
- Square: A framing square is necessary for checking angles and ensuring that your cuts are square.
- Chalk Line: This tool helps mark straight lines over longer distances, which is essential for cutting lumber accurately.
- Power Saw: A circular saw is ideal for cutting larger pieces of lumber with speed and accuracy. If you need more versatility, consider a miter saw.
- Drill/Driver: This tool is critical for making pilot holes and driving screws into your lumber.
- Clamps: Use clamps to hold your materials in place as you work, ensuring stability and precision during assembly.
- Level: A level helps ensure that your trusses are built flat and true.
- Screw Gun: An electric screw gun can save you time and effort while ensuring consistent torque and depth.
- Safety Gear: Don’t forget safety glasses and gloves to protect yourself while working.
Necessary Materials
Next, let’s look at the materials you’ll need. Selecting quality materials is critical for the durability of your roof trusses:
- Wood: The most commonly used wood types for trusses are Douglas fir, southern pine, or engineered lumber. Choose straight, knot-free boards to ensure quality construction.
- Screws: Use compatible wood screws, preferably galvanized, to resist corrosion. Ensure they come in the right lengths for your project.
- Wood Glue: A high-strength adhesive enhances the connection between joints, improving overall integrity.
- Sheathing Material: Plywood or OSB (oriented strand board) can serve as the sheathing that provides extra strength and support.
- Truss Connector Plates: These metal plates enhance the joints where truss components meet, ensuring they stand up to pressure.
- Flashing: This waterproof material is useful at seams and penetrations to prevent leaks on your roof.
Planning Your Truss Design
With tools and materials in hand, you’ll want to plan the design of your roof trusses carefully. You can find various design templates and guidelines that suit your specific needs. Websites like FEMA or Wood Magazine can provide excellent resources regarding design and local building codes.
Assembly Considerations
Once your materials are ready, the next step is assembly. During assembly, keep these tips in mind:
- Follow Your Plans: Stick to your design plan to ensure each component is placed correctly.
- Work on a Level Surface: Ensure your assembly area is flat and stable to avoid any misalignment.
- Start with a Mock-Up: If you’re new to this, building a small mock-up can help you understand how everything fits together.
- Check Your Angles: Use a square tool frequently to validate your corners and joints are at the right angles.
- Secure All Joints Well: Use both screws and glue at joints to maximize strength.
You need to closely adhere to the right tools and materials to How to Build Wooden Roof Trusses DIY effectively. Ensure safety throughout the project and align each component as per your design. Make use of available online resources for guidance and insights.
Common Mistakes to Avoid When Building DIY Roof Trusses
Building DIY roof trusses can save you money and give you a sense of accomplishment, but it requires careful planning and execution. Many DIY enthusiasts make common mistakes that can affect the quality, safety, and durability of the roof. Here are some pitfalls to avoid to ensure your roof trusses are built correctly.
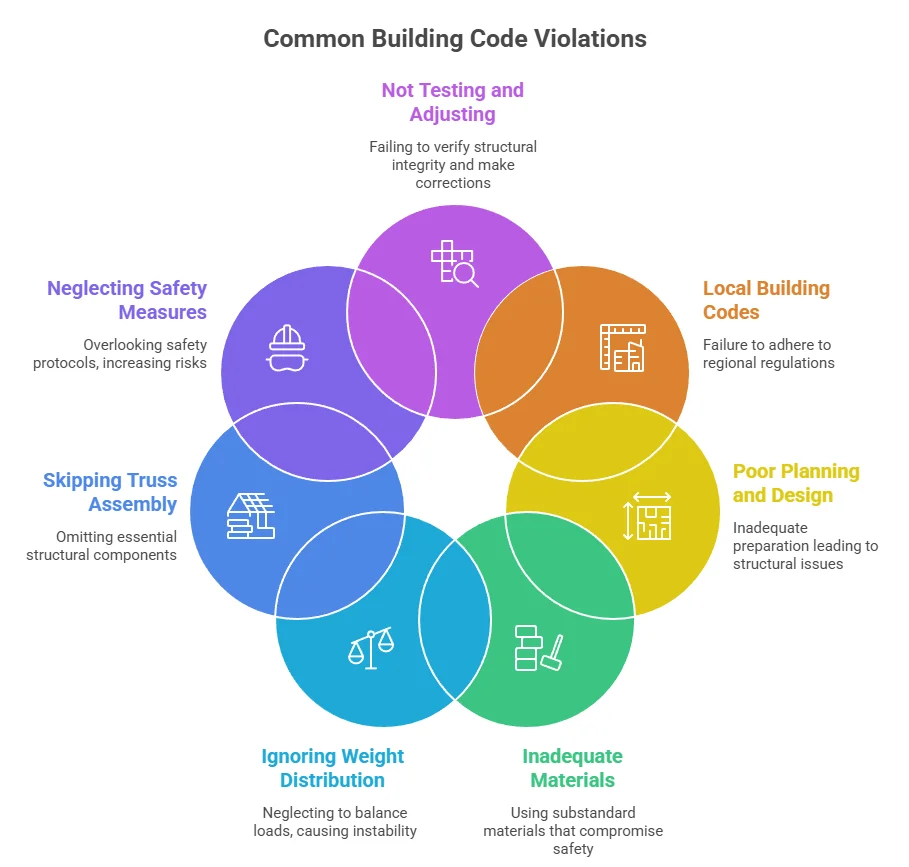
Not Following Local Building Codes
One of the most significant oversights when building roof trusses is failing to adhere to local building codes. These regulations ensure that your structure is safe and complies with legal requirements. Always check with your local building authority before starting your project, as violating codes can lead to serious consequences and costly fines.
Poor Planning and Design
Before you begin constructing your roof trusses, take the time to plan and design them properly. Sketch your truss system and calculate the load they will carry. A well-thought-out design helps avoid mistakes and ensures that the trusses will provide adequate support. Consider using design software or consulting a professional for this stage.
Using Inadequate Materials
The materials you select for your roof trusses are crucial to their strength and longevity. Avoid using low-quality or unsuitable wood. Look for quality lumber that meets standards, such as WI Wood. Make sure your materials are free from defects like warping, knots, or other damage, which could compromise the integrity of your trusses.
Ignoring Weight Distribution
Understanding weight distribution is essential. Many DIY builders neglect to calculate loads properly, resulting in uneven weight distribution on the trusses. This can lead to sagging or even collapse over time. Consider factors such as snow load, the weight of roofing materials, and other loads when designing your roof trusses.
Skipping the Truss Assembly Process
Take your time during the assembly process. Rushing can lead to mistakes, such as misaligning joints or not using enough fasteners. Ensure each joint is securely connected with the proper hardware, like nails or bolts. This ensures your trusses can handle the loads they are meant to support.
Neglecting to Use Proper Tools
Using the right tools can significantly improve the quality of your roof trusses. Some common tools you’ll need include a miter saw for cutting, a drill for fastening, and a level for checking alignment. If you aren’t familiar with these tools, take the time to learn how to use them correctly. This knowledge can prevent accidents and lead to better results.
Overlooking Safety Measures
Your safety should be a priority while building DIY roof trusses. Always wear appropriate personal protective equipment (PPE), including safety goggles and gloves. Ensure your workspace is well-lit and free from hazards. Don’t forget to have a first aid kit on hand for any unexpected accidents.
Not Testing and Adjusting
Once you’ve built your trusses, test them thoroughly. Check for any signs of weakness, such as creaking noises or visible misalignment. If you notice any issues, address them before completing your roofing project. A little extra effort at this stage can save you from costly repairs down the line. Common mistakes often lead to larger problems in the future. Stay organized, follow guidelines, and invest time in your project. You’ll find that with careful consideration and planning, How to Build Wooden Roof Trusses DIY can be a rewarding experience.
The Benefits of Using Wooden Roof Trusses in Home Construction
When it comes to home construction, choosing the right materials can significantly impact the structure’s durability and aesthetic appeal. One material that stands out in terms of performance and beauty is wood. Wooden roof trusses, in particular, have gained popularity among builders and homeowners alike for their various advantages. Let’s explore some of the remarkable benefits of How to Build Wooden Roof Trusses DIY in home construction.
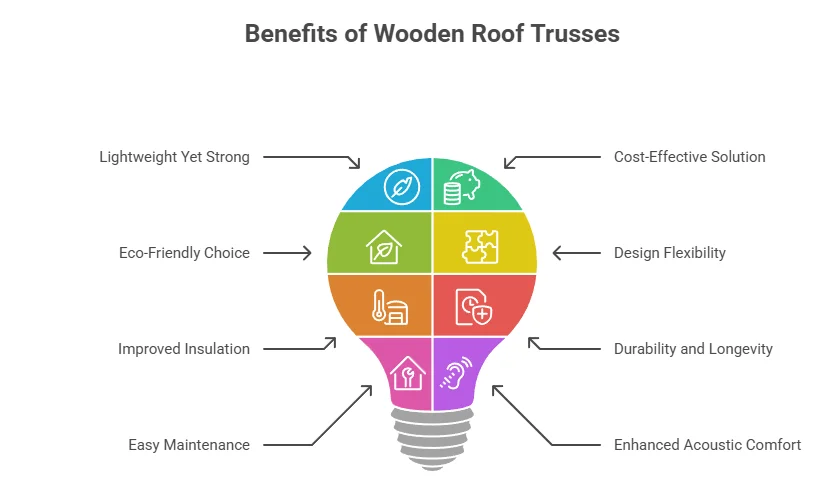
Lightweight Yet Strong
One of the standout features of wooden roof trusses is their impressive strength-to-weight ratio. Wood is much lighter than steel or concrete yet provides a robust framework for roofs. This quality allows builders to transport and install the trusses more easily, resulting in reduced labor and construction time.
Cost-Effective Solution
Using wooden roof trusses can be a cost-effective solution for homeowners. Here’s how:
- Lower Material Costs: Wood is often less expensive than alternative roofing materials.
- Reduced Labor Costs: Wooden trusses are easier to install, which can lead to lower labor costs.
- Energy Efficiency: Good insulation potential with wooden structures can help cut down energy bills.
Eco-Friendly Choice
For environmentally conscious homeowners, wooden roof trusses present an eco-friendly option. Wood is a renewable resource, and when sourced sustainably, it has a much lower carbon footprint compared to materials like steel or concrete. Therefore, choosing wood supports forestry management practices that promote replanting and preservation.
Design Flexibility
Wooden roof trusses offer phenomenal design flexibility. They can be crafted in various shapes and sizes, allowing architects to create unique ceiling designs. This flexibility enables more intricate designs such as vaulted or cathedral ceilings, which can enhance the aesthetic appeal of your home.
Improved Insulation
Wood is a natural insulator, helping to keep homes warm in the winter and cool in the summer. This property contributes to overall energy efficiency, which can lead to significant savings over time. A well-insulated roof can greatly minimize heating and cooling costs, making wooden roof trusses an ideal choice for energy-conscious homeowners.
Durability and Longevity
Contrary to some misconceptions, wooden roof trusses can be incredibly durable when properly treated and maintained. With the proper sealing and care, wood can resist many environmental factors, such as moisture and pests. Treated wood can last for decades, ensuring that the investment in your roof will withstand the test of time.
Easy Maintenance
Maintaining wooden roof trusses is generally easier than caring for roofs made of metal or concrete, which often require specific cleaning techniques and maintenance routines. Periodic inspections, repainting, or resealing are typically all that is needed to keep wooden trusses in top shape.
Enhanced Acoustic Comfort
Wooden roof trusses can help absorb sound, providing better acoustic comfort within the home. Unlike metal structures that may echo noises, wood can create a quieter environment perfect for residential spaces. This quality can contribute to a more peaceful atmosphere in bedrooms and living areas.
on Wooden Roof Trusses
Wooden roof trusses offer numerous benefits that can greatly enhance home construction projects. From their lightweight and cost-effective nature to their eco-friendliness and design flexibility, wooden roof trusses remain a preferred choice for many builders. Moreover, thanks to their durability and ease of maintenance, they have the potential to provide not only immediate advantages but long-term value.
Tips for Designing Custom Roof Trusses for Your Specific Needs

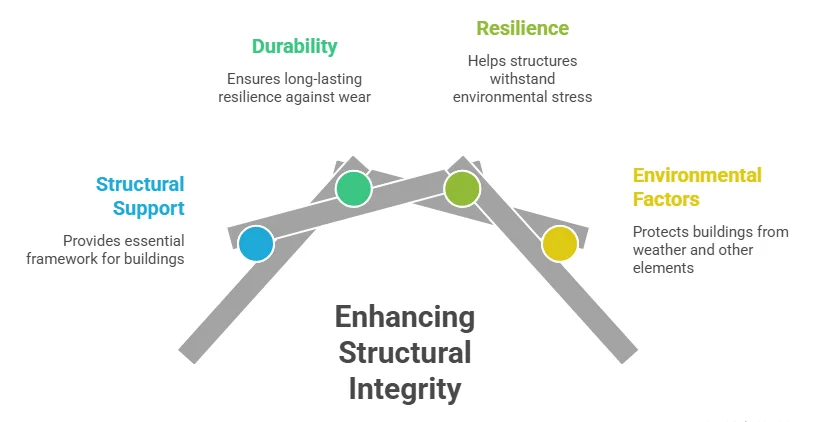
Designing custom roof trusses requires careful planning and creativity, especially if you want to meet your specific needs. Roof trusses play a crucial role in the structural integrity of a building, so understanding their design elements is key. Here are some tips to help you How to Build Wooden Roof Trusses DIY for your project.
Understand Your Building’s Requirements
Before you start designing, take the time to understand the load requirements of your building. The following factors should influence your design:
- Roof Type: Consider whether your roof will be flat, sloped, or have multiple peaks.
- Climate: Analyze local weather conditions. Heavy snow, strong winds, and rain should all be factored into your design.
- Building Size: The greater the span you need to cover, the more robust your trusses must be.
Select the Right Material
Choosing the right materials for your wooden roof trusses is vital. Popular options include:
- Plywood: This material is both lightweight and strong, making it ideal for various designs.
- 2×4 Lumber: This is commonly used for framing due to its availability and ease of use.
- Engineered Wood: Laminated veneer lumber (LVL) or glulam beams can provide more strength with less material.
Design for Efficiency
A well-thought-out design can save you both time and materials. Focus on creating efficient shapes and connections. Here are some shapes to consider:
- King Post Truss: Ideal for short spans and has a simple design that is easy to build.
- Queen Post Truss: Offers more space and can span greater distances than the king post truss.
- Fink Truss: Popular in residential applications due to its lightweight and sufficient load-carrying capacity.
Utilize Software Tools
In the digital age, several software programs can help you design strong roof trusses tailored to your needs. Consider using the following:
- Simpson Strong-Tie – Offers design tools for trusses and other structural elements.
- Autodesk – Popular for architectural designs including trusses.
- SketchUp – Easy-to-use 3D modeling software for designing trusses and roofs.
Check Local Building Codes
Once you have a design in mind, it’s crucial to check local building codes. These codes can dictate:
- Materials used for construction
- Required safety measures
- Load requirements
Compliance with these codes not only ensures safety but can also impact your home’s insurance rates.
Perform Load Calculations
Calculating the load that each truss will need to support is crucial for safety and functionality. You can use the following types of loads in your calculations:
| Load Type | Description |
|---|---|
| Dead Load | Weight of roofing material, trusses, and other permanent structures. |
| Live Load | Temporary loads like snow, rain, or people. |
| Environmental Load | Load from wind or seismic activity. |
Consult a Professional
If you feel unsure at any point, consider consulting a professional. An experienced engineer or architect can provide insights tailored to your unique needs. Their expertise can save you time, resources, and potential safety issues. Ultimately, designing custom roof trusses for your specific needs is achievable with careful planning and consideration of various factors. Whether you’re a DIY enthusiast or a seasoned builder, these tips can guide you through the process and help ensure that your roof is both functional and aesthetically pleasing.
Conclusion
Building wooden roof trusses on your own is a rewarding project that can enhance the strength and appeal of your home. By following the step-by-step guide provided, you can gain hands-on experience and realize the satisfaction of creating something functional and beautiful. Remember, having the right tools and materials makes a significant difference, so don’t overlook the essentials outlined earlier. They are your allies in ensuring accuracy and durability in your trusses.
It’s equally important to be aware of the common pitfalls when constructing How to Build Wooden Roof Trusses DIY. Awareness of these mistakes can save you time, money, and frustration during your project. Learning from these issues can lead to a smoother building experience and enhance the overall quality of your work.
Wooden roof trusses offer numerous benefits, such as improved energy efficiency and cost-effectiveness, making them an excellent choice for home construction. Additionally, you have the freedom to design custom trusses that cater to your specific needs and aesthetic preferences. This creative aspect allows you to truly personalize your space while maintaining structural integrity.
As you embark on this DIY journey, embrace the learning process. Take your time to plan, measure, and execute your design carefully. With patience, creativity, and attention to detail, you can successfully How to Build Wooden Roof Trusses DIY that not only support your roof but also add character and value to your home.