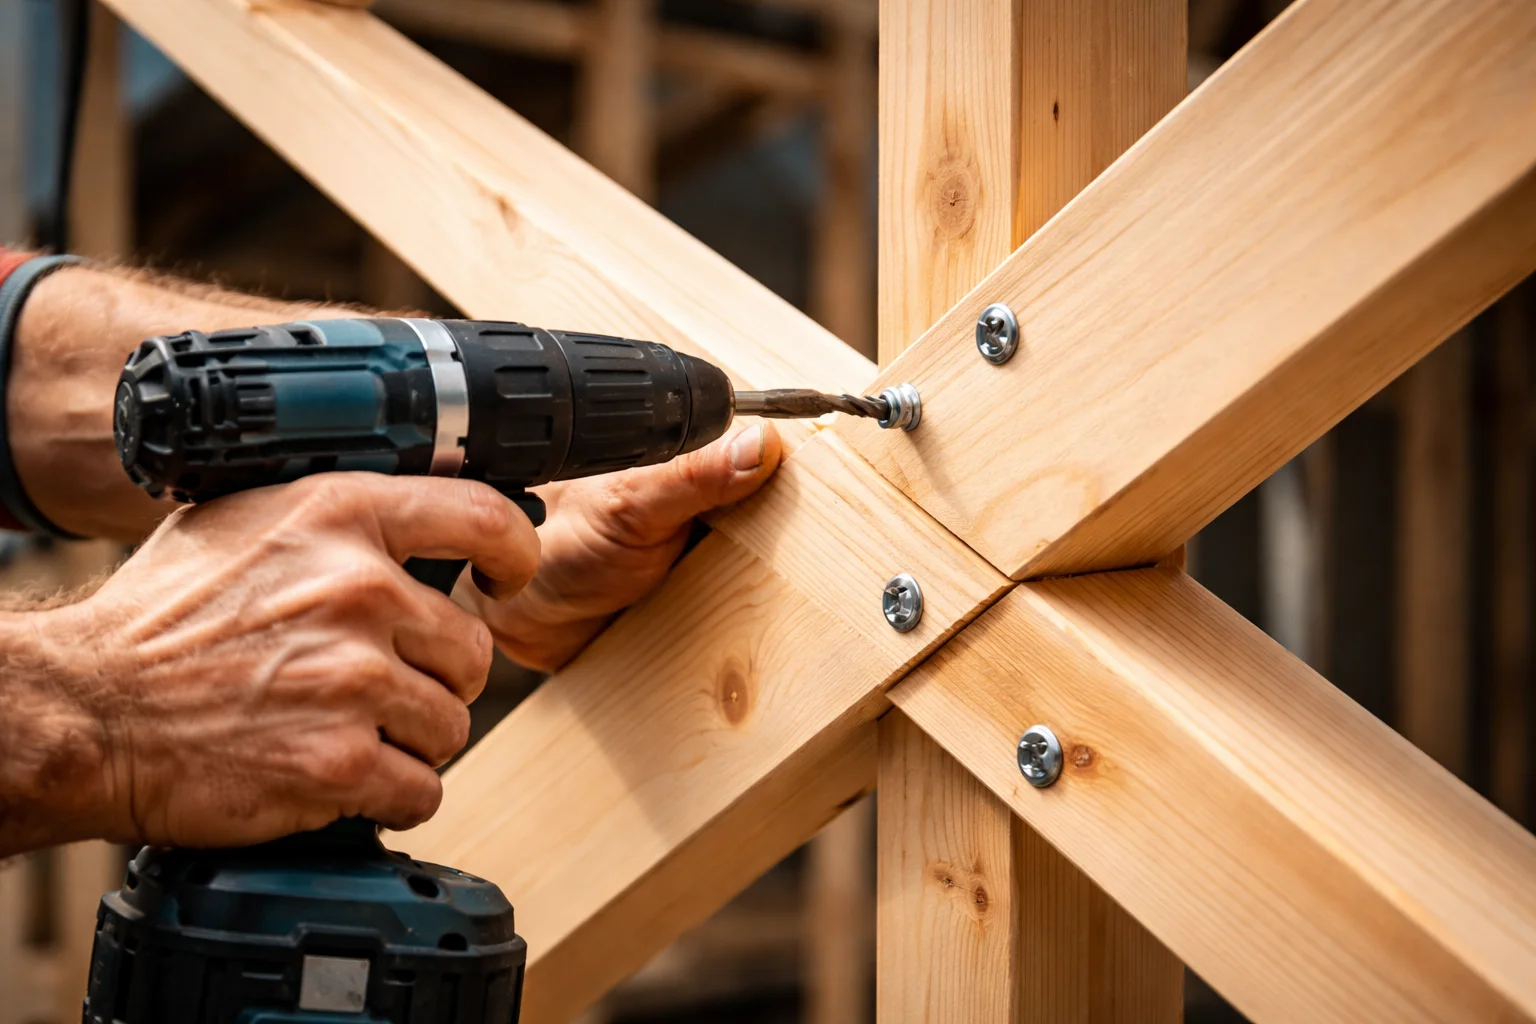
Building your own wooden privacy fence panels can enhance your outdoor space while providing you with much-needed privacy. This step-by-step guide will equip you with the essential knowledge and skills needed to create Wooden Privacy Fence Panels that are both functional and stylish.
Materials You Will Need
- Wooden boards (cedar or pressure-treated lumber)
- Concrete mix
- Fence posts (4×4 lumber is ideal)
- Nails or screws
- Wood stain or sealant
- Tools: saw, hammer, drill, level, tape measure, and safety goggles
Step 1: Plan Your Fence Layout
Before you begin building, sketch out the desired layout of your fence. This includes the height and length of your panels. Be sure to check local zoning laws and homeowner association rules to ensure compliance. Mark the fence line with stakes and string to visualize your project clearly. Make sure to measure accurately as this affects the entire installation.
Step 2: Gather Your Tools and Materials
Collect all the materials and tools you’ll need. Having everything within reach will make your work more efficient. You might also want to have a helper to assist you, especially while lifting heavy pieces or holding the fence panels in place.
Step 3: Dig Post Holes
For sturdy fence panels, you need to install strong fence posts. Use a post hole digger to create holes. Here’s how:
- Each hole should be about 2-3 feet deep, depending on your frost line.
- Space the holes about 6-8 feet apart, adjusting as necessary based on your panel width.
Step 4: Set the Fence Posts
Place the fence posts in the holes you’ve dug. Use concrete mix to secure the posts, ensuring they’re level with a tangential level tool. Allow the concrete to set according to the manufacturer’s instructions, usually for 24-48 hours. This is crucial for the stability of your fence.
Step 5: Cut the Wooden Panels to Size
Once the posts are securely in place, it’s time to cut the wooden boards for your panels. Here’s what to consider:
- For a standard 6-foot tall fence, cut your boards to a length of about 6 feet.
- Ensure all your cuts are straight for uniformity.
Step 6: Assemble the Panels
Lay out the cut boards on a flat surface to assemble your panels. Be sure to maintain even spacing between the boards. Use nails or screws to attach the boards together firmly. You can create individual panels or assemble them directly on the fence to save time. A common design is making three horizontal boards across the length of the panels for extra stability.
Step 7: Attach Panels to the Fence Posts
With your panels built, you can now attach them to the fence posts. Here’s how:
- Start with the first panel and position it between the two end posts.
- Use screws to attach the panel to the posts, ensuring it’s level.
- Repeat for each panel until your fence is complete.
Step 8: Finish and Seal Your Fence
After installing all the panels, it’s time to protect your new fence. Apply wood stain or sealant to enhance durability and prevent rot. Choose a weatherproof stain suitable for your wood type. This will also enhance the appearance of your fence.
Step 9: Maintain Your Fence
To keep your How to Build Wooden Privacy Fence Panels looking great, it’s essential to maintain them regularly. Here are some tips:
- Inspect for loose boards or nails annually and rectify them.
- Reapply sealant or stain every few years to maintain water resistance.
Choosing the Right Wood for Your Privacy Fence
Building a wooden privacy fence is a rewarding project that enhances your backyard while providing security and seclusion. However, the first step is to choose the right wood for your fence panels. Selecting quality materials is crucial not only for the appearance but also for the long-term durability of your fence. Here’s a closer look at different types of wood commonly used for privacy fences and what you should consider before making your decision.
Common Types of Wood for Privacy Fences
Different types of wood have unique characteristics, making some more suitable for fencing than others. Here’s a breakdown of the most popular options:
- Cedar: Known for its natural resistance to rot and insects, cedar is lightweight yet strong. Its appealing color and fragrance make it a favorite for privacy fences. Cedar wood can last up to 30 years with proper care.
- Redwood: Another durable choice, redwood offers a luxurious look due to its rich, warm tones. It’s resistant to warping and splitting, making it ideal for areas with fluctuating temperatures. Its lifespan can be as long as 25 years or more.
- Pressure-Treated Pine: This is often the most economical choice. The treatment protects the wood from decay and pests, allowing it to last around 15 years. However, note that it may be prone to cracking over time and requires sealing to maintain its integrity.
- Spruce: Spruce is a good choice for those on a budget. It’s affordable and paints well. However, it tends to warp and may not last as long as other options, typically around 7 to 10 years.
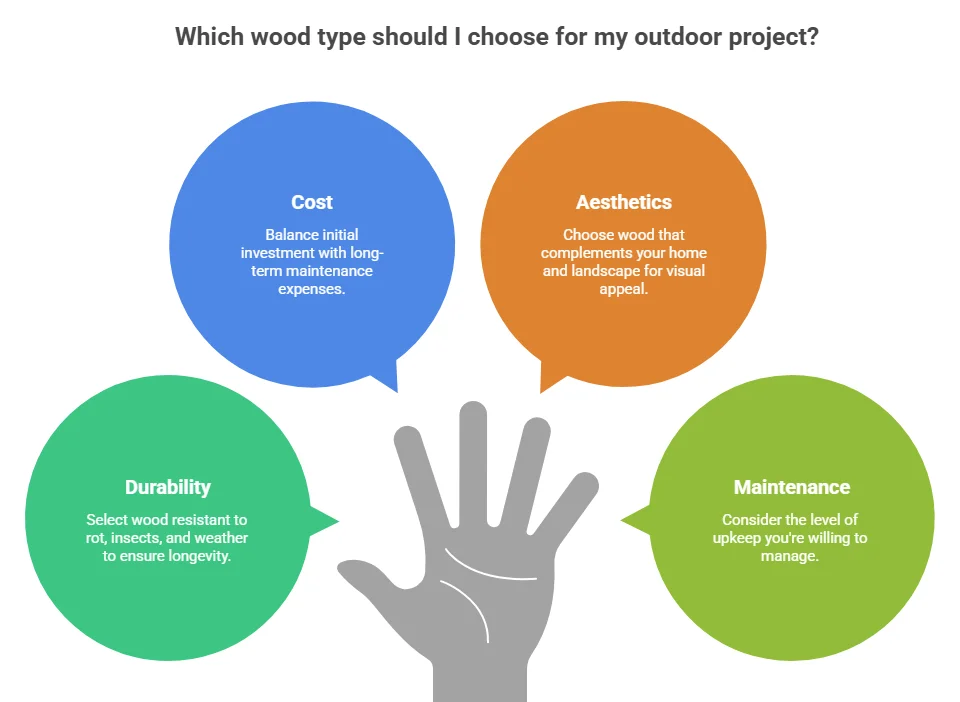
Factors to Consider When Choosing Wood
| Factor | Importance | Notes |
|---|---|---|
| Durability | High | Choose wood resistant to rot, insects, and weather conditions. |
| Cost | Medium | Consider initial investment versus long-term maintenance costs. |
| Aesthetics | High | Choose a wood type that complements your home and landscape. |
| Maintenance | Medium | Determine how much upkeep you’re willing to manage over the years. |
Maintenance Tips for Wooden Privacy Fences
Even the best wood requires some care to ensure longevity. Here are a few maintenance tips:
- Regular Inspections: Check for signs of rot, insect damage, or loose boards to address issues early.
- Sealing and Staining: Apply water-repellent sealant annually, and consider staining every few years to enhance protection.
- Cleaning: Use a gentle detergent and a soft brush to clean the fence. Avoid harsh chemicals that can damage the wood.
Your dream of a private, secure backyard is just a few decisions away. Whether you prefer the robust elegance of cedar or the affordability of pressure-treated pine, the right wood choice will ensure your fence stands the test of time.
Essential Tools You Need for Building Fence Panels
Building Wooden Privacy Fence Panels can be a rewarding project that adds both beauty and functionality to your yard. To ensure your success, it’s important to gather the right tools before you get started. Having the essential tools will not only make your work easier but also help you achieve a professional finish. Below is a list of the crucial tools you need when embarking on this project.
Hand Tools
- Measuring Tape: Accurate measurements are crucial when constructing fence panels. A measuring tape, preferably 25 feet long, will help you mark out where the posts and panels will go.
- Level: A level ensures each fence panel is perfectly straight. It helps you maintain uniformity throughout the height of the fence.
- Hammer: A reliable hammer will be your best friend when securing nails into the wood. Opt for a heavier model for efficient driving of nails and an added claw end for pulling them out if needed.
- Saw: Decide between using a handsaw or a power saw. A circular saw is preferable for making quick, straight cuts when preparing wood for your panels.
Power Tools
- Drill: A cordless drill will make quick work of creating pilot holes and securing screws. Choose one with multiple speed settings for versatility.
- Angle Grinder: This tool is highly effective for cutting through thicker wood when necessary, providing precision along the edges of your fence materials.
Cutting Tools
- Miter Saw: This saw is ideal for making precise angled cuts, especially useful for corner panels or decorative touches on your fence.
- Claw Hammer or Framing Hammer: Depending on your preference, either hammer will work well to drive in nails and secure boards together.
Protection Gear
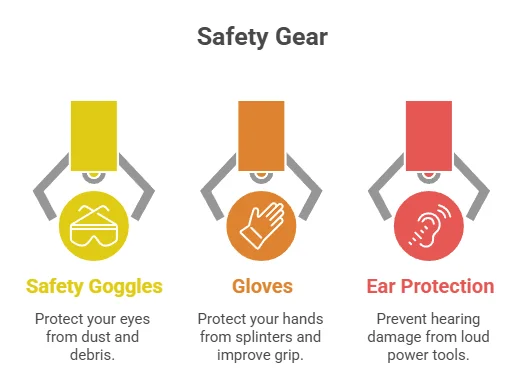
- Safety Goggles: Protecting your eyes is essential when working with power tools. Goggles will keep dust and debris away while cutting.
- Gloves: Durable work gloves help protect your hands from splinters and provide a better grip on tools.
- Ear Protection: If you’re using loud power tools like a circular saw or an angle grinder, ear protection can prevent long-term hearing damage.
Installation Accessories
- Nails or Screws: Choose exterior-grade screws or nails to ensure your fence holds up against the elements. Screws are generally preferred for their holding power.
- Wood Preservative: Consider applying a wood preservative to enhance the life of the wood in your fence. A good waterproof sealant can protect against rot and degradation.
Other Useful Items
- String Line: Handy for marking straight lines where the fence will stand, a string line helps maintain an even alignment.
- Squaring Tool: A squaring tool will ensure your posts are placed squarely, which is essential for stability and aesthetics.
When undertaking the project, organizing your workspace and keeping your tools within easy reach will make your task smoother. Whether you’re a first-time builder or someone with more experience, gathering these essential tools ensures that your How to Build Wooden Privacy Fence Panels will be a valued addition to your property.
Common Mistakes to Avoid When Constructing a Wooden Fence
Constructing a wooden fence can be a rewarding project that enhances your property’s privacy and aesthetic appeal. However, many homeowners make common mistakes that can lead to future problems. Avoiding these pitfalls can save you time, effort, and money. Here are the key mistakes to steer clear of when building your wooden fence.
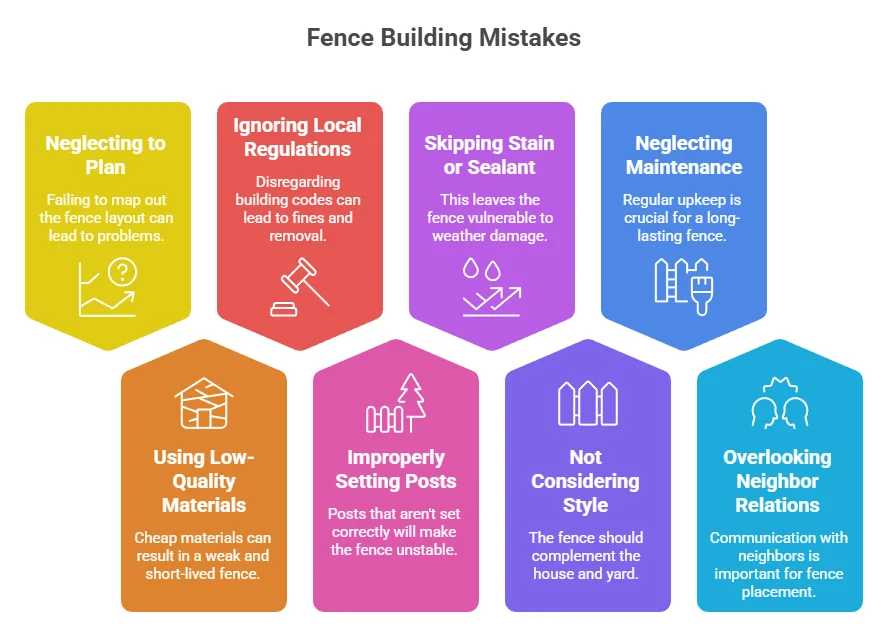
Neglecting to Plan Your Fence Layout
Before you start hammering nails, take time to plan out your fence layout. A well-thought-out design will help you avoid issues later on. Consider the following:
- Check property lines to ensure your fence is on your property.
- Visualize the fence placement and its relationship with existing structures and landscapes.
- Mark your fence line with stakes or chalk to get a clearer picture.
Using Low-Quality Materials
Choosing the right materials is crucial for the longevity of your wooden fence. Using low-quality lumber can lead to warping, cracking, and early deterioration. Instead, opt for pressure-treated wood or a decay-resistant species, like cedar or redwood. While these options may cost more upfront, they will pay off in the long run.
Ignoring Local Regulations
Many areas have zoning laws or homeowner association rules regarding fences. Ignoring these regulations can lead to costly fines or the requirement to remove your fence. Ensure you:
- Check local zoning laws for fence height and placement restrictions.
- Obtain any necessary permits before starting construction.
- Consult your homeowner association if applicable.
Improperly Setting Fence Posts
One of the most critical steps in building a fence is setting the posts correctly. If the posts aren’t set properly, your entire fence structure could become unstable. To avoid this mistake:
- Dig post holes deeper than the frost line if you live in a cold climate.
- Use concrete to set the posts for extra stability.
- Ensure the posts are plumb (vertically straight) before the concrete sets.
Skipping the Fence Stain or Sealant
Many people believe that raw wood is sufficient for outdoor fencing. However, untreated wood is prone to moisture damage, rot, and insect infestations. Applying a stain or sealant is crucial. Here are tips for doing it effectively:
- Choose a high-quality wood stain or sealant designed for outdoor use.
- Apply the stain every few years to maintain protection.
- Consider color options that match your home and landscape.
Not Considering Fence Style and Functionality
Understanding the style and purpose of your fence is essential to achieving the right appearance and function. Are you looking for privacy, decorative appeal, or security? Think about the following:
- Select a style that complements your home’s architecture.
- Choose a height that provides the desired privacy or security level.
- Consider adding features like lattice tops for decoration or to support climbing plants.
Neglecting Maintenance
Even a newly built wooden fence requires maintenance. To prevent your fence from falling victim to natural wear and tear, set a regular maintenance schedule. Here’s what to consider:
- Inspect the fence regularly for signs of damage, such as cracks or decay.
- Clean the wood to remove dirt, mold, and mildew.
- Reapply stain or sealant as needed for optimal protection.
Overlooking Neighbor Relations
Building a fence often requires a good relationship with your neighbors. It’s wise to discuss your intentions before beginning construction. Consider the following:
- Talk to your neighbors about your fence plans to avoid potential conflicts.
- Share the advantages of your project, such as improved privacy for both sides.
- Be open to their suggestions or concerns regarding the fence height or design.
Building a wooden fence might seem straightforward, but avoiding these common mistakes can make a significant difference in the final outcome. For more detailed guidance, consider visiting Wood Magazine or Fence Authority. These resources can help you with material selection and design ideas that suit your project.
Maintenance Tips to Keep Your Privacy Fence Looking Great
Owning a wooden privacy fence can offer you the seclusion and aesthetic charm that enhances your property. However, maintaining its appearance and integrity is crucial for longevity. By investing time to care for your fence, you ensure that it remains an attractive border for your yard. Here are some effective maintenance tips that will keep your How to Build Wooden Privacy Fence Panels looking great throughout the years.
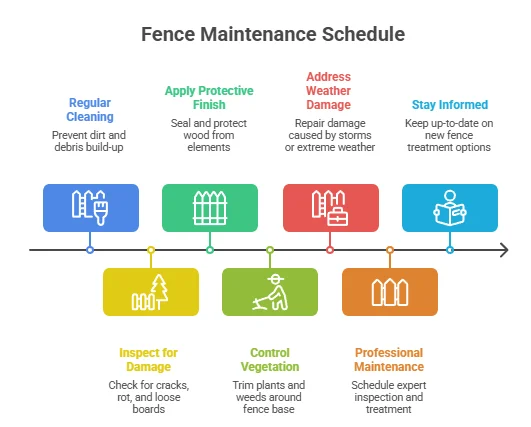
Regular Cleaning to Prevent Build-Up
One of the simplest ways to maintain your fence is by cleaning it regularly. Dust, dirt, and mold can accumulate over time, making your fence look worn. Here’s how you can clean it:
- Use a pressure washer to remove dirt without damaging the wood.
- For mild cases, scrubbing with soap and water is effective.
- Consider using a fence cleaner or a 50-50 vinegar-water solution to eliminate algae or mold.
Perform this cleaning once a year or as often as needed, especially after harsh weather conditions.
Inspect for Damage and Wear
Regular inspections will help identify issues before they become major problems. Look for:
- Cracks or splits in the wood.
- Loose or missing boards.
- Signs of insect infestation.
If you spot any damage, repair it promptly to prevent further deterioration. Replacing a single board is much easier than repairing an entire section!
Apply a Protective Finish
To protect your How to Build Wooden Privacy Fence Panels from the elements, applying a protective finish is essential. Here’s what to consider:
- Stain: A stain can enhance the grain of the wood while providing protection. Choose a semi-transparent or solid stain that works best for your style.
- Sealant: Applying a sealant will help repel water and prevent rot. Look for a sealant that is specifically designed for outdoor wood.
Generally, you should reapply stain or sealant every two to three years, depending on the climate.
Control Vegetation Around Your Fence
Vegetation growing close to your wooden fence can trap moisture, leading to rot. Here are some tips for managing this:
- Keep shrubbery and grass trimmed back from the fence line.
- Aim for a clearance of at least 6 inches from the fence to plants and soil.
- Consider a gravel border to facilitate drainage and keep vegetation at bay.
Address Weather Damage
Harsh weather can be tough on your wooden fence. Here are some proactive steps you can take:
- Inspect your fence after heavy storms for any signs of damage.
- Ensure that you have a good drainage system around the fence to reduce water damage.
- Consider storing outdoor furniture away from the fence area during winter months.
Professional Maintenance Option
If the task feels overwhelming, consider hiring a professional. They can offer expert advice and services tailored to your fence’s needs. Look for local fence maintenance services with good reviews to ensure you’re choosing the right provider.
Stay Informed on Treatment Options
Proper maintenance of your Wooden Privacy Fence Panels enhances its beauty and lifespan. To learn more about options for cleaning or protective treatments for your wooden fence, check out Fence Paint or Wood Magazine. These resources provide a wealth of information to guide you through your fence maintenance journey.
Conclusion
Building a Wooden Privacy Fence Panels can dramatically enhance your outdoor space while providing you with the seclusion and security you desire. By following the step-by-step guide, you can confidently create a sturdy and beautiful fence that meets your needs. Remember, choosing the right type of wood is just as important as following the proper construction methods. Selecting durable and weather-resistant materials will ensure your fence stands the test of time.
Equipping yourself with the essential tools is crucial for smoother construction, so be sure to gather everything you need before beginning your project. As with any DIY endeavor, it’s important to be aware of common mistakes that can lead to costly repairs or unsatisfactory results. Take your time to measure accurately, maintain consistency in your work, and seek help if needed.
Once your wooden fence panels are up, don’t forget about maintenance. Regular care will keep your fence looking fresh and extend its lifespan. Consider treatments like staining or sealing to protect against the elements. Additionally, periodic inspections for wear and tear will help you catch any issues before they become major problems.
By applying these insights and strategies, you’ll be well-equipped to create a functional and attractive wooden privacy fence. Enjoy your newfound sanctuary and take pride in having built a barrier that not only serves its purpose but also adds character to your home. Don’t forget to share your fencing journey with friends and neighbors, inspiring them to create their own private enclaves!