Building a Wooden Channel Gate Fencing can be a rewarding project that enhances the aesthetic appeal and security of your property. Following a clear step-by-step approach ensures that the final product is both functional and visually pleasing. Here’s how to get started and create a wooden channel gate that you can be proud of.
Gathering Your Materials
Before beginning any construction, collecting the correct materials is crucial. You will need:
- Wooden boards (select treated lumber for outdoor use)
- Metal channel (for the structure of the gate)
- Hinges
- Gate latch
- Concrete mix (for securing posts in the ground)
- Tools: saw, drill, level, measuring tape, and a hammer
Planning Your Design
Determine where you want to place your channel gate fencing. Consider the width and height of the gate you desire. Common widths range from 3 to 6 feet, depending on your needs. Sketching a basic design can help visualize the setup.
Measuring and Marking
Once you have a design, it’s time to measure. Use a measuring tape to accurately measure the width of the opening. Mark the ground where the posts will go using stakes or chalk. Typically, posts should be placed 6 to 8 feet apart, depending on the width of your boards.
Setting Up the Posts
The next step involves installing the gate posts:
- Dig holes for your posts at least 2 feet deep to ensure proper support.
- Place the posts in the holes, ensuring they are level.
- Mix the concrete according to package instructions and pour it into the holes around the posts. Allow it to cure for at least 24 hours.
Building the Gate Frame
After the concrete has dried, construct the gate frame:
- Using your sturdy wooden boards, cut two pieces for the vertical sides and two for the top and bottom.
- Join these pieces by creating a rectangular frame.
- Use the metal channel to reinforce the structure. Attach the channel inside the frame using screws.
Attaching the Gate
Now it’s time to put your gate in place:
- Position the gate between your posts.
- Attach hinges to the side of the gate that will open away from the fence.
- Secure the other end of the hinges to the post, ensuring the gate swings freely without obstruction.
Installing the Gate Latch
For added security, you must have a functional gate latch:
- Select a latch that suits your design and fits comfortably to the opening side of the gate.
- Follow the manufacturer’s instructions to attach it on the post, ensuring proper alignment with the gate.
Final Touches
Once the gate is erect and functional, you can add finishing touches to enhance both durability and aesthetics:
- Sand any rough edges to prevent splinters.
- Apply a water-resistant wood sealant to protect against the elements.
- Consider painting or staining your gate for an extra layer of protection and visual appeal.
Maintenance Tips
To keep your How to Build Wooden Channel Gate Fencing looking great, follow these maintenance tips:
- Inspect the structure regularly for signs of wear.
- Reapply wood sealant every few years.
- Ensure the hinges are lubricated to maintain smooth operation.
Essential Tools and Materials Needed for Wooden Gate Construction
Constructing a wooden gate can be a rewarding project, allowing you to enhance your property’s security and aesthetics. Before diving into the construction process, it’s essential to gather the right tools and materials to ensure a smooth and efficient build. Below is a comprehensive list tailored for your wooden gate project, making it easy for you to get started.
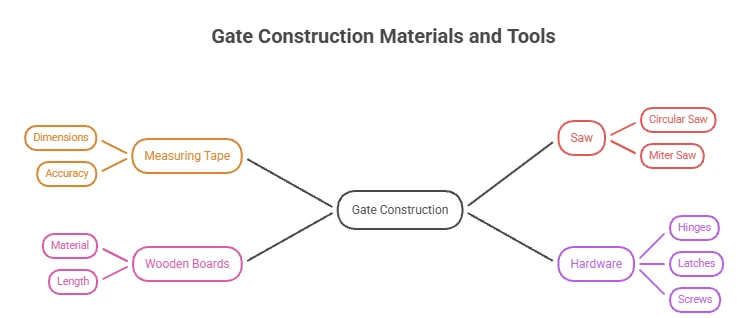
Essential Tools for Building a Wooden Gate
Having the right tools can significantly affect the quality and speed of your wooden gate construction. Here’s a breakdown of the essential tools you will need:
- Measuring Tape: A reliable measuring tape is crucial for accurate measurements to ensure your gate is built to fit its frame perfectly.
- Square: A carpenter’s square helps you ensure your cuts are straight and your corners are square.
- Level: A level tool is necessary to ensure that the gate hangs straight and operates smoothly.
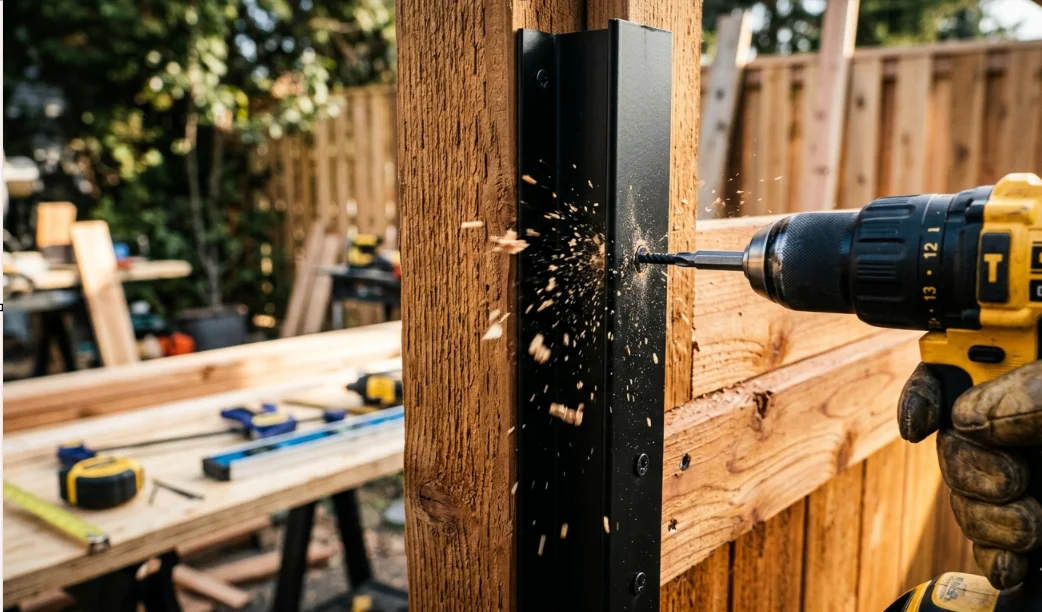
- Power Drill: A power drill will allow you to efficiently create pilot holes and drive screws into the wood.
- Saw: A circular saw or miter saw is ideal for making clean and precise cuts in wooden planks.
- Hammer: You will need a hammer for driving in nails, particularly if you plan to use them in conjunction with screws for added stability.
- Screwdriver: A set of screwdrivers (or a power screwdriver) is necessary for assembling the gate and attaching hardware.
- Sander: A sander will help you smooth out rough edges of wood for a polished finish.
- Wood Chisel: A chisel may be handy for making finer adjustments or crafting notches in your wood.
Materials Required for Wooden Gate Construction
Choosing the right materials is just as important as having the proper tools. Here are some of the materials you will need to build your gate:
- Wooden Boards: Select the type of wood that suits your needs best. Common choices include cedar for its resistance to decay or pressure-treated pine for durability.
- Gate Hardware: This will include hinges, screws, latches, and handles. Heavy-duty hardware is recommended for stability and longevity.
- Wood Glue: Using wood glue in conjunction with screws adds an extra layer of strength and stability.
- Paint or Stain: Finish your gate with weather-resistant paint or stain to protect it from the elements and match your home’s aesthetic.
- Sealant: A waterproof sealant will help your wooden gate withstand rain and dew, prolonging its lifespan.
Sample Materials and Tools Table
| Item | Description |
|---|---|
| Measuring Tape | Used for measuring the dimensions of the gate area. |
| Saw | Circular or miter saw to cut wood planks to the desired length. |
| Wooden Boards | Actual material needed for constructing the gate itself. |
| Hardware | Includes hinges, latches, and screws for fastening. |
Preparation and Planning
Before you start assembling everything, take the time to plan your project. Sketch out the design of your gate and calculate the materials you need based on the dimensions of your entryway. This not only helps in knowing what to buy but also allows for adjustments and improvements before construction begins.
Ensure your workspace is clear and organized. A clean environment can reduce the chances of accidents and mistakes. Consider laying out all your tools and materials beforehand so you can easily access everything during the build.
For more detailed guidance, resources, and materials, you can visit Wood Magazine and Family Handyman for tips on wooden gate construction.
By gathering the necessary tools and materials before starting your project, you can simplify the construction process and ensure a successful build. Your beautifully crafted wooden gate will not only provide security but also enhance the visual appeal of your property.
Common Mistakes to Avoid When Building Wooden Channel Gates
When building wooden channel gates, avoiding common mistakes can save you time and money. Building a sturdy and functional gate requires careful planning and execution. Here are some pitfalls to watch out for:
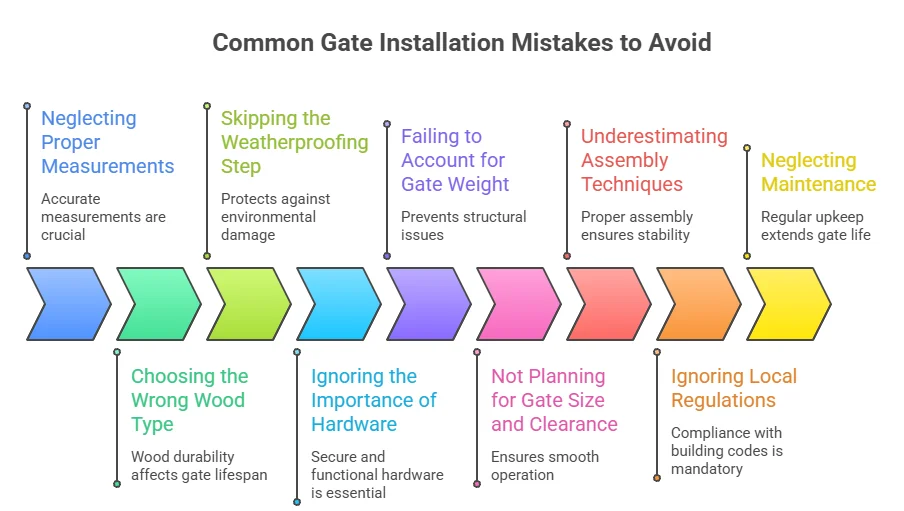
1. Neglecting Proper Measurements
One of the most crucial steps in any construction project is ensuring accurate measurements. If you miscalculate space requirements, your gate may not fit or function correctly. Always measure twice, and cut once. Consider the following tips:
- Take precise measurements of the entryway.
- Account for any slope or uneven ground.
- Double-check measurements before making cuts.
2. Choosing the Wrong Wood Type
The material you select plays a vital role in the durability and longevity of your wooden channel gate. Avoid softwoods like pine, as these are not ideal for outdoor use. Instead, consider using hardwoods such as cedar or redwood, which are naturally resistant to rot and pests.
3. Skipping the Weatherproofing Step
Many builders mistakenly assume that treated wood is enough to protect their gate from the elements. Weatherproofing your gate is essential to enhance its lifespan. Follow these tips:
- Use a quality sealant to protect against moisture.
- Apply paint or wood stain for added protection.
- Reapply treatment as needed, typically once a year.
4. Ignoring the Importance of Hardware
Choosing the right hardware is just as crucial as the wood. Using cheap or inappropriate hardware can lead to a structural failure or a gate that doesn’t function properly. Always invest in high-quality hinges and locks. The following tips can guide your selection:
- Opt for galvanized or stainless steel hardware to resist rust.
- Ensure that hinges are rated for the weight of your gate.
- Consider adjustable hinges for future modifications.
5. Failing to Account for Gate Weight
The weight of your wooden channel gate is vital for proper function and longevity. Overly heavy gates can cause wear on the hinges and may sag over time. To address this:
- Limit the width and height of the gate to manageable dimensions.
- Consider using lightweight materials, like hollow-core wood.
- Use additional support beams if necessary.
6. Not Planning for Gate Size and Clearance
When designing your channel gate, it is essential to consider not just the dimensions but also the clearance needed for smooth operation. Ensure that the gate has:
- Enough space to open without obstruction.
- Cuts made for any contours in the ground.
- Extra room to prevent binding when opening and closing.
7. Underestimating Assembly Techniques
Many builders overlook the importance of proper assembly techniques. If connections aren’t secure, your gate may loosen over time. Make sure to:
- Use appropriate joinery methods such as dovetail or mortise and tenon.
- Utilize quality wood glue alongside screws for added durability.
- Follow the order of assembly closely to avoid misalignment.
8. Ignoring Local Regulations
Depending on your location, there may be building codes or regulations that govern fence and gate construction. Always check local guidelines to avoid fines or having to redo your work.
9. Neglecting Maintenance
Many homeowners set and forget their wooden channel gates. Regular maintenance is vital to ensure your gate remains functional and aesthetically pleasing. Make it a habit to:
- Inspect hardware and replace any worn parts.
- Reapply weatherproofing treatments as necessary.
- Check alignment and adjust hinges occasionally.
By avoiding these common mistakes, you can create a beautiful and functional wooden channel gate that will last for years to come. For more in-depth research on building wooden gates, visit This Old House or The Family Handyman. Take your time, measure accurately, and ensure you use the best materials and techniques for a successful project.
Maintenance Tips for Long-Lasting Wooden Channel Fencing
Wooden channel fencing is a beautiful addition to any property, providing both privacy and aesthetic appeal. However, proper maintenance is essential to ensure that your wooden channel fencing lasts for many years. Here are some effective tips to keep your fencing in great shape.
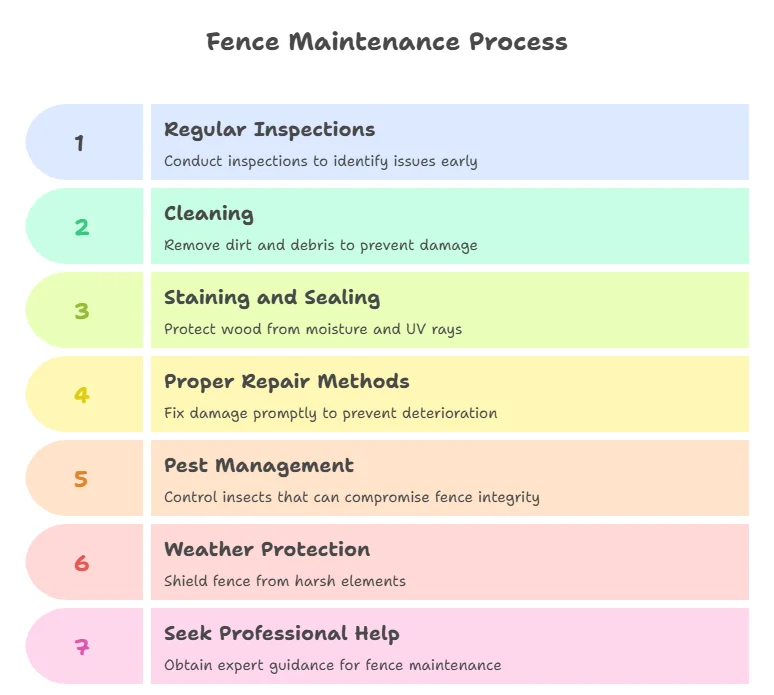
Regular Inspections
Start by conducting regular inspections of your wooden channel fencing. Look for any signs of wear, damage, or rot. Pay special attention to:
- Support posts
- Horizontal rails
- Individual boards
If you notice any issues, address them immediately to prevent further deterioration.
Cleaning Your Fence
Keeping your wooden channel fencing clean is crucial. Here’s how you can clean it:
- Use a soft-bristle brush to remove dirt and debris.
- Wash with a solution of mild detergent and water.
- For tougher stains, consider using a pressure washer on a low setting.
Make sure to rinse thoroughly to remove any soap residue that could harm the wood.
Staining and Sealing
One of the best ways to protect wooden fencing is by applying a stain or sealant. Here’s a simple guide:
- Choose a high-quality wood stain that offers UV protection.
- Apply the stain using a brush, roller, or sprayer in the direction of the wood grain.
- Ensure every surface is covered, including edges and ends, to prevent moisture ingress.
- Allow adequate drying time before exposing it to rain or moisture.
Repeat this process every few years as needed based on weather exposure.
Proper Repair Methods
Even with regular maintenance, damage can still happen. Here’s how to handle some common issues:
- For minor cracks: Use wood filler to repair and then stain over the area.
- For broken boards: Replace with new boards, ensuring they match the existing wood.
- For leaning posts: Dig up and re-set the post in concrete for stability.
Addressing these repairs promptly helps maintain the integrity of your fencing.
Pest Management
Wooden fencing can attract pests like termites and carpenter ants. To prevent infestations:
- Apply a pest repellant suitable for wood.
- Keep wooden elements away from direct soil contact.
- Trim vegetation and debris to reduce pest habitats.
Regularly check for signs of pest activity and take action quickly if you find any.
Weather Protection
Weather can take a toll on wooden fences. Here are ways to shield your fencing from extreme conditions:
- In snowy areas, trim back overhanging branches to reduce snow load.
- In sunny regions, a UV protectant can help prevent fading.
Additionally, ensure that your fence is installed with adequate drainage to avoid moisture build-up.
Professional Help
If your fencing needs extensive repairs or you’re unsure how to proceed, don’t hesitate to consult a professional. Experts can provide insights based on their experience and help restore your wooden channel fencing effectively.
For more detailed information about maintaining wooden channel fencing, visit Wood Magazine and Home Depot’s Tips.
Adopting these maintenance practices will not only extend the life of your wooden channel fencing but also ensure it continues to enhance the beauty and security of your property for many years to come.
Creative Design Ideas for Personalizing Your Wooden Gate Fencing
When it comes to wooden gate fencing, personalization can turn a simple structure into a unique expression of your style and taste. Here are some creative design ideas to inspire you as you customize your wooden gate fencing.
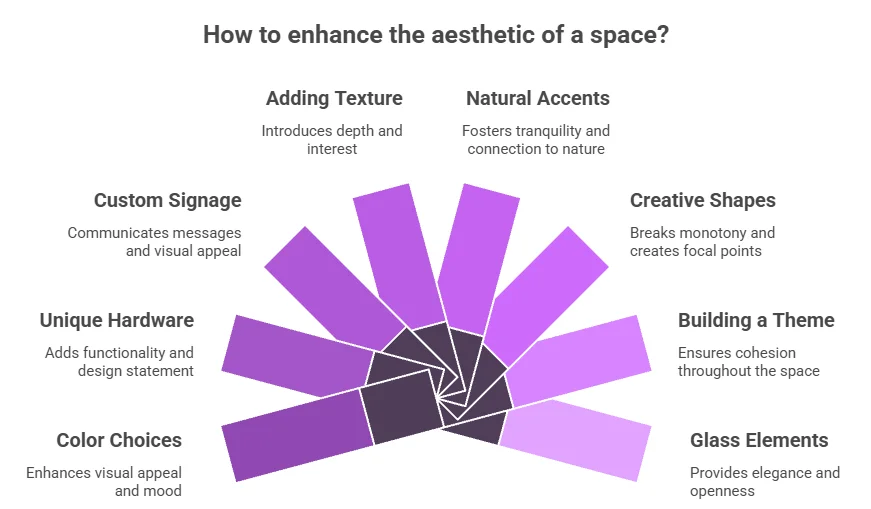
Color Choices
The color of your wooden gate can dramatically affect its overall look. Consider painting or staining your gate in shades that complement your home or garden.
- Bold Hues: Vibrant colors like deep red or royal blue can make a statement.
- Natural Tones: Staining wood in rich browns or reds enhances its natural beauty.
- Pastel Shades: Soft yellows or greens can create a whimsical feel.
Unique Hardware
Do not overlook the significance of the hardware you select. Unique handles, hinges, or locks can add flair to your wooden gate. Here are some options:
- Rustic Iron Hinges: These provide a sturdy yet decorative touch.
- Artistic Handles: Consider custom-designed handles or ones with intricate carvings.
- Decorative Locks: A stylish lock can be both functional and aesthetically pleasing.
Custom Signage
Adding personalized signage on your wooden gate can give your fencing personality. You could incorporate:
- Family Name Plaques: A beautiful way to claim your space.
- Welcome Signs: These can give a friendly, inviting vibe.
- Quotes: Add your favorite quote to inspire visitors.
Adding Texture
Consider mixing textures to create visual interest. Here are a few ways to do this:
- Combine Wood Types: Use different types of wood for a layered effect.
- Incorporate Metal Elements: Add metal screens or accents for a modern touch.
- Use Different Patterns: Horizontal slats paired with vertical ones can create dynamic designs.
Natural Accents
Integrating natural elements can enhance the beauty of your wooden gate fencing.
- Climbing Plants: Vines can soften the look and add greenery.
- Lighting: Install solar lanterns or string lights for ambiance.
- Flower Boxes: Placing flower boxes at the base of your gate can add a pop of color.
Creative Shapes
Don’t be afraid to break away from the conventional rectangular shape of gates. Here are some imaginative options:
- Arched Designs: An arch can create an elegant silhouette.
- Pointed Tops: For a more dramatic effect, consider a pointed or scalloped design.
- Custom Carvings: Intricate carvings can make the gate a work of art.
Building a Theme
Creating a theme throughout your property can unify the look of your gate with your garden or home. Consider these themes:
- Rustic Farmhouse: Use reclaimed wood and vintage elements.
- Modern Minimalist: Clean lines and a monochrome palette work wonders.
- Cottage Garden: A whimsical gate with floral designs or pastels fits well in cottage-style gardens.
Glass Elements
Glass details within your wooden fence can allow light while maintaining privacy. Here are ways to incorporate glass:
- Glass Panels: These can be framed in wood for a balanced aesthetic.
- Frosted Glass: Provides privacy while letting in light.
- Stained Glass Inserts: A colorful option that adds character.
DIY vs. Professionally Built
Deciding whether to build your wooden gate fencing yourself or hire a professional can depend on your skills and budget. Here’s a comparison:
| Option | Pros | Cons |
|---|---|---|
| DIY | Cost-effective, customized design potential | Time-consuming, requires skill |
| Professional | Expertise, speed of completion | Higher costs, less personal touch |
Your wooden gate fencing can be a reflection of your individuality. By exploring these creative ideas and incorporating them with care, you can create a structure that not only serves its purpose but also enhances the visual appeal of your property.
For more inspiration and wood-related projects, visit Wood Magazine or check Family Handyman for various woodworking ideas.
Conclusion
Building a Wooden Channel Gate Fencing can be a rewarding project that enhances the beauty and functionality of your property. By following a step-by-step guide, you not only ensure a strong and attractive fence but also gain a sense of accomplishment as you create something unique. Remember to gather all the essential tools and materials before starting your project; this preparation will streamline the building process and save you time.
While constructing your gate, be mindful of common mistakes that can compromise its stability and appearance. Taking the time to avoid these pitfalls will lead to a more successful outcome. Once your wooden channel gate is built, regular maintenance will be crucial for its longevity. Simple tasks, like cleaning and sealing the wood, can significantly extend the life of your fencing, preventing decay and damage caused by the elements.
Don’t forget about the aesthetics! Personalizing your wooden gate fencing opens up a world of creative design options. From selecting unique hinges to adding decorative elements, there are countless ways to reflect your personal style. Each choice you make contributes to a fence that is not only functional but also a striking feature of your landscape.
Building a Wooden Channel Gate Fencing combines practicality with creative expression. With thoughtful planning, careful execution, and consistent upkeep, your wooden gate will stand the test of time, serving as a welcoming entrance to your home. Embrace the process, and enjoy the transformation it brings to your outdoor space.