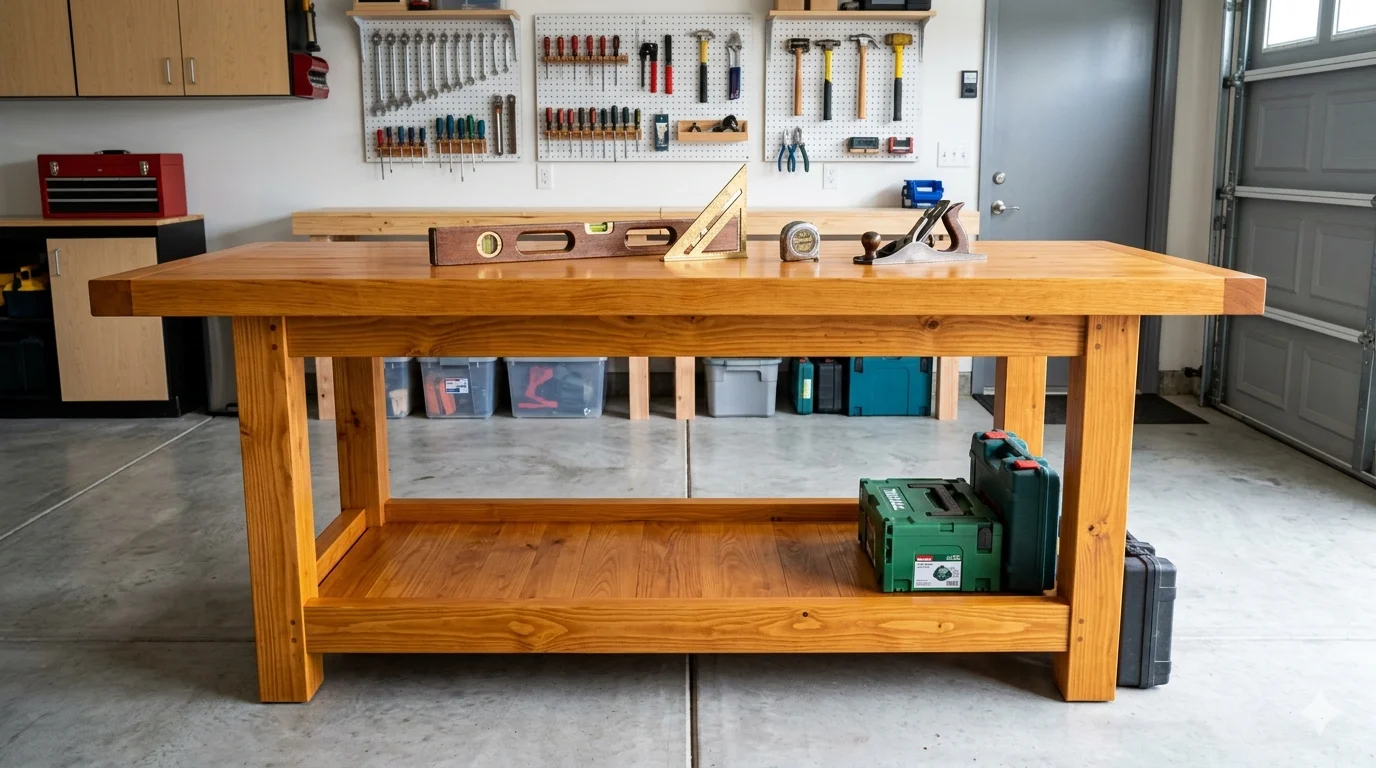
Creating a wooden workspace bench can enhance your productivity, provide a sturdy area for projects, and add a personal touch to your space. Building one can seem intimidating, but with the right tools and steps, it can be a rewarding experience. Here’s How to Build A Wooden Workspace Bench, step by step.
Gather Your Materials
Before starting, it’s important to gather all the necessary materials and tools. Here’s a list of what you need:
- Lumber: 2×4 or 2×6 wooden boards for the frame and top
- Wood screws: Exterior-grade screws for durability
- Wood glue: For added strength
- Sandpaper: 120 and 220 grit for smoothing surfaces
- Finish: Paint, stain, or sealant to protect the wood
- Tools: Drill, saw (circular or miter saw), measuring tape, square, and level
Measure and Cut the Lumber
Start by measuring the space where your bench will go. A common size for a workspace bench is 60 inches in length, 30 inches in width, and 36 inches in height, but feel free to adjust these measurements to fit your specific needs. Once you have your dimensions, you can begin cutting the lumber:
- Cut four pieces for the legs at your desired height (e.g., 36 inches).
- Cut two pieces for the width and two pieces for the length of the frame at the top (subtract the width of the legs).
- Cut a piece for the workbench surface, typically a single piece or several joined together to reach the desired dimensions.
Assemble the Frame
Now that you have all your pieces cut, it’s time to assemble the frame. Lay the two longer pieces parallel to each other and join them with the two shorter pieces. Use a square to ensure that the frame is perfectly rectangular. Secure the joints using wood screws, drilling them through the ends of the shorter pieces into the longer ones. Add wood glue to the joints for extra strength. Repeat the process for the lower shelf frame if you’re adding one.
Attach the Legs
With the frame secure, it’s time to attach the legs. Turn the frame upside down and position a leg at each corner. Ensure the legs are flush with the edges of the frame. Use screws to secure each leg in place. Not only does this provide structural integrity, but it also supports weight evenly across the bench.
Add the Surface
Once the frame and legs are secure, place your work surface on top. Center it, so it hangs evenly over the edges. Use wood screws to secure the top surface to the frame underneath. For additional stability, apply wood glue between the frame and the surface.
Sand and Finish
After assembly, it’s time to smooth out the surfaces. Sand down any rough spots using the 120 grit sandpaper first, followed by the finer 220 grit sandpaper. This step is crucial, as it helps prevent splinters and gives your bench a clean finish. Once you’re satisfied with the smoothness, it’s time to apply your finish. You can choose a wood stain for color or a sealant for protection against spills and wear. Apply the finish according to the product instructions and allow it to dry completely.
Organize Your Workspace
After your wooden workspace bench is complete, consider how you can organize your space. Adding tools trays, pegboards for hanging tools, or benches for seating can further enhance functionality. For more ideas and tips on DIY woodworking projects, visit Wood Magazine or explore woodworking forums.
Essential Tools and Materials for Crafting Your Workspace Bench
Creating a wooden workspace bench is a rewarding project that can tailor your environment to fit your work style. Before diving into construction, you must gather essential tools and materials for the job. This preparation is crucial to ensure a successful build, maintaining quality and efficiency. Here’s a comprehensive list and explanation of what you need to get started on crafting your very own workspace bench.
Essential Tools Needed

Having the right tools makes all the difference when building your workspace bench. Below are the vital instruments you should have:
- Circular Saw: A circular saw is ideal for making straight cuts on larger pieces of wood.
- Miter Saw: This tool is excellent for precise angle cuts, especially for joints.
- Drill: A powerful drill will be necessary for creating holes for screws and dowels. You may also want to have a variety of bits handy.
- Measuring Tape: Accuracy is key when building. A measuring tape helps you get the dimensions right.
- Square: A square will ensure that your cuts are straight and your angles are correct.
- Level: Using a level helps you make sure that your bench is perfectly horizontal.
- Sanders: To smooth the surfaces of your wood, a sander will be crucial. Both handheld and power sanders can be used.
- Clamps: Clamps hold your pieces together while they dry or while you’re mounting them.
Key Materials Required
The next step involves selecting the right materials for your workspace bench. The choice of materials greatly influences the durability and appearance of your bench.
- Wood: Choose sturdy wood such as plywood, oak, or maple for the surface and framework. Plywood can be a cost-effective solution that still offers strength.
- Wood Glue: This adhesive will help secure the joints in your construction more firmly.
- Screws: Opt for wood screws that are appropriate for your chosen wood species and thickness.
- Varnish or Stain: Finishing your wooden bench with varnish or stain not only enhances appearance but also helps protect it from wear.
- Legs: Depending on your design, you may need to purchase pre-made wooden legs or craft your own.
Optional Additional Tools
While the essential tools and materials are integral to your build, there are optional tools that could enhance your crafting experience:
- Router: A router allows for detailed cuts and designs, giving you more options in the styling of your workspace bench.
- Band Saw: This tool helps with curved cuts and can be handy for custom shaping your bench.
- Table Saw: If you plan on doing a lot of woodworking, a table saw is a significant investment that increases precision.
Setting Up Your Workspace
Before starting your project, it’s crucial to set up your workspace efficiently.
- Organize your tools so they are easily accessible.
- Make sure you have enough space to work comfortably without crowding.
- Keep safety gear, like goggles and gloves, close at hand.
By preparing all these tools and materials in advance, you can ensure a smoother building process. Don’t forget to check websites such as Wood Magazine or Popular Woodworking for additional insights and tips. With everything you need at hand, you are one step closer to creating a functional and beautiful workspace bench tailored to your needs!
Design Ideas to Customize Your Wooden Workspace Bench
Creating a functional and stylish wooden workspace bench can significantly enhance your productivity and enjoyment while working. Personalizing your bench with thoughtful design ideas not only optimizes space but also adds a unique touch that reflects your personal style. Here are several design ideas to help you customize your wooden workspace bench.
Choose the Right Wood Type
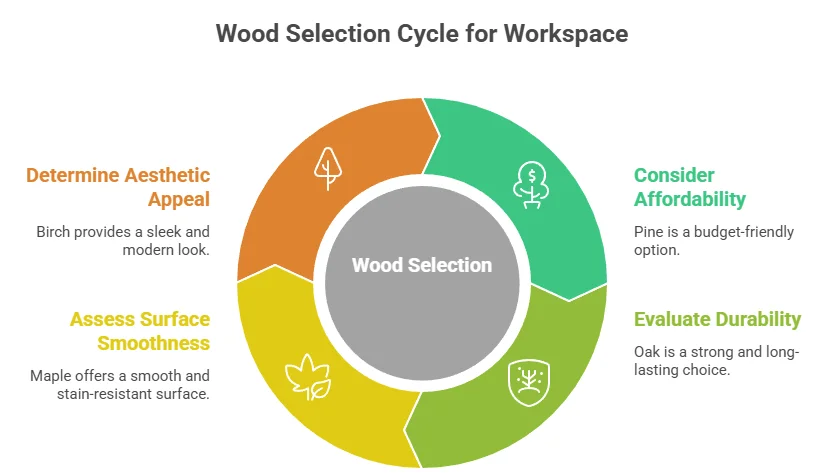
The type of wood you use can set the tone for your workspace. Here are a few popular choices:
- Pine: Affordable and easy to work with, pine is an excellent option for beginners. It offers a light color that can brighten up your workspace.
- Oak: Known for its durability and beautiful grain, oak is a classic choice for a sturdy bench. It can withstand wear and tear, making it ideal for heavy use.
- Maple: A fine hardwood, maple provides a smooth surface and is less porous than other types, making it resistant to stains.
- Birch: This wood is strong and has a fine grain, providing a sleek look that is perfect for modern designs.
Incorporate Storage Solutions
Storage is a crucial aspect of any workspace. Here are some inventive ways to introduce storage into your bench design:
- Drawers: Build drawers into the bench to store tools, materials, and other essentials. Make them deep enough to hold larger items comfortably.
- Shelves: Integrate open shelves beneath the work surface for easy access to frequently used tools and supplies. This keeps the workspace tidy and accessible.
- Magnetic Strips: Attach magnetic strips to hold metal tools securely. This keeps tools visible and within reach, making your workspace efficient.
Incorporate a Height-Adjustable Feature
Having a height-adjustable workspace bench can cater to various needs. Here are two common mechanisms:
| Mechanism | Details |
|---|---|
| Manual Crank | Allows users to adjust the height with a simple hand crank. It’s cost-effective and straightforward. |
| Electric Lift | Provides convenience with a touch of a button. This is perfect for those who may frequently change their working positions. |
Add Personal Touches
Your workspace should be a reflection of you. Incorporate elements that represent your personality, such as:
- Paint: A splash of color can energize your workspace. Choose a shade that motivates you or calms you, depending on your preference.
- Inlay Designs: Use contrasting wood species to create unique inlay patterns or designs. This adds visual interest and can make your bench stand out.
- Engravings: Consider engraving your name or a meaningful quote onto the wood. It’s a great way to personalize your bench and make it exclusively yours.
Integrate Technology
In today’s digital world, integrating technology into your workspace can enhance your efficiency. Here are some ideas:
- Built-in Outlets: Install power strips or USB charging ports into your bench. This allows you to keep all devices powered and accessible.
- LED Lighting: Adding LED lights under the work surface or above can illuminate the workspace without taking up space.
- Cable Management: Design compartments within the bench to hide cables and wires, which can declutter your workspace.
Understand the Importance of Ergonomics
To maintain comfort during long working hours, incorporate ergonomic design principles into your workspace bench:
- Ensure the work surface is at a comfortable height to prevent strain on your wrists and back.
- Include a padded chair or cushion if you’ll be sitting for prolonged periods.
- Consider adding adjustable footrests to enhance your comfort while working at your bench.
For more woodworking inspiration, you can check out Wood Magazine or Woodsmith. These resources provide a myriad of designs and detailed tutorials to help elevate your wooden workspace bench. By choosing the right materials, incorporating storage solutions, and personalizing your design, you can create a wooden workspace bench that not only meets your needs but also showcases your style. Happy building!
Tips for Maintaining and Caring for Your Workspace Bench
Maintaining and caring for your workspace bench is essential for ensuring its longevity and functionality. Whether you are using it for woodworking, assembling projects, or as a general work area, keeping your bench in good shape will enhance your productivity and creativity. Here are some effective tips to help you take care of your workspace bench.
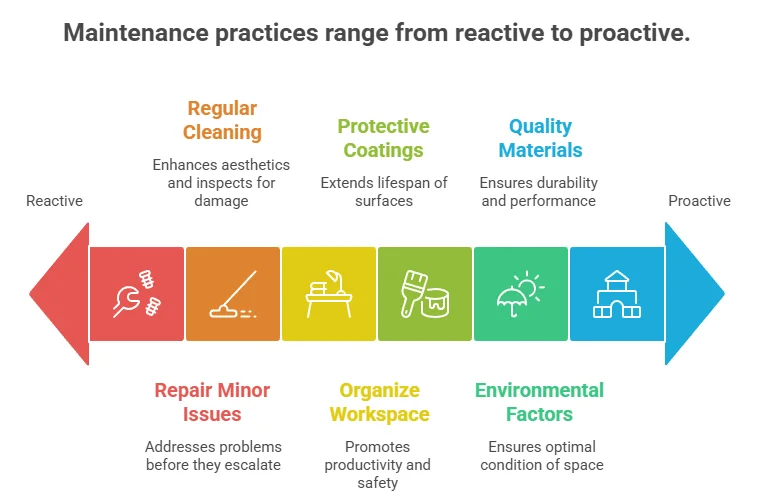
Regular Cleaning
The first step in maintaining your workspace bench is to clean it regularly. Dust, sawdust, and other debris can accumulate over time, affecting the quality of your work. Use the following cleaning tools:
- Broom or Vacuum: Remove large debris using a broom or vacuum cleaner.
- Damp Cloth: Wipe down the surface with a damp cloth to remove finer dust particles.
- Degreaser: For stubborn stains, a mild degreaser can help lift grime.
Inspect for Damage
Routine inspections are key to keeping your bench in optimal condition. Look for signs of wear or damage:
- Scratches and Dents: Examine the surface for any scratches or dents that could affect your work quality.
- Loose Joints: Check all joints and ensure they are secure to maintain stability.
- Rust: Keep an eye on any metal parts for rust; this can weaken your bench over time.
Repair Minor Issues
If you notice any minor issues during your inspection, address them promptly. Here are some quick fixes:
- Sanding: Lightly sand scratched areas to smooth them out.
- Glue: Use wood glue to reattach any loose pieces. Clamp them until the glue dries for a strong bond.
- Paint or Stain: Touch up paint or stain to protect the wood and improve aesthetics.
Apply Protective Coatings
Applying a protective finish to your workspace bench can help prevent damage. Consider these options:
- Varnish: A clear varnish can provide a durable waterproof layer.
- Oil: Mineral oil can nourish the wood while offering some protection.
- Wax: A layer of wax can help in sealing the surface and preventing moisture penetration.
Organize Your Workspace
Keeping your workspace organized not only helps maintain your bench but also makes your tasks more efficient. Implement organizational strategies:
- Storage Solutions: Use shelves, drawers, or storage bins to keep tools and materials organized and within reach.
- Labeling: Label bins and areas for quick identification of tools and supplies.
- Regularly Declutter: Schedule a regular decluttering session to remove unwanted items.
Protect from Environmental Factors
Environmental factors can also affect the health of your workspace bench. Take steps to protect it from:
- Moisture: Avoid leaving the bench in damp areas to prevent rotting or mold. Utilize dehumidifiers if needed.
- Direct Sunlight: Keep the bench out of direct sunlight to avoid warping or fading.
- Temperature Fluctuations: Try to maintain a consistent temperature in your workspace to avoid expanding and contracting wood.
Utilize Quality Materials
When building or upgrading your workspace bench, ensure you are using quality materials. Here are some suggestions:
- Wood Selection: Choose hardwoods like oak or maple that are sturdy and resilient.
- Fasteners: Use galvanized or stainless steel fasteners to resist rusting and wear.
- Surface Treatments: Look for high-quality varnishes or oils that will provide long-lasting protection.
Following these tips will help you maintain and care for your workspace bench effectively. As you invest time and care into your bench, you will find that it not only lasts longer but also enhances your overall work experience. For more information on woodworking techniques and maintenance tips, check out Wood Magazine for resources and inspiration. Remember, taking care of your workspace bench is an investment in your craft. By keeping it clean, organized, and protected, you can ensure that it remains a reliable tool in your workshop for years to come. Happy building!
Creative Uses for Your Wooden Workspace Bench Beyond Work

Many people associate a wooden workspace bench solely with projects, repairs, and crafts. However, this versatile piece of furniture can serve many creative purposes beyond just handling tools and materials. Let’s explore several unique ways you can use your wooden workspace bench to enhance your living or working space.
1. Gardening Station
Your wooden workspace bench can become an excellent gardening station. It provides a sturdy surface for potting plants, organizing gardening tools, and even starting seeds. This setup keeps your gardening supplies in one accessible location and ensures you have a comfortable place to work. To optimize the area, consider the following:
- Use storage bins to hold seeds, soil, and small tools.
- Add hooks to hang trowels and scissors.
- Implement a watering can or small hose nearby for convenience.
2. Creative Art Space
Your workspace bench can transform into a creative art area where you can paint, sculpt, or craft. The sturdy wooden surface provides a perfect backdrop for various artistic projects. Here are several tips to make this space fruitful:
- Designate specific areas for supplies such as brushes, paints, and media.
- Use a clear plastic covering to protect the wood from spills or splashes.
- Incorporate a hanging system for drying finished pieces.
3. DIY Home Bar
For those who enjoy entertaining, consider converting your wooden workspace bench into a DIY home bar. This approach gives your guests a cozy, inviting space to gather. You can build your home bar with these suggestions:
- Utilize the surface for mixing drinks and serving snacks.
- Install shelving beneath or above for bottles and glasses.
- Add bar stools for a casual seating arrangement.
4. Mini Library or Reading Nook
Your bench can also serve as an ideal spot for a mini-library or reading nook. By stacking books or magazines neatly, you create a cozy area to enjoy your favorite reads. Consider the following tips:
- Add cushions or a padded mat to enhance comfort.
- Incorporate a small lamp for proper lighting.
- Organize books by genre or color for visual appeal.
5. Child’s Craft Area
If you have children, your wooden workspace bench can become a dedicated craft area for their artistic endeavors. It provides a safe and sturdy place for kids to express their creativity. To make it kid-friendly:
- Add a protective surface cover to guard against messes.
- Use containers for art supplies within their reach.
- Incorporate a chalkboard or whiteboard surface for playful drawing.
6. Workshop for Hobbies
Whether you are into model building, sewing, or electronics, your workspace bench can be the perfect hobby station. Allocate a section for your favorite pursuits, making it a comfortable and efficient workspace. Here’s how:
- Organize tools and materials specifically for your hobbies.
- Ensure good lighting to focus on detailed work.
- Consider adding a vice or clamps for steady hands-on projects.
7. Fitness and Stretching Zone
Another creative use is as a fitness area where you can perform stretches or body-weight exercises. Position it in a way that allows you to flow through workouts easily. A few tips include:
- Add non-slip mats for safety.
- Use the bench to assist with exercises like push-ups or step-ups.
- Incorporate fitness equipment storage under or alongside.
Your wooden workspace bench is not only a tool holder but a multifaceted asset for your home. The potential uses are limited only by your imagination. By engaging in these creative applications, you can maximize both functionality and enjoyment from this simple but effective piece of furniture.
Conclusion
Building your own wooden workspace bench can be a rewarding project that enhances both your productivity and creativity. By following the step-by-step guide, you can confidently create a sturdy and functional surface tailored to your specific needs. Make sure to gather essential tools and materials beforehand, as this will streamline your building process and set you up for success.
As you design your bench, don’t shy away from personal touches. Customize it with unique features that reflect your style, whether it’s additional shelving for tools or a creative paint job. Remember to prioritize maintenance by regularly checking for any signs of wear and treating your wood to keep it looking fresh and inviting. The versatility of a wooden workspace bench doesn’t end with work tasks. Think outside the box and explore other creative uses, such as extra seating for gatherings or a display space for plants and decorations. Your bench can easily become a multifunctional piece in your home or workshop.
Building a wooden workbench empowers you to enhance your environment while developing your woodworking skills. Embrace the journey, enjoy the process, and let your workspace become a source of inspiration for all your projects! Your finished bench will not only be a testament to your hard work but also a valuable addition to your space for years to come.