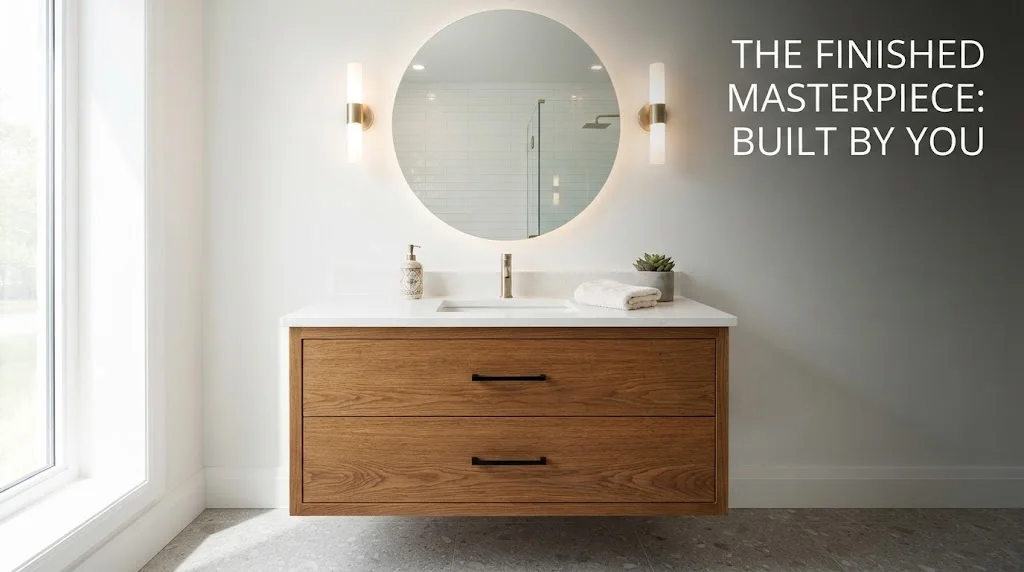
Building A Wooden Vanity Cabinet can be a rewarding and satisfying project. Not only does it enhance the beauty of your bathroom or kitchen, but it also provides essential storage space. Whether you are a seasoned DIYer or a beginner, this step-by-step guide will help you through the entire process.
Before you start, gather your tools and materials. You will need:
- Wood (plywood, hardwood, or MDF)
- Wood screws
- Nails
- Wood glue
- Sandpaper
- Wood stain or paint
- Cabinet handles
- Measuring tape
- Circular saw
- Drill
- Screwdriver
- Clamps
- Level
- Safety goggles
Measure the space
First, measure the space where you want to place the vanity cabinet. Sketch a design that fits within these measurements. Consider your style. Would a modern or classic look work better for you? Once you have a solid plan and the right dimensions, you’re ready to move on to cutting the wood.
Cut the wood
Next, cut the wood following your measurements. For a basic cabinet, you’ll usually need pieces for the top, bottom, sides, shelves, and doors. Use a circular saw for straight cuts, and always wear safety goggles to protect your eyes.
Assembling the cabine
When your pieces are cut, start assembling the cabinet. Begin with the frame by attaching the sides to the top and bottom pieces. Use wood screws and wood glue for extra durability. Ensure everything is square and level as you go, using a level tool to check. This is where clamps can be handy to hold the pieces while the glue dries.
Install the interior shelves
Once the frame is complete, install the interior shelves. The number and height of these shelves depend on your design and storage needs. If you want adjustable shelves, use shelf pins to make it easy to customize the height later on.
Work on the cabinet doors
After building the basic structure, it’s time to work on the cabinet doors. Cut two pieces of wood for the doors, making sure they fit well within the frame. Attach the hinges to the cabinet frame before securing the doors in place. Adjustments may be necessary to ensure the doors swing smoothly.
Sand all surfaces
Sand all surfaces of the vanity cabinet to eliminate rough edges and prepare for finishing. Start with a coarse grit sandpaper and gradually move to a finer grit for a smooth finish. This step not only improves the look but also increases adhesion for paint or stain.
Choose your finish wisely
Choose your finish wisely, whether it’s stain or paint. If you opt for stain, apply it with a brush and wipe off any excess. For paint, you may need to use a primer first, especially if you’re using a lighter color over a darker wood. Apply at least two coats, allowing proper drying time between coats.
Attach the cabinet handles
After the finish is fully dry, attach the cabinet handles. Mark the position carefully to ensure they are at a comfortable height. Drill holes for the screws, then secure the handles in place.
Check all seams and joints
Before placing your new wooden vanity cabinet in your desired spot, check all seams and joints to ensure they are secure. It’s also a good time to add any additional features, like a backing for stability or feet for easier cleaning.
Place your cabinet in position
Now you can place your cabinet in position and secure it to the wall if needed. This is crucial if you’re going for a freestanding design to prevent tipping.
Essential Tools You Need for Constructing a Vanity Cabinet

Building your own How To Build A Wooden Vanity Cabinet can be a rewarding project, allowing you to customize your space while saving money. To ensure your DIY experience is smooth and successful, you’ll need the right tools at your disposal. Below is a comprehensive list of essential tools you should have when constructing a wooden vanity cabinet, along with some tips on how to use them effectively.
Basic Hand Tools
Hand tools are indispensable for any woodworking project. Here are the basics:
- Tape Measure: A good-quality tape measure is essential for taking accurate measurements of your cabinet components.
- Woodworking Square: This tool ensures your cuts are square and your joints are perfect.
- Handsaw: A fine-toothed handsaw allows for precise cuts on your wood pieces.
- Chisel Set: Sharp chisels help you create clean joints and details. Opt for a range of sizes for versatility.
- Screwdriver Set: You will need both flat and Phillips screwdrivers to secure parts together.
Power Tools
Power tools can greatly ease your workload and increase accuracy. Here’s what you’ll need:
- Power Drill: A cordless drill makes it easy to drill holes and drive screws. Always keep extra batteries charged for convenience.
- Jigsaw: This is perfect for making curved and intricate cuts. Choose a fine blade for cleaner edges.
- Table Saw: A table saw is a major asset when cutting larger pieces of wood, giving you straight and uniform cuts.
- Miter Saw: Useful for making angled cuts, a miter saw helps in crafting edges and joints perfectly.
- Sander (Orbital or Belt): For a smooth finish on your cabinet, a sander will save you time and effort compared to hand sanding.
Measuring and Marking Tools
Having precise measurements is vital in cabinet construction. These tools will help you mark and measure accurately:
- Carpenter’s Pencil: Ideal for marking on wood with precision.
- Clamps: Use these to hold pieces together while the glue dries and during assembly.
- Level: Ensure that your cabinet is perfectly leveled during installation.
Finishing Tools
To achieve a professional finish, consider these additional tools:
- Paintbrushes and Rollers: For painting or applying stains to your cabinet.
- Lacquer or Polyurethane: Sealing products enhance durability and appearance; applying these evenly is key.
- Rags: Handy for smudging off excess stain or cleaning up leftover glue.
Safety Equipment
Don’t forget the importance of safety while working with tools:
- Safety Glasses: Protect your eyes from dust and debris.
- Dust Mask: Prevent inhalation of wood dust that can cause respiratory issues.
- Ear Protection: When using power tools, protect your hearing from loud noises.
By gathering these essential tools, you’ll set yourself up for success when constructing your Wooden Vanity Cabinet. Whether you’re a novice or a seasoned woodworker, having the right equipment will make the process far more enjoyable and efficient. For more detailed instructions and ideas, visit resources such as Wood Magazine and Woodworking Network for inspiration and tips.
Choosing the Right Wood and Materials for Your Project
When embarking on a woodworking project, especially one involving furniture like a vanity cabinet, the choice of wood and materials is incredibly important. Not only does the right wood ensure durability, but it also impacts the aesthetics of your finished project. Here, we will explore how to select the best wood and materials for your project, enhancing both function and style.
First, you need to consider the type of wood suitable for your vanity cabinet. Here’s a list of popular options:
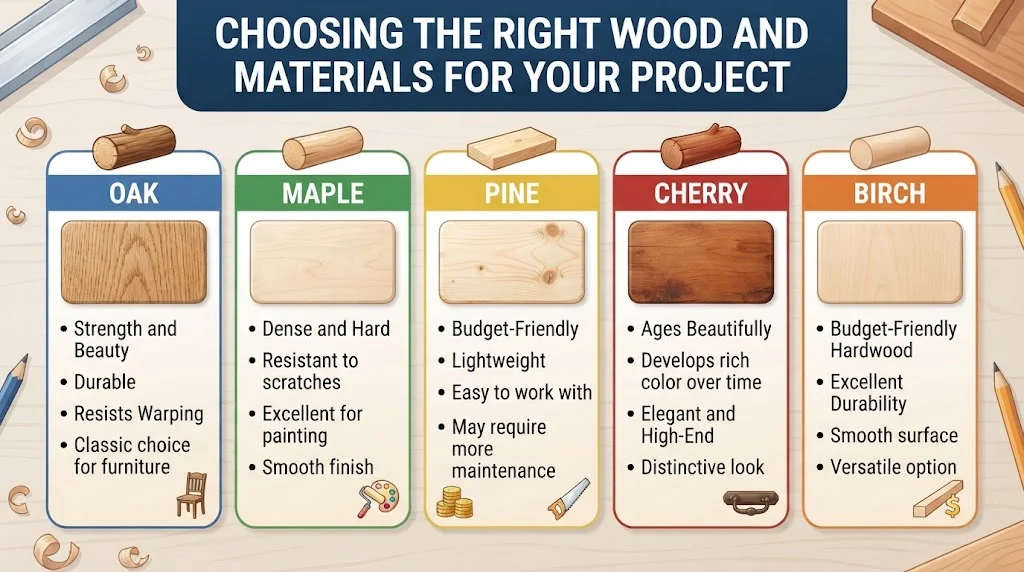
- Oak: Known for its strength and beautiful grain, oak is a fantastic choice for furniture. It’s durable and resists warping.
- Maple: This hardwood is dense and resistant to scratches. It’s a good option for painted finishes.
- Pine: If you prefer a budget-friendly option, pine is lightweight and easy to work with, though it may require more maintenance.
- Cherry: This wood ages beautifully, developing a rich color over time. It’s a fantastic choice for elegant and high-end cabinets.
- Birch: A great option for those looking for a budget-friendly hardwood with excellent durability.
Choosing the wood also depends on your personal style and how the cabinet will fit with the rest of your decor. Consider samples of each type to see how they appeal to you in your space. Wood choices can also extend to the type of finish you want to achieve. Natural finishes emphasize the wood’s natural beauty, while painted finishes can introduce colors that complement your home.
Next, you need to think about the components that will support the structure of your vanity cabinet. These include:
- Screws and Fasteners: Quality fasteners ensure your cabinet is stable. Opt for rust-resistant options if you use them in a bathroom environment.
- Wood Glue: A strong wood glue can act as an additional bonding agent, providing extra stability, especially in joints.
- Hardware: Choose handles and knobs that match the style of your cabinet. They can range from modern stainless steel to rustic bronze for an old-world feel.
Don’t forget about the finishing product you’ll use to protect your wood. Here are some choices:
- Stain: Adds color while showcasing the wood grain. It’s essential to pick one suitable for your wood type.
- Sealant: A clear sealant protects against moisture and stains, making it particularly important in bathrooms.
- Paint: If you prefer a colorful look, high-quality paint can give you a clean finish and protect the underlying wood.
Choosing high-quality materials not only improves the durability of your cabinet but also influences the overall finish and feel of your kitchen or bathroom. Working with wood requires patience; rushing the material selection process can lead to problems later on.
For an organized approach, consider using a table to compare different materials. Here’s a simple comparison table:
| Wood Type | Durability | Grain Appearance | Cost |
|---|---|---|---|
| Oak | High | Prominent | Moderate to High |
| Maple | High | Smooth | Moderate |
| Pine | Low to Moderate | Knotted | Low |
| Cherry | High | Fine | High |
| Birch | Moderate | Fine | Moderate |
When selecting your materials, also pay attention to the environmental impact. Choosing sustainably sourced wood helps reduce your carbon footprint and contributes to forest conservation. Consider visiting websites like Woodworkers Source or ForestEthics to learn more about sustainable options.
Ultimately, building your Wooden Vanity Cabinet can be a rewarding project. The right selection of wood and materials not only gives your cabinet function but also creates a stylish centerpiece in your home. Take your time assessing options and remember: good craftsmanship begins with quality materials.
Designing Your Vanity Cabinet: Tips and Considerations

Creating Wooden Vanity Cabinet allows you to enhance your space while showcasing your individual style. Whether you’re looking to maximize storage or simply make a design statement, there are key considerations when designing your cabinet. Here are some tips to help you get started.
Determine Your Style
Your vanity cabinet can be a focal point in your bathroom or dressing area. First, decide on the style that best fits your aesthetic:
- Modern: Clean lines, sleek finishes, and minimal hardware.
- Rustic: Featuring natural wood finishes, distressed paint, and traditional hardware.
- Traditional: Ornate details, classic shapes, and elegant materials.
- Transitional: A blend of traditional and modern elements, offering versatility.
Sizing and Layout
Once you’ve picked a style, consider the dimensions of your space. Measure the area where the cabinet will go, ensuring enough room for doors to open and access any plumbing. Here are some common sizes:
| Cabinet Type | Width | Height | Depth |
|---|---|---|---|
| Single Sink | 24”-36” | 30”-34” | 18”-22” |
| Double Sink | 60”-72” | 30”-34” | 18”-22” |
| Corner Cabinet | 30”-36” | 30”-34” | 22”-26” |
Functionality and Storage Solutions
Think about what you need to store. Effective storage solutions will help keep your space organized. Consider the following:
- Drawers: for smaller items like cosmetics and toiletries.
- Shelves: for larger items, such as towels and extra supplies.
- Pull-out trays: for easy access to hair dryers and styling tools.
Choosing the Right Materials
When building your vanity cabinet, selecting the right wood is vital for both durability and aesthetics. Common choices are:
- Maple: Strong and resistant to dents.
- Oak: Offers a classic look with excellent durability.
- Plywood: A cost-effective option with good structural integrity.
- Mahogany: A premium choice that adds luxury to your cabinet.
Finishing Touches
Don’t forget about the finishing touches that can really elevate your Wooden Vanity Cabinet. This includes selecting appropriate hardware and accessories:
- Knobs and pulls: Choose styles that match your overall aesthetic.
- Countertops: Quartz or granite can complement the wood beautifully.
- Backsplash: Tiles or wood cladding for added style and protection.
Lighting Considerations
Proper lighting can enhance both functionality and ambiance. Include options like:
- Wall-mounted sconces: on either side of the mirror for even lighting.
- LED strip lights: underneath the cabinet for a modern touch.
- Overhead lighting: to complement the main fixtures.
Seek Professional Advice
If you’re unsure where to start, consider consulting with a professional. Designers can provide insights specific to your needs and space. Visit Houzz for design inspirations or look for local contractors who specialize in custom cabinetry.
Designing your Wooden Vanity Cabinet can be a rewarding experience. The right approach will not only improve functionality but also enhance the overall look of your space. Remember to take your time in planning and consider the unique aspects that make your design personal. Ready to start your project? Don’t forget to gather all your supplies beforehand and consult resources like Better Homes & Gardens for project plans and tutorials.
Finishing Touches: Painting and Staining Your Wooden Vanity Cabinet
Painting and staining your Wooden Vanity Cabinet can transform it into a stunning centerpiece for your bathroom or dressing area. This final step not only enhances the aesthetic appeal but also protects the wood from moisture and wear. Whether you’re aiming for a sleek modern look or a rustic finish, applying the right paint or stain is crucial. Here’s a guide to help you achieve the best results.
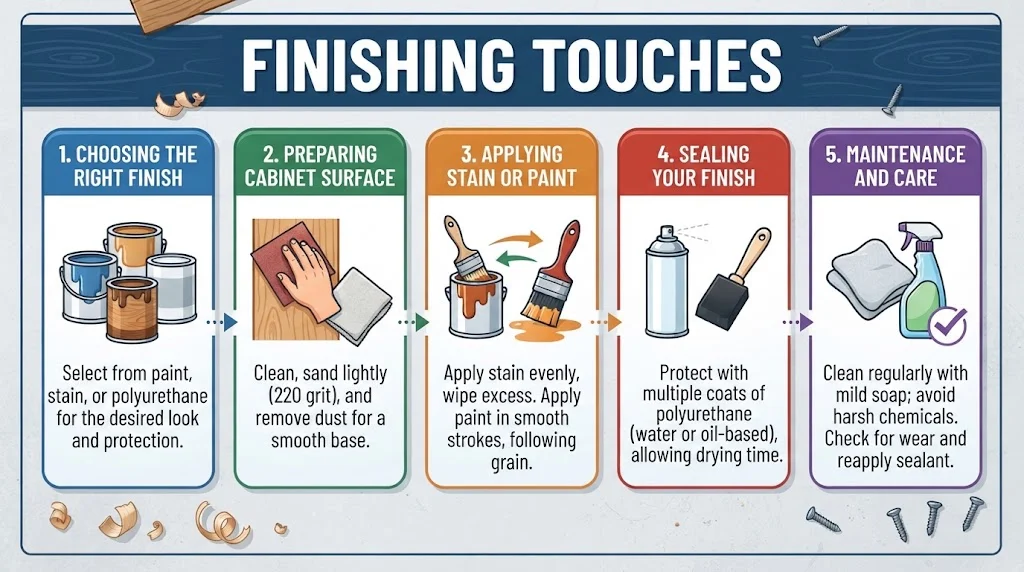
Choosing the Right Finish
Before diving into the application process, it’s essential to select the right type of finish for your wooden vanity cabinet. Here are some options:
- Paint: Provides a solid color and can be used to create a sleek, modern look. It also offers a wide range of colors.
- Stain: Enhances the natural grain of the wood while adding color. It’s perfect for those who appreciate the beauty of natural wood finishes.
- Polyurethane: A clear coat that protects both paint and stain, making it durable and water-resistant.
Preparing Your Cabinet Surface
Preparation is key to achieving a flawless finish. Follow these steps:
- Clean the Surface: Use a damp cloth to remove dust and grime. For tough stains, a mild detergent can help.
- Sanding: Sand the cabinet lightly with fine-grit sandpaper (220 grit) to ensure the paint or stain adheres properly. Pay attention to corners and edges. Always sand in the direction of the grain.
- Dust Removal: After sanding, wipe down the surface with a tack cloth to remove all dust particles.
- Priming (if painting): Apply a primer suitable for wood. This helps the paint stick better and reduces the number of coats needed.
Applying Stain or Paint
Now it’s time to apply your chosen finish. Here’s how:
For Stain:
- Use a brush or cloth to apply the stain, following the wood grain.
- Let the stain sit for a few minutes (follow the manufacturer’s instructions) and then wipe off the excess with a clean cloth.
- Allow it to dry fully before applying a second coat if a deeper color is desired.
For Paint:
- Stir the paint thoroughly to mix in any settled pigments.
- Using a high-quality brush or roller, apply the paint in even strokes, going with the grain.
- Let the first coat dry completely before applying the second coat to ensure even coverage.
Sealing Your Finish
After applying the stain or paint and allowing it to dry completely, it’s vital to seal your work:
- Apply a Clear Coat: Choose a water-based or oil-based polyurethane for enhanced protection. This will shield the surface from scratches and moisture.
- Light Sanding: Lightly sand between coats of polyurethane to ensure a smooth finish. Use fine-grit sandpaper and dust off thoroughly.
- Multiple Coats: Apply at least two to three coats of the clear sealant for maximum durability.
Maintenance and Care
To keep your wooden vanity cabinet looking its best:
- Avoid harsh chemicals when cleaning. Use a mild soap and water solution instead.
- Regularly check for wear and tear, especially around hinges and handles.
- Reapply protective coatings as needed based on wear.
For further guidance on painting and staining wood, you can visit Family Handyman for expert tips. Additionally, Wood Magazine offers valuable insights on various wood finishes.
Conclusion
Building your own Wooden Vanity Cabinet can be a rewarding project that adds both functionality and aesthetic appeal to your bathroom. By following the step-by-step guide detailed earlier, you can transform simple materials into a beautiful piece of furniture tailored to your needs. Remember, having the right tools is essential for a successful build. Investing in quality equipment will make the process smoother and ensure a professional finish.
Choosing the right type of wood is crucial. Engaging with various materials not only affects the durability of your vanity but also its overall look. Selecting the right wood ensures that your cabinet can withstand the daily demands while still showcasing elegance. Don’t forget to dedicate time to the design phase; considering factors such as size, style, and storage options can significantly improve the end result.
The final touches of painting and staining are where your personality shines through. This is your chance to make the vanity cabinet uniquely yours. By experimenting with colors and finishes, you can create a stunning visual impact that complements your bathroom decor.
Ultimately, the process of building A Wooden Vanity Cabinet is not just about crafting a practical item; it can also be an enjoyable and fulfilling journey. Embrace every step, from initial planning to the final coat of paint, and take pride in creating a space that truly reflects your style and functionality needs. Happy building!