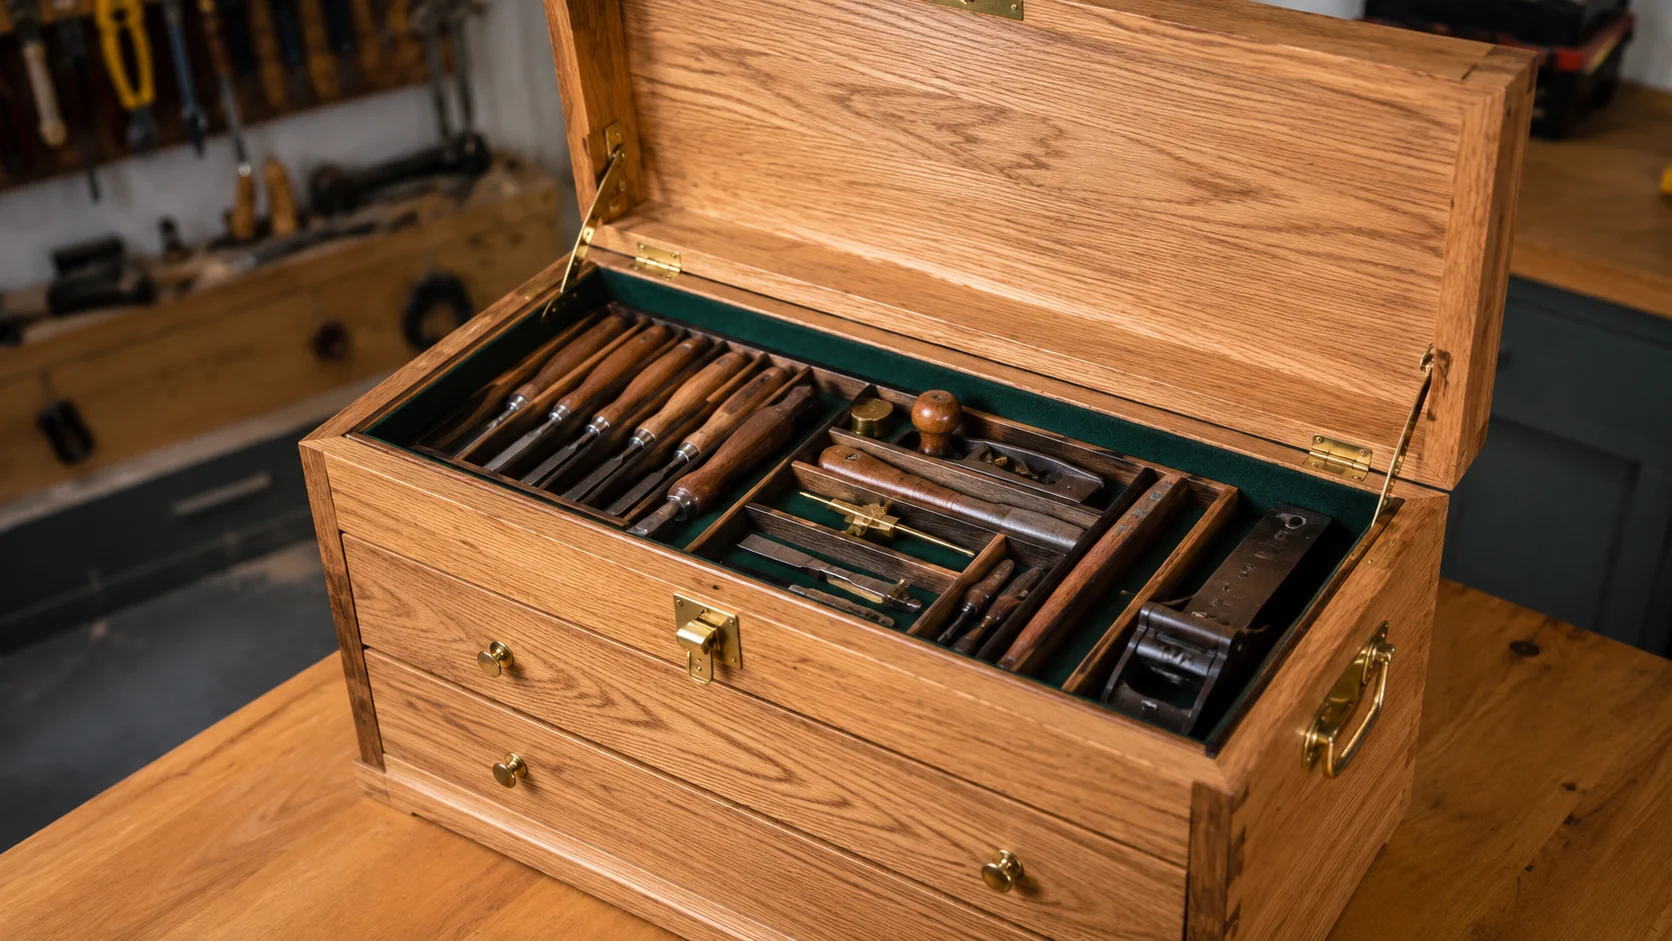
Building A Wooden Tool Chest can be a rewarding project, giving you a sturdy and functional place to store your tools. This guide will walk you through the steps, from planning to the final assembly, ensuring you create a durable chest that meets your needs.
Gather Your Materials and Tools
To start this project, you’ll need to collect all necessary materials and tools. Here’s a basic list:
- 1/2-inch plywood or solid wood boards
- Wood screws
- Wood glue
- Sandpaper (medium and fine grit)
- Wood finish or paint (optional)
- Hand saw or circular saw
- Drill
- Screwdriver
- Measuring tape
Make sure to have a clean workspace and good lighting. It’s important to measure twice and cut once as you proceed.
Designing Your Tool Chest
Before cutting any wood, take some time to design your chest. You can find plenty of free plans online, like those on Family Handyman or Wood Magazine. Consider the following:
- Size: How many tools do you need to store?
- Organization: Will you need shelves or compartments?
- Portability: Do you want it to have a handle?
Preparing the Wood
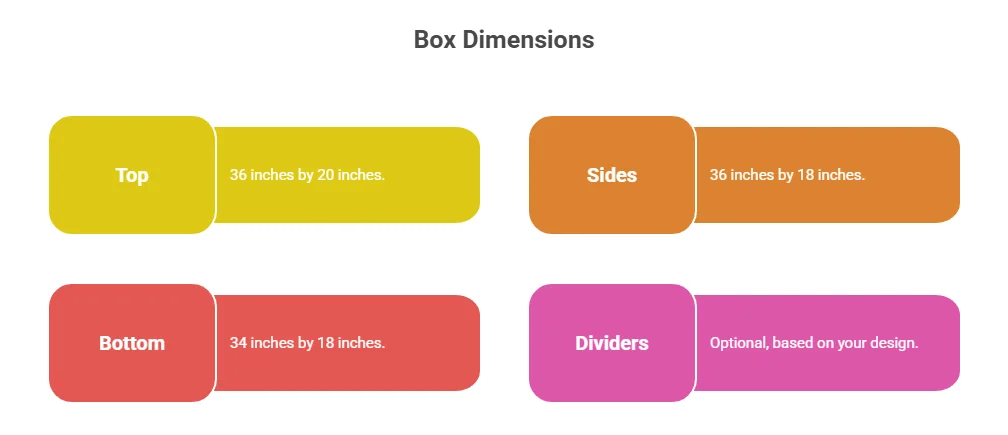
Once you have your design, it’s time to prepare the wood. Cut your pieces according to your plan. Here’s a basic breakdown of the typical parts:
| Part | Dimensions |
|---|---|
| Top | 36″ x 20″ |
| Sides | 36″ x 18″ |
| Bottom | 34″ x 18″ |
| Dividers | Optional, based on your design |
After cutting, sand all edges to prevent splinters. Start with medium grit sandpaper and finish with fine grit for a smooth touch.
Assembling the Tool Chest
Now comes the assembly. Here’s how to proceed:
- Attach the sides to the bottom: Position the side pieces vertically and attach them to the bottom piece using wood screws and wood glue for added strength.
- Add the back: Secure the back piece in place, ensuring everything is aligned properly. Check for squareness by measuring the diagonal corners of the structure.
- Attach the front and top: Next, add the front panel and secure it with screws, followed by the top panel.
- Create compartments: If you chose to have dividers, now is the time to install them inside the chest.
Finishing Touches
Once the assembly is complete, it’s time to think about finishing. You might want to:
- Apply a wood finish or paint to enhance the look.
- Install a handle on the top for easy carrying.
- Add a latch to keep it securely closed.
Be sure to allow adequate drying time if you are using paint or wood finish. A well-finished tool chest not only looks great but helps to protect the wood from moisture and wear.
Maintaining Your Tool Chest
After your tool chest is complete, regular maintenance can extend its life. Periodically check for any loose screws and tighten them. Keep the chest clean, and reapply finish when necessary to maintain its appearance.
Essential Materials Needed for Crafting Your Tool Chest
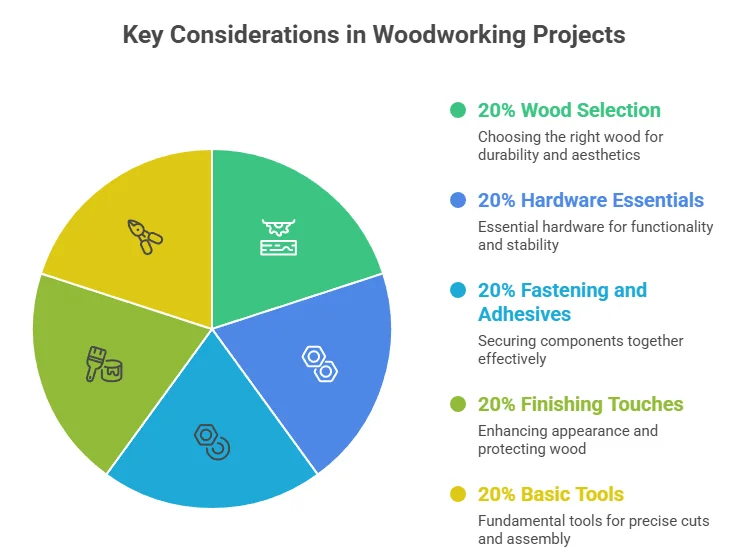
Building your own How to Build A Wooden Tool Chest can be a fulfilling woodworking project that not only gives you a practical storage solution but also allows you to express creativity. Before you get started on this rewarding journey, it is essential to gather the right materials. By having all the necessary supplies on hand, you can streamline the process and achieve the best results. Here are the key materials you will need to craft your own tool chest.
Wood Selection
The primary component of your tool chest will be wood. Choosing the right type ensures durability and a pleasing aesthetic. Here are some popular wood options:
- Plywood: Affordable and easy to work with, plywood is a common choice for tool chests. It offers strength and reliability without breaking the bank.
- Hardwood: If you prefer a more luxurious appearance, consider hardwoods like oak, maple, or cherry. Although more expensive, they provide stunning finishes and long-lasting durability.
- Softwood: Species like pine or fir can also work if you’re on a budget. They are lighter and easier to handle but may not be as robust as hardwoods.
Hardware Essentials
Besides the wood, you will need several hardware components to ensure your tool chest functions effectively:
- Screws: Use wood screws to join pieces together securely. Make sure they are the right length and gauge for your chosen thickness of wood.
- Hinges: When building a lid, durable hinges are necessary. Look for heavy-duty options that allow smooth operation and can support the chest’s weight.
- Handles: Comfortable handles will make it easier to lift and move your tool chest. Choose handles that are sturdy and easy to grip.
- Locks: To secure your tools, consider adding a lock. This will help protect your valuable equipment from theft or unauthorized access.
Fastening and Adhesives
A good tool chest requires strong joints. In addition to screws, you might need some adhesives to reinforce critical joints:
- Wood Glue: High-quality wood glue can increase the strength of the joints. It’s ideal for larger pieces where screws alone may not suffice.
- Clamps: To hold pieces in place while the glue dries, clamps are essential. They ensure the stability of your joints and help create a sturdy frame.
Finishing Touches
After constructing your wooden tool chest, adding the right finishing touches will enhance its appearance and longevity:
- Sandpaper: Smooth out rough edges and surfaces for a professional finish. You may need varying grits for different areas.
- Wood Stain: If you’d like to give your tool chest color, consider staining the wood. This will accentuate its natural grain and make it more visually appealing.
- Sealer or Varnish: A protective sealer or varnish will help preserve the wood and protect it from moisture damage. This is especially important if you’re storing your tool chest in a humid environment.
Basic Tools
In addition to your materials, you will need several tools to assist in the construction process. Here’s a checklist:
- Saw: A table saw or circular saw is ideal for cutting wood to length. A hand saw can also work for smaller projects.
- Drill: A power drill is useful for creating holes and driving screws efficiently.
- Screwdriver: Make sure you have a good screwdriver handy for manual adjustments and assembly.
- Measuring Tape: Accurate measurements are crucial. A reliable measuring tape will help ensure your pieces fit together well.
- Square: A framing square ensures that your corners are straight, which is essential for a well-built tool chest.
Once you have all these materials and tools ready, you’ll be on your way to creating a custom tool chest that not only meets your needs but also reflects your personal style. For more detailed guides about woodworking projects, be sure to check out resources on Wood Magazine and Woodworker’s Journal.
Tips for Design and Layout of Your Wooden Tool Chest
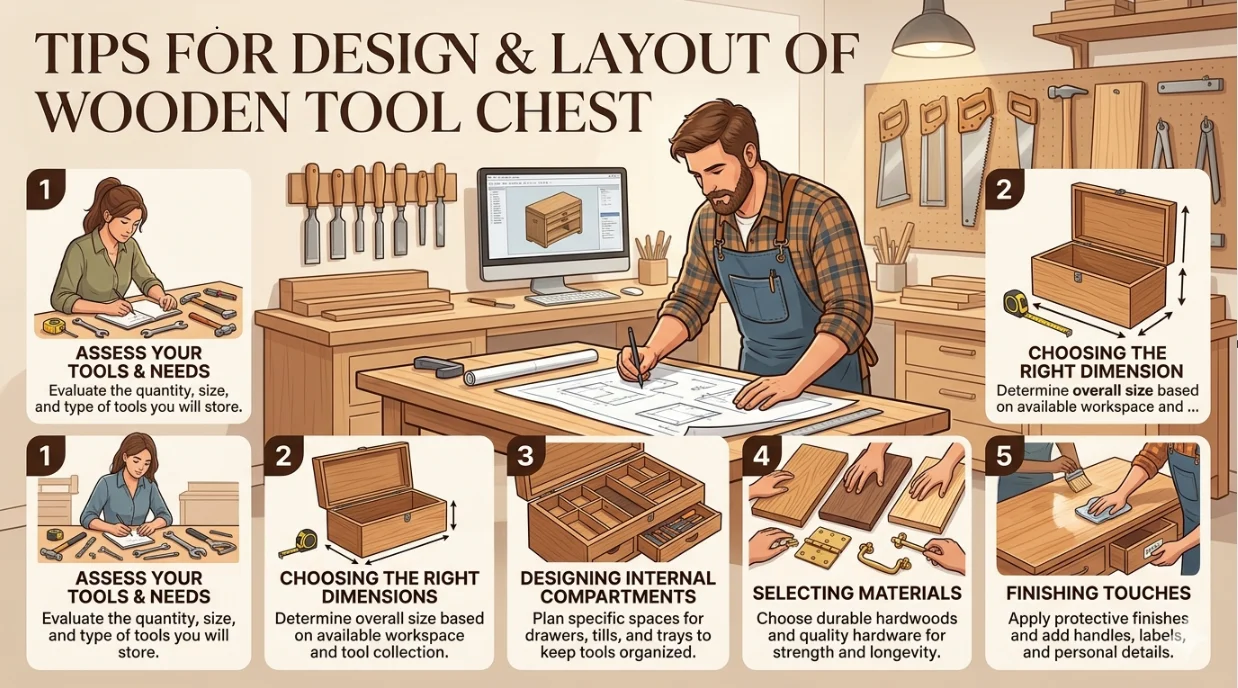
Creating A Wooden Tool Chest is a fulfilling project that not only helps organize your tools but also adds a touch of craftsmanship to your workspace. To build an effective tool chest, you need to consider its design and layout carefully. The key is to balance functionality with aesthetics. Here are some practical tips to guide you through the process.
Assess Your Tools and Needs
Before you start designing your wooden tool chest, take stock of the tools you want to store. Different tools require different amounts of space. Make a list of the tools and their dimensions:
- Hand tools (like hammers and screwdrivers)
- Power tools (like drills and saws)
- Accessories (like screws, nails, and tape measures)
By understanding what you need to store, you can create tailored compartments that make your tool chest more efficient.
Choosing the Right Dimensions
The size of your tool chest will depend on the tool collection and the space available. Typically, a tool chest should be:
- Low enough to access without hassle
- Wide enough to accommodate all tools
- Deep enough for larger tools
A standard measurement is around 24 inches tall, 30 to 36 inches wide, and 18 inches deep, but adjust as necessary based on your tools.
Designing Internal Compartments
Using internal compartments is essential for keeping your tools organized. Each tool should have its designated spot. Here’s how you can design them:
- Drawers: Use shallow drawers for small items, like screws and nails. Deeper drawers work well for larger tools.
- Bins: Separate bins for different types of tools can be beneficial. For example, have one for power tools and another for hand tools.
- Vertical Organizers: Consider adding vertical slots for tools like screwdrivers and chisels. This keeps them easily accessible and visible.
Selecting Materials
The material you choose plays a significant role in the durability and aesthetic of your tool chest. Here are some popular options:
| Material | Pros | Cons |
|---|---|---|
| Plywood | Cost-effective and strong | Can be less attractive |
| Hardwood (like oak or maple) | Durable and beautiful finish | More expensive |
| Softwood (like pine) | Light and easy to work with | Less durable over time |
Select the material that best fits your budget and the look you want to achieve.
Finishing Touches
Once your tool chest is built, consider adding some finishing touches to enhance its appearance and longevity:
- Stain or Paint: Choose a stain that enhances the wood’s natural beauty or paint it to match your workshop.
- Protective Finish: Apply a clear sealant to protect the wood from moisture and wear.
- Felt or Foam Liners: Adding soft liners in the drawers prevents scratches and keeps tools secure.
Maintain Your Tool Chest
After building your wooden tool chest, it’s important to maintain its condition. Regularly check for any signs of damage or wear. Dust and clean the interior to keep it tidy. Every once in a while, apply more protective finish to ensure its longevity.
For more detailed guides and tips on woodworking and tool storage, check out Wood Magazine or Popular Mechanics. These resources provide excellent insights and inspiration for your woodworking projects.
Common Mistakes to Avoid When Building a Tool Chest
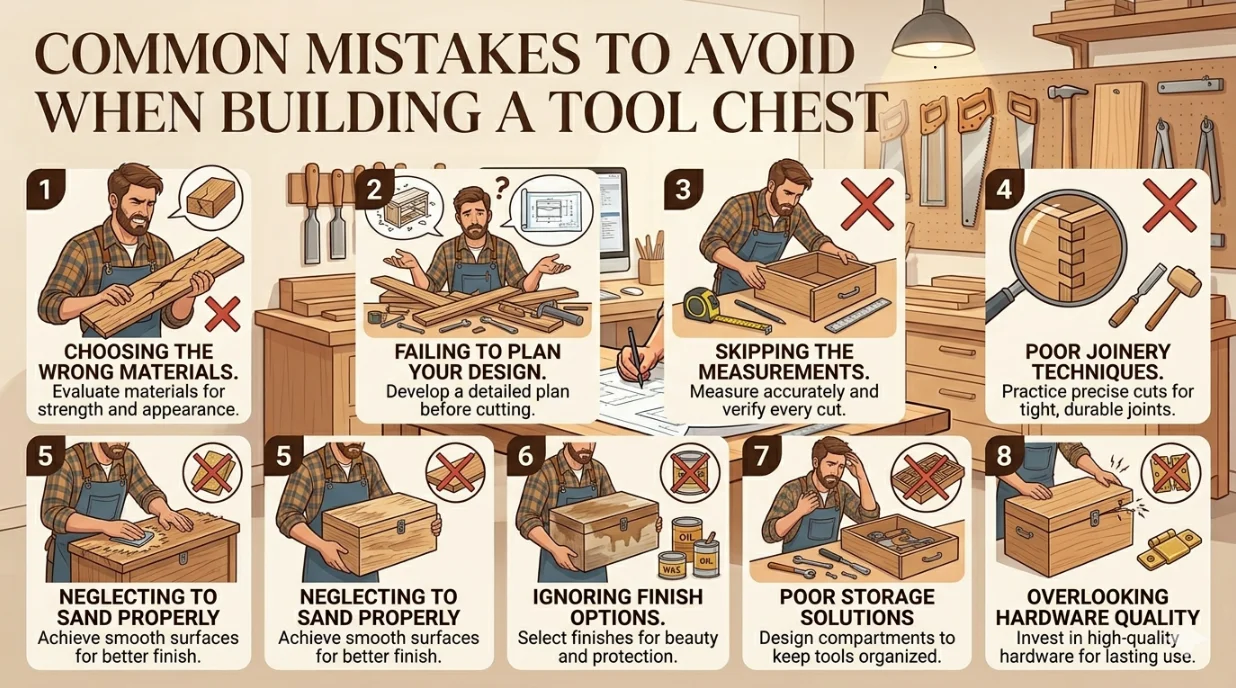
Building a How to Build A Wooden Tool Chest can be a rewarding project, but there are common pitfalls that can impact the quality of your build. Recognizing and avoiding these mistakes can save you time, materials, and frustration. Here are several key mistakes to steer clear of when you embark on this DIY journey.
Choosing the Wrong Materials
One of the first mistakes people make is selecting the wrong type of wood. While some softer woods may seem appealing due to their low cost, they might not withstand the wear and tear that comes with storing tools. Opt for hardwoods like oak, maple, or birch. These materials ensure durability and longevity, which is crucial for a tool chest that will see regular use.
Failing to Plan Your Design
A well-thought-out design is essential. Many builders jump right into cutting wood without a proper plan, leading to mistakes in dimensions and functionality. Always sketch your design beforehand. Consider the dimensions of your tools and how you will organize them within the chest. Use planning tools or apps that can help you visualize the chest before you start building.
Skipping the Measurements
Measure twice, cut once is more than just a saying; it’s a crucial rule that many forget. Accurate measurements are vital for your tool chest to fit well and be aesthetically pleasing. Always double-check your dimensions before making any cuts. Additionally, incorporating standard tool sizes into your design can prevent any surprises down the line.
Poor Joinery Techniques
The strength of your tool chest relies on solid joinery. Common mistakes include using insufficient or inappropriate joints. Simple butt joints may not offer enough strength for heavy items. Instead, consider stronger options like dovetail or mortise and tenon joints. They take more time but will provide much better support and durability. Be sure to practice your techniques on scrap wood before applying them to your finished piece.
Neglecting to Sand Properly
Sanding is often an overlooked step as builders rush through the process. However, neglecting to sand your project properly can lead to splinters and an unfinished look. Start with a coarse sandpaper and gradually move to finer grits. This ensures a smooth finish that not only looks good but is also safe to handle. Use a sanding block for flat surfaces and consider an orbital sander for larger areas.
Ignoring Finish Options
Once your chest is built, the finish you choose can make a big difference in durability and appearance. Many people skip or rush through this stage, opting simply for a stain or paint. Instead, take the time to research different finishes, such as polyurethane, lacquer, or oil-based products, and choose one that matches your needs and aesthetic goals. Finishing protects the wood from moisture and wear.
Not Storage Solutions
When building your wooden tool chest, think about organization. Mistakes can happen when builders fail to consider how tools will be stored. Including compartments, drawers, and dividers can help keep your tools organized and easily accessible. Plan where your most frequently used tools will go, and design your storage solutions accordingly.
Overlooking Hardware Quality
The last aspect to consider is the quality of the hardware used in your tool chest. Many builders cheapen the project by opting for low-cost handles, hinges, or latches. Always invest in sturdy, high-quality hardware that complements your build. This ensures that your tool chest not only functions well but also stands the test of time.
By avoiding these common mistakes, you can create a robust and functional wooden tool chest. Remember, the key is in the preparation and attention to detail. Proper planning and execution will lead to a final product that you’re proud to use and show off.
Maintaining Your Wooden Tool Chest for Longevity
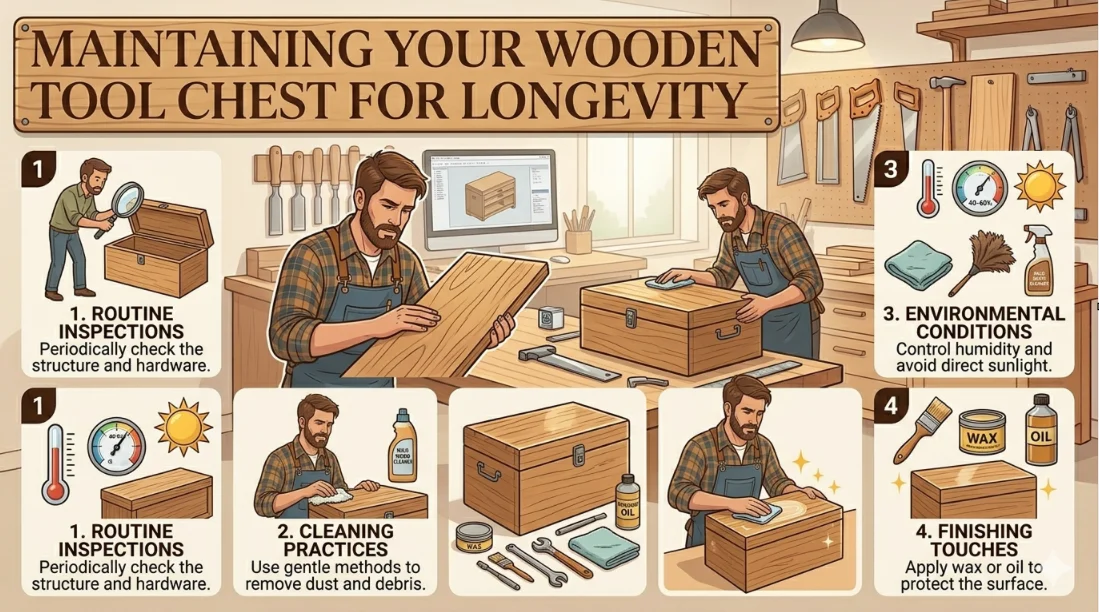
Owning A Wooden Tool Chest is not just about having a stylish storage solution; it’s about preserving the longevity of your investments. By maintaining your wooden tool chest properly, you can extend its life and ensure it continues to serve you faithfully for years. Proper care includes routine inspections, cleaning, and environmental considerations.
Routine Inspections
Start by making it a habit to inspect your tool chest regularly. Look for the following:
- Rust and Corrosion: Check the hinges, locks, and any metal components for signs of rust. A little rust can lead to bigger issues down the road.
- Wood Condition: Look for any cracks, splits, or signs of warping. These issues can weaken the structure of your chest.
- Pests: Inspect for wood-boring insects such as termites. These pests can cause significant damage if not addressed quickly.
Cleaning Practices
Keeping your tool chest clean is essential for its long-term care. Here’s how to do it right:
- Dust Removal: Use a soft cloth or a microfiber cloth to gently remove dust. This prevents any buildup that could harm the finish.
- Stain Treatment: For any stubborn stains, mix a solution of warm water and mild soap. Use a soft brush to gently scrub the area, then wipe clean with a damp cloth.
- Wipe Down Metal Parts: Use a rust inhibitor on the metal parts to keep them in top shape.
Environmental Conditions
The environment where you store your wooden tool chest can greatly affect its longevity. Here are some factors to keep in mind:
- Humidity: Keep your chest in a climate-controlled environment. High humidity can cause wood to swell, while low humidity can lead to cracks.
- Temperature: Aim for mild temperatures. Extreme heat can warp wood, and cold can make it brittle.
- Exposure to Elements: Avoid placing your tool chest in direct sunlight or near moisture sources like a sink. This will prolong its life.
Finishing Touches
Applying a wood finish can not only enhance the appearance of your tool chest but also protect it from the elements. Here are your options:
- Varnish: Provides a strong protective layer against moisture and wear.
- Oil: Enhances the wood’s natural look while providing some water resistance.
- Wax: Offers a natural finish and an additional layer of protection. Just remember to reapply it regularly.
For the best results, consider reapplying your chosen finish every few years, depending on use and exposure. This approach keeps the wood nourished and allows your unique piece to shine.
Storage Tips
Proper organization inside your wooden tool chest is just as vital as external care. Here are some tips for keeping things tidy:
- Use Organizers: Drawer dividers can help keep small tools and parts separated and easily accessible.
- Labeling: Invest in labels for your drawers and containers to find what you need quickly.
- Regularly Declutter: As tools accumulate, regularly go through and remove anything that is broken or that you no longer use.
Conclusion
Building A Wooden Tool Chest is a rewarding project that not only enhances your woodworking skills but also provides you with a practical storage solution. By following the step-by-step guide, you can create a beautifully crafted tool chest tailored to your needs. Remember, starting with the right materials is crucial; selecting quality wood and fasteners will ensure your tool chest withstands the test of time.
As you consider the design and layout, think about how you use your tools. Organizing your tool chest in a way that makes sense to you will improve your efficiency during projects. It’s equally important to be aware of common mistakes, such as underestimating the size you’ll need or skipping essential measurements. By planning ahead and paying attention to detail, you can avoid these pitfalls and create a functional piece.
Once your tool chest is complete, don’t forget the importance of maintenance. Regular care will keep your chest looking great and prolong its life. Simple tasks like keeping it clean and checking for any loose parts can make a significant difference.
Whether you’re a beginner or an experienced woodworker, creating your own tool chest can be a fulfilling journey. Not only will it serve as a valuable addition to your workspace, but it will also give you a sense of accomplishment. So roll up your sleeves, gather your tools, and get started on building a Wooden Tool Chest that reflects your style and meets your storage needs.