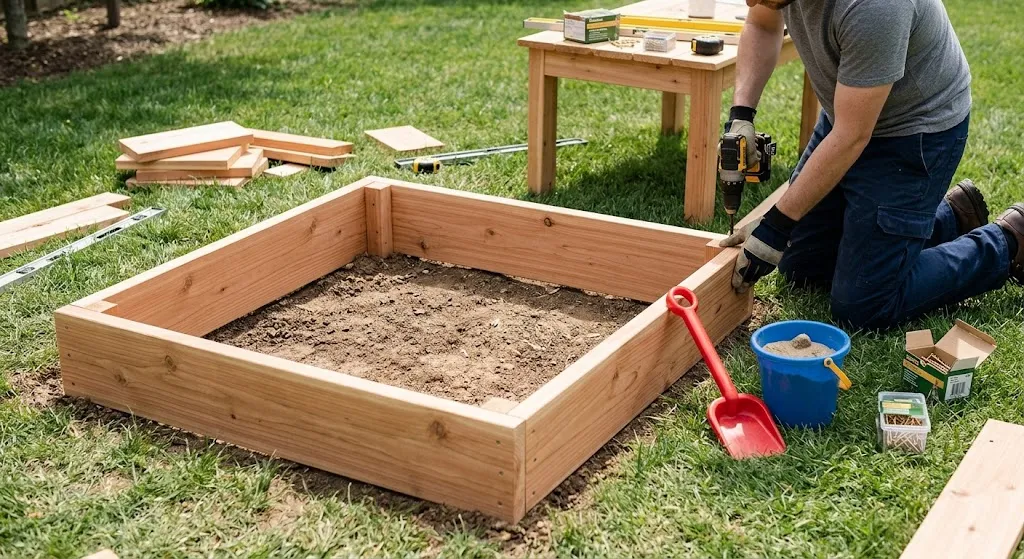
Building a Wooden Sandbox with Lid is a fulfilling project that can provide countless hours of fun for your children. Not only does it encourage creativity and outdoor play, but it also helps develop fine motor skills. Follow this step-by-step guide to create a durable, safe, and enjoyable sandbox that will last for years.
Gather Your Materials
Before starting your project, make sure you have all the necessary materials and tools. Here’s a list to get you started:
- Wood (cedar or pine are great options)
- Wood screws
- Sandpaper (medium and fine grit)
- Wood stain or sealant (optional)
- Hinges for the lid
- Outdoor fabric (optional, for a weed barrier)
- Power drill
- Saw (circular or hand saw)
- Measuring tape
- Level
Decide on the Size and Location
The first step is to choose the size of your sandbox. A common dimension is 4 feet by 4 feet, which allows enough space for several children to play comfortably. Think about where you want to place it; a flat, shaded area is ideal to keep the sand cooler and more enjoyable.
Prepare the Area
Once you have selected the location, clear the area of grass and debris. Ensure the ground is level by using a level tool. You can also dig a shallow hole about 2 inches deep to create a base for the sandbox.
Build the Sandbox Walls
Cut the wood to size. For a 4-foot by 4-foot sandbox, you will need:
| Part | Dimensions |
|---|---|
| 4 Side Panels | 4 feet x 2 feet |
| 2 End Panels | 4 feet x 1 foot |
Assemble the walls by screwing the side panels together. Ensure everything is square by measuring diagonally between the corners. Secure the corners with extra screws for stability.
Build the Base
You need a solid base to hold the sand. Cut additional wood planks to fit inside your walls, leaving a few inches of space for drainage. Screw them to the bottom of the walls. This will also help in preventing weeds from growing inside.
Add a Lid for Protection
A lid is essential for keeping the sandbox clean and preventing animals from using it. Construct the lid with plywood cut to fit over the sandbox. Use hinges to attach the lid securely to one side so that it can open easily. You might opt to add a latch to keep it closed when not in use.
Sand and Safety
After building your sandbox, it’s time to fill it with sand. Use clean, natural play sand that is safe for children. A good rule of thumb is to fill it about 6-8 inches deep. Additionally, it’s wise to place a layer of outdoor fabric at the bottom to prevent weeds from poking through.
Finishing Touches
Your sandbox is almost complete! Before letting your kids play, take some time to sand down any rough edges and apply wood stain or sealant to protect the wood from moisture. This can extend the life of your creation.
Encouraging Play
Once everything is done, invite them out to play! Provide toys such as buckets, shovels, and molds to enhance their experience. You can also consider landscaping around the sandbox to create a fun and inviting area.
For more expert tips on building a sandbox or to explore various designs, visit Better Homes & Gardens or check out The Spruce.
Building a sandbox is an excellent weekend project that will reward your family for years to come. Remember to take your time, be safe, and let your creative juices flow!
Essential Materials Needed for Constructing a Wooden Sandbox
Building a Wooden Sandbox with Lid can be a fun and rewarding project, providing endless possibilities for outdoor creativity. Before you start, it’s crucial to gather the right materials. Here’s a detailed list of everything you will need for constructing a wooden sandbox.
Basic Materials
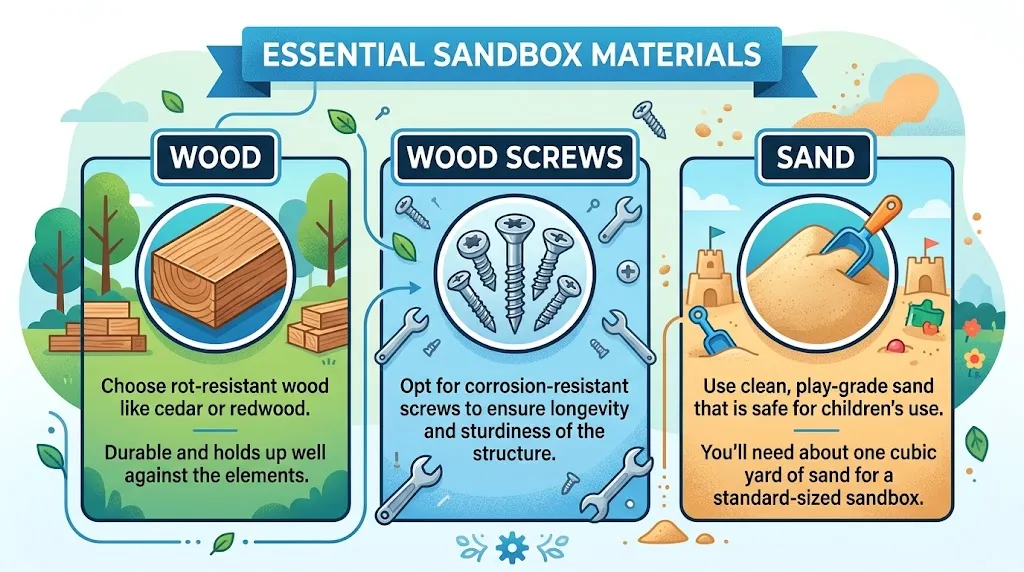
- Wood: Choose rot-resistant wood like cedar or redwood. These types are durable and hold up well against the elements.
- Wood Screws: Opt for corrosion-resistant screws to ensure longevity and sturdiness of the structure.
- Sand: Use clean, play-grade sand that is safe for children’s use. You’ll need about one cubic yard of sand for a standard-sized sandbox.
Tools Required
- Saw: A circular saw or handsaw will suffice for cutting wood to size.
- Drill: A power drill is essential for making pilot holes and driving screws.
- Screwdriver: A manual or power screwdriver will help secure everything tightly.
- Measuring Tape: For precise measurements to ensure accurate cuts and dimensions.
- Square: A carpenter’s square will help in making right-angle cuts and ensuring the corners are perfectly squared.
- Sandpaper: Use sandpaper to smooth out any rough edges after cutting the wood, preventing splinters.
Additional Supplies
Besides the main materials, these extra supplies will enhance your sandbox:
- Landscape Fabric: Placing fabric at the bottom helps prevent weeds and allows for drainage.
- Wood Sealant: Applying a non-toxic sealant can protect the wood from moisture and prolong its life.
- Hinges: If you plan on adding a lid to your sandbox, heavy-duty hinges will allow for easy opening and closing.
- Handles: These can be added to the lid for easy access.
Choosing the Right Size
The size of your sandbox may vary depending on the space you have and how many kids will use it. Common dimensions include:
| Size | Children Fit |
|---|---|
| 4 ft x 4 ft | 2-3 Children |
| 6 ft x 6 ft | 4-5 Children |
| 8 ft x 8 ft | 6+ Children |
Safety Considerations
When constructing a sandbox, safety should be a priority. Make sure to:
- Use non-toxic materials, especially for sealants and finishes.
- Sand should be free of debris and contaminants.
- Check for sharp edges or exposed screws, sanding them down as necessary.
For more guidance on safe playground practices, visit CPSC.
Where to Buy Materials
Finding the right suppliers can make the process smoother. Consider local hardware stores, lumber yards, or online retailers such as:
Many of these stores also offer online shopping and delivery options.
By gathering the right materials and tools, you can create a fun and safe wooden sandbox that will provide hours of enjoyment for children. Happy building!
Creative Design Ideas for Sandboxes with Lids
Building a wooden How To Build a Wooden Sandbox with Lid is a project that can enhance outdoor play for children while also providing an attractive feature in your yard. With creativity, you can design a sandbox that is not only functional but also fits seamlessly into your outdoor environment. Here are some design ideas to get you started.
Multi-Functional Sandbox
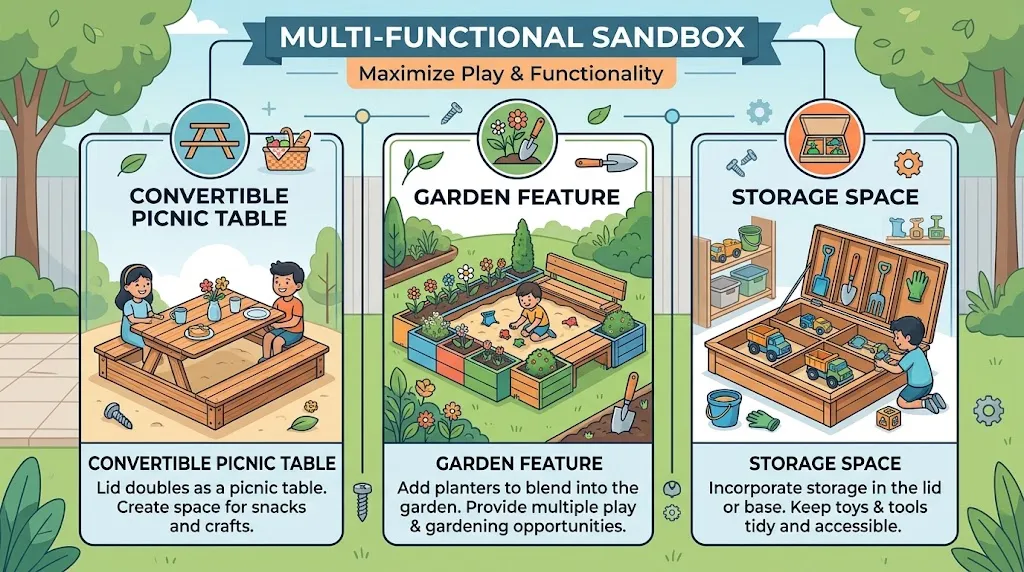
Consider creating a sandbox that serves more than one purpose. Here are some ideas:
- Convertible Picnic Table: Design the lid to function as a picnic table. When the sandbox is covered, it turns into a flat, usable surface for snacks and crafts.
- Garden Feature: Incorporate planters on the sides of the sandbox, allowing it to blend in with a garden area while providing multiple play opportunities.
- Storage Space: Add compartments within the lid for storing toys or tools, keeping everything tidy and accessible.
Creative Shaped Sandboxes
Instead of a traditional rectangular sandbox, consider fun shapes that stand out:
- Animal Shapes: Design your sandbox in the form of a turtle, fish, or any favorite animal. This playful shape will intrigue children and make playtime even more engaging.
- Custom Geometric Shapes: Use hexagons, stars, or even a large flower shape. Unique silhouettes can add an artistic touch to your yard.
- Theme-Based Designs: Incorporate themes such as a pirate ship or castle for imaginative play. Paint and decorate the lid accordingly, enhancing creativity.
Safety and Comfort Features
Making the sandbox safe and comfortable encourages more playtime:
- Cushioned Seating: Include built-in seating with padded benches or backrests to make it comfortable for parents watching their children.
- Covered Edges: Round corner edges to prevent injuries and make it kid-friendly.
- Weather-Resistant Materials: Use treated wood that withstands the elements, ensuring the longevity of the sandbox.
Decorative Touches
Add personality and charm to your sandbox:
- Fun Colors: Paint the sandbox in vibrant colors that appeal to children. You can incorporate designs like rainbows or keep it earthy to blend with nature.
- Interactive Lids: Create lids with built-in artwork or games, such as a tic-tac-toe board, which can be drawn or painted directly onto the surface.
- Sand Play Accessories: Install small hooks to hang tools or buckets on the side of the sandbox, making it easy for children to access their toys.
Technology
Modern sandboxes can have interactive elements:
- LED Lighting: For evening playdates, install weatherproof LED lights around the sandbox or underneath the lid to provide a soft glow at night.
- Solar Panels: Use solar energy to run small pumps for making a sand and water play area, giving children a versatile environment.
Choosing the Right Location
Thoughtfully consider where to place your sandbox: Position it in a shaded area to prevent overheating during sunny days. Ensure it’s close to your home for monitoring while providing good drainage. A flat, safe surface will protect children from any falls.
| Feature | Description |
|---|---|
| Size | Consider the number of children and space available in your yard. |
| Material | Use treated wood or composite materials for durability and safety. |
| Lid Mechanism | Ensure the lid is easy to open and close but secure enough to keep sand clean. |
Creating a wooden How To Build a Wooden Sandbox with Lid that includes these creative designs not only enhances its functionality but also makes it appealing to children. For more inspiration and tips on sandbox designs, visit Family Handyman and Better Homes & Gardens. Building a sandbox allows you to create a joyful space that encourages creativity and outdoor play.
Benefits of Having a Lid on Your Sandbox
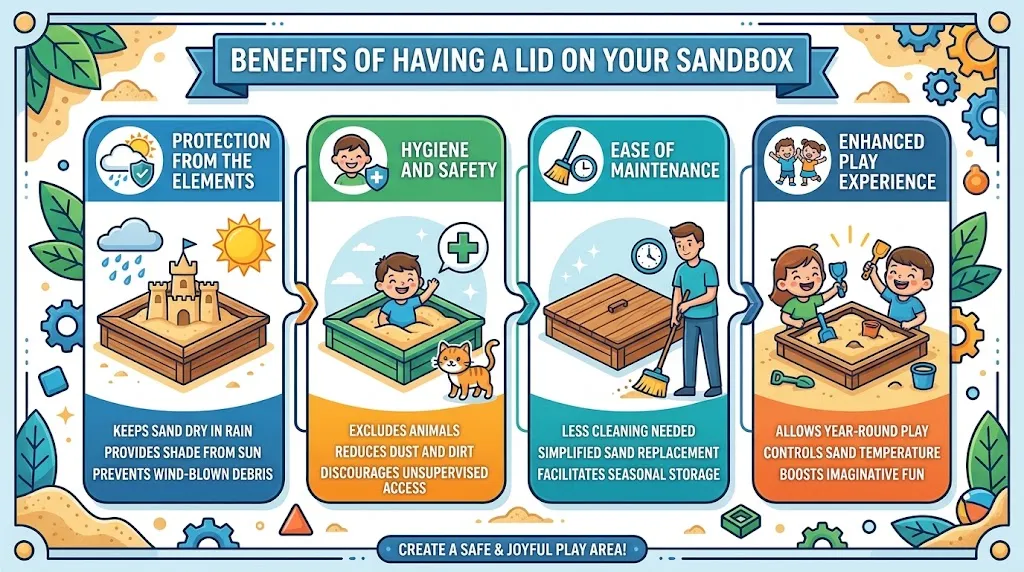
Building a Wooden Sandbox with Lid is a fantastic project that provides endless hours of fun for children. However, one key element that often gets overlooked is the importance of having a lid for your sandbox. A lid not only enhances the functionality of a sandbox but also offers several benefits that protect both the sand and the environment around it.
Protection from the Elements
One of the primary reasons for installing a lid on your sandbox is to safeguard it from various environmental elements. Weather can play a significant role in maintaining the quality of the sand. Here are some ways a lid helps:
- Rain Protection: Rain can wash away the sand’s consistency and introduce unwanted debris. A lid keeps the sand dry, ensuring that playtime is always convenient.
- Sun Protection: Sunlight can cause sand to heat up quickly and become uncomfortable for little hands and feet. A lid offers shade, making it more enjoyable for kids to play in.
- Wind Protection: Wind can blow dirt and leaves into your sandbox, cluttering the sand and making it less appealing. A lid prevents this from happening.
Hygiene and Safety
Another significant advantage of having a lid on your sandbox is the improved hygiene and safety it provides. There are several factors to consider:
- Animal Exclusion: Cats, dogs, and other animals may see your sandbox as a litter box. A lid keeps pets and wildlife from contaminating the sand, ensuring a cleaner play area for your kids.
- Dust and Debris Protection: A covered sandbox prevents dust, dirt, and other debris from settling into the sand, maintaining a cleaner environment.
- Child Safety: An enclosed sandbox with a sturdy lid discourages little children from climbing inside when they are not supervised, reducing the risk of accidents.
Ease of Maintenance
Maintaining a sandbox can be a chore, but a lid can significantly simplify the process. Here’s how:
- Less Cleaning: With a lid, you’ll spend less time cleaning out leaves, dirt, and other debris that can accumulate in an open sandbox.
- Simplified Sand Replacement: When the sand is protected, you won’t need to replace it as often. This saves both time and money in the long run.
- Seasonal Storage: If you live in an area with distinct seasons, a lid allows for easier storage of the sandbox during the off-season. Simply close it up for winter to prevent damage.
Enhanced Play Experience
A lid isn’t just about protection; it can also enhance the play experience for children. Consider these aspects:
- Year-Round Play: With a lid, children can enjoy the sandbox regardless of the season, allowing for creative play even in the colder months.
- Sand Temperature Control: A lid helps regulate the sand’s temperature, keeping it enjoyable for children to dig and build.
A lid on your wooden How To Build a Wooden Sandbox with Lid is not just an aesthetic choice; it’s an essential step in safeguarding the sand and enhancing the overall experience for your children. For additional inspiration and instructional videos on building sandboxes, visit Family Handyman. Building a sandbox with a lid ensures that your kids have a safe, clean, and enjoyable play area for many years to come.
Maintenance Tips for a Wooden Sandbox with Lid
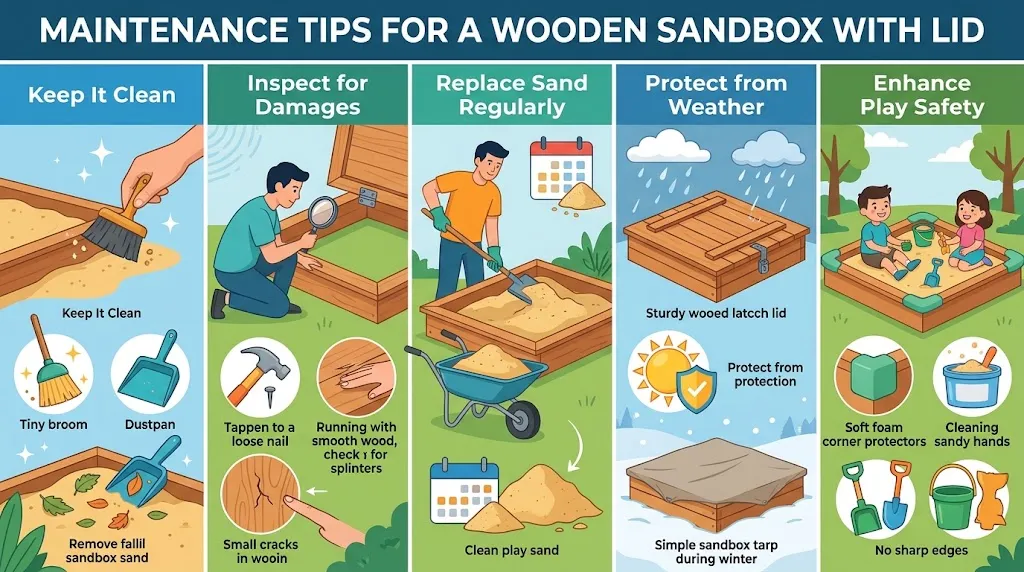
Owning a Wooden Sandbox with Lid can bring hours of joy and creativity to kids. However, to keep it a safe and fun play area, regular maintenance is essential. Proper care helps extend the life of the sandbox, ensuring your children can enjoy it for years to come. Here are some essential maintenance tips to help you maintain a wooden sandbox with a lid.
Keep It Clean
Regular cleaning is vital. Here’s how to clean your sandbox effectively:
- Remove Debris: Use a small rake or a brush to clear any leaves, dirt, or toys from the sandbox. This keeps the sand clean and safe.
- Rinse the Sand: Occasionally, you may want to rinse the sand if it becomes muddy. Be sure to let it dry completely before covering it with the lid again.
- Wash the Lid: Use mild soap and water to clean the lid, ensuring it’s free from mold or mildew.
Inspect for Damages
Every few months, check your sandbox for any damages. Look for:
- Splintering Wood: Sand down any rough edges to prevent splinters that could hurt your child.
- Loose Nails or Screws: Tighten or replace any fasteners that may have come loose over time.
- Warping: Check for warped wood which can be a sign of moisture damage. If the wood is severely warped, consider replacing that piece.
Replace Sand Regularly
The sand in your sandbox may need replacing after several months of play. Here are some tips:
- Frequency: Generally, replace the sand every one to two years depending on usage.
- Type of Sand: Use play sand that is specifically designed for sandboxes, as it is cleaner and safer for children.
- Storage: Store extra sand in a dry place to keep it clean when not in use.
Protect from Weather
Weather can be tough on wooden sandboxes. Here’s how to protect it:
- Use the Lid: Always cover the sandbox with its lid when not in use. This keeps out rain and prevents animals from using it as a litter box.
- Seal the Wood: Every few years, consider applying a wood sealant to protect against moisture damage. Make sure it’s non-toxic.
- Shade: If possible, place your sandbox in a shaded area. This helps prevent sun damage and keeps the sand cooler.
Enhance Play Safety
Keeping your sandbox safe is crucial for the well-being of your child. Here’s how:
- Check for Pests: Regularly inspect the sandbox for bugs or pests. If you find any, consider using non-toxic pest control methods.
- Monitor Sand Consistency: Ensure the sand stays dry and doesn’t clump together, as this can indicate moisture issues.
- Teach Children: Teach kids to respect the space. For instance, they should avoid eating or drinking in the sandbox to keep contaminants out.
If you want more details on building or maintaining wooden sandboxes, you can check resources such as the Family Handyman and Better Homes and Gardens.
By adhering to these maintenance tips, you’ll ensure that your Wooden Sandbox with Lid remains a safe and enjoyable space for your children. Regular upkeep not only prolongs the life of the sandbox but also ensures that your kids have a clean and fun environment to play in. So go ahead and make those memories while keeping things clean and safe!
Conclusion
Building a Wooden Sandbox with Lid is a rewarding project that provides children with countless hours of imaginative play. By following the step-by-step guide, you can create a safe and inviting space for your kids to explore and enjoy. Essential materials like treated wood, screws, and sand are fundamental to constructing a durable sandbox that will last for years.
Designing your sandbox with creativity in mind adds a personal touch, allowing you to incorporate elements such as built-in seating or colorful designs. A lid not only helps to keep the sand clean and free from pests but also protects it from rain and other weather, ensuring that your kids can enjoy their sandbox at a moment’s notice.
Regular maintenance is key to preserving the longevity of your Wooden Sandbox with Lid. Simple tasks, like cleaning the lid and checking for wear, can make a significant difference in keeping your sandbox a healthy and safe play area.
By taking all these factors into account, you can build a wonderful sandbox that fosters creativity and outdoor play while providing comfort and peace of mind for you as a parent. So roll up your sleeves, gather your materials, and get started on this delightful project that your children will cherish for years to come. Enjoy the journey of building not just a sandbox, but a special space for discovery and joy.