
Building a wooden loft bed can be a rewarding project that maximizes space and adds an elegant touch to your room. This guide will walk you through the steps involved in crafting a sturdy and stylish loft bed. By following these instructions, you’ll create an impressive centerpiece that showcases your woodworking skills while also being functional.
Before you start, gather the necessary tools and materials. Here’s a quick list of what you’ll need:
- Wood planks (2x4s, 2x6s, and plywood for the mattress base)
- Wood screws
- Wood glue
- A drill and drill bits
- A saw (circular or miter saw)
- Sandpaper or a sanding machine
- A measuring tape
- A level
- Safety goggles and gloves
Next, let’s run through the step-by-step process for building your wooden loft bed.
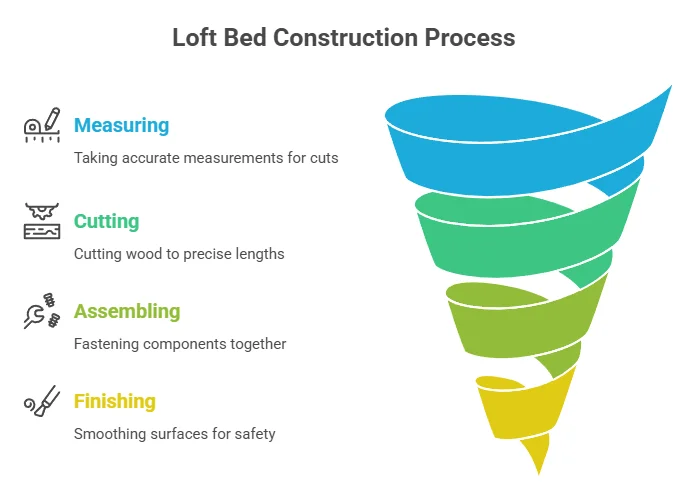
1. Design and Planning
Before cutting any wood, you need to create a design. Measure the height, width, and length of your loft bed. Standard loft beds are typically around 5 to 6 feet tall, allowing for adequate headspace underneath. Your design should also include a mattress size (usually twin or full). Sketch out your plan on paper, keeping in mind the location of your bed and accessibility to stairs or a ladder.
2. Preparing the Wood
Once your design is ready, cut your wood to the required lengths. Here are some common dimensions:
- Four vertical posts (for height) – usually about 5 to 6 feet long.
- Two horizontal supports for the width – approximately the width of your mattress.
- Two more horizontal supports for the length – about 10 inches shorter than your mattress, to allow for fitting.
Use sandpaper to smooth all cut edges to prevent splinters and ensure a clean finish.
3. Assembling the Frame
Start by building the bed’s frame. Attach the horizontal supports between the vertical posts at both the top and bottom levels, creating a rectangular frame. Make sure the frame is square by measuring from corner to corner; they should be equal. Secure each joint with wood screws and wood glue for added stability.
4. Adding the Mattress Support
Once your frame is assembled, it’s time to add the mattress support. This can be done using plywood or additional 2x4s spaced approximately 3 to 4 inches apart to give enough support for the mattress. These should be attached to the top frame’s inner edges.
5. Creating the Ladder or Stairs
If your loft bed is tall, consider building a ladder or staircase for easy access. You can use additional 2x4s for the ladder’s rungs, spaced comfortably, making sure each is secure. If you are using a staircase, you may want to build in storage to maximize your space.
6. Securing the Bed
It’s crucial to ensure that your loft bed is secure and can handle weight. Use brackets on each joint for extra support, especially in the corners. Once everything is tightened and secure, you can move on to the finishing touches.
7. Finishing Touches
Apply your choice of wood finish or paint to enhance the look of your loft bed. You can also add a protective sealant to make it durable. Decorate the space under the loft bed according to your taste—perhaps with a cozy reading nook or storage for toys or books.
Always remember to follow safety guidelines, especially if the loft bed will be used by children. Installing guardrails is a smart choice to prevent any falls.
This project can be tackled by most DIY enthusiasts and will provide you with a unique and functional furniture piece. If you seek more guidance or tutorials, check out Wood Magazine or Instructables for additional resources.
Essential Tools and Materials Needed for Loft Bed Construction
Building a wooden loft bed can be a rewarding project. However, to create a strong and safe structure, having the right tools and materials is essential. Here’s a comprehensive list to help guide your construction process.
Essential Tools
Before you begin, gather these essential tools:
| Tool | Purpose |
|---|---|
| Power Drill | Indispensable for making holes and driving screws into the wood. |
| Measuring Tape | Crucial for taking accurate measurements of your space and cutting wood to size. |
| Level | Ensuring that your loft bed is level is crucial for safety and stability. |
| Saw | Circular saw or miter saw to cut wood pieces to the correct lengths. |
| Square | Helps ensure that your angles and cuts are precise. |
| Screwdriver | Set of screwdrivers for fastening components together. |
| Sander | Smooths out wooden surfaces for safety and appeal. |
| Pencil | For marking measurements and cuts clearly on your wood. |
| Clamps | Useful for holding pieces together while you secure them. |
Key Materials
Next, you will need several materials, which are critical to a successful loft bed build:
- Wood: The primary material for your loft bed. Common choices include Pine, Cedar, or Oak. Choose sturdy boards for the frame and plywood for the mattress support.
- Screws: Use wood screws that are suitable for the type of wood you’re working with. Be sure they are long enough to provide a strong hold.
- Wood Glue: This can provide extra strength to your joints, ensuring everything stays secure.
- Finish or Stain: If you want your loft bed to match your home decor, consider using a wood stain or finish. Choose non-toxic options if this will be for a child’s room.
- Varnish or Sealant: Applying a protective coating helps to prolong the life of the wood and keep it looking great.
Optional But Useful Items
There are several additional items that can enhance your loft bed construction experience:
- Safety Gear: Always prioritize safety. Wear goggles and a dust mask while working with wood and power tools.
- Router: A router can add decorative edges to your bed or hollow out spaces in the wood for custom features.
- LED Strip Lighting: If you want to add some flair to your loft bed, consider incorporating lights to create an inviting atmosphere.
- Storage Bins: To optimize space, consider building in storage under the loft area or installing shelving.
Planning Your Build
Before you purchase tools and materials, create a detailed plan. Sketch out your loft bed design and determine all dimensions. Be sure to take into account the height of the ceiling, the desired height of the loft bed, and the thickness of the mattress.
You can find various plans online that cater to different styles and space requirements. Websites like Ana White provide excellent free plans with detailed instructions for various wooden furniture projects, including loft beds.
Once you have gathered all tools and materials, double-check that everything you need is on hand before starting your project. This preparation will help you avoid delays and ensure a smoother construction process.
Safety Tips for Building and Using Your Loft Bed
Building and using a loft bed can be an exciting project, but safety should always come first. Whether you’re crafting a cozy nook for your child or creating a space-saving solution for your own bedroom, following essential safety tips is crucial to ensure a safe and enjoyable sleeping experience. Below are some vital safety recommendations to keep in mind.
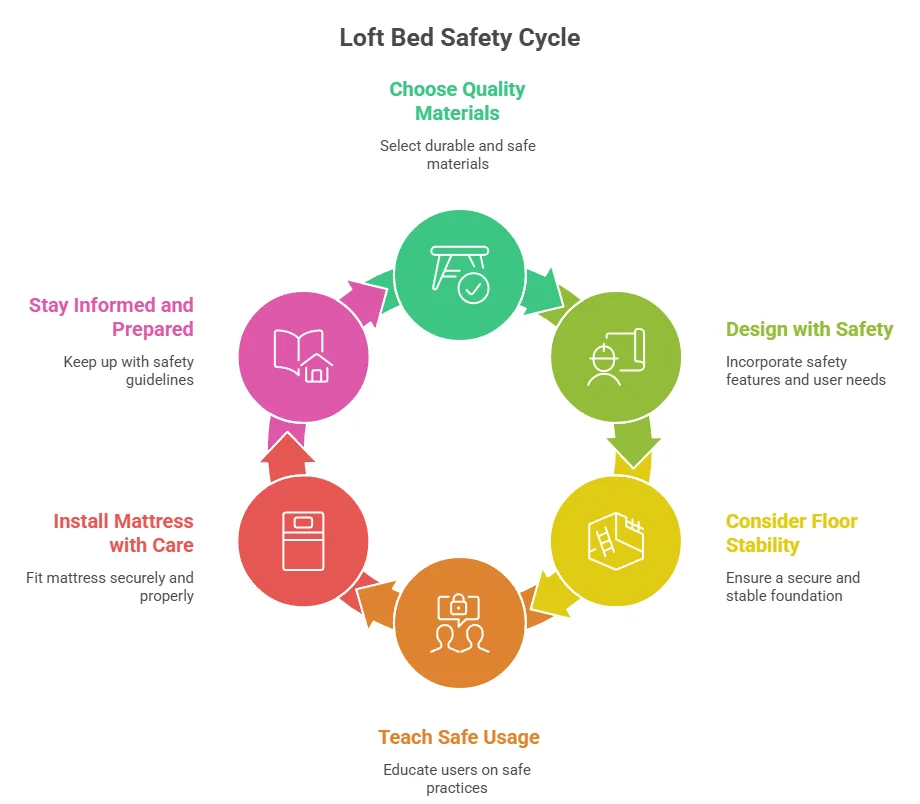
Choose Quality Materials
When building your loft bed, selecting the right materials is fundamental for both support and safety.
- Use solid wood: Avoid plywood or particle board for the frame. Sturdy hardwoods like oak or maple provide the best strength.
- Check the weight limit: Ensure that your bed can support the weight of its users safely. Most loft beds can hold around 200-250 pounds, but verify with your material specifications.
- Secure fasteners: Use quality screws and brackets designed for structural support. Avoid using nails alone as they might not hold under heavy stress.
Design with Safety in Mind
The design of your loft bed plays a significant role in its safety features. Here are a few design elements to consider:
- Guardrails: Install guardrails on both sides of the loft bed. The FDA recommends a minimum height of 5 inches for these rails to prevent falls.
- Ladder design: Make sure the ladder is sturdy and firmly attached to the bed. A wider ladder with handrails is generally safer than a narrow one.
- Headroom: Ensure there is sufficient headspace above the mattress to prevent bumping your head when sitting up.
Consider Floor Stability
Your loft bed’s stability greatly depends on the surface it’s built upon. Follow these suggestions to ensure a secure base:
- Solid ground: Place the bed on a flat, even surface. Avoid carpeting or uneven flooring that might lead to wobbling.
- Secure to the wall: For additional safety, consider anchoring the loft bed to the wall. This can prevent tipping and enhance overall stability.
- Regular checks: Periodically inspect the bed to ensure that all components remain tight and secure, particularly after heavy use.
Teach Safe Usage
It’s vital to educate users, especially children, on how to safely use the loft bed. To do this, consider the following tips:
- Climbing safely: Encourage users to face the ladder when climbing or descending, keeping their hands on the rungs.
- Rough play caution: Remind children to avoid jumping or wrestling on the bed, as this can lead to falls or injuries.
- Light up the area: Ensure that the space around the loft bed is well-lit, especially at night to prevent accidents.
Install a Mattress with Care
The mattress used on your loft bed is also a critical factor in safety. Follow these mattress tips:
- Right size: Use a mattress that fits snugly within the frame to avoid gaps. A twin mattress is commonly used for loft beds.
- Safe materials: Opt for a mattress made from high-quality materials that are flame retardant and free from harmful chemicals.
- Regular maintenance: Rotate the mattress regularly to ensure even wear and prolong its lifespan.
Stay Informed and Prepared
Making informed decisions about your loft bed isn’t only about construction and materials. It’s essential to stay prepared for potential emergencies. Keep the following items close:
- Emergency contact numbers: Have a list of important contacts readily available in case of accidents.
- First aid kit: Store a first aid kit in the room, ensuring it’s easy to access in case of minor injuries.
- Emergency plan: Have an escape plan in place, teaching users how to safely exit the loft bed during emergencies.
Creative Design Ideas for Customizing Your Loft Bed
Transforming a standard loft bed into a personalized sanctuary can be a fun and creative endeavor. Whether it’s for a child, teenager, or adult, customizing a loft bed allows you to express style while maximizing space. Below are some inventive ideas to inspire you in designing your loft bed exactly how you envision it.
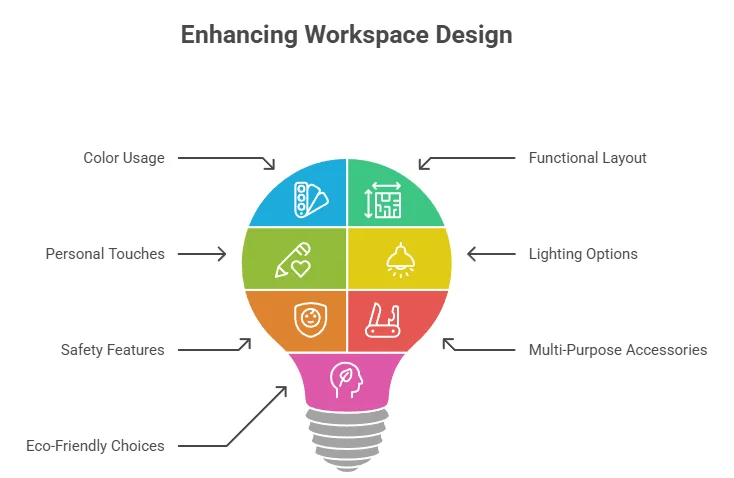
Use Color to Your Advantage
Color can completely change the atmosphere of any space. When customizing your loft bed, consider the following:
- Paint the Frame: Choose a bold color that contrasts with your wall. This can serve as a focal point in the room.
- Add Decor: Incorporate colorful bedding, pillows, and throws that not only add comfort but also enhance visual appeal.
- Wall Art: Paint murals or use removable wall decals that align with your theme, making the loft bed area more inviting.
Create Functional Workspace
Loft beds are perfect for creating multifunctional spaces. You can easily integrate a workspace directly under the loft bed:
- Built-In Desk: Install a small desk underneath for studying or working from home.
- Storage Solutions: Use the space for shelves or cabinets. This keeps everything organized and efficient.
- Pegboards: Hang a pegboard to store craft materials or office supplies for quick access.
Incorporate Personal Touches
Your loft bed should reflect your personal style. Here are some unique touches you might consider:
- Monogramming: Personalize bedding and decor by monogramming items to add a unique flair.
- Photography Wall: Use framed photos of friends, family, or places you’ve traveled as part of the room’s decor.
- Textiles: Choose fabrics that resonate with you—whether they are bohemian, minimalist, or eclectic.
Stylish Lighting Options
Lighting plays a crucial role in setting the mood. Here are some stylish ideas:
- Fairy Lights: String lights can add warmth and a magical touch.
- Desk Lamps: A chic desk lamp can make your workspace both functional and stylish.
- Overhead Fixtures: A unique chandelier or pendant light can add elegance and focal interest.
Innovative Safety Features
Customizing your loft bed doesn’t just stop at aesthetics. You should also consider safety:
- Guardrails: Ensure sturdy guardrails for added safety—especially for children.
- Non-Slip Steps: If your loft bed includes a ladder or stairs, consider using non-slip materials or treads to prevent falls.
- Balanced Weight Distribution: Make sure the structure is balanced and sturdy to avoid wobbling.
Multi-Purpose Bedroom Accessories
Maximize functionality by adding multi-purpose accessories:
- Convertible Furniture: Use a fold-out chair or a bed that transforms into a sofa.
- Storage Ottomans: Invest in ottomans that can double as storage for blankets or books.
- Portable & Stackable Baskets: Utilize baskets under or near the loft bed to keep items organized.
Eco-Friendly Options
Consider using sustainable materials for a greener approach:
- Reclaimed Wood: If building the loft bed, use reclaimed wood to reduce environmental impact.
- Non-Toxic Paints: Choose paints and finishes that are eco-friendly to ensure a healthier environment.
- Second-Hand Decor: Shop at thrift stores for unique pieces that are affordable and environmentally friendly.
Troubleshooting Common Issues During Loft Bed Assembly

Assembling a loft bed can be an exciting DIY project, but it often comes with its own set of challenges. Whether you are a seasoned builder or trying your hand at woodworking for the first time, knowing how to handle common issues during loft bed assembly is essential. Here are some common problems you might encounter and practical solutions to overcome them.
Missing or Incorrect Parts
It’s not uncommon to find that you have missing or incorrect parts in your loft bed assembly kit. Here’s how you can tackle this issue:
- Check the Inventory: Before starting assembly, lay out all parts and fasteners. Reference the parts list to ensure everything is present.
- Contact Customer Service: If something is missing or wrong, don’t hesitate to reach out to the manufacturer’s customer service for replacements.
- Keep Receipts: Retain any receipts or order confirmations as proof of purchase for warranty claims.
Instructions Are Confusing
Sometimes, the instruction manual can be hard to follow. Here are tips to make it easier:
- Read Thoroughly: Go through the entire manual before starting. Understanding each step will help you see the bigger picture.
- Watch Videos: Many manufacturers provide videos online. Check YouTube for visual aids that can offer a clearer understanding.
- Take it Slow: Don’t rush through tasks. Finish one step at a time before moving on to the next.
Mismatched Holes
If parts do not align as per the instructions, don’t panic. This is a common issue. Here’s what to do:
- Double-Check Alignment: Sometimes, you might be looking at the bed upside down or backwards. Reassess before making any adjustments.
- Use a Level: A level can help determine if the investment in brackets was installed correctly and is aligned. If not, loosen screws and readjust.
- Wait to Tighten: Don’t fully tighten screws until the entire frame is constructed. This allows for minor adjustments as needed.
Stability and Durability Concerns
Once the bed frame is up, you may notice instability or shakiness. You can resolve this issue by:
- Re-check Connections: Go back to each connection point and ensure that all screws and bolts are tightened securely.
- Use Additional Reinforcements: Consider adding corner brackets for support if the bed still feels wobbly.
- Distribute Weight Evenly: Make sure that no one side carries more weight than the other. This can help maintain balance.
Height Difficulties
As with any loft bed, adjusting the height may become an issue. If the loft bed feels too high or low:
- Check Adjustable Parts: Some loft beds come with adjustable legs. Ensure these are set correctly based on your room’s ceiling height.
- Space Consideration: Measure the space above the mattress before finalizing the assembly to ensure adequate headroom.
- Consider Different Models: If height is a persistent problem, investigate models that offer adjustable lofting heights for your needs.
Safety Precautions
Prioritize safety throughout the assembly and usage of your loft bed:
- Use Guardrails: Always install guardrails if your loft bed is higher than 30 inches from the ground.
- Secure the Loft Bed: Consider anchoring it to the wall if stability is a concern.
- Weight Limits: Be mindful of the weight specifications and adhere strictly to them for safety.
Conclusion
Building a How to Build A Wooden Loft Bed can be a rewarding project that transforms a small space into a functional and stylish sleeping area. By following the step-by-step guide provided, you’ll gain a clear understanding of How to Build A Wooden Loft Bed. Remember that gathering the essential tools and materials beforehand will streamline the process, making it more enjoyable.
Safety is crucial when building and using your loft bed, so always follow the recommended tips to ensure a secure and safe sleeping environment. With a little creativity, you can also customize your loft bed to reflect your personal style, whether it’s through unique paint colors, decorative elements, or added features like shelves or a workspace beneath.
As you embark on this project, it’s normal to encounter some common issues. Familiarizing yourself with troubleshooting techniques will help you address any setbacks quickly, ensuring your dream How to Build A Wooden Loft Bed becomes a reality.
This project not only saves space but also enhances your living area with a unique touch that fits your needs. Enjoy the process as you craft a How to Build A Wooden Loft Bed that speaks to your personality and serves its purpose beautifully. Now, gather your materials, prepare your workspace, and dive into creating a How to Build A Wooden Loft Bed that you will enjoy for years to come. Happy building!