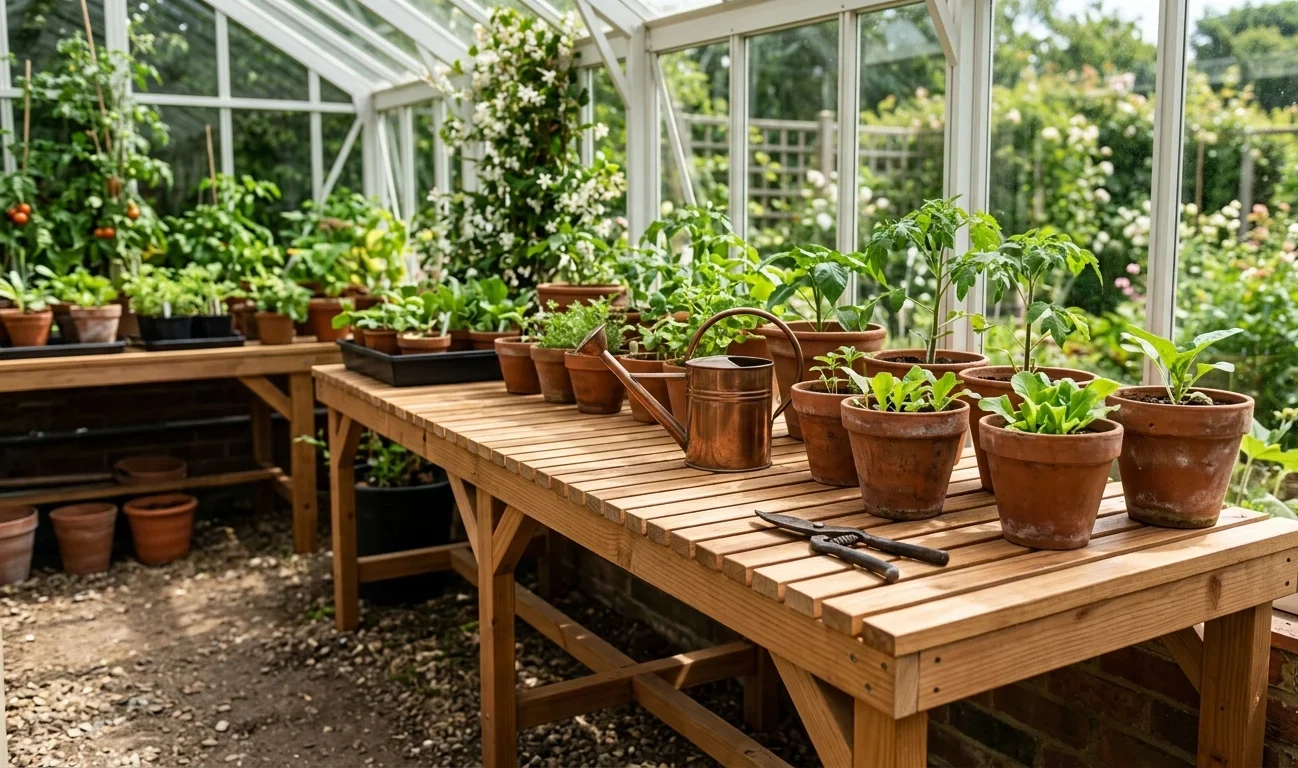
Building a wooden greenhouse bench can enhance your gardening experience by providing a sturdy and organized space for your plants. Follow this detailed guide to create a functional bench that suits your greenhouse perfectly.
Before you start, gather your materials and tools. Here’s a list of what you’ll need:
- 1×4 or 2×4 lumber for the frame
- 1×6 boards for the top surface
- Wood screws
- Wood glue
- Sandpaper
- Outdoor wood sealant or paint
- Drill
- Saw
- Measuring tape
- Square
Now that you have everything you need, follow these steps:
Step 1: Measure Your Space
Determine where you want to place your bench in the greenhouse. Make sure to measure the available space accurately. A standard greenhouse bench height is around 30 inches, but you can adjust this based on your preferences.
Step 2: Cut the Lumber
Using the saw, cut your lumber to size. Here are some suggestions:
| Part | Dimensions |
|---|---|
| Side rails | 30 inches (Length) |
| Top surface boards | 48 inches (Length) |
| Support beams | 24 inches (Length) |
Make sure all cuts are straight and clean; this will help ensure a solid build.
Step 3: Assemble the Frame
Lay out your side rails and the support beams to form a rectangle. Use wood screws to attach the support beams between the side rails, creating a stable frame for your bench. Make sure to pre-drill holes to avoid splitting the wood. A square is useful here to ensure corners are at right angles.
Step 4: Attach the Top Surface
Next, take your 1×6 boards for the top. Space them evenly across the frame you assembled in Step 3. Secure each board using wood screws. You may want to leave a small gap between the boards for drainage, especially if you plan to water your plants directly on the bench.
Step 5: Sand and Finish
Once your bench is assembled, take sandpaper to smooth out any rough edges. This step is essential to prevent splinters and ensure a safe working environment. After sanding, apply an outdoor wood sealant or paint to protect your bench from moisture and damage. Let it dry completely before using it.
Step 6: Position the Bench
When the finish is dry, carefully lift your bench into place within your greenhouse. It’s a good idea to position it near a light source and ensure it’s level. You can add wheels at the base if you want mobility, but ensure they are lockable to secure the bench when in position.
Step 7: Add Storage and Accessories
Consider incorporating some storage options for your gardening tools. Simple hooks on the side or a small shelf beneath the bench can keep your gardening supplies organized. You can also add trays or pots on the bench top to enhance your planting layout.
For more inspiration and ideas on building garden furniture, you can visit Garden Gate Magazine. They provide great tips on DIY projects and gardening advice.
With your wooden greenhouse bench complete, you’re now ready to enjoy your gardening activities more comfortably and efficiently. Remember to maintain the bench as needed, ensuring it remains a sturdy spot for years to come!
Essential Tools and Materials Needed for Your Greenhouse Project
Embarking on a greenhouse project can be an exciting endeavor that allows you to grow your own plants, vegetables, and flowers year-round. However, to create a successful and functional greenhouse, the right tools and materials are essential. Here’s a comprehensive rundown of what you’ll need to get started on your greenhouse project.
Essential Tools for Building a Greenhouse
Before you dive into construction, gather these important tools to make the process smoother:
- Measuring Tape: Precision is key when building a greenhouse. A flexible measuring tape helps you take accurate measurements of space and materials.
- Level: Use a level to ensure that all surfaces and structures are balanced. This prevents water from pooling and keeps your greenhouse sturdy.
- Drill: A power drill facilitates securing screws, making assembly quicker and more efficient. Look for a model with adjustable speed settings.
- Saw: A circular or miter saw will be handy for cutting wood or metal frames to the correct lengths.
- Hammer: Use a hammer for driving nails into the framing and for securing various components.
- Tools for Gardening: Basic gardening tools like trowels, pruners, and shovels will be essential once your greenhouse is up and running.
Essential Materials for Greenhouse Construction
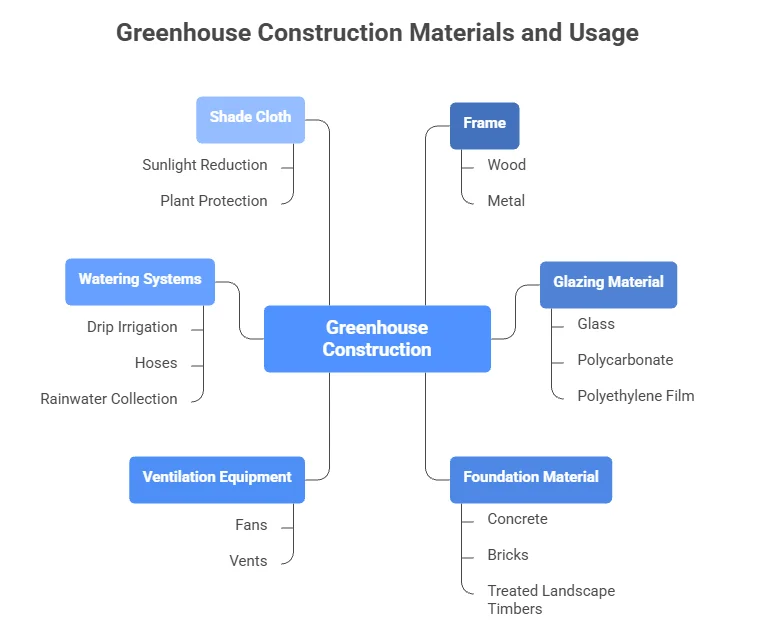
Now, let’s discuss the materials you’ll need to construct your greenhouse. These will vary depending on the type of greenhouse you are building, whether it be simple or advanced, freestanding or attached to your home.
| Material | Usage |
|---|---|
| Wood or Metal Frame | Creates the fundamental structure of the greenhouse. Wooden frames offer an appealing aesthetic, while metal frames provide durability and strength. |
| Glazing Material | This could be glass, polycarbonate, or polyethylene film. Each material has its own benefits in insulating and allowing light through. |
| Foundation Material | Concrete, bricks, or treated landscape timbers can be used to create a solid foundation for stability and insulation. |
| Ventilation Equipment | Fans and vents help regulate temperature and humidity levels inside the greenhouse. |
| Watering Systems | Drip irrigation or hoses are necessary for efficient watering. A rainwater collection system can enhance sustainability. |
| Shade Cloth | Helps reduce sunlight exposure during the hottest parts of the day, protecting delicate plants from overheating. |
Where to Find Your Supplies
Finding the right supplies can significantly affect the success of your greenhouse project. Here are some recommended suppliers:
- Greenhouse Megastore – This site offers everything from frames to fans and covers your entire greenhouse setup.
- Amazon – A great resource for tools and materials, often offering competitive prices and fast shipping.
- Home Depot – Ideal for local supplies and tools, allowing you to pick up what you need quickly.
- Lowe’s – Another trusted home improvement store where you can find frames and repair materials.
Gathering the right tools and materials is crucial for efficiently building your greenhouse. With a solid plan and the necessary supplies, you’ll be on your way to creating a thriving space for your plants. Remember, investing in quality tools and materials can save you time and headaches down the road.
Once your greenhouse is built, maintaining it with regular checks and proper care will ensure optimal growing conditions. Happy gardening!
Tips for Designing a Functional and Aesthetic Wooden Bench
Designing a wooden bench that is both functional and aesthetically pleasing starts with a clear vision of its purpose, style, and placement. A well-crafted bench can enhance your space, providing seating and adding charm to your backyard or garden. Here’s how to create a beautiful and practical wooden bench.
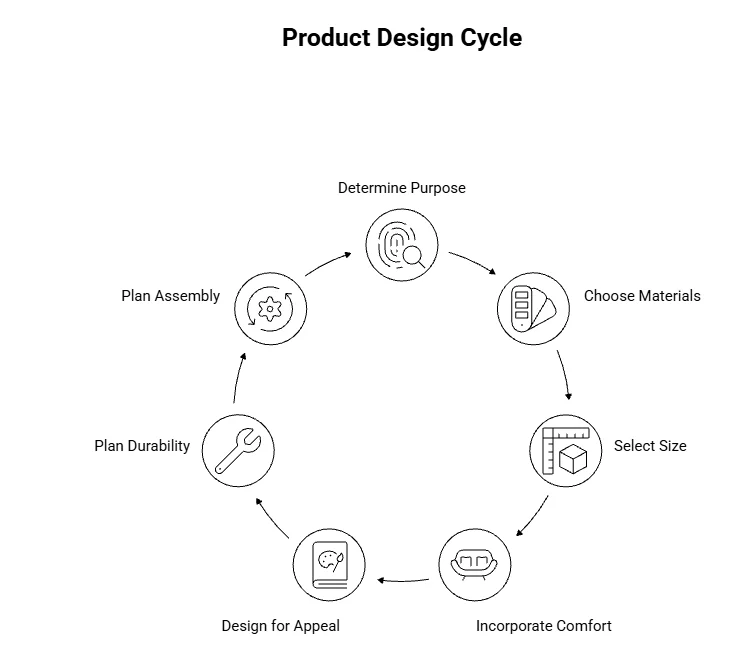
Determine the Purpose
Before you start designing, consider what you want the bench to accomplish. Here are a few questions to help clarify its purpose:
- Will it serve as a decorative piece, or is it meant for daily use?
- Will it be placed indoors or outdoors?
- How many people do you want to accommodate?
Choose the Right Materials
When selecting wood for your bench, focus on durability and style. Different types of wood can offer various aesthetics and levels of weather resistance. Popular options include:
- Cedar: Known for its natural resistance to decay and insects; it has a beautiful grain.
- Redwood: Offers a stunning hue and is great for outdoor use due to its durability.
- Treated Pine: Cost-effective and sturdy; it requires sealing to withstand the elements.
Select an Appropriate Size
Size plays a crucial role in both function and design. Measure the area where you plan to place the bench to ensure a good fit. Here’s a simple size guide:
| Seating Capacity | Bench Length |
|---|---|
| 1-2 People | 3-4 feet |
| 3-4 People | 5-6 feet |
| 5-6 People | 7-8 feet |
Incorporate Comfort Features
If you want your bench to be enjoyable to use, consider adding features that enhance comfort:
- Cushions: Consider using weather-resistant fabric to add cushions. This will make the seating more comfortable while allowing for easy cleaning.
- Backrest: A backrest can provide additional comfort, especially for long periods of sitting.
- Armrests: These can offer added support and a place to rest drinks or books.
Design for Visual Appeal
The design of your bench should complement your space’s aesthetics. Here are some design elements to consider:
- Style: Decide whether you want a rustic, modern, or traditional look. Each style entails different design features.
- Color: Choose a finish that matches or contrasts with existing outdoor furniture or architectural elements.
- Grain Pattern: Highlight the natural beauty of the wood by choosing cuts that showcase unique patterns and textures.
Think About Durability and Maintenance
To ensure your bench lasts, factor in maintenance during the design phase:
- Choose quality wood and finishes to resist wear and tear over time.
- Regularly apply sealants or stains to protect against moisture and UV damage.
- Store cushions indoors during harsh weather to prolong their lifespan.
Plan the Assembly Process
Once you’ve finalized your design, planning your construction is crucial. Here’s a simple approach to get started:
- Gather your tools and materials: saw, drill, screws, and wood.
- Cut wood according to your design dimensions.
- Assemble the frame first before attaching the seat and backrest.
- Sand all surfaces to ensure smooth edges and surfaces.
- Apply your chosen finish and allow it to dry completely.
Designing a functional and aesthetic wooden bench not only elevates your outdoor space but also serves as a delightful gathering spot for friends and family. By considering these tips, you can create a bench that meets your needs while enhancing your environment. For more information on woodworking and design inspiration, check out Wood Magazine or Popular Woodworking.
Maintenance and Care for Your Wooden Greenhouse Bench
Keeping your wooden greenhouse bench in great shape is essential for both the longevity of the bench and the health of your plants. Wood is an organic material that needs proper care to resist decay and retain its strength. Here are some effective maintenance and care tips to help you maximize the life of your wooden greenhouse bench.
Regular Cleaning
Start by establishing a routine for cleaning your greenhouse bench. Dirt, debris, and plant residues can accumulate and lead to rot if left unchecked. Clean your bench at least once a month. Here’s how to do it:
- Clear the Surface: Remove any pots, trays, or tools from the bench.
- Use a Brush: Take a stiff-bristle brush to remove loose dirt and debris. A dustpan can be handy to collect the debris afterward.
- Soapy Water Solution: Mix a mild detergent in a bucket of warm water and use a cloth or sponge to scrub the surface. Rinse with clean water and dry it with a towel.
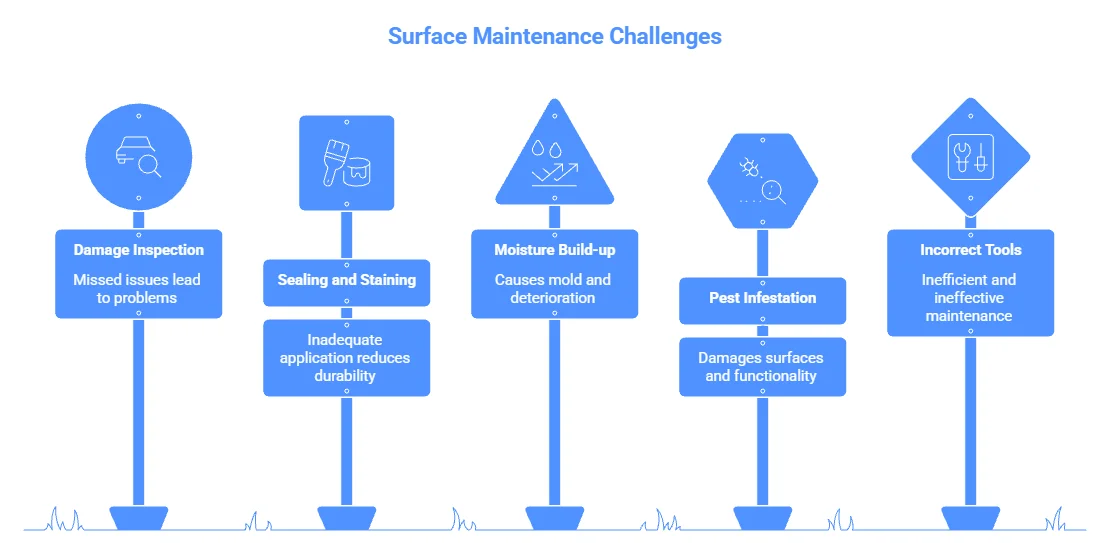
Inspect for Damage
Regular inspections are crucial. Every season, check your bench for signs of damage. Look for:
- Rot: Soft or discolored areas indicate rot.
- Splitting or Cracking: Wood can split due to extreme weather conditions.
- Insect Infestation: Check for wood-boring insects that may weaken the structure.
If you spot any issues, address them immediately. Small problems can turn into bigger ones if left unattended.
Sealing and Staining
Applying a protective sealant can help prolong the life of your wooden bench. Here’s what you need to do:
- Choose the Right Product: Opt for a high-quality wood sealant or stain that is specifically designed for outdoor use. Products like Minwax offer durable options.
- Application: Clean the surface thoroughly before applying. Use a brush or roller for an even coat, and follow the manufacturer’s instructions regarding drying time.
- Frequency: Reapply sealant every one to two years, depending on weather conditions and wear.
Preventing Moisture Build-Up
Excess moisture can lead to mold and mildew growth. To prevent this:
- Drainage: Ensure that your greenhouse has good drainage to avoid standing water.
- Airflow: Keep the area around the bench clear to allow adequate airflow, helping reduce humidity levels.
- Covering During Inclement Weather: If possible, cover the bench with a tarp during heavy rain or snow to protect it.
Protect from Pests
Wooden benches can attract pests, so it’s wise to implement a protection plan:
- Natural Repellents: Use natural pest deterrents like neem oil or diatomaceous earth.
- Maintain Cleanliness: Pests are attracted to debris—regular cleaning helps keep them at bay.
- Monitor and React: Set traps for common pests and regularly inspect for signs of infestation.
Using the Right Tools
Using the right tools for maintenance can make a difference:
| Tool | Purpose |
|---|---|
| Stiff-Bristle Brush | For cleaning debris |
| Sponge | For scrubbing |
| Sealant/Protectant | For moisture and decay prevention |
| Clean Rags | For wiping down surfaces |
Following these maintenance and care tips ensures that your wooden greenhouse bench remains functional and visually appealing for years. Remember, taking proactive steps can save you time and money in the long run. For more resources on this topic, visit sites like Gardener’s Supply Company and Better Homes and Gardens for additional advice on garden care. With a little effort, your greenhouse bench will provide the perfect workspace for nurturing your plants.
Common Mistakes to Avoid When Building a Greenhouse Bench
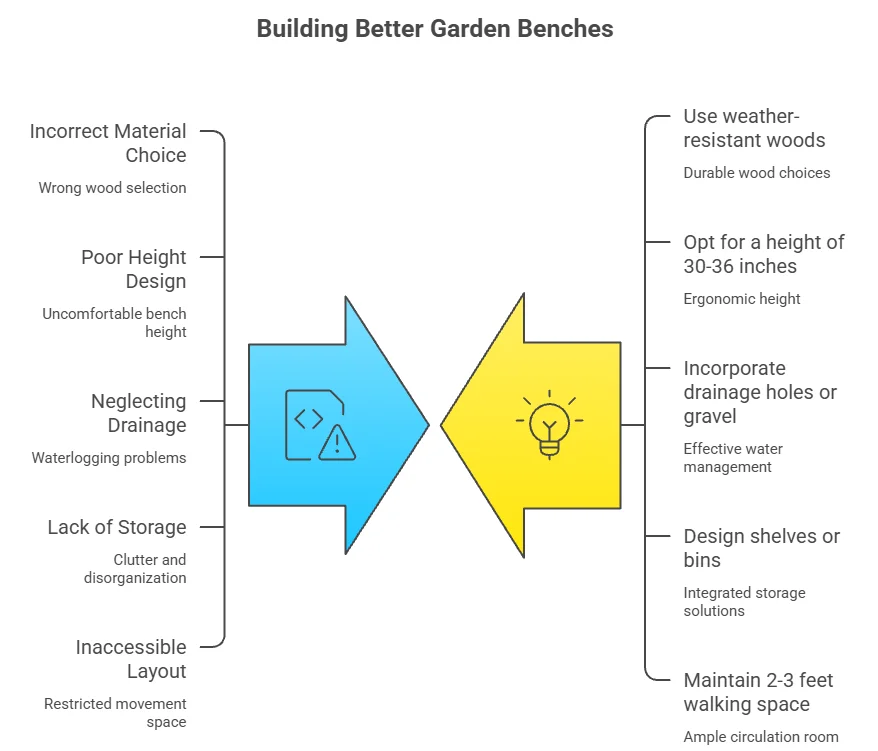
Building a greenhouse bench can be a rewarding DIY project, allowing you to create an efficient space for nurturing your plants. However, several common mistakes can hinder your efforts and affect the bench’s functionality. By knowing what to avoid, you can ensure a successful build that meets your gardening needs.
One of the first pitfalls to consider is the choice of materials. Many people neglect to use weather-resistant wood suitable for outdoor use. Softwoods like pine, while cheaper, are prone to rot and damage from moisture. Instead, consider using materials like cedar or redwood that resist decay. Not only do these woods last longer, but they also add aesthetic value to your greenhouse. You can learn more about selecting materials for outdoor projects on Wood Magazine.
It’s also crucial to plan the size and height of your bench. A common mistake is building it too high or too low, which can lead to back strain or difficulties in reaching your plants. Ideally, the height should be comfortable for you when standing or working, typically around 30 to 36 inches. Keep your tallest plants in mind to maximize space effectively. Additionally, consider how wide you want your bench to be. A width of two to four feet allows easy access from both sides, enhancing your greenhouse’s functionality.
Another frequent error is neglecting proper drainage. Waterlogged plants can suffer, leading to root rot and other problems. Ensure your bench has drainage holes if you plan to place pots directly on it. Alternatively, you can add a layer of gravel or sand beneath your pots to facilitate drainage. Remember to elevate the bench slightly to allow water to run off easily.
Some people forget to incorporate storage options into their bench design. Including shelves or bins can help you organize plant care tools, pots, and other supplies. A clutter-free workspace makes it easier to focus on your plants and maintain organization. You might think about adding hooks for tools or a small shelf overhead for frequently used items.
Designing for accessibility is another area where mistakes often occur. If you plan to have multiple benches or beds in your greenhouse, be sure to allow enough walking space between them. A minimum of 2 to 3 feet is ideal to enable easy movement, especially when carrying equipment or watering cans. This layout helps prevent accidents and improves the overall functionality of your greenhouse.
Taking time on planning the layout is vital, yet many jump straight into building. Create a sketch of your greenhouse and mark where each bench or item will go. This visual guide can help you visualize and reorganize if necessary before the actual build. Plus, it reduces the chances of discovering last-minute issues during construction.
To be certain you are executing your project correctly, review your plans regularly. Double-check measurements and alignments while you work, ensuring everything is on track. Small mistakes in measurements can lead to significant issues down the line. A little extra time checking your work can save you from having to dismantle and redo sections.
Remember to consider finishing touches. Adding a coat of sealant or outdoor paint can protect your bench from the elements. Be sure to let any finishes dry completely before placing plants on your new structure. The durability of your bench increases with these precautions, contributing to a longer lifespan.
| Common Mistakes | Solutions |
|---|---|
| Incorrect Material Choice | Use weather-resistant woods like cedar or redwood. |
| Poor Height Design | Opt for a height of 30-36 inches for comfort. |
| Neglecting Drainage | Incorporate drainage holes or gravel for moisture control. |
| Lack of Storage | Design shelves or bins into the bench for organization. |
| Inaccessible Layout | Maintain 2-3 feet walking space between features. |
By avoiding these common mistakes when building your greenhouse bench, you will create a functional, attractive, and durable structure. Every detail helps cultivate a flourishing garden, so take these insights to ensure your project is a success. For more tips on DIY gardening projects, visit Gardening Know How.
Conclusion
Building a wooden greenhouse bench is a rewarding project that enhances both the beauty and functionality of your gardening space. By following the step-by-step guide outlined earlier, you can create a sturdy and appealing bench that meets your needs. Remember to gather all essential tools and materials before you start, ensuring a smoother building process.
As you design your bench, keep in mind the importance of functionality without sacrificing aesthetics. This balance will not only make your green thumb happy but will also elevate the overall look of your greenhouse. Regular maintenance and care are vital to prolonging the life of your wooden bench, and simple practices like cleaning and treating the wood will go a long way.
Avoiding common mistakes, such as miscalculating dimensions or neglecting weather considerations, will result in a successful build. With each of these elements, you create a safe and inviting space for your plants to thrive.
Take pride in your craftsmanship as you enjoy your new greenhouse bench, a product of your effort and creativity. Each time you nurture your plants or relax in your greenhouse, you’ll appreciate the thoughtfulness that went into designing and building this essential gardening feature. Embrace the journey and enjoy the greenery that flourishes around your carefully constructed wooden bench. Happy gardening!