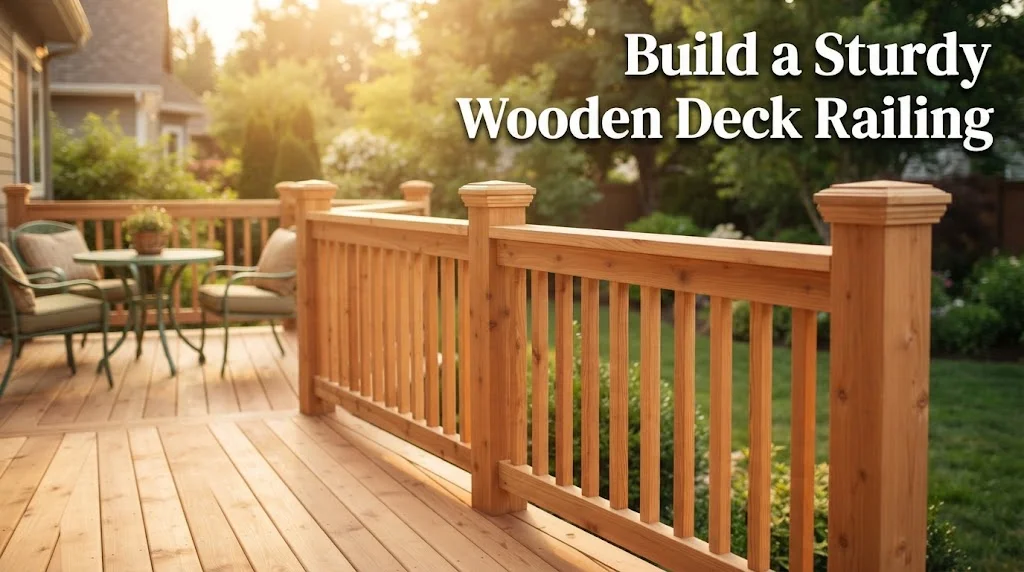
Building a wooden deck railing not only enhances the beauty of your outdoor space but also ensures safety while enjoying your deck. In this step-by-step guide, you’ll learn how to create a sturdy and attractive railing that you can be proud of. By following these detailed instructions, you’ll make your deck safe and visually appealing for gatherings, relaxing evenings, or family barbecues.
Materials and Tools Needed
Before you start building, gather all your materials and tools to make the process smooth. Here’s a helpful list:
- Pressure-treated lumber (for posts, rails, and balusters)
- Wood screws
- Wood glue
- Post caps (optional)
- Sandpaper
- Paint or wood stain (optional)
- Measuring tape
- Level
- Saw (circular saw or miter saw)
- Drill
- Safety goggles
Step 1: Measure and Plan
Start by measuring the area where your railing will go. Determine the height and length of the railing. A standard railing height is about 36 to 42 inches, depending on your deck’s elevation. Sketch a rough plan including dimensions and placements of the posts and balusters.
Step 2: Install the Posts
Once you have your plan, it’s time to install the posts. Here’s how:
- Mark the positions of the posts along the perimeter of the deck. Posts should be spaced no more than 6 feet apart.
- Dig holes for the posts at least 2 feet deep for stability.
- Place the posts in the holes and use a level to ensure they are vertical. Fill the holes with concrete for added durability.
Step 3: Attach the Top and Bottom Rails
With the posts installed, you will now attach the top and bottom rails. Follow these steps:
- Measure the distance between the posts and cut the rails to size.
- Attach the bottom rail to the posts about 3 inches above the deck surface.
- Secure the top rail to the posts, making sure it’s level and flush with the top of the posts.
Step 4: Place the Balusters
Now it’s time to install the balusters. These vertical supports add style and safety to your railing.
- Cut the balusters to your desired height, usually about 32-36 inches.
- Space the balusters evenly along the bottom and top rails, ensuring they are no more than 4 inches apart.
- Secure each baluster to the top and bottom rails using screws and wood glue for added strength.
Step 5: Sand and Finish
Once your balusters are in place, take some sandpaper to smooth any rough edges. A well-finished railing looks better and lasts longer. You can then paint or stain your railing to protect it from the elements.
Step 6: Install Post Caps
If you want to add a decorative touch, consider installing post caps. These can be secured on top of each post for both a stylish finish and additional weather protection.
Maintenance Tips
To keep your wooden deck railing looking its best, regular maintenance is essential:
- Inspect for any loose screws or damaged wood at least once a year.
- Clean the railing periodically to remove dirt and mildew.
- Reapply paint or stain every few years to protect against moisture and UV damage.
Building a Wooden Deck Railing can be a rewarding DIY project that adds value and safety to your home. By following these steps, you can ensure that your railing is sturdy and complements your outdoor space beautifully.
Essential Tools and Materials for Deck Railing Construction
Building a sturdy and attractive How to Build a Wooden Deck Railing requires not only skilled hands but also the right tools and materials. Whether you’re a seasoned DIYer or a beginner, having the correct equipment at your disposal can make all the difference. Here’s what you’ll need for a successful deck railing construction project.
Essential Tools
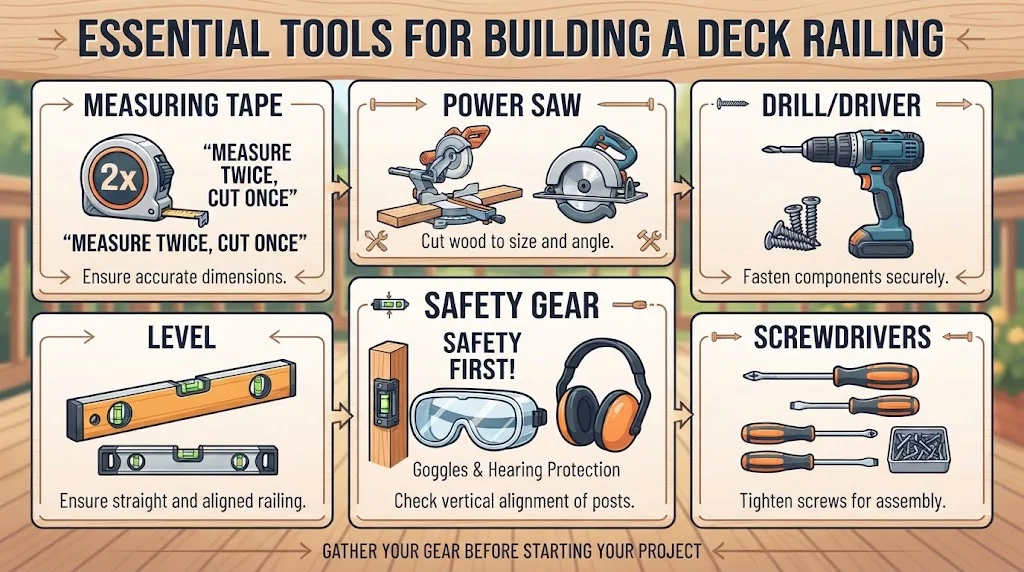
Before you start building your railing, gather the following tools:
- Measuring Tape: A reliable measuring tape ensures accurate dimensions. Measure twice to cut once!
- Power Saw: A miter saw is ideal for cutting the wood at precise angles. A circular saw can also work for straight cuts.
- Drill/Driver: An electric drill will help you fasten your railing components securely.
- Level: A level ensures that your railing is straight and aligned properly.
- Post Level: This specialized tool helps you check the vertical alignment of your posts.
- Screwdrivers: A set of screwdrivers in various sizes will assist you in tightening screws that hold the railing together.
- Safety Gear: Don’t forget your safety goggles and ear protection while using power tools.
Wood Materials
Choosing the right wood is essential for both aesthetics and durability. Here are some popular options:
- Cedar: Naturally resistant to decay and insects, cedar is lightweight and easy to work with.
- Redwood: Known for its beauty and durability, redwood can withstand various weather conditions. Its natural oils help it resist pest damage.
- Pressure-Treated Pine: This is often the most economical choice. It’s treated with chemicals to prevent rot and insects, although it may require regular maintenance.
- Composite Materials: Composite railing materials combine wood fibers and plastic, offering a low-maintenance alternative that mimics natural wood.
Fasteners and Connectors
Fasteners are critical to the structural integrity of your railing. Consider the following:
- Wood Screws: Use exterior-grade wood screws for all joints, as they provide better holding power than nails.
- Lag Bolts: These are perfect for securing the posts to the deck frame, providing superior strength.
- Post Anchors: These brackets secure your posts and can be attached directly to the deck for added stability.
- Corner Brackets: Use these to reinforce the connection between rails and posts, enhancing stability.
Finishing Materials
To protect your railing and enhance its appearance, you’ll need some finishing materials:
- Wood Stain: A quality stain can enhance the beauty of the wood while providing protection from the elements.
- Sealant: A water-resistant sealant is important for preserving the wood’s integrity over time.
- Paint: If you prefer a custom color, paint can offer a wide range of looks. Ensure that it’s designed for outdoor use.
Common Mistakes to Avoid When Building Deck Railings
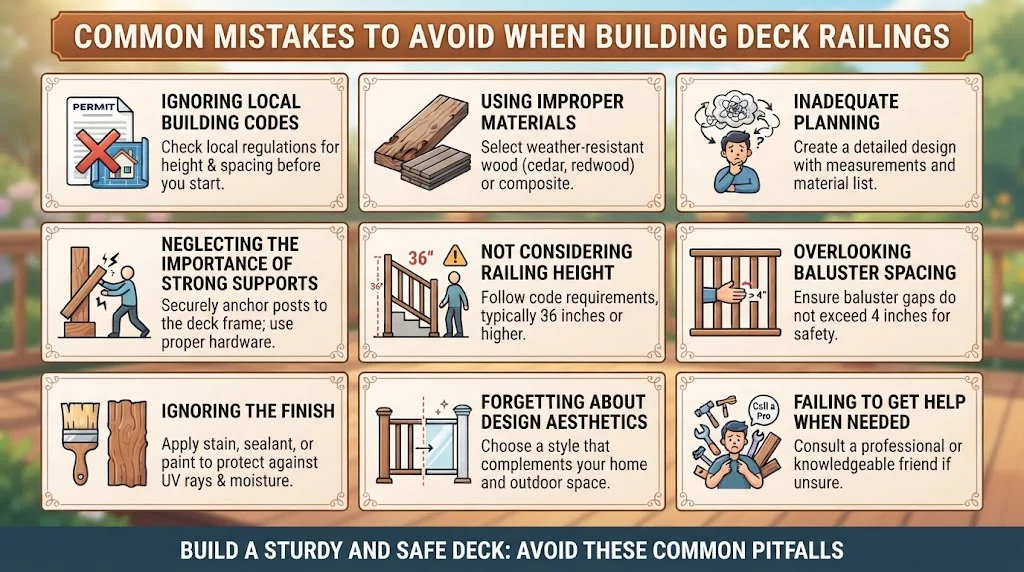
Building a Wooden Deck Railing adds both safety and style to your outdoor space. However, there are common mistakes that many DIY enthusiasts make which can lead to problems down the line. Understanding these pitfalls can help you achieve a sturdy and aesthetically pleasing deck railing that meets safety standards. Here are some key mistakes to avoid when building deck railings.
Ignoring Local Building Codes
One of the most significant mistakes is not checking with local building codes. Each locality has regulations regarding deck heights, railing heights, and the spacing between balusters. Ignoring these rules can lead to fines or the need to tear down and rebuild your railing.
Using Improper Materials
Choosing the wrong materials can compromise the structural integrity of your deck railing. Make sure to select weather-resistant wood, such as cedar or redwood. Using untreated wood can result in rotting and warping over time. Always check for high-quality options that can withstand outdoor elements.
Inadequate Planning
Failing to plan adequately is another common mistake. Before starting, create a detailed design that includes measurements, materials, and styles. Consider elements such as the height and spacing of the railing to ensure safety and comfort for those using the deck.
Neglecting the Importance of Strong Supports
Deck railings require strong supports to hold the weight of the railing and withstand pressure over time. Ensure that posts are securely anchored into the ground or deck frame. Adequate spacing between posts is vital as well; typically, a maximum of six feet is recommended.
Additional Supporting Tips:
- Use galvanized or stainless steel hardware to prevent rusting.
- Consider adding diagonal bracing for added stability.
- Regularly check for signs of wear or damage.
Not Considering Railing Height
The height of your railing is crucial not only for aesthetics but also for safety. Most building codes specify that railings should be at least 36 inches high. Failing to adhere to this can create unsafe conditions, especially for children and pets. If your deck is higher than 30 inches off the ground, you may even be required to build your railing higher.
Overlooking Baluster Spacing
Another common error is improper spacing between balusters. If the gap is too wide, small children or pets can easily slip through. Generally, the spacing should not exceed 4 inches. Make sure to measure correctly and use a jig to keep the spacing consistent throughout.
Ignoring the Finish
After building your deck railing, do not forget to apply a finish. A quality stain or sealant will protect the wood from water damage and UV rays, prolonging its lifespan. Regular maintenance, including reapplying the finish every few years, is essential to keep the wood looking beautiful and functional.
Forgetting About Design Aesthetics
While safety and functionality are critical, the aesthetics of your deck railing shouldn’t be overlooked. Choose a design that complements your home and outdoor space. Whether you prefer a classic look, a modern feel, or a rustic charm, your choice of railing style can enhance the overall appeal of your deck.
Design Style Ideas:
- Traditional Pickett Railings
- Contemporary Horizontal Railings
- Glass Panel Railings for an unobstructed view
Failing to Get Help When Needed
If you’re unsure about any step in the process, it’s okay to seek professional help. Consulting with a contractor or a knowledgeable friend can save you time and money in the long run. Don’t let pride lead you into a project that becomes overwhelming.
Design Ideas for Custom Wooden Deck Railings
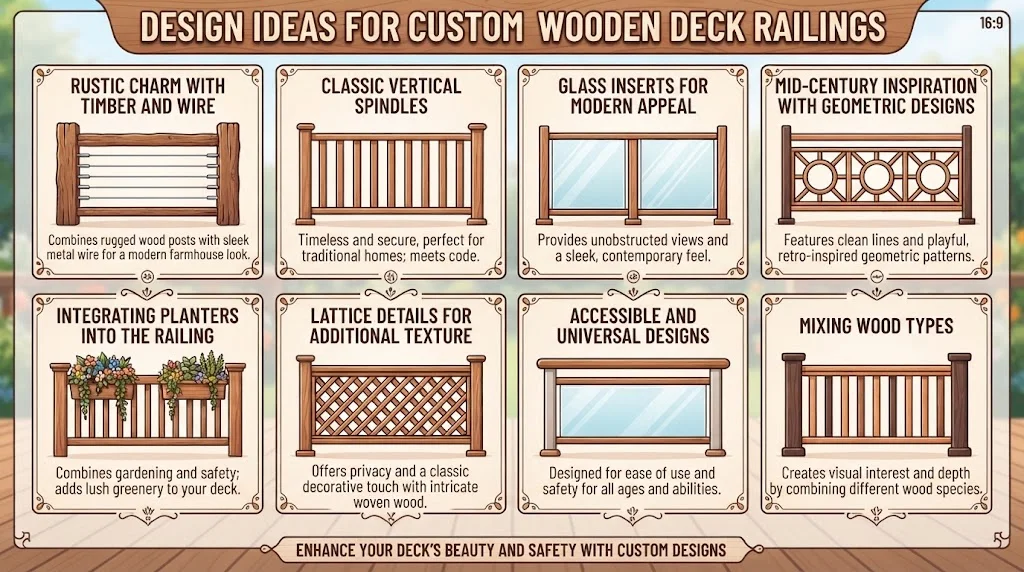
When you’re looking to enhance your outdoor space, custom Wooden Deck Railing can add both style and safety to your deck. Creating the perfect railing requires careful thought and creativity, but it is also a fun project that can showcase your personality. Below are several design ideas to inspire you as you build or remodel your wooden deck railings.
Rustic Charm with Timber and Wire
Imagine the natural beauty of timber combined with the modern look of wire. This design is perfect for those who want to achieve a rustic feel while incorporating a contemporary twist. Using thick wooden posts paired with horizontal or vertical metal wire provides safety without obstructing views.
Classic Vertical Spindles
A timeless design involves using vertical spindles. This design complements various architectural styles and provides a traditional look. Here’s how to create classic vertical spindles:
- Use 2×2-inch posts, spaced evenly apart.
- Ensure each spindle reaches a height of at least 36 inches to meet safety codes.
- Finish with a wood stain to enhance the wood grain and provide protection against the elements.
Glass Inserts for Modern Appeal
For a sleek, modern look, consider incorporating smooth glass panels into your railing design. This allows for unobstructed views while ensuring safety. Glass railings offer a contemporary flair and can be framed with wood.
Mid-Century Inspiration with Geometric Designs
You can channel mid-century aesthetics by using geometric patterns in your wooden deck railing. This can be achieved through cut-out sections in the wooden panels or by combining various wood stains to create an eye-catching design. Here’s how:
- Choose a wood type that fits your climate.
- Experiment with different shapes, such as triangles and hexagons.
- Mix different finishes to highlight the design and keep it stylish.
Integrating Planters into the Railing
Combine functionality and style by integrating planters into your deck railing. This green addition serves as a beautiful display for flowers or herbs while enhancing the overall look of your deck. Below are some tips:
- Opt for removable planters if you want flexibility.
- Choose lightweight materials to avoid adding too much weight to the railing.
- Ensure there’s proper drainage to keep your plants healthy.
Lattice Details for Additional Texture
If you want to add texture without losing the woody feel, consider using lattice. Lattice can be incorporated into the lower section of your railing for a unique look. It provides additional privacy and a decorative touch:
- Use treated wood to withstand weather conditions.
- Paint or stain the lattice to match or complement your existing railing.
- Vines or climbing plants can be trained to grow on the lattice for added charm.
Accessible and Universal Designs
Incorporate accessible designs for those with mobility issues. Consider using rounded edges and lower railing heights. Create wider spaces in between spindles and use non-slip materials to improve safety. Take into account the following:
- Install a handrail at a comfortable height.
- Ensure there is adequate space for maneuverability.
- Choose materials that offer good traction and won’t eventually wear down.
Mixing Wood Types
Another approach is mixing different types of wood in your railing design. Combining a softwood like cedar with a hardwood like oak can create visual interest. Be sure to:
- Sand the surfaces smooth for a seamless transition.
- Use wood finishes that complement both wood types.
- Inspect wood for warping to ensure a long-lasting structure.
Maintenance Tips for Preserving Your Wooden Deck Railing
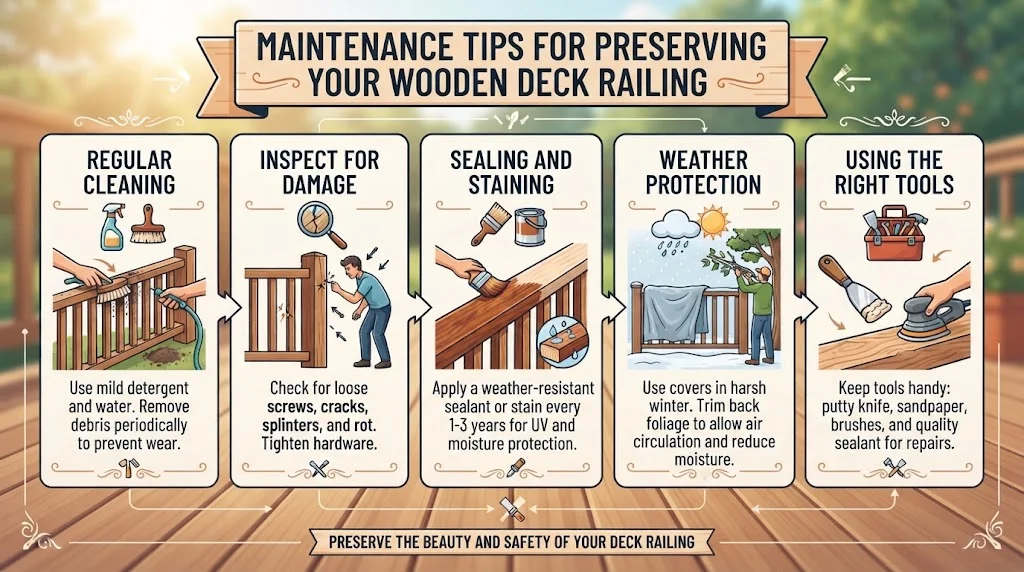
Wooden deck railings are a beautiful addition to your outdoor space, enhancing both safety and aesthetics. However, they do require care and maintenance to keep them looking their best. Here are several tips to help you preserve your Wooden Deck Railing for years to come.
Regular Cleaning
One of the simplest yet effective ways to maintain your wooden deck railing is regular cleaning. Dust, dirt, and debris can accumulate over time, causing wear and tear on the wood. To clean your railings:
- Use a soft broom or a leaf blower to remove loose debris.
- Wash the railings with a mixture of mild detergent and water using a soft brush.
- Rinse with a hose to get rid of any soapy residue.
- Avoid harsh chemicals that can damage the wood finish.
Inspect for Damage
Regularly inspecting your wooden deck railing can help you catch problems early. Look for signs of damage like cracks, splinters, or rotting wood. If you find any issues:
- Replace any broken spindles or rails promptly.
- Fill small cracks with wood filler and sand down any rough spots.
- Monitor for mildew or mold, especially in humid areas. If found, treat it with a mixture of water and vinegar before following with proper cleaning.
Sealing and Staining
Sealing and staining your wooden deck railing helps protect it from moisture and UV rays. Natural wood can fade and warp without proper treatment. Follow these steps for effective sealing:
- Choose a high-quality wood stain or sealant that offers UV protection.
- Apply the product using a brush, making sure to cover all surfaces evenly.
- Allow the first coat to dry before applying a second coat for maximum durability.
- Reapply every one to two years, or as needed based on the climate.
Weather Protection
The changing weather can be tough on wooden railings. Here are some tips to protect your railings from the elements:
- In winter, use furniture covers or tarps to shield railings from snow and ice.
- Consider applying a waterproofing sealant before the rainy season.
- Trim back any overhanging branches that could scratch or damage the railing.
Using the Right Tools
Using proper tools will make maintenance easier and more effective. For instance, investing in good quality brushes, scrapers, or sanding tools can save time and effort. Some essential tools you might consider:
| Tool | Purpose |
|---|---|
| Soft Brush | For cleaning dirt and debris |
| Putty Knife | For filling holes or cracks |
| Sandpaper | For smoothing rough spots |
| Quality Sealant | For waterproofing and protection |
Seek Professional Help When Necessary
Sometimes, the best option is to consult a professional. If you notice severe damage or feel overwhelmed by the maintenance tasks, hiring a deck maintenance specialist can be a wise choice. They can identify issues you might miss and provide expert solutions.
Resources for Deck Care
For more information on deck care and maintenance, you can visit the following sites:
- Decks.com – Offers comprehensive guides on deck maintenance.
- Wood Magazine – Provides tips and articles specifically for wood care.
- Angie’s List – A source for finding trusted deck maintenance professionals.
By following these maintenance tips, you can ensure your Wooden Deck Railing remains a beautiful and functional part of your outdoor space. Regular care will not only extend its lifespan but also enhance the overall look of your deck.
Conclusion
Building a Wooden Deck Railing can significantly enhance your outdoor space, providing both safety and aesthetic appeal. By following the step-by-step guide outlined, you can transform your vision into reality. Remember that having the right tools and materials is crucial for a successful project. Tools like a drill, saw, and level, along with quality wood, make for a strong foundation.
While undertaking this project, steer clear of common mistakes such as improper measurements and inadequate support, which can compromise the railing’s integrity. It’s also an opportunity to get creative. Exploring various design ideas, like vertical or horizontal slats, adds a personal touch to your home.
Once you’ve completed your railing, don’t forget to prioritize maintenance. Regular inspections, sanding, and applying protective finishes will ensure its longevity against the elements. By keeping your Wooden Deck Railing well-maintained, you ensure it remains a beautiful and functional part of your home for years to come.
Whether you’re looking to add value to your property or create a cozy spot for gatherings, a well-built Wooden Deck Railing is a sound investment. With the right approach, tools, and creativity, you can create not just a boundary but a beautiful focal point that enhances your outdoor experience. Embrace the journey, enjoy the process, and take pride in your craftsmanship as you bring your outdoor living space to life.