
Building a wooden computer desk is a rewarding project that combines creativity and practicality. Whether you need a space for work, gaming, or hobbies, crafting your own desk allows you to customize it to fit your needs perfectly. Here are the key steps to guide you through the process of building a sturdy and stylish wooden computer desk.
Gather Your Materials
Before diving into the building process, it’s essential to gather all necessary materials and tools. Here’s a list of what you will need:
- Wood (Pine, Oak, or Plywood)
- Wood screws
- Wood glue
- Sandpaper (various grits)
- Wood finish or paint
- Measuring tape
- Power tools (saw, drill, sander)
- Safety goggles
- Clamps
Be sure to visit Home Depot or your local hardware store for quality materials.
Plan Your Design
Take time to sketch your desk design. Consider the dimensions you want based on your available space and personal needs. Here are aspects to consider:
- Size: Measure the area where the desk will go to ensure a good fit.
- Storage: Think about whether you need drawers or shelves for additional storage.
- Ergonomics: Ensure the height is comfortable for sitting or standing.
Creating a detailed blueprint will make the building process smoother.
Cut the Wood
Once you have your design ready, it’s time to cut the wood. Follow these steps carefully:
- Measure and mark your wood according to the design.
- Use a saw to cut each piece accurately.
- Always wear safety goggles to protect your eyes.
Some common pieces you’ll cut include the tabletop, legs, and any additional shelves. Don’t forget to sand each cut edge for a smooth finish.
Assemble the Desk Frame
Before attaching the tabletop, start by assembling the frame. Follow these steps:
- Lay out the legs and support beams according to your design.
- Use wood screws to attach the legs to the support beams.
- Make sure everything is square and level before tightening the screws.
This frame is the backbone of your desk, so ensure it’s sturdy.
Attach the Desktop
After the frame is ready, the next step is attaching the tabletop. Here’s how:
- Place the tabletop on the frame and center it properly.
- Secure it using wood screws along the edges.
- Utilize wood glue for additional support.
Make sure the tabletop is flush with the sides for a polished look.
Finish Your Desk
Now it’s time to add the finishing touches. Sand the entire desk again, focusing on any rough areas. Choose a finish that suits your style:
- Stain: Provides color while enhancing the wood grain.
- Paint: Offers a variety of colors for a unique look.
- Sealer: Helps protect the wood from spills and scratches.
After the finish is dry, your desk will be ready for use. You can find inspiration and finishing products at Woodworkers Source.
Personalize Your Desk
Once the desk is complete, think about personalizing it. You might consider adding:
- Cable management systems to keep cords organized.
- Decorative elements like lamps or plants.
- Customized drawers or organizers for better functionality.
Personal touches can turn your functional desk into a comforting workspace.
Choosing the Right Wood and Materials for Your Desk Project
Understanding Different Types of Wood
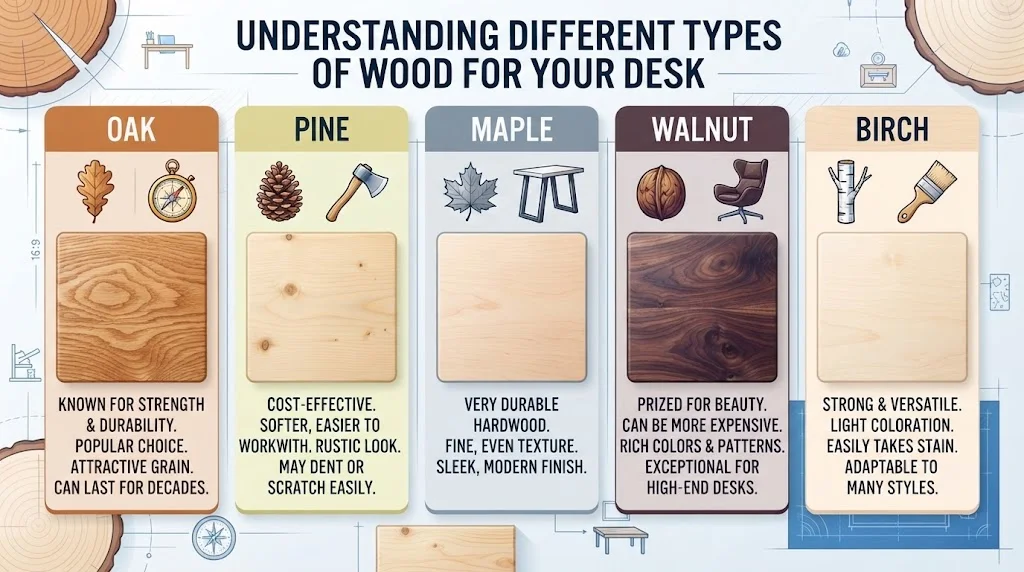
When crafting a wooden computer desk, the type of wood you choose makes a significant difference in appearance, durability, and overall function. Here are some common types of wood to consider:
- Oak: Known for its strength and durability, oak is a popular choice for desk projects. It has attractive grain patterns and can last for decades.
- Pine: A cost-effective option, pine is softer and easier to work with. It’s ideal for those wanting a rustic look but may dent or scratch more easily.
- Maple: This hardwood is very durable and has a fine, even texture. Maple is an excellent option if you want a sleek, modern finish.
- Walnut: Prized for its beauty, walnut can be more expensive. It features rich colors and patterns, making it an exceptional choice for high-end desks.
- Birch: Strong and versatile, birch has a light coloration that can easily take stain, making it adaptable to many styles.
Considerations for Wood Selection
Choosing the right wood involves more than just aesthetics. Keep these considerations in mind:
1. Durability
Choose a wood that can withstand daily use. Hardwoods like oak and maple are typically more durable than softwoods like pine. Consider how much wear and tear your desk will endure.
2. Aesthetic Appeal
Think about the look you want for your desk. Different woods offer a range of colors and grain patterns. Choose something that matches your style and the room’s decor.
3. Affordability
Your budget will play a crucial role in wood selection. While hardwoods provide durability, they can also be more expensive. Softwoods can afford you a beautifully crafted desk without breaking the bank.
4. Sustainability
Consider using reclaimed wood or certified Sustainable Affiliate Programs sources. This choice not only benefits the environment but often results in unique, character-rich materials.
Other Materials to Enhance Your Desk
While wood is the primary material, you can integrate other materials to elevate your desk’s functionality and style.
- Metal: Adding metal accents, such as brackets or legs, can provide a modern touch and increased stability.
- Glass: For a sleek finish, consider incorporating a glass top. This can make your desk feel lighter and more open.
- Fabric: If you’re creating a chair to match, consider upholstery to complement your desk’s wood type and color.
Finishing Touches
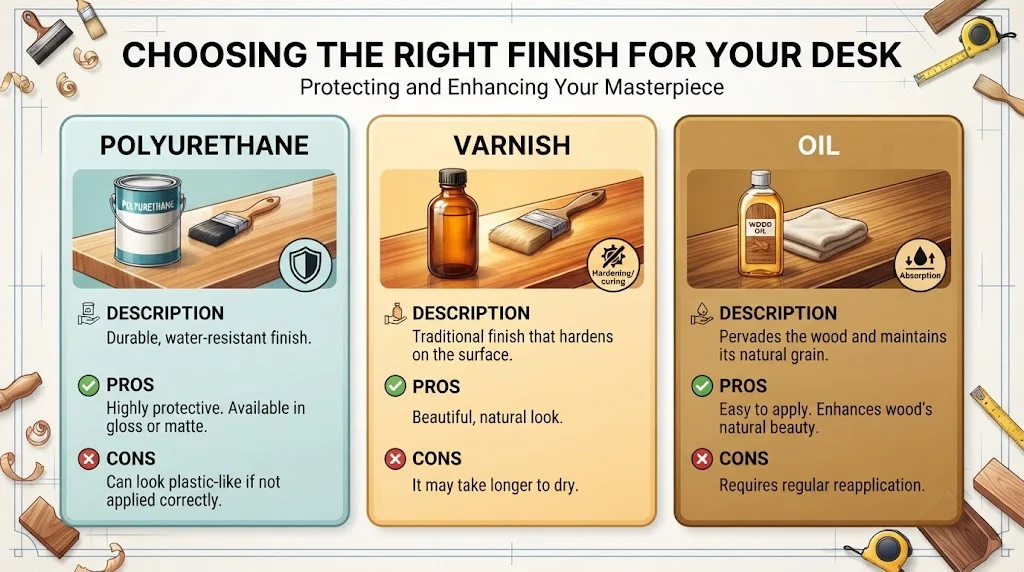
Choosing the right finish is critical in protecting your desk. Consider these popular options:
| Finish Type | Description | Pros | Cons |
|---|---|---|---|
| Polyurethane | A durable, water-resistant finish. | Highly protective, available in gloss or matte. | Can look plastic-like if not applied correctly. |
| Varnish | A traditional finish that hardens on the surface. | Beautiful, natural look. | It may take longer to dry. |
| Oil | Pervades the wood and maintains its natural grain. | Easy to apply, enhances wood’s natural beauty. | Requires regular reapplication. |
Where to Get Your Materials
Once you’ve decided on the type of wood and additional materials for your computer desk project, it’s time to gather your supplies. Local lumber yards, home improvement stores, and online retailers offer a plethora of options. You can find useful resources here:
- Wood Magazine – Offers guides on choosing and working with wood.
- Rockler – A great source for project materials and ideas.
- Home Depot – Provides a wide selection of wood and tools for your projects.
Consider these points when selecting your materials, as they will greatly influence the final look and function of your desk. You’re one step closer to building your dream How to Build A Wooden Computer Desk!
Essential Tools for Crafting a Sturdy Wooden Desk
Building a sturdy wooden desk is an exciting project that not only helps you enhance your workspace but also allows you to customize it to your needs. To achieve the best results, having the right tools is essential. Below is a list of must-have tools that will aid you on your journey to crafting a sturdy wooden desk. These tools range from basic hand tools to more advanced power tools that will ensure precision and durability in your build.
Hand Tools
Even in today’s world of advanced technology, hand tools remain vital for woodworking projects. They offer precision and versatility, which can be especially beneficial for detailed work. Here are some of the primary hand tools you’ll need:
- Saw: A good quality hand saw or a jigsaw will help you make accurate cuts in your wooden pieces.
- Chisel Set: Chisels are essential for shaping wood and cleaning up edges for a neater finish.
- Files and Rasps: Use these for smoothing out rough edges and surfaces, giving your desk a polished look.
- Measuring Tape: Accurate measurements are critical. A measuring tape ensures every cut is precise.
- Square: A carpenter’s square helps you achieve right angles for accurate assembly.
- Clamps: They keep your pieces in place, allowing for clean, stable work while drilling or screwing together components.
Power Tools
For those who want to speed up the process or tackle more complex designs, power tools are a game changer. They not only save time but also improve accuracy. Here are some essential power tools you might consider:
- Power Drill: A cordless power drill is necessary for making holes and driving screws. Look for one with adjustable speed settings and a good battery life.
- Sander: An electric sander will help you smooth surfaces quickly compared to hand sanding. Orbital sanders are a popular choice for desk projects.
- Table Saw: If you plan on making large cuts or repeat cuts, a table saw is invaluable. Ensure safety features are intact for a smooth operation.
- Miter Saw: This tool can help you achieve precise angled cuts, making it easier to join different parts of your desk.
Specialized Tools
Depending on your desk design, some specialized tools may be necessary. Here are a few that can enhance the craftsmanship of your project:
- Router: A router is used for adding decorative edges or grooves in the wood. It can elevate the aesthetic of your desk considerably.
- Jig: If you’re making multiple identical pieces or require specific angles, a jig can simplify your process and improve precision.
Materials and Accessories
Having the right tools is important, but you should also have the right materials and accessories. For your desk, consider these items:
- Wood Selection: Choose quality hardwood for durability, such as oak, maple, or walnut.
- Glue: Wood glue is essential for reinforcing joints.
- Finish: Paint, stain, or varnish can protect and beautify your desk.
Creative Design Ideas for Customizing Your Computer Desk
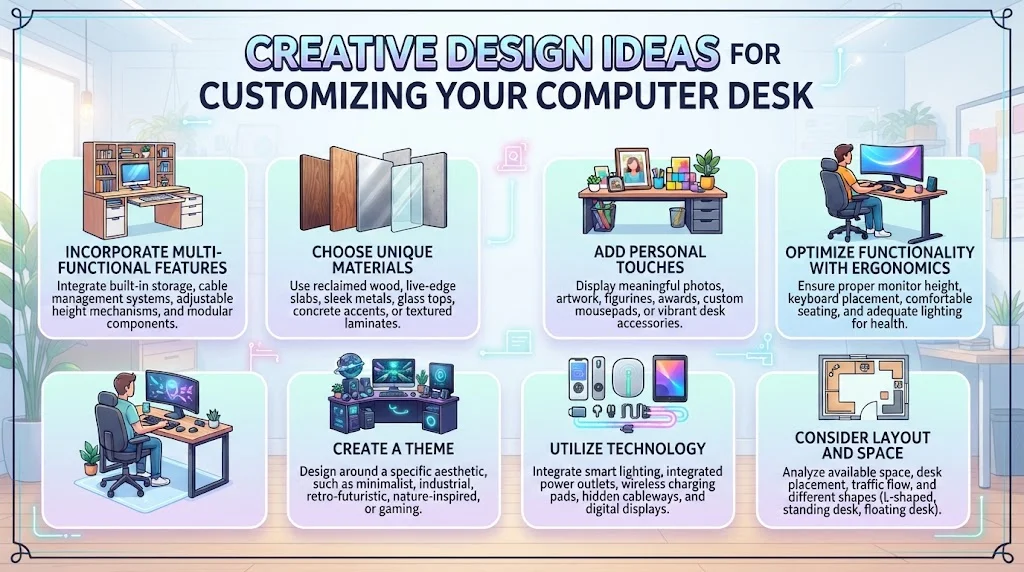
When it comes to personalizing your workspace, a custom computer desk offers a perfect blend of style and function. With creativity and the right materials, you can transform a simple desk into a one-of-a-kind masterpiece that reflects your personality and meets your work needs. Below are some innovative design ideas, ranging from basic adjustments to more elaborate customizations.
Incorporate Multi-Functional Features
One way to enhance your computer desk is by integrating multi-functional features. This not only saves space but also adds utility:
- Built-in Storage: Create hidden compartments or drawers to store office supplies.
- Adjustable Height: Consider a sit-stand desk design, allowing you to alternate between sitting and standing.
- Wireless Charging Pads: Install charging capabilities directly onto the desk surface.
Choose Unique Materials
Customizing your desk with various materials can make a significant difference in its appearance. Here are some suggestions:
- Reclaimed Wood: This eco-friendly option provides a rustic charm and durability.
- Metal Accents: Adding metal legs or handles can give your desk a modern touch.
- Glass Surfaces: This provides a sleek look and makes your space feel larger.
Add Personal Touches
Your desk should reflect your style. Consider these unique personalization ideas:
- Artwork: Hang a small piece of your favorite art above your desk.
- Plants: Adding flowers or a small potted plant can bring life to your workspace.
- Custom Colors: Paint your desk or apply peel-and-stick wallpapers for a pop of color.
Optimize Functionality with Ergonomics
Creating a comfortable workspace is essential. Here are ergonomic features you can implement:
- Monitor Stand: Elevating your screen can help reduce neck strain.
- Keyboard Tray: Install a pull-out tray to keep your hands at a comfortable level.
- Footrest: A footrest can improve circulation during long work sessions.
Create a Theme
Establishing a theme can tie your entire workspace together. Consider these ideas:
- Minimalist: Choose a few quality pieces with clean lines.
- Vintage: Incorporate retro furniture, perhaps a classic typewriter or a globe.
- Nature-Inspired: Use natural materials and colors, like greens and browns, to draw inspiration from the outdoors.
Utilize Technology
Integrating technology into your design can enhance both utility and aesthetic. Here are some ideas:
- Smart Home Integration: Use smart outlets to control lighting and devices.
- LED Lights: Install LED strip lights for customizable ambiance.
- Sound Systems: Add Bluetooth speakers for a better audio experience while working.
Consider Layout and Space
Your desk’s layout is crucial in maximizing efficiency. When planning your space:
- Zone Creation: Divide your desk into areas for work, creativity, and relaxation.
- Flow: Make sure your layout allows for easy movement.
- Use Vertical Space: Shelves or wall-mounted storage can help keep your desktop clutter-free.
With these creative ideas, you can achieve a workspace that not only looks great but also functionally meets your needs. For further inspiration and resources, check out websites like IKEA or Houzz. These platforms offer a wealth of designs and practical advice to help you customize your computer desk to perfection. These tips will not only enhance the aesthetics of your workspace but also boost your productivity. Remember, a well-designed custom computer desk can make all the difference in your work-from-home experience!
Tips for Maintaining and Caring for Your Wooden Desk
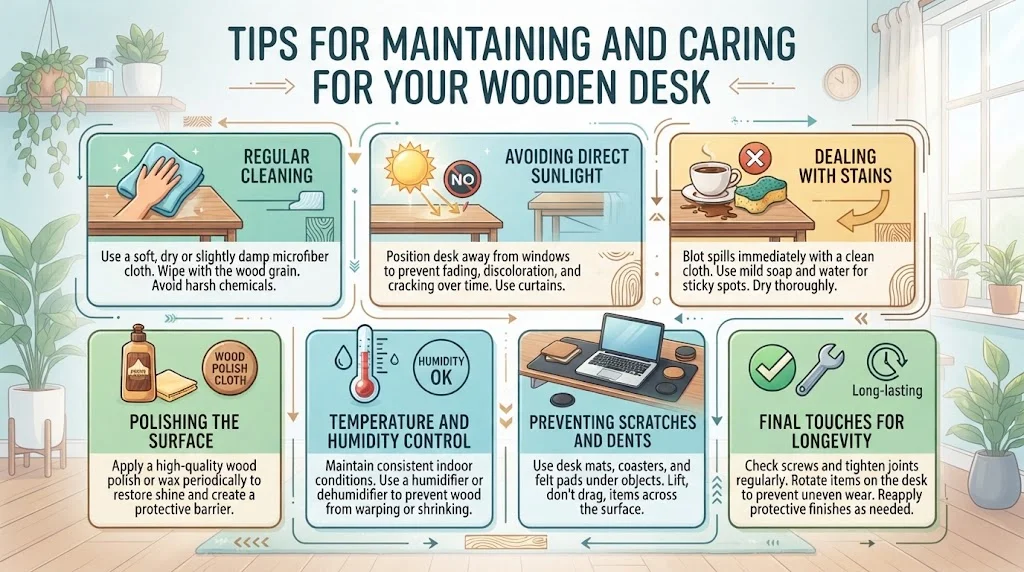
Your wooden desk is not just a piece of furniture; it’s a centerpiece in your workspace, exuding character and warmth. To keep it looking great and functioning well for years to come, proper maintenance and care are essential. Here’s a guide to help you maintain and care for your wooden desk.
Regular Cleaning
To keep your desk in top condition, it’s vital to clean it regularly. Dust and dirt can accumulate quickly, leading to scratches and dull surfaces. Here’s how to do it:
- Use a Soft Cloth: Always use a microfiber or soft cotton cloth for dusting. Avoid rough materials that could scratch the finish.
- Cleaning Solution: For deeper cleaning, mix a solution of warm water with a few drops of mild dish soap. Dampen the cloth with the solution, then dry it with a clean, dry cloth.
- Frequency: Aim to dust your desk weekly and perform a deeper clean every month.
Avoiding Direct Sunlight
Wood can fade when exposed to direct sunlight over time. To prevent discoloration:
- Position Wisely: Place your desk away from windows or areas with direct sunlight.
- Use Window Treatments: Install blinds or curtains to filter out harsh rays when necessary.
Dealing with Stains
Even with proper care, stains can occasionally occur. The faster you tackle them, the better:
- Water Stains: Dab a little mayonnaise or petroleum jelly onto the stain and let it sit overnight. Wipe clean the next day.
- Ink Stains: Try rubbing alcohol on a cotton ball, gently blotting the stain without spreading it.
- Food Stains: Immediately wipe with a damp cloth to prevent the stain from setting.
Polishing the Surface
Polishing your wooden desk helps enhance its natural beauty while providing a protective layer. Here’s how to polish safely:
- Choose the Right Product: Opt for a wax or oil designed specifically for wooden furniture. Products like Minwax are highly recommended.
- Application: Apply the polish evenly using a clean cloth, following the grain of the wood. Buff the surface for a nice shine.
Temperature and Humidity Control
Wood is sensitive to changes in temperature and humidity. Here are tips to manage these conditions:
- Maintain a Stable Environment: Try to keep your workspace at a consistent temperature, ideally between 60-75°F.
- Humidity Levels: Use a humidifier or dehumidifier to maintain a relative humidity level of about 40-60%.
Preventing Scratches and Dents
To keep your desk looking its best, avoid scratches and dents by following these simple guidelines:
- Coasters and Mats: Use coasters for drinks and mats for hot items to avoid damage to the finish.
- Keep Sharp Objects Away: Avoid using knives, scissors, or anything sharp directly on the desk surface.
Final Touches for Longevity
Investing time in small regular touches can significantly extend the life of your wooden desk. Follow these final tips:
- Regular Inspections: Check for any signs of damage or wear and address them early.
- Refinishing When Necessary: If your desk starts to look worn, consider refinishing it every few years. This will restore its original luster. For more detailed guides, check out Wood Magazine.
By following these maintenance tips, you can ensure your wooden desk stays beautiful and functional for a long time. Remember, a well-cared-for desk not only enhances your workspace but also brings joy to your daily tasks.
Conclusion
Building a wooden computer desk can be a rewarding and fulfilling project that enhances your workspace. By following the key steps outlined in this guide, you can create a desk that not only looks good but also serves you well for years to come. Choosing the right type of wood and materials sets the foundation for your project, ensuring durability and stability. With the essential tools at your side, you can efficiently work on your desk, whether you’re a beginner or have some experience.
Further, incorporating creative design ideas allows you to personalize your desk to fit your style and needs. Think about adding unique elements, like custom shelving or cable management features, to optimize your workspace. These little touches can make a big difference in both functionality and aesthetics.
Maintaining and caring for your wooden desk is crucial. Regular cleaning, polishing, and checking for wear and tear will prolong its life and keep it looking pristine. By embracing these tips, you can enjoy a beautiful, practical piece of furniture that serves as a perfect companion for your computing needs.
As you embark on this DIY journey, remember that every step you take contributes to your unique creation, transforming your ideas into reality. Happy building!