 ATTENTION: World's Largest Collection of 16,000 Woodworking Plans!
Stop struggling with incomplete plans that waste your time and money!
Step-by-step instructions that make woodworking super easy, even for beginners
Detailed schematics, cutting lists, and materials lists for every project
Get new plans monthly for life - no recurring fees or hidden costs
Request custom plans for your unique projects at no extra charge
Get 4 valuable bonuses including woodworking guides and business tips
GET INSTANT ACCESS NOW!
ATTENTION: World's Largest Collection of 16,000 Woodworking Plans!
Stop struggling with incomplete plans that waste your time and money!
Step-by-step instructions that make woodworking super easy, even for beginners
Detailed schematics, cutting lists, and materials lists for every project
Get new plans monthly for life - no recurring fees or hidden costs
Request custom plans for your unique projects at no extra charge
Get 4 valuable bonuses including woodworking guides and business tips
GET INSTANT ACCESS NOW!
Building a dresser can be a rewarding endeavor, providing both utility and an opportunity to express your creativity. Dresser Woodworking Plans come in a variety of styles and complexities, catering to woodworkers at all levels. Whether you’re a beginner eager to tackle your first project or an experienced craftsman looking to refine your skills, there’s a perfect plan out there for you. Let’s explore some essential designs and what you should consider when embarking on your dresser woodworking journey.
Understanding the Essential Designs
When choosing a Dresser Woodworking Plans, think about the style you want, the amount of space you have, and the type of wood you plan to use. Here are a few popular styles to consider:
- Traditional Dressers: These often feature ornate carving, detailed moldings, and warm finishes. They’re typically large, with multiple drawers for ample storage.
- Modern Dressers: Characterized by clean lines and minimalistic designs, modern dressers can add a contemporary flair to your room. They often use materials like plywood or MDF in sleek finishes.
- Rustic Dressers: Made from reclaimed wood or distressed finishes, rustic dressers are perfect for those looking to create a cozy, lived-in feel in their space.
- Floating Dressers: For a more innovative approach, consider a floating dresser design. These offer a unique way to save floor space while maintaining style.
Key Factors to Consider
Before you dive into your woodworking project, keep the following factors in mind:
1. Skill Level
Choose a plan that matches your skill level. Beginners might start with simpler assemblies, while more experienced woodworkers could tackle intricate designs. Always read through the entire plan to gauge its complexity before starting.
2. Tools Required
Ensure you have the right tools for the job. Basic hand tools may suffice for simple designs, whereas more complex projects may require power tools such as routers and saws. Here’s a brief list of tools that might come in handy:
- Saw (hand saw or power saw)
- Drill
- Screwdriver
- Sander
- Measuring tape
- Wood clamps
3. Material Selection
The type of wood can significantly impact the look and longevity of your dresser. Common options include:
| Wood Type | Characteristics |
|---|---|
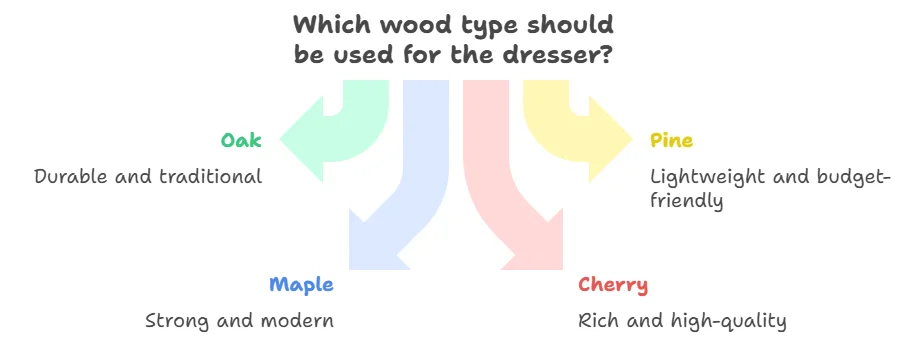
| Oak | Durable and resistant to wear; excellent for traditional styles. |
| Pine | Lightweight and budget-friendly; great for beginners. |
| Maple | Strong with a fine grain; ideal for modern designs. |
| Cherry | Rich color that deepens with age; perfect for high-quality pieces. |
Finding the Right Plans
There are many resources available online where you can find detailed Dresser Woodworking Plans. Websites like Wood Magazine and LumberJocks offer free and premium plans. Consider joining woodworking forums or social media groups where you can exchange ideas and get advice from fellow woodworkers. Utilizing these platforms not only provides access to plans but also helps you learn practical tips and techniques from experienced builders.
Staying Safe While You Build
Safety should always be your top priority. Whenever you use power tools, wear protective gear such as safety goggles and ear protection. Familiarize yourself with the proper operation of your tools to avoid accidents. Planning your workspace to ensure a clean, organized environment will also help minimize risks.
As you embark on your crafting journey, remember that the process can be just as satisfying as the finished product. With patience and practice, you’ll find that building a dresser is not only doable but also an enjoyable way to create something truly unique for your home. Happy woodworking!
Choosing the Right Wood for Your Dresser Project
When embarking on the journey of building a dresser, one of the most crucial decisions you’ll face is choosing the right wood. The wood not only shapes the aesthetics of your project but also impacts its durability and function. Let’s explore various wood options suited for Dresser Woodworking Plans and how to select the best one for your needs.
Softwoods vs. Hardwoods
Understanding the difference between softwoods and hardwoods is essential. Hardwoods, derived from deciduous trees, tend to be denser and more durable than softwoods, which come from coniferous trees. Here’s a quick comparison:
| Type of Wood | Characteristics | Common Uses |
|---|---|---|
| Softwood | Lightweight, easier to work with, less expensive | Framework, basic furniture |
| Hardwood | Dense, durable, often more expensive | High-end furniture, cabinetry |
Popular Wood Choices for Dressers
Here’s a look at some popular wood species that work well for dressers, along with their unique properties:
- Oak: Known for its strength and durability, oak is a popular choice. It has a beautiful grain pattern and can endure heavy use.
- Maple: This wood is hard and offers a smooth surface, making it easy to finish. It’s ideal for a modern look and is resistant to scratches.
- Pine: A softwood that is both affordable and lightweight. Pine is easy to work with, but it may not hold up as well as hardwoods over time.
- Cherry: This hardwood is favored for its rich color and smooth finish. Cherry becomes more beautiful with age, making it an exquisite option for elegant dressers.
- Walnut: Known for its dark color and beautiful grain, walnut is a luxury wood. It is strong and stable, making it ideal for high-end furniture.
Factors to Consider When Choosing Wood
Before you decide on the type of wood for your dresser project, consider the following:
- Durability: How will the dresser be used? If it’s for a child’s room, you may want something more durable.
- Budget: High-quality hardwoods can be expensive. Determine your budget before selecting wood.
- Appearance: The grain and color of the wood can significantly influence the look of your dresser. Choose a wood that complements your home’s decor.
- Workability: Some woods are easier to work with than others. Ensure you are comfortable handling the type of wood you select.
Where to Buy Quality Wood
Finding the right wood is critical for your project. Check out local lumber yards or specialty woodworking shops. Websites like Woodworkers Source offer a wide variety of timber for every woodworking project.
Storage and Preparation Tips
Once you’ve selected your wood, proper storage is key to maintaining its quality. Always store wood in a dry, temperature-controlled environment. If the wood is not pre-cut, take care to measure accurately for your Dresser Woodworking Plans. Additionally, let your wood acclimate to the room’s humidity and temperature to avoid warping.
Finishing Your Wood
After you’ve built the dresser, finishing it is a task that enhances both its beauty and longevity. Use a good-quality stain or paint that highlights the natural characteristics of the wood you’ve chosen. Seal with a clear coat for protection against scratches and spills. Choosing the right wood for your dresser project plays a pivotal role in the overall quality and appearance. Take your time to evaluate your options, consider your needs, and make a choice that fits your vision. With careful selection, your dresser will not only serve its purpose but will also be a beautiful addition to your space.
Tips for Customizing Dresser Woodworking Plans to Fit Your Space
Customizing Dresser Woodworking Plans can be a fulfilling project that helps you create a unique piece suited to your exact needs. With the right modifications, you can make a dresser that complements your bedroom perfectly while maximizing space and functionality. Here are some practical tips to help you customize your Dresser Woodworking Plans for an ideal fit.
Understand Your Space
Before you start modifying any plans, take a good look at your bedroom. Measure the space where you want to place your dresser. Knowing the exact dimensions will help you avoid any miscalculations later on. Consider the following:
- Height: Ensure it won’t overpower your other furniture.
- Width: Make sure it fits without blocking doors or windows.
- Depth: Be mindful of how far it extends into the room.
Select the Right Style
Think about the aesthetic you would like to achieve. From modern and sleek to rustic and vintage, choosing the right style will influence how you customize your plans. Here are a few styles to consider:
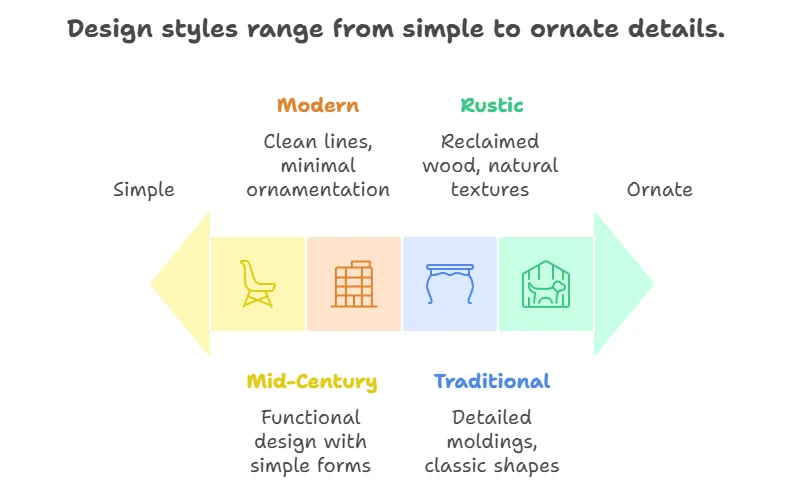
- Modern: Clean lines with minimal ornamentation.
- Rustic: Reclaimed wood finishes and natural textures.
- Traditional: Detailed moldings and classic shapes.
- Mid-Century: Simple forms with functional design.
Once you have selected a style, you can find specific woodworking plans that align with your vision.
Modify Dimensions
One of the easiest ways to customize Dresser Woodworking Plans is to adjust the dimensions. Whether you need a taller dresser for more vertical space or a wider one for more drawer storage, modifying the size is straightforward. Here’s how to do it:
- Measure your desired height, width, and depth.
- Copy the original woodworker’s dimensions, then adjust the cabinet height and depth accordingly in the plan.
- Recalculate any material needs based on these new dimensions to ensure you have enough wood.
Choose Different Materials
The type of wood you choose can significantly affect both the appearance and durability of your dresser. You might opt for:
- Pine: A cost-effective and easy-to-work-with wood.
- Oak: Offers durability and a classic look.
- Maple: Great for a smooth finish and strength.
- Birch: Exhibits a fine grain that takes stain and paint well.
Switching materials can also allow for unique effects, such as painted finishes or using a wood grain that complements your room.
Add or Remove Features
Consider adding features that enhance usability and style. Here are some features you might think about:
- Drawers: Customize the number and size based on your storage needs.
- Open shelving: Great for displaying books or decorative items.
- Pull-out racks: Useful for accessories or ties.
- Mirror: Adds functionality and opens up the room visually.
Removing unnecessary components can streamline the design, making it simpler and cleaner.
Incorporate Personal Touches
Personalizing your dresser gives it character. Some ideas include:
- Custom handles or knobs: Swap out standard hardware for unique options.
- Paint or stains: Use colors that resonate with your style or décor.
- Engraving or stenciling: Add specific designs or initials for a personal flair.
These small touches make a big difference in how your dresser will look and feel in your space.
For high-quality plans that cater to various styles and customization options, consider resources such as Wood Magazine or Ana White. Both offer in-depth projects that can inspire your woodworking journey. By understanding your space, selecting the right style, and customizing dimensions, materials, features, and personal touches, your Dresser Woodworking Plans can evolve into a piece that is both functional and uniquely yours. Take the time to plan well, and you’ll be pleased with the results!
Tools and Supplies You Need for Building a Dresser
Building a dresser can be a fulfilling project that adds personal charm to your home. To create your beautiful piece of furniture, you’ll need specific tools and supplies to make the process smooth and enjoyable. Here’s a comprehensive guide to help you gather everything you need.
Essential Tools for Building a Dresser
Having the right tools can significantly ease your woodworking journey. Here’s a list of must-have tools:
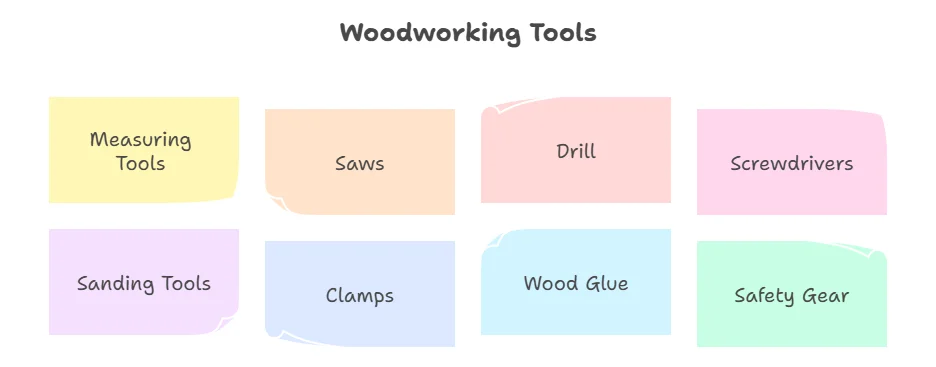
- Measuring Tools: Accurate measurements are crucial. Get a tape measure, square, and calipers for precision.
- Saws: A table saw or circular saw will help cut the wood to size. For finer cuts, consider a miter saw.
- Drill: A power drill is essential for making holes and driving screws. A drill bit set should accompany it for versatility.
- Screwdrivers: Have both a Phillips and flat-head screwdriver on hand.
- Sanding Tools: Use a random orbital sander to smooth surfaces. Sandpaper in varying grits is also useful for finishing touches.
- Clamps: These help hold your pieces together as glue dries or you drill, ensuring a sturdy build.
- Wood Glue: A strong adhesive will help bond pieces together securely.
- Safety Gear: Don’t forget safety glasses, ear protection, and dust masks to keep yourself safe while working.
Wood and Materials You Will Need
Choosing the right wood is crucial for your dresser’s durability and appearance. Here’s a list of common types of wood you might consider:
| Type of Wood | Characteristics | Recommended Use |
|---|---|---|
| Poplar | Easy to work with and budget-friendly | Dressers for children or starter projects |
| Oak | Strong and resistant to wear | High-quality furniture that lasts |
| Pine | Light and easy to cut | Casual dressers |
| Maple | Hardwood with a nice finish | Elegant, durable dressers |
Additionally, you will need the following materials:
- Wood Screws: Select screws appropriate for your wood type.
- Drawer Slides: Ensure smooth movement for your dresser drawers.
- Finish: Choose paint, stain, or a sealant to protect your wood and enhance its beauty.
Where to Purchase Your Tools and Supplies
Finding quality tools and supplies is crucial for your project. Here are some places that offer a range of woodworking materials:
- Woodcraft – Offers a wide selection of tools and wood types.
- Rockler – Known for quality woodworking supplies and tools.
- Home Depot – Great for getting general tools and materials in one trip.
Additional Tips for Your Dresser Project
As you embark on your dresser building adventure, keep the following tips in mind:
- Plan Ahead: Draft a detailed plan with measurements before starting your build.
- Practice Safety: Always wear safety gear and keep your workspace tidy.
- Pair Projects: If you enjoy this project, consider making matching furniture pieces.
With the right tools and materials, building a dresser can be both straightforward and enjoyable. Follow this guide, gather what you need, and get ready to create a stunning and functional piece for your home.
Finishing Techniques that Elevate Your Dresser’s Aesthetic Appeal
When it comes to woodworking, achieving the perfect finish can make all the difference for your dresser’s aesthetic appeal. Choosing the right technique can elevate the wood’s look, enhance its durability, and even bring out unique grains. Let’s explore various finishing techniques that turn your simple dresser into a showpiece.
Staining Techniques

Staining is a popular method to enhance the natural beauty of wood. By applying a stain, you can shift the wood’s color while allowing its grain to show through. Here are some key points to consider when picking a stain:
- Oil-Based Stains: These penetrate deeply into the wood and provide rich colors. They take longer to dry but offer a more durable finish.
- Water-Based Stains: Quick to dry and easy to clean up, these stains are ideal for indoor furniture. They provide a wide range of colors and a less intense odor.
- Gel Stains: Perfect for vertical surfaces, gel stains sit on the surface of the wood, allowing even application without streaks.
Painting Your Dresser
For a modern or whimsical touch, consider painting your dresser. Here are some tips to get it right:
- Primer: Always start with a good primer. This ensures that the paint adheres better and the color appears more vibrant.
- Choosing the Right Paint: Use acrylic or chalk paint for a smooth finish. Chalk paint can provide a matte look, while acrylic gives a glossier finish.
- Multiple Coats: Don’t hesitate to apply multiple coats for a deeper color. Always wait for the previous coat to dry before adding another.
Varnishing for Protection
Varnishing is essential if you want to protect the wood and enhance its shine. Here’s how to effectively apply varnish:
- Surface Preparation: Sand the surface lightly to ensure a smooth application.
- Application Technique: Use a high-quality brush or foam applicator. Apply in thin coats, allowing each to dry completely.
- Type of Varnish: Choose between urethane, spar, or water-based options. Each has its unique protective features, so select one that meets your needs.
Adding Decorative Finishes
For an extra touch of elegance, consider decorative finishes. These can transform an ordinary dresser into something truly special:
- Distressing: This technique adds character and allows the dresser to appear vintage. Techniques include sanding edges or using paint removal products.
- Glazing: Adding a glaze creates depth and can highlight unique features in the wood grain. Apply over a base coat and allow it to dry before buffing.
- Using Stencils or Découpage: Adding patterns or images can personalize your dresser. Ensure your base finish is completely dry before applying.
Maintaining Your Finish
To keep your dresser looking stunning, regular maintenance is vital. Here are some helpful tips:
- Regular Cleaning: Clean with a soft, damp cloth. Avoid harsh chemicals that may damage the finish.
- Reapply Wax or Oil: For a natural finish, reapply wax or oil periodically to maintain shine and protection.
- Inspect for Damage: Regularly check for any scratches or wear. Addressing issues promptly can extend the life of the finish.
Utilizing these finishing techniques can dramatically improve the look and longevity of your dresser. Exploring resources dedicated to woodworking can also offer additional insights and inspiration. Websites like Wood Magazine provide expert advice on woodworking projects and techniques. You can also check out Fine Woodworking for advanced techniques and tutorials. With the right finishing techniques, your dresser will not only serve its functional purpose but also become a stunning focal point in your space. Invest time in the finishing process, and enjoy the satisfaction of creating a beautifully finished dresser.
Conclusion
Building your own dresser can be a rewarding project, whether you’re a seasoned woodworker or just starting out. By exploring various Dresser Woodworking Plans, you can find designs that cater to your skill level and match your personal style. Choosing the right wood for your dresser is crucial as it affects both durability and appearance; consider options that align with your budget and the look you want to achieve.
Customizing your chosen plans to fit your space allows you to create a unique piece that perfectly meets your needs. Thought about how it will fit into the room? Tailoring sizes and features can make your dresser not just a storage solution but also a statement piece that enhances your home.
Equipping yourself with the right tools and supplies ensures you have everything on hand to tackle the project with confidence. From saws to screws, knowing what you need helps streamline the process. Additionally, mastering some finishing techniques can significantly elevate the aesthetic appeal of your dresser, making it not just functional but a beautiful centerpiece in your room.
No matter your skill level, with the right plans, materials, and techniques, you can create a stunning dresser that reflects your creativity and craftsmanship. Embrace the journey of woodworking, and enjoy every step of bringing your vision to life. The satisfaction of completing your own dresser will be a rewarding experience that adds flair and functionality to your space.