Building your own wooden tambour door cabinet can be a rewarding project. Not only does it add functionality to your space, but it also allows for a touch of personalization in your home decor. Before diving into this creative venture, consider a few key factors to ensure your DIY Wooden Tambour Door Cabinet Plans are a success.
Understanding the Basics
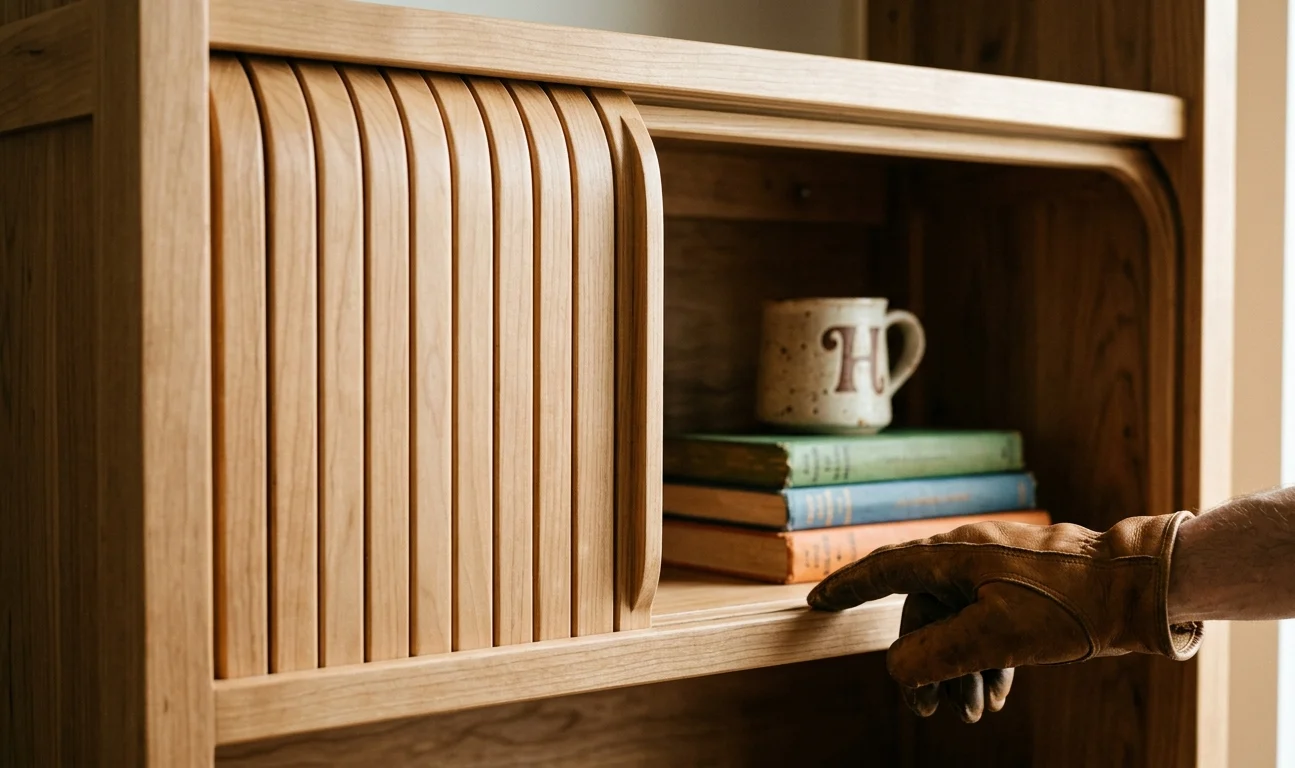
Before you start skimming through DIY Wooden Tambour Door Cabinet Plans, it’s essential to understand the parts of a tambour door cabinet and how they work together. A tambour door features multiple wooden slats wrapped around a flexible backing. This design enables the door to roll up seamlessly, providing easy access to the cabinet’s contents.
Materials Needed
- Wood (hardwood is preferable, such as oak or maple)
- Plywood for the cabinet structure
- Tambour door track hardware
- Wood glue
- Screws
- Finish (stain or paint)
Measuring Your Space
Before cutting any wood, measure the area where the cabinet will live. Knowing the height, width, and depth you want helps in determining the dimensions of your tambour door cabinet. A well-measured design ensures that your cabinet fits perfectly into your room. Consider potential obstructions like light switches or outlets when planning your layout.
Design Considerations
The design of your cabinet influences both its functionality and style. Here are a few pointers to consider:
- Dimensions: Keep the cabinet proportional to the surrounding furniture. A small cabinet may look lost in a large room, while a big one can overwhelm a small area.
- Style: Do you prefer a modern look or a more rustic appeal? Choose the finish and wood type accordingly to match the overall theme of your room.
- Functionality: Consider the type of items you’ll store. Ensure the cabinet has adequate shelves or compartments tailored to housing books, games, or electronics. You may wish to include adjustable shelves to maximize versatility.
Building Your Cabinet
Once you have your materials and DIY Wooden Tambour Door Cabinet Plans laid out, it’s time to start building:
- Cut the plywood to size for the cabinet structure based on your measurements.
- Assemble the cabinet using wood glue and screws, ensuring everything is square and secure.
- Create the tambour door, cutting slats from your chosen hardwood. Make sure they are even and have a smooth finish.
- Install the tambour door track hardware, ensuring that it operates smoothly.
- Apply your desired finish to both the cabinet and tambour door, allowing it to dry completely.
Final Touches
Add the final accessories, such as handles or knobs, that complement your design. Consider enhancing the aesthetic with decorations or even lighting inside the cabinet to highlight your belongings.
Maintenance Tips
After building your tambour door cabinet, maintaining it is crucial for longevity:
- Regularly dust and clean the cabinet to prevent buildup.
- Check for loose screws and tighten them as necessary.
- Reapply the finish every few years to keep the wood protected and looking fresh.
Essential Tools and Materials for Building a Tambour Door Cabinet
Creating your own tambour door cabinet can be a rewarding project that enhances your space while showcasing your craftsmanship. To embark on this journey, you need the right tools and materials to ensure your cabinet is not only functional but also visually appealing. Below is a comprehensive list of essential tools and materials required for following your DIY Wooden Tambour Door Cabinet Plans.
Essential Tools
- Measuring Tape: Accurate measurements are crucial. A sturdy measuring tape ensures your cuts and assembly are precise.
- Circular Saw: This tool is versatile for cutting wood panels to the required dimensions. It’s important for clean, straight cuts.
- Table Saw: If you have access, a table saw is excellent for cutting larger sheets of wood with precision.
- Drill/Driver: A power drill is necessary for making holes and driving screws, which hold your cabinet together.
- Screwdriver Set: While the drill can drive screws, a set of screwdrivers can help with any adjustments or specific screws.
- Router: If you want to add decorative edges or grooves, a router will help you achieve that polished finish.
- Clamp Set: Clamps hold your pieces together while the glue dries, ensuring everything is aligned correctly.
- Sanding Block or Orbital Sander: Smooth surfaces are important for aesthetics. Sanding tools help eliminate rough edges and prepare surfaces for finishing.
- Jigsaw: This tool is handy for making curved cuts or shapes in your tambour doors.
- Square and Level: These tools ensure your cabinet is both square and level during the assembly process.
Essential Materials
| Material | Description |
|---|---|
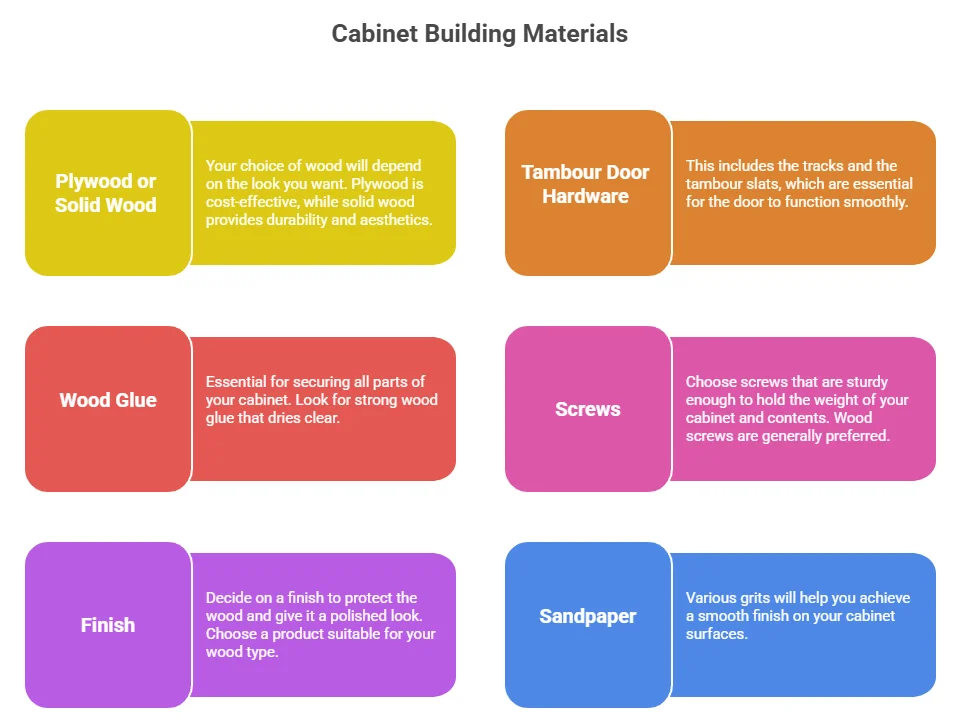
| Plywood or Solid Wood | Your choice of wood will depend on the look you want. Plywood is cost-effective, while solid wood provides durability and aesthetics. |
| Tambour Door Hardware | This includes the tracks and the tambour slats, which are essential for the door to function smoothly. |
| Wood Glue | Essential for securing all parts of your cabinet. Look for strong wood glue that dries clear. |
| Screws | Choose screws that are sturdy enough to hold the weight of your cabinet and contents. Wood screws are generally preferred. |
| Finish (Paint, Stain, or Varnish) | Decide on a finish to protect the wood and give it a polished look. Choose a product suitable for your wood type. |
| Sandpaper | Various grits will help you achieve a smooth finish on your cabinet surfaces. |
Tips for Efficient Assembly
Knowing your tools and materials is great, but effective assembly techniques can make your DIY Wooden Tambour Door Cabinet Plans even smoother. Consider the following tips:
- Always double-check your measurements before cutting. Small errors can lead to bigger problems later.
- Take your time during the sanding process; patience here will result in a much better finish.
- Assemble the cabinet in stages. Start with the frame before attaching the tambour doors.
- Use clamps to hold pieces in place as the glue dries, ensuring everything remains aligned.
- Regularly clean your workspace. It minimizes hazards and keeps your focus on the project.
With the right tools and materials, you are well on your way to creating a stunning tambour door cabinet. For more detailed DIY Wooden Tambour Door Cabinet Plans and inspiration, you may want to explore Wood Magazine or visit Ana White for DIY woodworking guidance. An extensive selection of resources will help hone your skills and provide step-by-step plans for your projects.
Step-by-Step Guide to Constructing a Wooden Tambour Door
Materials Needed
- Wood (plywood or hardwood)
- Tambour strips
- Wood glue
- Screws
- Sandpaper
- Wood finish (stain or paint)
- Hinges
- Router
- Measuring tape
- Safety goggles
- Clamps
- Paintbrush
- Drill
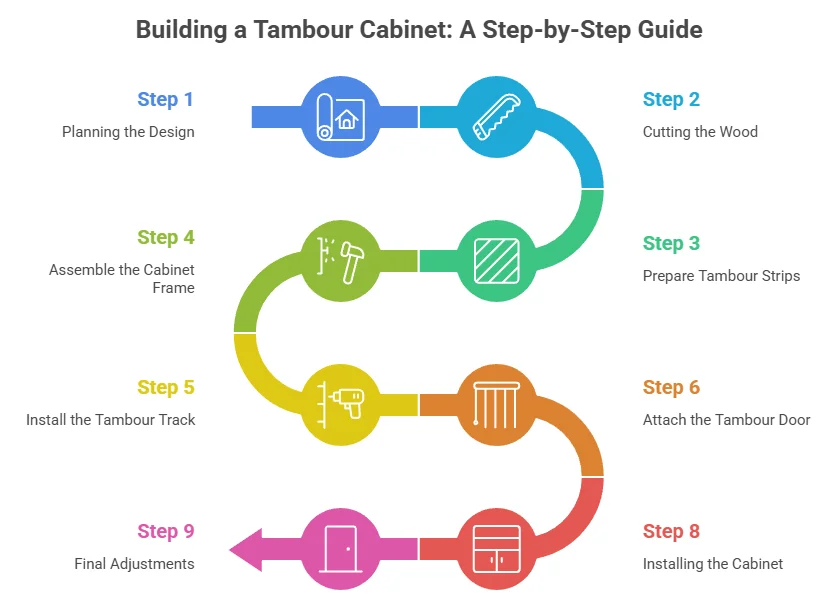
Step 1: Planning the Design
Before you start constructing your DIY Wooden Tambour Door Cabinet Plans, sketch out your design. Think about the size of the cabinet and the space you want it to occupy. Take into consideration what you will store inside the cabinet, as this will dictate the dimensions. Remember to draw the tambour door as this will be essential for the next steps.
Step 2: Cutting the Wood
Using your measurements, cut the wood for the cabinet body to size. You will need four panels: two side panels, a top panel, and a bottom panel. Ensure the cuts are straight and smooth for better assembly.
Step 3: Prepare Tambour Strips
The tambour strips are crucial for creating a rolling door. Cut wood into strips about three-quarters of an inch wide. The length should match the height of your cabinet door plus an additional inch for adjustments. Sand each strip thoroughly to remove any splinters and ensure a smooth finish.
Step 4: Assemble the Cabinet Frame
Begin assembling the cabinet frame by attaching the top and bottom panels to the side panels using wood glue and screws. Ensure everything is square by measuring diagonally. Use clamps to hold everything together while the glue dries. This will provide a strong structure for the tambour door.
Step 5: Install the Tambour Track
To allow the tambour door to roll smoothly, a track must be installed. Screw a length of wood to both sides of the cabinet where the tambour will sit. This will act as a guide for the tambour strips.
Step 6: Attach the Tambour Door
Once the frame is prepared and the track is in position, it’s time to attach the tambour door. You can attach it using screws or nails at the top edge where it will slide along the track. Install hinges at the bottom so that the tambour can pivot outwards when opening.
Step 7: Finishing Touches
Sand any rough edges to make the cabinet look polished. After sanding, apply your preferred wood finish. Whether you choose a stain to bring out the wood grain or paint for a pop of color—always apply evenly with a brush.
Step 8: Installing the Cabinet
Once the finish has dried, it’s time to install the cabinet. Depending on your design, you might want to anchor it to a wall or leave it freestanding. Make sure it is level for stability.
Step 9: Final Adjustments
Open and close the tambour door several times to ensure it rolls smoothly. You can make adjustments to screws or the track if needed. Use this opportunity to ensure the cabinet meets your storage needs.
Care and Maintenance
To keep your DIY Wooden Tambour Door Cabinet Plans looking great, regularly dust it with a soft cloth. Avoid using harsh chemicals that may damage the wood finish. If you notice any wear and tear over time, touch up the finish to maintain its aesthetic appeal.
Creative Finishing Techniques for Your Tambour Door Cabinet
If you’re ready to give your DIY Wooden Tambour Door Cabinet Plans a unique flair, exploring creative finishing techniques can elevate its look and ensure it stands out in your space. From stains to paint and beyond, the right finish can transform a simple cabinet into a statement piece that reflects your personal style.
Choosing the Right Finish for Your Cabinet
Before diving into the finishing process, consider the type of wood used for your tambour door cabinet. Different woods absorb finishes differently, affecting the final appearance. Here are some popular options:
- Stain: This enhances the natural grain of the wood while adding color.
- Paint: A solid color can give a modern look, while chalk paint can add a vintage vibe.
- Varnish: For a clear, protective coat that enhances sheen.
- Oil: This penetrates the wood and provides a natural finish that’s easy to maintain.
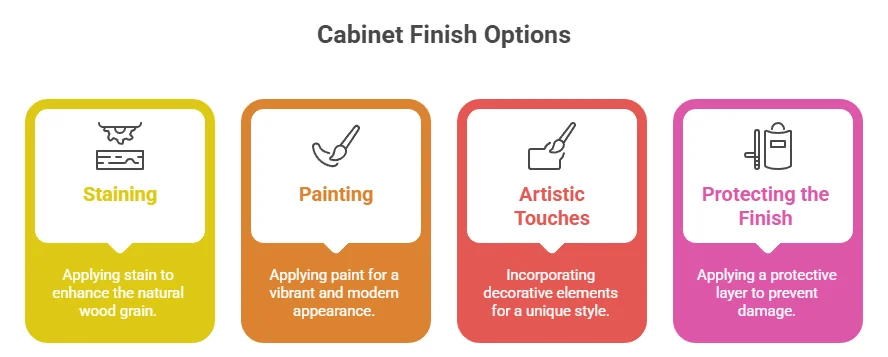
Staining Your Tambour Door Cabinet
Staining is a great way to highlight the wood grain of your DIY Wooden Tambour Door Cabinet Plans. Follow this simple process to achieve the best results:
- Preparation: Sand the wood thoroughly to remove any imperfections and ensure even application.
- Choosing the Right Stain: Select a stain that complements your home décor. Consider testing a small area first.
- Application: Use a brush, rag, or sponge to apply the stain. Wipe off excess with a clean cloth.
- Drying Time: Allow sufficient drying time as instructed on the stain’s label.
- Sealing: Finish with a clear topcoat to protect the stained finish and enhance durability.
Painting for a Fresh Look
If you prefer a colorful finish, painting your DIY Wooden Tambour Door Cabinet can be ideal. Here’s a quick guide:
- Prep Work: Like staining, start with sanding for a smooth surface. Clean dust afterward.
- Primer: Applying a primer helps the paint adhere better, especially if you’re painting over a dark or stained wood.
- Paint Selection: A water-based acrylic paint works well for indoor furniture due to its durability and ease of cleaning.
- Application: Use a high-quality brush or roller, applying thin coats for an even finish. Two to three coats might be necessary.
Adding Artistic Touches
Don’t be afraid to get creative with DIY Wooden Tambour Door Cabinet Plans. Here are some artistic ideas to consider:
- Distressing: This technique can give your cabinet a rustic, vintage character. Use sandpaper or a chisel on edges and corners to wear down the finish.
- Decoupage: Apply decorative paper or fabric onto the cabinet panels to add patterns and textures. Seal with a clear coat for durability.
- Stenciling: Use stencils to add unique designs or motifs on the cabinet doors. This can be a great way to personalize the piece.
Protecting Your Cabinet’s Finish
The final step in the finishing process is ensuring that your DIY Wooden Tambour Door Cabinet remains beautiful over time. Use these tips for optimal protection:
- Use Coasters: Protect surfaces from drinks and heat by using coasters on your cabinet top.
- Regular Cleaning: Dust frequently with a soft cloth and clean spills immediately to avoid damage.
- Avoid Direct Sunlight: Keep your cabinet out of direct sunlight to prevent fading over time.
Troubleshooting Common Issues When Building Wooden Cabinets
Building wooden cabinets can be a rewarding experience, but sometimes things don’t go as planned. Common issues can arise, which might leave you frustrated and unsure about how to proceed with your DIY Wooden Tambour Door Cabinet Plans. Here are some typical problems you may encounter, along with practical solutions.
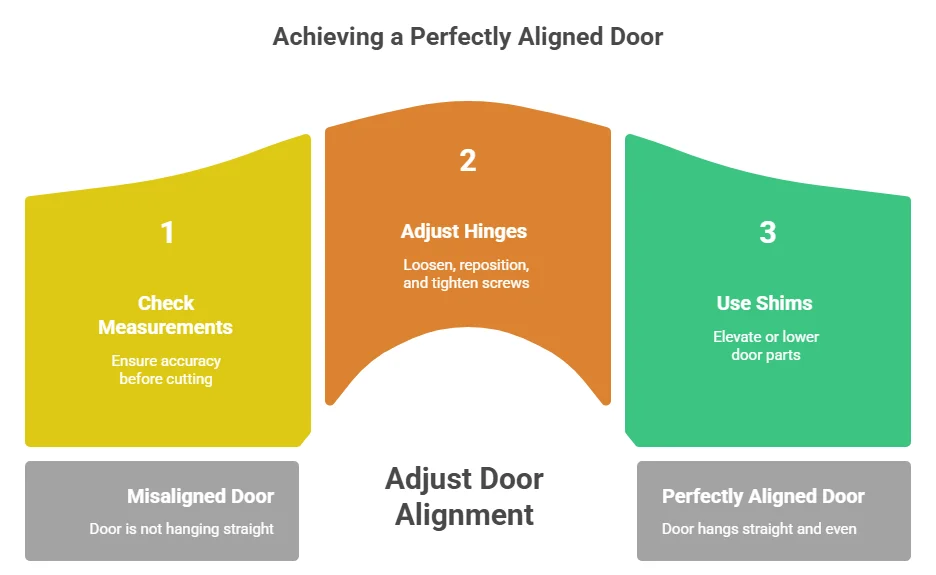
One of the most frequent challenges is misaligned doors. If your cabinet doors don’t align properly, they can be unsightly and frustrating to operate. This issue often occurs because of improper measurements or adjustments during assembly. To fix misalignment:
- Check all measurements before cutting your wood to ensure accuracy.
- Adjust the hinges; they often come with several adjustment options. Loosen the screws slightly, reposition the door, and then tighten the screws again.
- If the door is still misaligned, consider using shims to help elevate or lower different parts of the door.
Another common problem is the wood warping. Wood is a natural material, and fluctuations in humidity and temperature can cause it to warp. If you find your DIY Wooden Tambour Door Cabinet doors or parts warped, try the following:
- Store your wood properly in a climate-controlled environment before building, allowing it to acclimate to its surroundings.
- If the wood has already warped, consider using a moisture meter to check the humidity levels and store your cabinets in more stable conditions.
- In some cases, you may be able to fix minor warping by applying moisture and placing it under weight to help it straighten.
Another issue you might face is difficulties with the finish. Achieving the perfect finish on your DIY Wooden Tambour Door Cabinet Plans can be tricky. If your paint or stain doesn’t look right, it could be due to:
- Improper surface preparation; always sand your wood thoroughly before applying any finishes.
- Using the wrong type of finish for your project; check product specifications to choose the right finish carefully.
- Environmental conditions such as high humidity or temperature affecting the drying process; always apply finishes in a controlled environment.
Hardware installations can also present problems. If your cabinet handles or knobs aren’t installed correctly, they may feel loose or even fall off. To address hardware installation issues:
- Measure the placement of the handles twice before drilling to avoid misplacement.
- Use wood glue along with screws for added durability.
- Check the manufacturer’s specifications to ensure each piece of hardware is compatible with your cabinets.
Occasionally, you might encounter problems with the overall structure of your cabinet, such as sagging shelves. If the shelves are sagging under the weight of your items, consider the following:
- Ensure that your shelves are adequately supported, using brackets or additional supports for heavy items.
- Use thicker plywood or solid wood when constructing your shelves, as these materials provide greater strength.
- Avoid overloading your shelves; distribute weight evenly to prevent sagging.
To keep your woodworking project moving smoothly, maintain a well-organized workspace. Clutter can lead to mistakes and misplacements. Make a habit of cleaning and organizing tools and materials frequently. Also, take your time and don’t rush through the process; patience is crucial for achieving high-quality results.
If you wish to learn more about woodworking techniques and troubleshoot your DIY Wooden Tambour Door Cabinet effectively, consider visiting Wood Magazine for useful tips and resources. Always remember that even seasoned carpenters encounter challenges. Seek advice from communities like Woodworking Talk, where you can gain insights from fellow woodworking enthusiasts.
Conclusion
Building your own DIY Wooden Tambour Door Cabinet Plans can be an incredibly satisfying project that adds both beauty and functionality to your home. By following the key considerations in the design phase, you ensure that your cabinet will fit perfectly in your intended space and meet your storage needs. Gathering the essential tools and materials is critical, as it sets the foundation for a smooth building process.
The step-by-step guide empowers you to construct a tambour door cabinet with confidence, emphasizing safety and precision at every stage. Don’t forget to explore creative finishing techniques to elevate your cabinet’s appearance, whether you choose a paint color that complements your decor or a varnish that highlights the natural wood grain.
Even with careful planning, you may encounter some common issues during the building process. Troubleshooting these problems promptly can save time and frustration, allowing you to appreciate your handiwork sooner. Embrace the learning experience as a valuable part of your DIY journey.
Celebrating your finished DIY Wooden Tambour Door Cabinet is just the beginning; it’s a testament to your skills and creativity. Whether you designed it for your living room, kitchen, or office, this unique piece will not only enhance your space but also serve as a conversation starter. Enjoy the pride that comes with crafting something truly your own, and let it inspire you for your next DIY project.