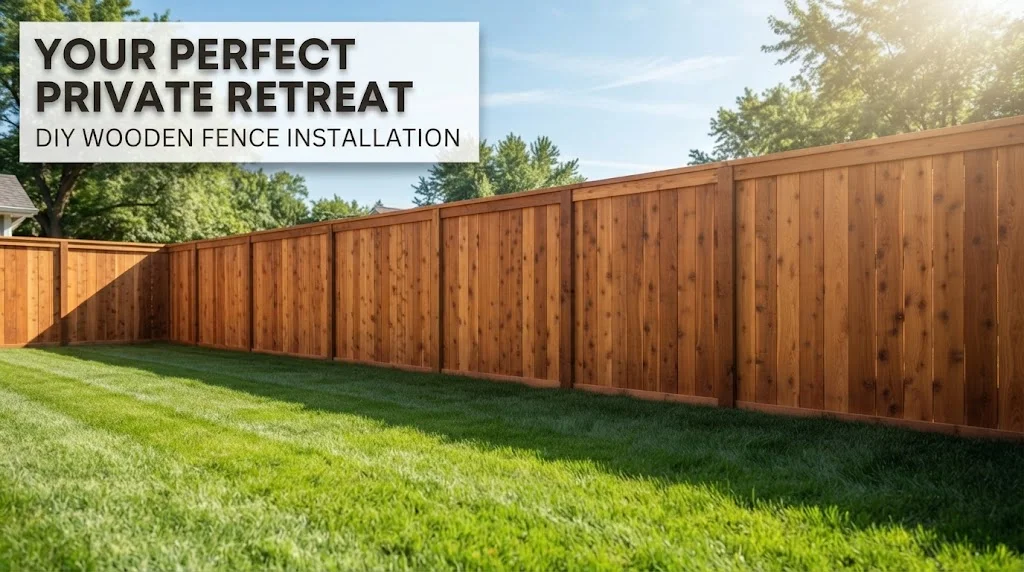
Installing a DIY Wooden Privacy Fence can be a rewarding DIY project that adds beauty and security to your yard. With a little planning and the right tools, you can create a space that feels private and inviting. This guide will walk you through the step-by-step process of building your own wooden privacy fence.
Gather Your Materials and Tools
Before you start, make sure you have all the necessary materials and tools ready. Here’s a checklist to help you out:
- Pressure-treated wood (fence panels, posts, and rails)
- Concrete mix for securing posts
- Screws or nails for securing panels
- Post brackets (optional)
- Wood stain or sealant (for longevity)
- Tools:
- Measuring tape
- Post hole digger
- Level
- Hammer or drill
- Saw (if cutting wood on-site)
- Safety goggles and gloves
Plan Your Fence Layout
Start by marking where your fence will go. Use stakes and string to lay out the fence line, keeping it straight and true. Measure the total length of the fence to determine how many posts and panels you will need. Make sure to check with local regulations for fencing height and placement, as some areas may have specific requirements.
Determine the Fence Height and Spacing
The standard height for a privacy fence is usually between 6 to 8 feet. Decide on your desired height and check local guidelines. For spacing, the posts are typically set 6 to 8 feet apart. It’s crucial to have consistent spacing for structural stability.
Install the Fence Posts
Begin by digging holes for your fence posts. Aim for a depth of at least one-third the length of the post, typically around 2-3 feet. Here are the steps:
- Dig the holes with a post hole digger.
- Place the posts in the holes, ensuring they are level.
- Backfill with concrete and dirt to secure the posts.
- Let the concrete cure for at least 24 hours before continuing.
Attach the Rails
Once the posts are secure, attach horizontal rails between them. Use at least two rails for stability, placing one at the top and one at the bottom. Use a level to keep them even. Secure the rails using screws or nails to ensure a strong connection.
Install the Fence Panels
Next, it’s time to install the fence panels. Follow these steps:
- Starting at one end, place the first panel between the posts.
- Use your level to ensure it is straight.
- Attach the panel to the rails with screws or nails.
- Repeat this process for each panel until the fence is complete.
Finish the Fence
To enhance the appearance of your new fence and extend its life, consider applying a wood stain or sealant. This step will help protect against moisture and sun damage. Allow the stain to dry completely before using the area.
Maintain Your Fence
Regular maintenance is key to prolonging the life of your wooden privacy fence. Check for damaged panels, loose nails, or signs of rot at least once a year and repair them as needed. This proactive approach will keep your fence looking great for years to come.
Building a DIY Wooden Privacy Fence Installation Guide is not just about enhancing your yard; it’s also about creating a space that offers comfort and privacy. Follow this guide, and you’ll have a beautiful and functional fence that adds value to your property.
Essential Tools You Need for Building a Wooden Privacy Fence
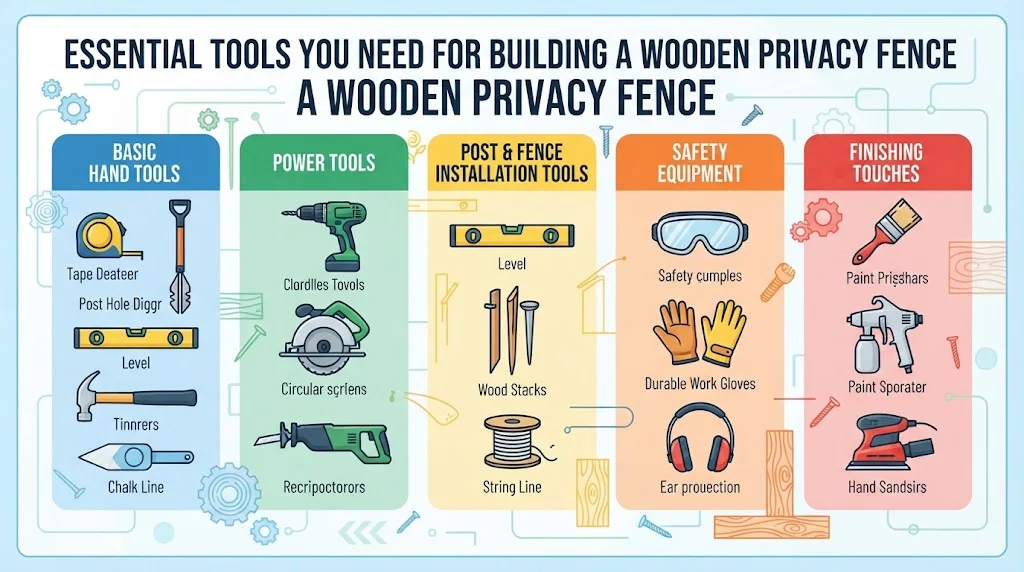
Building a wooden privacy fence is a great way to enhance your yard’s security and aesthetic appeal. To successfully embark on this DIY project, you will need a variety of essential tools. Each tool plays a specific role in ensuring that your fence is sturdy, durable, and well-constructed. Here is a detailed overview of the must-have tools for building a wooden privacy fence.
Basic Hand Tools
Starting with some simple hand tools, you can lay the foundation for your wooden privacy fence installation. Here’s what you will need:
- Measuring Tape: A measuring tape is crucial for accurately measuring the length and height of your fence. Make sure to choose a tape that is long enough to cover your project space.
- Post Hole Digger: This tool is essential for digging the holes where the fence posts will be set. You can opt for either a manual or mechanical version depending on the size of your project area.
- Level: A level will ensure that your fence posts are perfectly vertical, which is critical for overall fence stability.
- Hammer: You’ll need a hammer for driving nails and securing materials together effectively.
- Chalk Line: Use a chalk line to mark straight lines on the ground where your fence will be installed. This will serve as a guide for aligning your posts and panels.
Power Tools
Power tools can significantly speed up the process and make your work easier. Here are the key power tools to consider:
- Drill/Driver: A cordless drill is vital for drilling holes and driving screws. It can help you attach the panels to the posts securely.
- Circular Saw: A circular saw is necessary for cutting fence panels and posts to the desired size. If you need to make more intricate cuts, consider using a jigsaw.
- Reciprocating Saw: This saw is beneficial for cutting through tough materials and can be very handy if you need to adjust existing structures.
Post and Fence Installation Tools
When it comes to installing your fence posts and panels, certain specialized tools can make the job easier:
- Fence Post Level: This tool allows you to see if your posts are plumb from two sides, ensuring they are vertical.
- Wood Stakes: Use wood stakes to help maintain the proper alignment and positioning of your fence during installation.
- String Line: A string line will help you keep everything aligned when installing your panels, ensuring a straight and professional-looking fence.
Safety Equipment
Safety should always be a priority when undertaking any DIY project. Consider investing in the following safety equipment:
- Safety Goggles: Protect your eyes from dust and debris while using power tools.
- Work Gloves: Wear durable work gloves to protect your hands from splinters and rough materials.
- Ear Protection: If you’ll be using loud power tools, ear protection can prevent damage to your hearing.
Finishing Touches
Once your fence is up, there are a few final tools that can help with any finishing touches:
- Paintbrush or Sprayer: If you wish to stain or seal your fence, having a quality paintbrush or sprayer is important for even application.
- Sander: A sander can be helpful for smoothing out rough edges on your wooden fence before applying any finishes.
Choosing the Right Wood for Your Privacy Fence Project
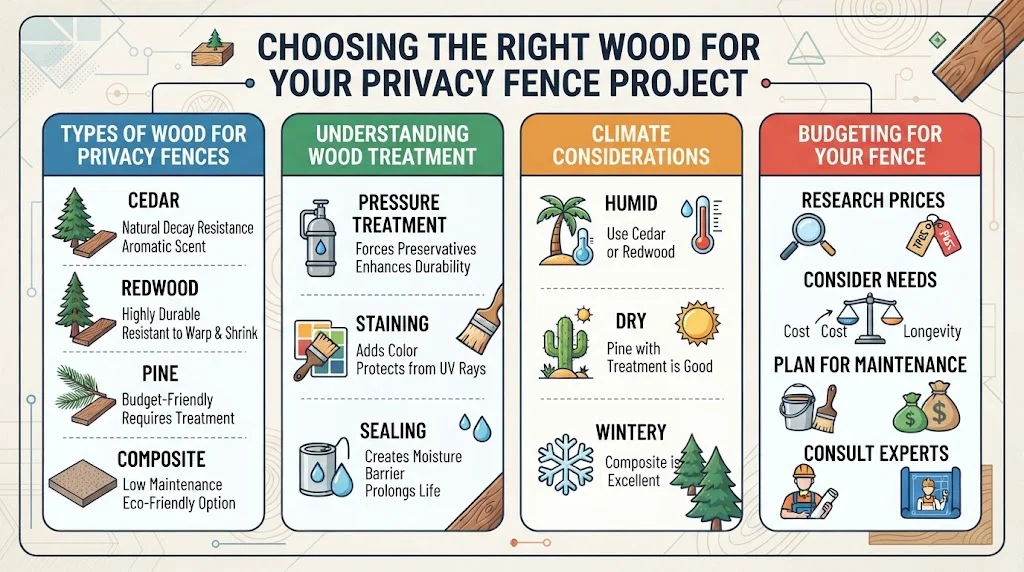
When embarking on a project like building a wooden privacy fence, the choice of wood is crucial. The right type of wood not only determines the appearance of your fence but also its longevity and maintenance needs. Here’s what you need to consider when choosing wood for your privacy fence.
Types of Wood for Privacy Fences
Different types of wood offer various benefits and aesthetics. Below is a list of popular wood choices:
- Cedar: Known for its natural resistance to decay and insect damage, cedar is a common choice for fences. It has a beautiful color and a pleasant aroma, which many homeowners appreciate.
- Redwood: This wood is highly durable and resistant to warping and shrinking. Its rich hues and fine texture make it an attractive option, though it tends to be more expensive.
- Pine: A more budget-friendly option, pine is easy to work with and readily available. However, it may require treatment to protect it from rot and pests.
- Spruce: Similar to pine, spruce is affordable and has a fine grain. It is a good option for a temporary fence but can warp if not treated properly.
- Composite Wood: Made from recycled materials, composite wood is resistant to rot and insects. It provides the look of wood without the maintenance, making it an attractive option for many homeowners.
Understanding Wood Treatment
No matter which wood type you choose, treatment is essential. Untreated wood is vulnerable to the elements, which can lead to decay and insect infestations. Consider these treatments:
- Pressure Treatment: This method forces preservatives into the wood fibers, enhancing durability against moisture and insects.
- Staining: Stains can add color and protect the surface from UV rays. Regular reapplication is needed, especially in sunny areas.
- Sealing: Sealers create a barrier against water and other elements, prolonging the life of the wood.
Climate Considerations
Your local climate can affect your wood choice significantly. Areas with high humidity require different considerations than arid environments. Here’s how climate impacts wood selection:
| Climate | Recommended Wood Type |
|---|---|
| Humid | Cedar or Redwood |
| Dry | Pine (with treatment) |
| Wintery | Composite |
Budgeting for Your Fence
Price often plays a significant role in determining your wood choice. Quality wood may require a larger initial investment, but it often pays off in longevity and reduced maintenance. Here are some budgeting tips:
- Research Prices: Look online or visit local suppliers to compare wood prices.
- Consider Your Needs: Assess how long you’d like the fence to last. If temporary measures are required, opt for a more affordable type of wood.
- Plan for Maintenance: Factor in the eventual costs of treatments, stains, or repairs when calculating your budget.
If you’re unsure about what type of wood to choose, consulting a fencing expert can be incredibly beneficial. Websites like Wood Magazine and Family Handyman offer great insights on wood types and fencing tips. They can guide you through the selection process based on your specific needs and preferences.
Common Mistakes to Avoid When Installing a Privacy Fence

Installing a privacy fence can enhance your backyard’s aesthetics, create a more secure environment, and provide the sanctuary you desire. However, many homeowners make common mistakes during the installation process. Here are some tips to help you avoid these pitfalls and ensure a successful fence installation.
Choosing the Wrong Material
One of the first mistakes you might encounter while planning your fence installation is selecting an unsuitable material. Each type of wood, such as cedar, pine, or redwood, comes with its unique properties. Cedar is known for its resistance to decay, while pine may require additional treatments to resist rot.
Improper Planning and Layout
Before you begin digging or assembling, it’s vital to plan properly. Failing to measure your yard or not marking the fence line can lead to significant problems, including an uneven fence line or positioning it too close to your neighbor’s property. Always check local regulations about property lines and permits before starting your project. Use stakes and string to outline where your fence will go, making adjustments as necessary. Here are some additional layout tips:
- Use property documents to confirm boundaries.
- Visualize the fence from various angles.
- Write down any gates and angles in your plan.
Neglecting to Check Local Regulations
Each neighborhood has specific rules regarding fence height and style. Not adhering to these regulations can lead to complaints or even requiring you to take the fence down. Research local zoning laws and homeowners’ association (HOA) guidelines before installation to avoid issues later. Websites such as Fence Authority can provide information on fencing regulations in your area.
Inadequate Foundation Preparation
A solid foundation is critical for the longevity and stability of your fence. One common mistake is neglecting to prepare the ground adequately. Ensure you dig post holes that are at least one-third of the post height into the ground and below the frost line if you live in a colder area. This will help prevent leaning or toppled fences over time. Remember to:
- Use a post-hole digger for better precision.
- Ensure holes are void of debris before inserting posts.
Improperly Installing Gate Hardware
Gates often see the most wear and tear on a fence, and how you install the hardware is crucial. Failing to secure hinges properly or misaligning the gate can lead to difficulties opening or closing it. Make sure to:
- Use high-quality hinges and latches.
- Install the gate before cementing your posts for easier adjustments.
Forgetting About Maintenance
Even before the installation, consider how you will maintain your fence. Picking a wood type that requires frequent staining or sealing may not be ideal if you want minimal upkeep. Research the maintenance needs of various materials to ensure you choose one that aligns with your lifestyle.
Ignoring Utility Lines
Before starting the fence installation, always check for underground utility lines. Not doing so can result in damaging lines, leading to costly repairs and potential safety hazards. Call your local utility company to mark the locations of lines before digging. Websites like Call811 can guide you on checking for these lines.
Overlooking Neighbors’ Opinions
While you might be excited to add a privacy fence, it’s courteous to discuss your plans with your neighbors beforehand. They might have concerns about the fence’s placement or appearance that you didn’t consider. Open communication can help maintain good relationships and even lead to shared projects.
By avoiding these common mistakes when installing a privacy fence, you can create a beautiful and functional addition to your yard. Remember, proper planning and consideration for materials, local regulations, and your landscape will lead to a successful installation. If you’re unsure where to start, consider consulting with professionals from reputable sites like Home Depot for advice tailored to your specific needs.
Maintenance Tips to Keep Your Wooden Privacy Fence Looking Great
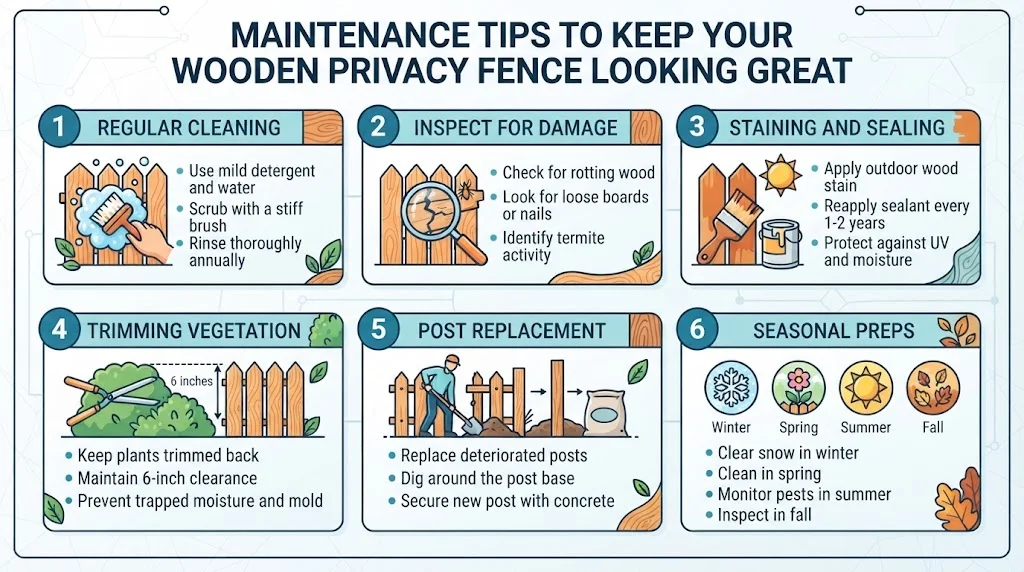
To keep your wooden privacy fence looking its best, routine maintenance is essential. With proper care, your fence can endure the test of time, preserving its beauty and functionality. Follow these tips to maintain your fence effectively.
Regular Cleaning
Over time, dirt, grime, and mildew can accumulate on your fence. To eliminate these unwanted elements, schedule a cleaning session at least once a year. Here’s how to do it:
- Gather your supplies: You will need a stiff brush, a pressure washer (optional), and a mixture of water and mild detergent.
- Apply the solution: Wet the fence with water and scrub it using the brush dipped in the cleaning solution. For tough stains, employ the pressure washer carefully to avoid damaging the wood.
- Rinse: After scrubbing, rinse off any detergent residue with clean water.
Inspect for Damage
Routine inspections can help you catch problems before they escalate. Check for:
- Rotting wood: Look for soft spots or discoloration in the wood.
- Loose boards: Ensure that all boards are secure. Tighten or replace any loose screws or nails.
- Termite activity: Check for signs of termites by looking for small holes or sawdust accumulations.
Staining and Sealing
Wooden fences benefit significantly from protective treatments. Staining enhances the appearance while sealing prevents moisture intrusion and decay. Here’s how to proceed:
- Choose the right stain: Opt for stains specifically designed for outdoor use.
- Apply the stain: Use a brush or roller for even application. For best results, apply the stain on a dry, warm day.
- Seal the fence: A sealant can add extra protection from water and UV rays. Consider reapplying every one to two years.
Trimming Vegetation
Keep nearby plants and bushes trimmed. Vegetation that touches the fence can trap moisture, which may foster mold and rot development. Maintain a clearance of at least six inches between your fence and any plants.
Post Replacement
Fence posts are vital for overall stability. Their longevity is crucial, but they can deteriorate over time. If you notice any leaning or damage, it’s wise to replace these posts promptly. Follow these steps:
- Dig around the post: Create a hole that is wider than the post base.
- Remove the old post: Use a pry bar if necessary, and dispose of it responsibly.
- Place the new post: Insert it into the hole, add gravel, and ensure it is plumb before filling with concrete.
Seasonal Preps
Different seasons bring unique challenges. Preparing your fence for winter or summer can be beneficial. Here are some seasonal tips:
| Season | Action |
|---|---|
| Spring | Clean thoroughly and apply a fresh coat of stain. |
| Summer | Monitor for pest activity and trim nearby plants. |
| Fall | Inspect for damage and repair as needed. |
| Winter | Remove snow buildup to prevent excessive weight on the fence. |
Taking the time to maintain your DIY Wooden Privacy Fence can significantly enhance its lifespan and appearance. For more detailed information on fence maintenance and care, check out resources from Wood Magazine and Houzz.
By following these steps diligently, you can ensure your wooden privacy fence remains a beautiful and functional boundary for years to come. Regular maintenance not only enhances visual appeal but also increases property value and security.
Conclusion
Installing a DIY Wooden Privacy Fence can be a rewarding and enriching experience. By following the step-by-step guide, you gain not only the privacy you desire but also a sense of accomplishment. Selecting the right tools for the job is paramount; investing in quality tools will streamline the installation process and improve the final result. Equally important is choosing the right type of wood; options like cedar or redwood are not only sturdy but also offer natural resistance to decay.
Throughout your project, be mindful of common mistakes that many first-time builders make. Taking shortcuts or neglecting proper measurements can lead to a fence that may not stand the test of time. By avoiding these pitfalls, you can ensure your fence is as strong and stable as possible.
Once your wooden privacy fence is up, don’t forget the importance of regular maintenance. Simple care tips, such as staining or sealing the wood, can go a long way in preserving its beauty and longevity. By dedicating a little time to upkeep, your fence can maintain its fresh appearance for years.
A DIY Wooden Privacy Fence is not only a practical solution for your yard but also a project that enhances your outdoor space. Embrace the journey, take pride in your work, and enjoy the privacy and comfort that your new fence provides.