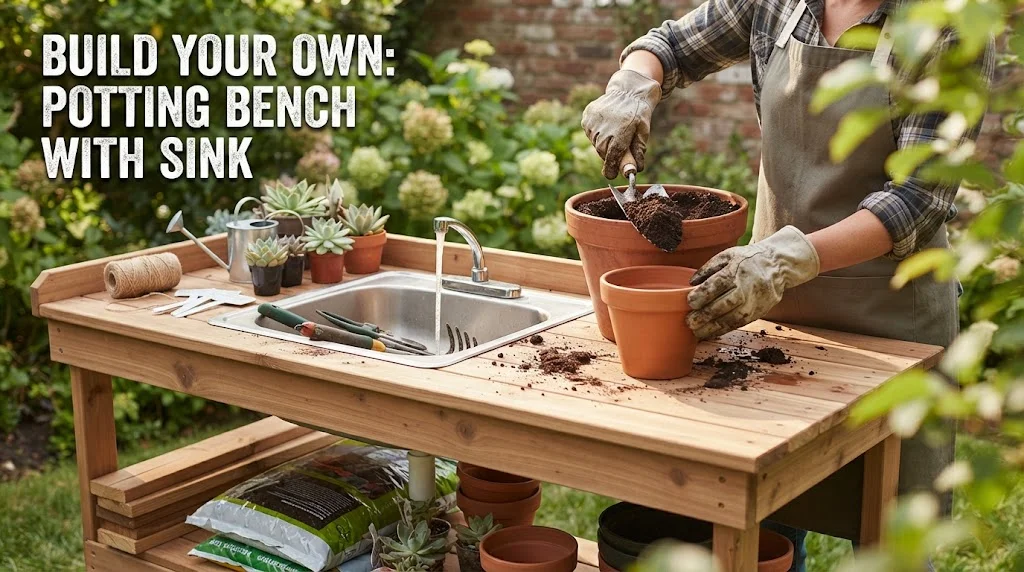
Creating a DIY Wooden Potting Bench with Sink can be a rewarding project that enhances your gardening experience. It provides a dedicated space to pot plants, clean tools, and manage your gardening supplies efficiently. By incorporating a sink, you’re not only adding functionality but also convenience. Let’s explore the essential materials and tools you’ll need to build your own potting bench.
Essential Materials for Your Potting Bench
Choosing the right materials is crucial for both durability and aesthetics. Here’s a list of materials you’ll typically need to build a wooden potting bench with a sink:
- Wood: Select weather-resistant wood such as cedar or redwood. These types of wood are known for their resistance to rot and insects.
- Sink: A simple stainless steel sink works best for easy cleaning and durability.
- Plywood: Use exterior-grade plywood for the top surface and shelves.
- Wood Screws: Ensure they are galvanized or stainless steel to prevent rust.
- Wood Glue: This adds stability to your assembly.
- Sealer or Finish: Protect your wooden bench with an outdoor wood sealer to extend longevity.
Tools You’ll Need
Using the right tools will make your construction process smoother and more efficient. Here’s a list of tools you should gather:
- Measuring Tape: Accuracy is key, so a measuring tape will help you get the right dimensions.
- Power Drill: Essential for creating holes and driving screws into the wood.
- Saw: A circular saw or miter saw will help you cut your wood accurately.
- Level: Ensure your bench is even for proper drainage from the sink.
- Screwdriver: Handy for finishing up the screws easily.
- Sandpaper or Sander: To smooth out rough edges on your wood.
Building Steps Overview
With your materials and tools ready, let’s briefly go over the steps to construct your potting bench:
- Cut all wooden pieces: Measure and cut your wood to the desired lengths for the frame, top, and shelves.
- Assemble the frame: Use wood glue and screws to create a sturdy frame. Make sure it’s square using a level.
- Install the sink: Cut an appropriate hole in the top for the sink and secure it in place.
- Add the top: Attach the plywood top securely over the frame ensuring the sink is properly integrated.
- Finish with sandpaper: Smooth the entire bench to prevent splinters and enhance the appearance.
- Seal the wood: Apply a sealer to protect against moisture damage.
Tips for a Successful Build
Keep these tips in mind as you start your project:
- Involve friends or family if possible; teamwork can make the process quicker and more enjoyable.
- Prioritize safety by wearing protective gear like goggles and gloves.
- Consider adding hooks or shelves for extra storage space.
For more detailed guidance on building your potting bench, you can explore resources such as Gardening Know How or Family Handyman.
Constructing a DIY Wooden Potting Bench with Sink is a fulfilling task that can significantly improve your gardening efficiency. With the right materials and tools, along with a bit of patience and creativity, you can create a beautiful and functional workspace for all your gardening needs.
Step-by-Step Guide to Assembling Your Potting Bench
Building your own potting bench can be a rewarding DIY project, especially when you incorporate useful features like a sink. A wooden potting bench with a sink can enhance your gardening experience by providing a convenient workspace for planting and nurturing your plants. Here’s a step-by-step guide to help you assemble your potting bench effectively.
Gather Your Materials
Before you start assembling your potting bench, make sure you have all the materials you need. Here’s a list of items you’ll want to gather:
- Wood: Choose weather-resistant wood like cedar or redwood, which stands up well to outdoor conditions.
- Wood screws: These will hold your bench together securely.
- Sink: Opt for a stainless steel sink that can withstand the elements.
- Plumbing supplies: Get PVC pipes and fittings for water supply and drainage.
- Wood glue: For extra stability in your joints.
- Tools: A saw, drill, tape measure, level, and screwdriver are essential.
Design Your Layout
Before cutting any wood, sketch out the design for your potting bench. Having a clear visual will make the building process much easier. Consider the following dimensions:
| Feature | Recommended Dimension |
|---|---|
| Height | 36 inches |
| Width | 48 inches |
| Depth | 24 inches |
This layout will give you ample space to work and a sturdy frame to accommodate the sink. Adjust the size according to your specific garden needs.
Cut the Wood to Size
Once you have the design in mind, it’s time to cut your wood. Using a saw, carefully cut the wood pieces according to your design dimensions. Be sure to wear safety goggles and follow proper cutting techniques to avoid any injuries.
Assemble the Frame
Start by building the frame of the potting bench. Lay out the legs and attach them to the top surface using wood screws. Use your level to ensure everything is even. Here’s how to do it:
- Position the two outer legs at each end of the top board.
- Secure with screws, drilling them into the wood at an angle for better grip.
- If you have a lower shelf, attach additional supports to hold this shelf up.
Install the Sink
Now it’s time to make your potting bench functional by installing the sink. Here’s how to do it:
- Cut a hole in the surface for the sink that matches the sink’s dimensions.
- Secure the sink into the cut hole; you may need to use silicone sealant for a watertight fit.
- Attach the plumbing for the sink. Connect your PVC pipes to allow for both water supply and drainage.
Add Finishing Touches
To complete your potting bench, you can personalize it with various finishing touches. Here are some ideas:
- Stain or paint: Choose a weather-resistant exterior stain to protect the wood.
- Storage: Add hooks, shelves, or drawers for tools and gardening supplies.
- Accessories: Consider adding decorative accents like potted plants or signage.
Maintenance Tips
To ensure your potting bench lasts for years, consider these maintenance tips:
- Regularly check the condition of the wood and treat any wear with sealant.
- Keep the sink clean and free from debris to prevent clogs in the plumbing.
- Store your tools out of the elements when not in use.
With your DIY Wooden Potting Bench with Sink complete, you’ll find gardening easier and more enjoyable. For more detailed plans and resources, visit Family Handyman or check out Better Homes & Gardens for additional inspiration.
Creative Design Ideas to Personalize Your Potting Bench
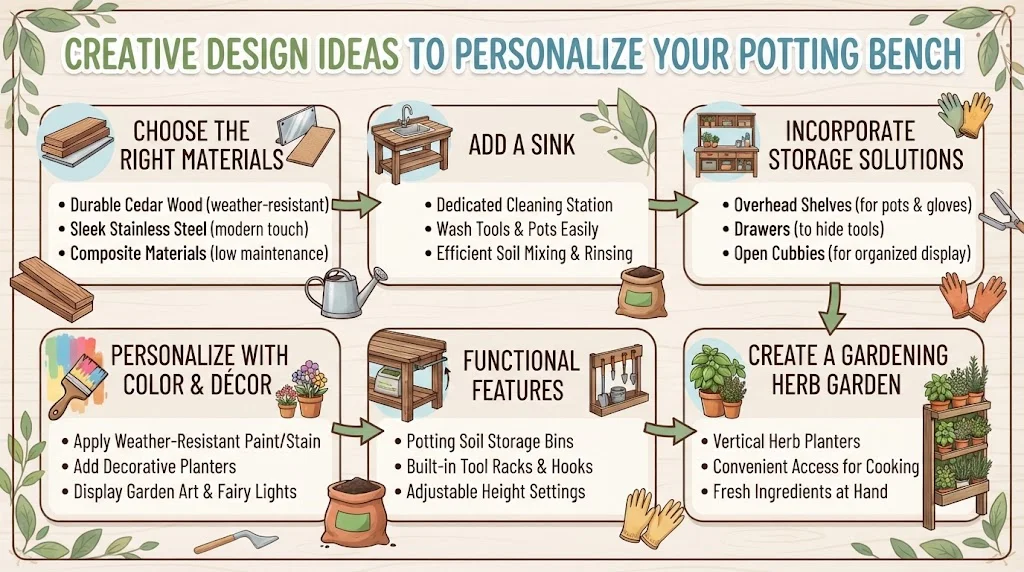
Personalizing your potting bench can elevate your gardening experience and make it more enjoyable. By incorporating your style and practical elements into the design, you can create a workspace that resonates with you. Here are some creative design ideas to help you customize your potting bench.
Choose the Right Materials
The materials you choose can greatly influence the look and functionality of your potting bench. Consider using:
- Wood: Durable and easy to customize. Cedar is a popular choice because it’s resistant to moisture.
- Metal: Provides a modern touch. Stainless steel is strong and easy to maintain.
- Composite materials: These can mimic wood but offer enhanced durability and moisture resistance.
Add a Sink
Including a sink in your potting bench design transforms your workspace into a more functional area. Here’s how a sink can enhance your potting bench:
- Washing Tools: Easily rinse off soil and debris from your gardening tools.
- Cleaning Plants: Gently wash plants to remove dust and pests.
- Mixing Soil: Having a sink allows for easy mixing and watering of soil blends without mess.
Incorporate Storage Solutions
Storage is key to keeping your potting bench organized. Here are some smart storage ideas:
- Overhead Shelves: Install shelves above your potting bench to store pots, gardening gloves, and small tools.
- Drawers: Utilize drawers within the bench to hide away loose items and keep your workspace tidy.
- Cubbies: Create cubby spaces for a charming display of colorful pots or potted plants.
Personalize with Color and Decor
Choosing a color scheme that reflects your personality can bring your potting bench to life. You might paint your bench a bright color or use weather-resistant stains for a natural wood look. Here are some decorative ideas:
- Planters: Use decorative planters to hold your gardening tools or display flowers.
- Garden Art: Incorporate artwork or handmade signs that resonate with your gardening style.
- Fairy Lights: Adding lights can create a cozy atmosphere for evening gardening sessions.
Functional Features
Consider adding features that make your potting bench even more functional:
- Potting Soil Storage: Design a space under your bench for larger bags of potting mix.
- Tool Rack: Incorporate a tool rack on the side for easy access to your gardening tools.
- Adjustable Height: If you’re often bending over, consider a bench with adjustable height settings for comfort.
Create a Gardening Herb Garden
If you are passionate about cooking with fresh herbs, why not incorporate a small herb garden into your potting bench? Vertical planters or small pots can be arranged at the end of the work surface. This also personalizes your bench while providing fresh ingredients for your meals.
If you’re looking for supplies to build your potting bench or for decorative elements, websites like Wood Magazine offer great resources and project ideas. You can also explore DIY tips at DIY Network to learn more about customizing your gardening space.
The journey to personalizing your potting bench can be as rewarding as nurturing the plants that will grow upon it. With thoughtful design choices and functional enhancements, your potting bench will undoubtedly become an inspiring part of your gardening sanctuary.
Maintaining Your Wooden Potting Bench for Longevity
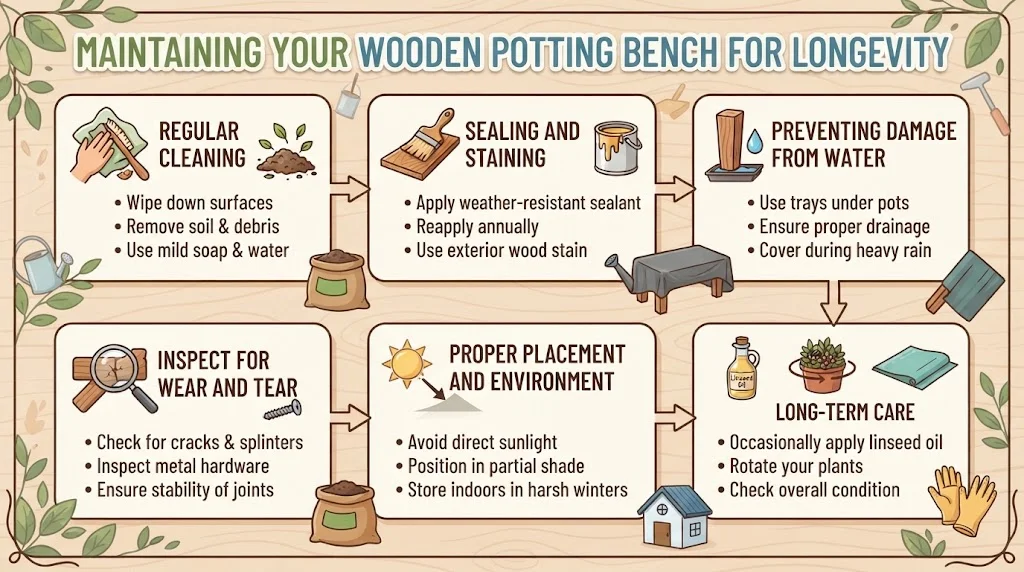
Having a DIY Wooden Potting Bench with Sink can significantly enhance your gardening experience. However, to ensure its longevity and maintain its appearance, proper upkeep is crucial. Here are several practical tips on how to care for your wooden potting bench effectively.
Regular Cleaning
One of the basic maintenance steps for your wooden potting bench is regular cleaning. Debris such as soil, leaves, and plant residue can accumulate on its surface. Here’s how to keep it clean:
- Start with a dry cloth: Wipe down the surface to remove loose dirt.
- Use soapy water: Mix mild soap with warm water to clean any stubborn stains.
- Rinse with clean water: Rinse the bench thoroughly with fresh water to remove soap residue.
- Dry properly: Use a towel to dry the bench to prevent moisture retention.
Sealing and Staining
Proper sealing and staining are essential in protecting your wooden potting bench from the elements. Here are steps you can take:
- Choose the right sealant: Opt for outdoor wood sealants designed to hold up against moisture and UV rays.
- Apply annually: Reapply sealant at least once a year, especially before the rainy season.
- Consider staining: If preferred, use an exterior wood stain that adds color while providing essential protection.
Preventing Damage from Water
Your DIY Wooden Potting Bench with Sink is susceptible to water damage. To avoid this, you can:
- Use trays: Place trays or containers underneath pots to catch any excess water.
- Install a drainage system: Ensure that your sink has proper drainage to prevent pooling water.
- Avoid direct exposure: If possible, place your potting bench in a shaded area or use a cover during heavy rain.
Inspect for Wear and Tear
Regular inspections can help identify any problems before they become serious. Look out for the following:
- Cracks and Splits: Examine the wood for any cracks or splits that may form over time.
- Rust on Metal Parts: Check any metal components or hardware for signs of rust, which can weaken them.
- Wobbly Structure: Ensure that all screws and joints are secure to maintain stability.
Proper Placement and Environment
The location of your wooden potting bench can affect its longevity. Consider these factors:
- Avoid Direct Sunlight: Prolonged exposure can lead to fading and cracking. Try to position it in a partially shaded area.
- Protect from Extreme Weather: Use a waterproof cover or tarp during severe weather conditions.
Long-Term Care
For long-term care, remember the following tips:
- Rotate Your Plants: Frequently changing the location of pots can prevent uneven wear.
- Consider Linseed Oil: Applying linseed oil occasionally can provide an extra layer of protection against moisture.
- Store for Winter: If the climate is harsh during winter, consider taking your bench indoors if possible.
To learn more about caring for your wooden furniture, you can visit Wood Magazine. Maintaining your wooden potting bench will ensure that it serves you well for years to come, making your gardening tasks easier and more enjoyable.
For even more tips and detailed guidance, check out HGTV for DIY projects and a variety of maintenance strategies.
By following these straightforward guidelines, you can keep your DIY Wooden Potting Bench with Sink in pristine condition, allowing you to focus on what truly matters—growing and nurturing your plants.
The Benefits of Having a Sink on Your Potting Bench
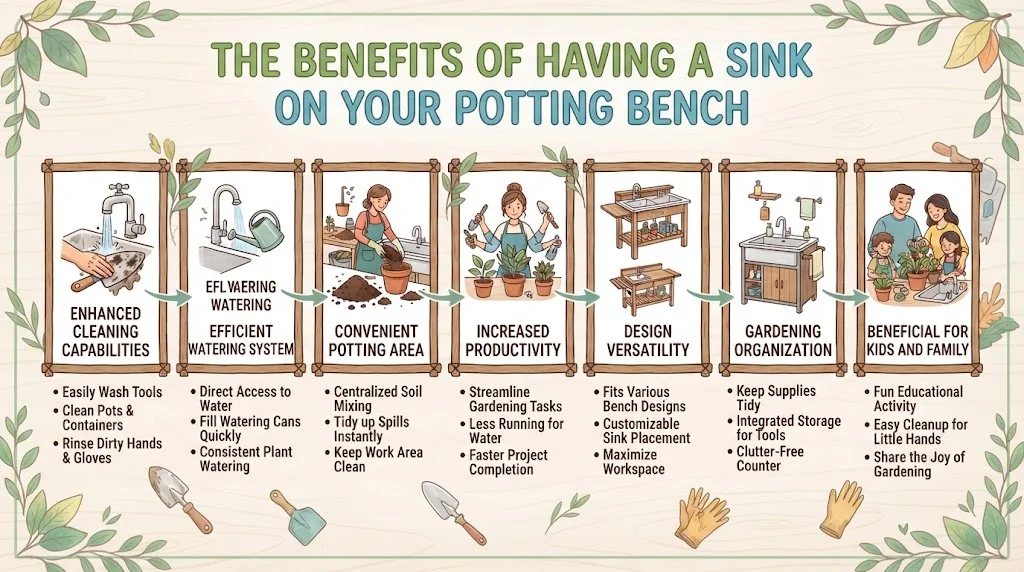
Having a sink on your potting bench adds convenience and enhances your gardening experience. This functional feature streamlines numerous tasks, making it easier to work with plants and soil. Here are several benefits to consider if you’re contemplating a DIY Wooden Potting Bench with Sink.
Enhanced Cleaning Capabilities
A sink provides you with a dedicated space to clean tools, pots, and other gardening equipment. This prevents mud and grime from making their way into your house.
- Wash dirty tools: Toss those dirty trowels and pruning shears directly into the sink for a quick rinse.
- Clean pots: Reevaluating your plant displays is simple when you can wash your pots right there.
- Maintain hygiene: Keeping your tools clean helps prevent the spread of plant diseases.
Efficient Watering System
When your potting bench is equipped with a sink, it allows you to easily fill watering cans or buckets without the hassle of moving them around. This significantly reduces the mess.
- Easy access: No more trekking back and forth to the hose or spigot.
- Water conservation: Fill only what you need, reducing water waste.
- Precise control: You have direct control over how much water you use for various plants.
Convenient Potting Area
Potting plants can often lead to a messy endeavor. A sink offers a designated space for potting, so soil doesn’t get all over your yard or garden.
- Soil disposal: Easily wash away excess soil right after repotting.
- Multi-tasking: Have everything you need in one area, helping you stay focused.
Increased Productivity
With an integrated sink, you spend less time fetching water or cleaning tools. That translates into more time enjoying your garden. You can easily handle multiple tasks in one spot, improving your overall gardening efficiency.
Design Versatility
DIY wooden potting benches are highly customizable. You can integrate a sink into your design based on your specific needs, whether you want a simple wash station or something more elaborate.
- Materials: Use weather-resistant woods or treated lumber for durability.
- Style: Create a rustic, chic, or modern look based on your aesthetic.
- Functionality: Design the sink position to suit your workflow, whether you need it on the left, right, or center.
Gardening Organization
When your potting bench comes equipped with a sink, you foster better organization. Designate areas for tools, soil, and plants to easily find what you need.
- Tool storage: Keep your tools within arm’s reach to save time.
- Clean workspace: A tidy area promotes creativity and efficiency.
Beneficial for Kids and Family
A sink on your potting bench makes gardening more accessible and fun for children. They can wash their hands after planting, learning valuable skills while having a great time. Activities can include:
- Hands-on learning: Kids can learn to plant seeds or prune plants under your guidance.
- Interactive fun: Encourage family bonding as everyone pitches in to help with gardening tasks.
A DIY Wooden Potting Bench with Sink not only boosts convenience but also enhances your gardening experience significantly. The benefits range from improved cleaning and organization to increased productivity. If you’re considering building or upgrading a potting bench, incorporating a sink is a game-changer.
For inspiration and tips on building your own potting bench, check out Wood Magazine or gather design ideas from Better Homes & Gardens.
Conclusion
Creating a DIY Wooden Potting Bench with Sink not only enhances your gardening experience but also adds a touch of creativity and personalization to your outdoor space. By gathering the essential materials and tools, you laid a solid foundation for your project. The step-by-step guide provided you with clear instructions, enabling you to assemble your potting bench with confidence.
Adding unique design elements is where your personality shines through, transforming a simple bench into a functional and stylish gardening station that reflects your taste. Coupling your bench with a sink elevates its practicality, making tasks like rinsing soil or watering plants much more manageable, while keeping your workspace tidy and organized.
To ensure your potting bench lasts for years to come, regular maintenance is crucial. Simple steps like sealing the wood, cleaning the sink, and checking for any wear will keep your bench looking good and functioning well.
Embracing the DIY spirit in crafting your wooden potting bench with sink not only provides you with a dedicated space for your gardening needs but also offers a fulfilling project that enhances your outdoor environment. With care, your potting bench will become an essential part of your gardening routine, making every planting season more enjoyable. Now, roll up your sleeves and get started on this rewarding journey that combines practicality with creativity, enabling you to grow and nurture your green thumb like never before.