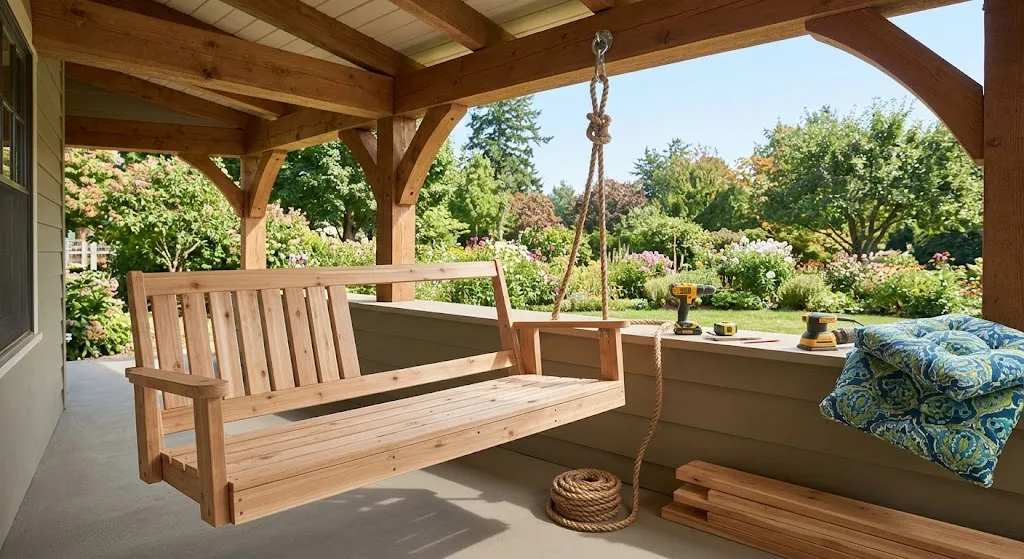
Creating a DIY Wooden Porch Swing Hanging Plans is an excellent way to enhance your outdoor space, making it a cozy retreat for family and friends. This project can be both enjoyable and rewarding, allowing you to spend quality time outdoors while crafting something beautiful. Below are step-by-step instructions to help you build your own porch swing, complete with hanging plans.
The Materials You Will Need
Before you get started, gather these materials:
- 1×4 or 1×6-inch outdoor-grade lumber
- Wood screws (outdoor-grade)
- Sandpaper (medium and fine grit)
- Wood finish or paint (optional, but recommended for durability)
- Heavy-duty eye bolts or swing hangers
- Chain or rope (depending on the hanging method)
- Drill and drill bits
- Saw (hand saw or power saw)
- Measuring tape
- Level
Building the Swing Frame
Follow these steps to assemble the frame for your wooden porch swing:
- Measure and Cut the Lumber: Decide the dimensions of your swing. A standard porch swing can be around 4 to 5 feet long. Cut two side pieces and the front and back support beams.
- Assemble the Bottom Frame: Use wood screws to attach the side pieces to the front and back support beams, forming a rectangular structure. Ensure everything is square by measuring the diagonals.
- Add the Seat Slats: Cut additional wood planks for the seat slats. Space these evenly across the bottom frame, securing them with screws.
- Sand the Edges: Smooth any rough edges with sandpaper to ensure the safety of your swing and enhance its appearance.
Adding the Backrest
To add comfort, you need a backrest:
- Cut the Backrest Pieces: Use the same lumber to create the backrest. Depending on your preference, you can make it a simple flat piece or have it slatted for a more decorative look.
- Attach the Backrest: Secure the backrest to the rear of the swing frame, ensuring it’s sturdy enough to lean on.
Finishing Touches
After constructing your swing, it’s time for the final touches:
- Sand Again: Make sure to sand any remaining rough spots.
- Apply Wood Finish: Choose a weather-resistant wood finish or paint to protect your swing from the elements.
- Let It Dry: Ensure that the finish is completely dry before hanging the swing.
Planning the Hanging Method
Now that your porch swing is ready, it’s time to choose the hanging method. You can use either a chain or rope, depending on your style preferences:
- Using Chain: If you opt for chain, make sure it’s heavy-duty and rust-resistant. Measure and cut lengths equal to the height you want the swing from the ground.
- Using Rope: Use robust, outdoor-rated rope that can withstand weight and weather conditions. Cut equal lengths based on your desired swing height.
Hanging the Swing
Follow these simple steps to hang your porch swing:
- Locate a Sturdy Support Beam: Ensure the beam can support the swing and its users’ weight.
- Mark the Locations: Measure and mark where the swing will hang, ensuring it’s level.
- Attach the Eye Bolts: Drill holes and secure the eye bolts where you marked. If using rope, make sure to tie secure knots.
- Hang the Swing: Attach the swing to the eye bolts or chain securely.
- Test the Swing: Before using, make sure the swing is secure by applying some weight gradually.
Essential Tools and Materials for Building Your Porch Swing
Building your own porch swing is a rewarding project that enhances your outdoor space while providing a cozy spot to relax. To ensure your DIY Wooden Porch Swing Hanging Plans comes together smoothly, you’ll need a combination of tools and materials. Here’s a comprehensive list to help you get started on this enjoyable venture.
Essential Tools
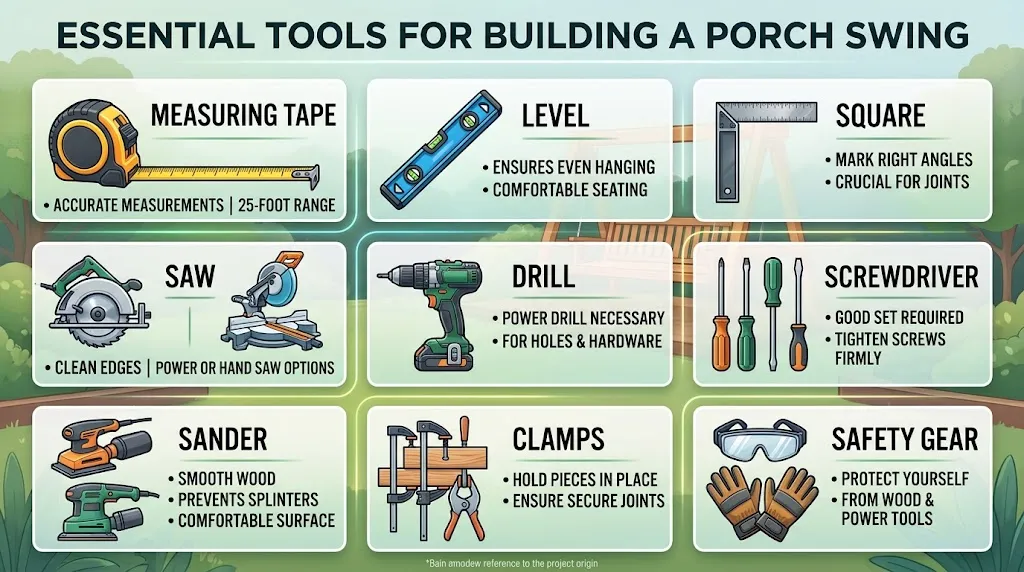
When building a porch swing, having the right tools is critical for efficiency and precision. Here’s a list of tools you’ll require:
- Measuring Tape: Accurate measurements are key. A 25-foot measuring tape will provide the range you need.
- Level: A level ensures that your swing hangs evenly, providing a comfortable experience when seated.
- Square: This tool helps you to mark right angles, crucial for joining parts of the swing correctly.
- Saw: Depending on your preference, you can use a circular saw or a miter saw for cutting the wood. Both will provide clean edges.
- Drill: A power drill is necessary for making holes for screws and hanging hardware.
- Screwdriver: A good set of screwdrivers will help you tighten screws firmly.
- Sander: A hand or power sander will smooth the wood, preventing splinters and creating a comfortable surface.
- Clamps: These hold pieces in place while you work, ensuring everything is secure before you attach them.
- Safety Gear: Include safety glasses and gloves to protect yourself while working with wood and power tools.
Materials Needed
With your tools ready, let’s look at the materials you will need to construct your porch swing:
- Wood: Select weather-resistant wood, like cedar or redwood. The standard sizes include 1×4 boards for the seat and thicker boards for the frame.
- Screws: Use galvanized or stainless steel screws to prevent rust. They should be at least 2.5 inches long for a secure fit.
- Wood Glue: To reinforce the joints, wood glue adds extra strength to the structure.
- Paint or Stain: Choose a weather-resistant finish in your preferred color to protect the wood from moisture and UV rays.
- Hanging Hardware: This includes heavy-duty eye bolts, chains, or rope for suspending the swing securely from your porch or tree.
Additional Considerations
Here are a few more pointers to consider for your porch swing project:
- Treatments: If you’re using untreated wood, consider applying a wood preservative to prolong its lifespan outdoors.
- Design Plans: Having detailed plans is important. You can find excellent free resources for swing plans at Instructables or Wood Magazine.
- Comfort: Don’t forget comfortable cushions for your swing! Look for outdoor fabric that can withstand fading and moisture.
Cost Estimation
Here’s a simple table estimating the cost of tools and materials you might use for your DIY Wooden Porch Swing Hanging Plans:
| Item | Estimated Cost (USD) |
|---|---|
| Wood (Cedar or Redwood) | $100-$150 |
| Screws and Glue | $10-$20 |
| Hanging Hardware | $30-$50 |
| Tools (if needed) | $200-$300 |
| Paint/Stain | $20-$40 |
| Total Estimated Cost | $390-$580 |
By gathering these tools and materials, you’ll set the foundation for a successful DIY project. Remember to take your time and enjoy the building process. Once completed, your porch swing will not only add value to your home but also provide a lovely place to relax with family and friends.
Design Ideas to Personalize Your Wooden Porch Swing
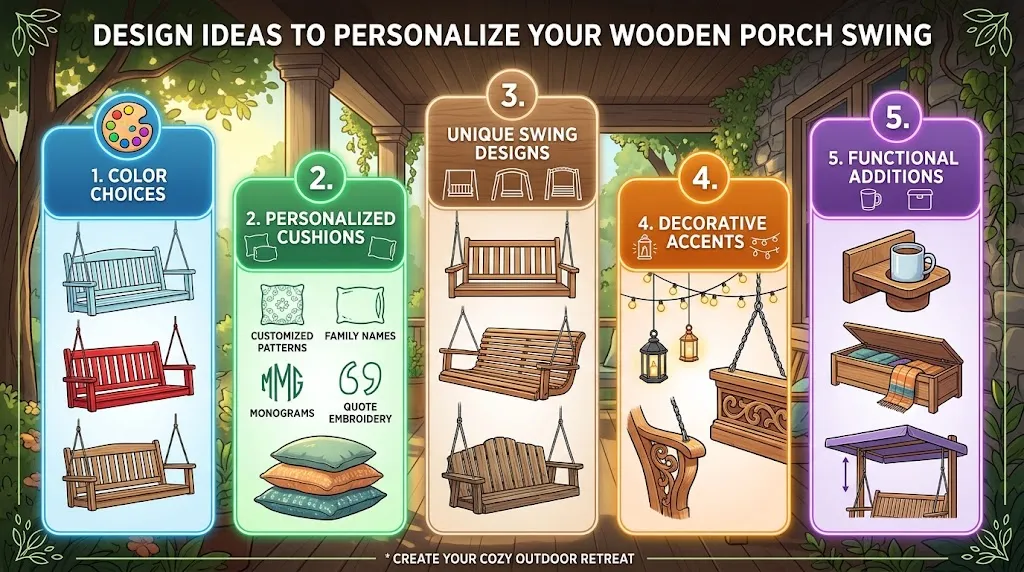
A wooden porch swing can be a delightful addition to your home, providing a cozy spot for relaxation and enjoyment. To make your porch swing truly yours, consider various design ideas that allow you to personalize it with charm and character. Here are several suggestions to inspire your creative side and add a personalized touch to your DIY Wooden Porch Swing Hanging Plans.
Color Choices
One of the easiest ways to customize your porch swing is through color. Here are some ideas to consider:
- Pastel Shades: Light blues, pinks, or mint greens can create a soft and inviting atmosphere.
- Bold Colors: Bright reds, yellows, or rich blues can make a statement and add energy to your porch.
- Natural Finishes: If you prefer a more rustic look, consider a clear stain or natural oil finish that highlights the wood grain.
Personalized Cushions
Cushions not only provide extra comfort but also give you the chance to showcase your personal style. Options include:
- Custom Fabrics: Choose fabrics in unique patterns or colors that reflect your personal taste.
- Pillows with Quotes: Add cushions embroidered with favorite quotes or sayings that resonate with you.
- Seasonal Changes: Rotate your cushions with the seasons; lighter fabrics in summer and warmer materials in winter create a dynamic look.
Unique Swing Designs
The design of the swing itself plays a significant role in its overall aesthetic. Consider these distinctive designs:
- Traditional Slat Style: A classic design that never goes out of style, featuring horizontal slats for a timeless look.
- Curved Backrest: A swing with a gently curved back offers additional comfort and a unique visual appeal.
- Rustic Charm: Reclaimed wood can add a touch of history and uniqueness to your porch swing.
Decorative Accents
Decorative accents can set your porch swing apart. Here are some ideas for embellishments:
- Hanging Lanterns: Adding lanterns on either side of the swing can create a cozy atmosphere, especially in the evening.
- Fairy Lights: String lights can be woven around the frame of the swing to add enchanting illumination.
- Artwork: Paintings or wood carvings can be displayed nearby to enhance the surrounding area.
Functional Additions
Consider adding functional elements to your swing design for practicality while still maintaining style:
- Drink Holders: Built-in holders make it easy to enjoy refreshments while relaxing on the swing.
- Storage: Under-seat storage can be utilized for cushions, blankets, or outdoor games.
- Adjustable Canopy: A movable canopy can provide shade during those hot summer days.
Maintenance Considerations
To ensure your personalized swing looks great for years to come, regular maintenance is key. Here are some tips:
- Regular Cleaning: Keep the wood free of dirt and grime to prevent decay.
- Re-staining: Depending on exposure to the elements, consider re-staining every few years.
- Check Hardware: Periodically inspect hanging hardware and connections to ensure everything remains secure.
With a bit of creativity and effort, your DIY Wooden Porch Swing Hanging Plans can be a personalized haven that reflects your unique personality and style. By implementing these design ideas, you can create a welcoming outdoor space that you and your loved ones will enjoy for years to come.
Safety Considerations When Hanging a Porch Swing
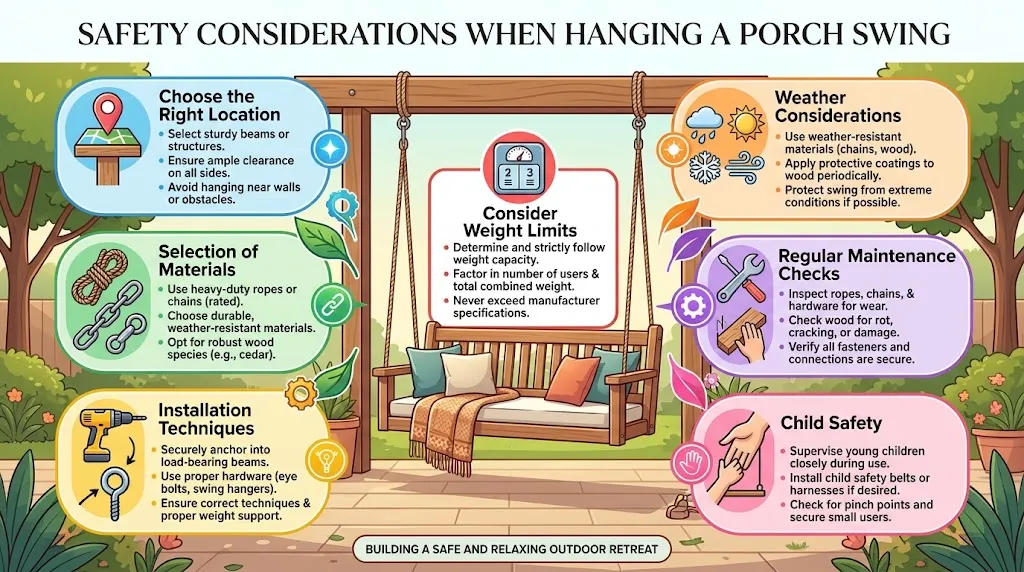
Hanging a porch swing can add charm and comfort to any outdoor space, but safety should always come first. Proper installation and maintenance are crucial for preventing accidents and ensuring that your porch swing remains a fun and relaxing feature for years to come. Below are some vital safety considerations to keep in mind when hanging a DIY Wooden Porch Swing Hanging Plans.
Choose the Right Location
Selecting the proper location for your porch swing is essential to its safety and longevity. Consider these factors:
- Support Structure: Ensure that the beam or structure you’re attaching the swing to is sturdy enough to support the weight of the swing and its users.
- Height: The swing should be hung at a height that allows for enough clearance above and below. This helps avoid hitting heads on structures above or dragging on the ground.
- Space: Allow sufficient space around your swing. Ensure that there’s enough room for it to swing freely without hitting walls, railings, or other objects.
Selection of Materials
When it comes to hanging a porch swing, using the right materials is essential for durability and safety.
- Ropes or Chains: Choose high-quality ropes or chains rated for outdoor use. Make sure they can comfortably support the weight of the swing and the people who will use it.
- Hardware: Use rust-resistant hardware such as stainless steel or galvanized brackets and fasteners to prevent degradation over time.
- Wood Type: If creating a wooden swing, opt for weather-resistant wood like cedar or redwood to ensure it withstands the elements.
Installation Techniques
The way you install the porch swing is critical to its safety. Here are some important points:
- Anchoring: Ensure that the swing is secured to a strong support, such as a ceiling beam or a specially designed stand. Avoid anchoring to light fixtures or weak structures.
- Leveling: Make sure the swing hangs level. An unlevel swing can tip or shift, posing a risk of falling.
- Clearance: Ensure that the swing has enough overhead space for safe movement, as well as ample clearance on all sides to prevent collisions.
Regular Maintenance Checks
Regular maintenance is key to ensuring your porch swing remains safe and functional. Here’s what to monitor:
- Inspect Ropes/Chains: Regularly check for fraying or rust. If you notice any wear, it’s time to replace them.
- Tighten Hardware: Periodically ensure that all fasteners and hardware are tight. Loose connections can lead to instability.
- Clean and Protect: Clean the swing regularly to remove dirt, debris, or mold. Apply a protective sealant to the wood to resist weather-related damage.
Consider Weight Limits
Understanding the weight limits of your porch swing is critical. Ensure that the swing you choose can accommodate the number of users and their total combined weight. Always check the manufacturer’s specifications for load limits.
Weather Considerations
Be mindful of your local weather conditions. If you live in an area that experiences significant rain or snow, consider ways to protect your swing:
- Cover: Use a cover designed for outdoor swings to shield it from adverse weather conditions.
- Removal: If possible, remove the swing during extreme weather to prolong its life.
Child Safety
If children are using the porch swing, additional safety measures may be beneficial:
- Always Supervise: Never leave young children unsupervised while swinging.
- Install Safety Belts: Consider adding a safety belt or harness for small children to prevent them from falling out.
By taking these safety considerations into account when hanging a porch swing, you can create a beautiful and secure outdoor space for relaxation and enjoyment. For more information on porch swings and design ideas, visit Home Depot or Ace Hardware.
Remember, safety is paramount when it comes to building and using a porch swing. After ensuring that all aspects are covered, you can enjoy the restful sway of your new porch swing without worry.
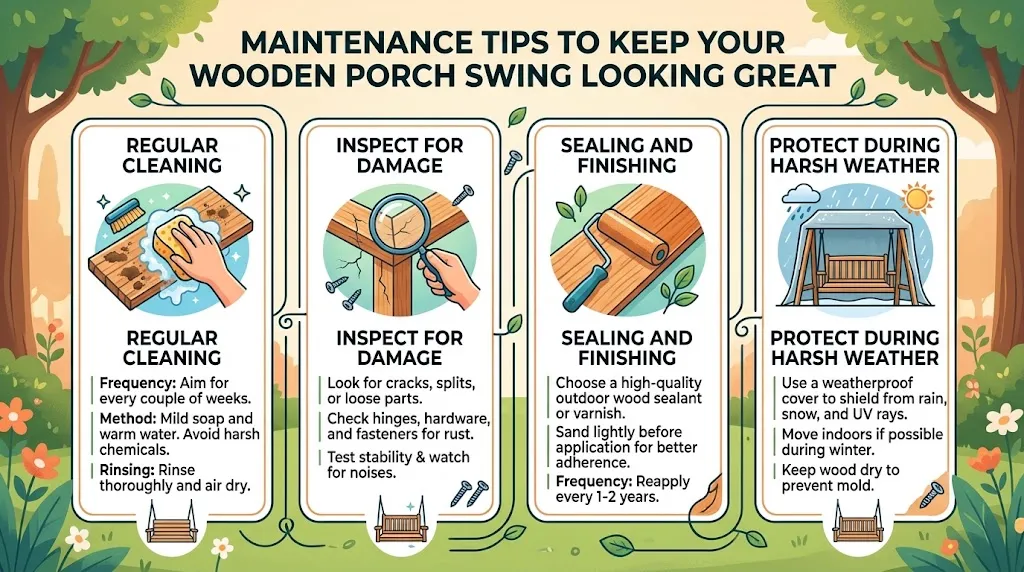
Maintenance Tips to Keep Your Wooden Porch Swing Looking Great
Owning a wooden porch swing is a joy that can provide comfort and relaxation. However, to ensure it remains in pristine condition, regular maintenance is essential. Understanding how to care for your swing can prolong its life and keep it looking great. Here are effective maintenance tips to help you keep your DIY Wooden Porch Swing Hanging Plans in top shape.
Regular Cleaning
Cleaning your wooden porch swing is the first step to maintaining its beauty. Dust and dirt can build up over time, leading to potential damage.
- Frequency: Aim to clean your swing every couple of weeks to prevent grime accumulation.
- Method: Use a soft cloth or a sponge with mild soap and warm water. Avoid harsh chemicals that can harm the wood.
- Rinsing: After washing, rinse the swing thoroughly and let it air dry to prevent moisture from seeping into the wood.
Inspect for Damage
Regularly inspect your swing for any signs of wear and tear. This proactive approach can help catch potential issues early.
- Look for Cracks: Check for splitting or cracking wood, especially in high-stress areas.
- Check the Hinges: Ensure that all the hardware and hinges are tight and free from rust.
- Test the Stability: Sit lightly on the swing to ensure stability and watch for any creaking noises.
Sealing and Finishing
Applying a protective seal over your wooden porch swing can significantly extend its lifespan. Sealing the wood helps in keeping moisture out, preventing rot, and repelling pests.
- Choose the Right Sealant: Use a high-quality wood sealant or outdoor varnish designed for patio furniture.
- Application: Lightly sand the surface before applying the sealant for better adherence. Follow the manufacturer’s instructions for the best results.
- Frequency: Reapply every one to two years, depending on exposure to the elements.
Protect During Harsh Weather
Extreme weather conditions can wreak havoc on your wooden porch swing. Taking steps to protect it will ensure it stands the test of time.
- Cover it Up: Invest in a weatherproof cover to shield the swing from rain, snow, and UV rays.
- Move Indoors: If possible, bring your swing inside during the winter months to protect it from harsh conditions.
- Regularly Check for Moisture: Ensure the swing doesn’t hold moisture after rain to prevent mold and mildew.
Enhancing Comfort and Style
To keep your wooden porch swing inviting and stylish, consider adding cushions and pillows. Select materials that can withstand outdoor conditions.
- Water-Resistant Fabrics: Choose outdoor fabric that is fade-resistant and easy to clean.
- Secure Attachments: Use ties or Velcro to keep cushions in place during windy conditions.
Resources and Additional Links
If you need more tips or resources, check out these helpful sites that specialize in maintaining outdoor furniture:
By following these maintenance tips, you can ensure your DIY Wooden Porch Swing Hanging Plans remains an attractive and comfortable fixture of your outdoor space for many years to come. Remember, a little care goes a long way in preserving its charm!
Conclusion
Creating your own wooden porch swing can be a rewarding and enjoyable project that enhances your outdoor space. By carefully following the step-by-step guide outlined in this article, you can bring your vision to life with clarity and ease. Remember to gather essential tools and materials before starting; being fully prepared will help the construction process run smoothly.
Personalizing your swing is one of the most enjoyable aspects of this DIY Wooden Porch Swing Hanging Plans. Let your creativity shine through with different stains, paints, or even unique cushions that reflect your personal style. Your swing will not only serve as a place to relax but also as a beautiful addition to your porch.
Safety plays a crucial role when hanging a porch swing; making sure that it is securely attached and properly supported is vital for you and your family’s well-being. Take the time to review safety guidelines and ensure the installation is solid before it’s ready for use.
Maintenance is another key component to keep your wooden porch swing looking its best year-round. By regularly checking for wear and tear, applying protective finishes, and cleaning it regularly, you can ensure that your DIY Wooden Porch Swing Hanging Plans remains a cherished spot for years to come.
With the right guidance and a little bit of work, your DIY Wooden Porch Swing Hanging Plans will soon become a favorite retreat, allowing you to enjoy quiet afternoons or lively gatherings on your porch. Embrace the journey, and enjoy every moment spent swinging into relaxation!