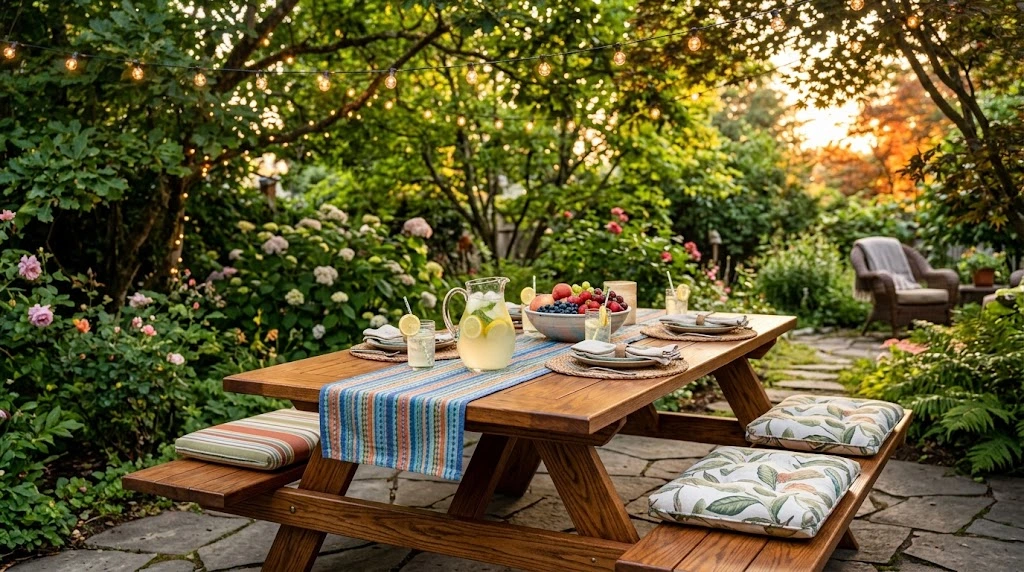
Step by step guide
Step 1: Planning Your Design
To start building your DIY Wooden Picnic Table with Benches, sketch a design on paper. Decide on the dimensions based on your available outdoor space. A standard picnic table measures about 6 feet long and 28 inches wide, while benches usually match this length. Remember to include space for legroom.
Step 2: Cutting the Wood
Once your design is ready, begin cutting the wood accordingly. Here are the typical cuts needed:
- Tabletop: 5 pieces of 2×6 lumber, each 6 feet long
- Table legs: 4 pieces of 2×4 lumber, each 30 inches long
- Benches: 4 pieces of 2×6 lumber, each 5 feet long
- Bench legs: 4 pieces of 2×4 lumber, each 18 inches long
- Table support beams: 2 pieces of 2×4 lumber, each 5 feet long
Make sure to use a circular saw for precise cuts. Always wear safety goggles and gloves for protection.
Step 3: Assembling the Table
Begin by creating the tabletop. Lay the 5 pieces of 2×6 lumber side by side. Use wood glue between each board for extra hold and secure them using 2.5-inch wood screws. Place two support beams underneath, spaced evenly apart, to add stability. Next, attach the legs. Use the 30-inch 2×4 lumber for the legs. Position each leg at a 90-degree angle to the tabletop, ensuring it is level before securing with screws.
Step 4: Building the Benches
For the benches, repeat the assembly process. Attach the 5-foot 2×6 pieces together, like you did for the table. Then, attach the 18-inch legs in the same manner. Here’s a simple way to attach the benches to the table:
- Position the benches a few inches away from the table’s edges.
- Secure with screws from the bench legs to the underside of the tabletop for stability.
This connection will ensure that your benches are stable and comfortable for your outdoor gatherings.
Step 5: Sanding and Finishing
After assembling, it’s crucial to sand down all the surfaces to avoid splinters. Start with medium-grit sandpaper and finish with fine grit for a smooth surface. Be sure to focus on edges and corners. Once sanded, apply an outdoor wood sealant or a splash of color with weather-resistant paint. This step protects your picnic table from the elements and enhances its longevity.
Step 6: Styling Your Picnic Area
To complete your space, consider adding decorations. Here are some ideas:
- Colorful cushions for added comfort on the benches.
- A patio umbrella for shade.
- Outdoor string lights for ambiance in the evenings.
Personalizing your picnic area not only enhances your table’s look but also creates an inviting atmosphere for family and friends.
Essential Tools and Materials Needed for Your Picnic Table Project
Building a DIY Wooden Picnic Table with Benches is a rewarding project that adds charm to your outdoor space. To make this endeavor smoother, it’s essential to gather the right tools and materials. Here’s a comprehensive guide to what you’ll need.
Essential Tools
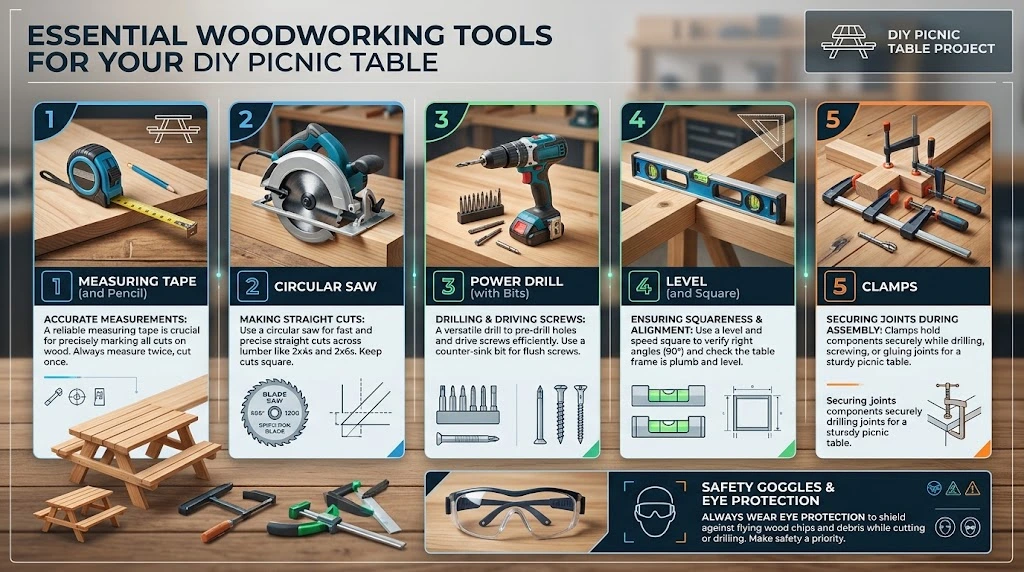
Before you start crafting your picnic table, ensure you have the following tools on hand:
- Measuring Tape: Accurate measurements are crucial for a well-built table.
- Saw: A circular saw or miter saw will help you cut wood to the desired lengths. If you don’t have access to power tools, a hand saw will work too.
- Power Drill: This tool is vital for drilling holes for screws, enhancing stability.
- Screwdriver: A good screwdriver helps in driving screws with ease. Invest in a power screwdriver for quicker assembly.
- Level: Ensures that your table is even and looks perfect in your backyard.
- Clamps: To hold your pieces together securely while you assemble them.
- Safety Gear: Don’t forget to wear goggles and gloves to protect yourself while working!
Essential Materials
Now that you have your tools, it’s time to gather the materials required for your picnic table. Here’s a list to guide you:
- Pressure-Treated Lumber: For the tabletop and benches, use high-quality pressure-treated wood to withstand the outdoors.
- Screws: Choose outdoor-rated screws to prevent rust and ensure durability. Wood screws work best for joining the pieces.
- Wood Glue: While not always necessary, adding wood glue to your screws increases the joint’s strength.
- Sandpaper: Smooth out rough edges before assembly to avoid splinters and enhance the table’s appearance.
- Wood Finish or Outdoor Sealant: Protect your table from the elements by applying a weatherproof finish or sealant.
Building the Frame
Begin by constructing a sturdy frame. For the frame, you will need the following components:
| Component | Dimensions |
|---|---|
| Tabletop | 4 pieces, 2” x 6” x 6’ |
| Table Legs | 4 pieces, 4” x 4” x 30” |
| Benches | 2 pieces, 2” x 4” x 6’ |
Make sure to cut each piece of lumber according to the dimensions. Pay close attention to the leg cuts as these will determine the table’s height and stability.
Assembling the Table
Once you have your wood cut and your materials ready, you can start the assembly:
- Attach the Legs: Secure the legs to the tabletop using screws and wood glue for added support.
- Install the Benches: Use screws to attach the benches to the frame. Make sure they are spaced evenly for comfort.
- Sand the Edges: Smooth out all edges to ensure a safe eating environment.
- Apply Finish: Once assembled, apply the wood finish or sealant to enhance durability and appearance.
Creative Design Ideas for Customizing Your Wooden Picnic Table
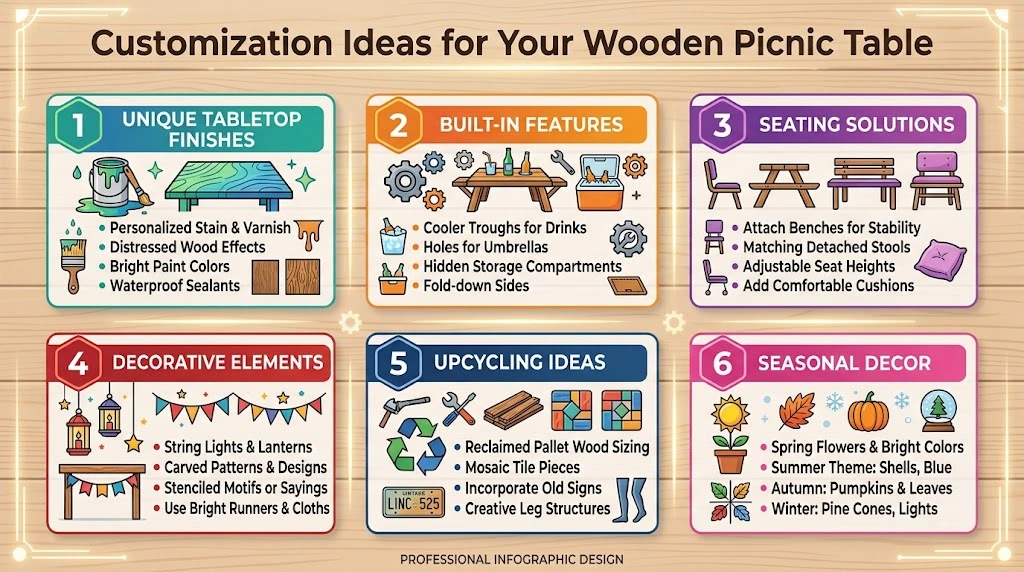
Customization Ideas for Your Wooden Picnic Table
Wooden picnic tables are timeless and bring a rustic charm to any outdoor space. However, you can take it a step further by customizing your table to reflect your style and creativity. Whether you’re looking for practical enhancements or aesthetic improvements, the possibilities are endless. Here are some creative design ideas for personalizing your wooden picnic table.
1. Unique Tabletop Finishes
The surface of your picnic table can set the overall tone for your outdoor area. Consider these options:
- Staining: Use a rich stain to enhance the natural beauty of the wood, adding depth and color.
- Painting: Bold colors can make your table a focal point. Choose non-toxic paint for safety.
- Decoupage: Apply a layer of your favorite outdoor-themed designs or family photos for a personal touch.
2. Built-in Features
Adding built-in features can make your picnic table even more functional. Here are some ideas:
- Umbrella Hole: Drill a hole in the center to fit an umbrella, providing shade on sunny days.
- Built-in Cooler: Incorporate a cooler compartment to keep drinks cold and easily accessible.
- Storage Compartments: Create spaces underneath the table for games, blankets, or outdoor utensils.
3. Seating Solutions
While traditional benches are commonplace, getting creative with seating can enhance comfort and style. Consider these options:
- Colorful Cushions: Add bright, weather-resistant cushions to your benches for added comfort.
- Foldable Seats: Opt for foldable benches or chairs that can be stored away when not in use.
- Stool Alternatives: Introduce wooden stools or tree stumps for a more rustic seating arrangement.
4. Decorative Elements
Adding decorative elements can truly personalize your picnic table. Here are a few suggestions:
- Outdoor Lighting: Hang string lights above the table for evening ambiance.
- Candles or Lanterns: Place decorative candles or lanterns for a warm glow during gatherings.
- Table Runner: Use a colorful table runner to bring texture and color to your setup.
5. Upcycling Ideas
If you have leftover wood or furniture pieces, consider integrating them into your picnic table design. Upcycling not only saves costs but is also great for the environment. Here are some ideas:
- Repurposed Pallets: Use old pallets to create the tabletop or benches for a rustic look.
- Old Door Tabletop: An old door can serve as a unique tabletop, adding character to your picnic table.
- Wine Crate Storage: Build storage from wine crates beneath your table for an eye-catching detail.
6. Seasonal Decor
Change the decor around your picnic table according to the seasons. This keeps the space fresh and inviting:
- Spring: Fresh flowers and pastel tableware can bring a joyful touch.
- Summer: Bright and vibrant colors with tropical accents enhance the summertime vibes.
- Fall: Incorporate pumpkins and autumn leaves for a cozy, seasonal feel.
- Winter: Use evergreen arrangements and candles to create a warm gathering place.
Maintenance Tips to Keep Your Picnic Table Looking New
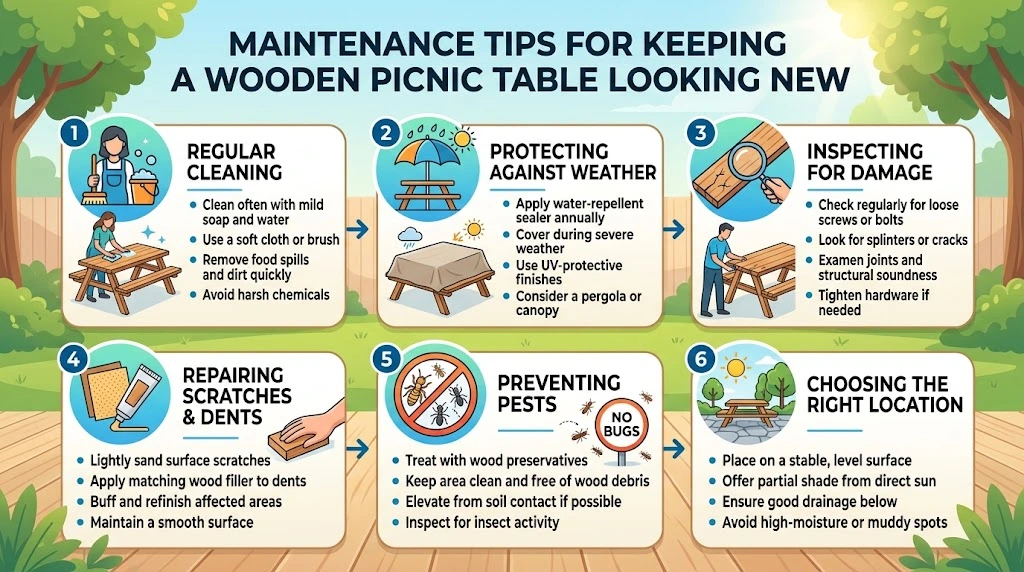
Keeping your DIY Wooden Picnic Table with Benches looking new can feel like a challenge, especially as the seasons change. With a bit of regular attention and care, you can maintain its beauty and prolong its life. Here are some essential maintenance tips to help you enjoy your outdoor furniture for years to come.
Regular Cleaning
One of the simplest yet most effective ways to maintain your picnic table is through regular cleaning. Dirt, pollen, and food particles can accumulate over time, leading to stains and attracting unwanted pests.
- Use a soft brush or broom: Gently sweep off any debris before washing.
- Soapy water: Mix mild soap with warm water and use a soft cloth to wipe down the surfaces.
- Rinse thoroughly: After cleaning, rinse with clean water to remove any soap residue.
Protecting Against Weather
Weather can take a toll on wooden surfaces. Sun, rain, and snow can fade colors and create cracks. To keep your picnic table looking fresh, consider applying weather-resistant treatments.
- Sealant: Apply a wood sealant once a year to protect against moisture.
- Stain and varnish: Use a quality stain or varnish to enhance the color and provide a protective layer.
- Canopy or tarp: When not in use, cover the table with a tarp or place it under a canopy to shield it from harsh weather.
Inspecting for Damage
Regularly checking your picnic table for any signs of damage can help you catch issues before they escalate. Look for:
- Cracks or splits: These can be signs of dry wood.
- Rusty hardware: Check the bolts and screws to ensure they are in good condition.
- Mold or mildew: If you notice any patches, clean these immediately to avoid spreading.
Repairing Scratches and Dents
Even with the best care, scratches and dents can occur. Address these issues quickly to prevent further damage.
- Wood filler: For deeper scratches or dents, use a wood filler to repair the surface.
- Sanding: Lightly sand the area to smooth out any rough spots.
- Stain matching: Use matching wood stain to conceal the repair.
Preventing Pests
Wooden furniture can attract pests like termites and ants. To keep your picnic table pest-free, follow these steps:
- Keep the area clean: Regularly sweep the area under and around the table.
- Store properly: When not in use, store your picnic table indoors, if possible.
- Pest control treatments: Consider using pest deterrents around the area to prevent infestations.
Choosing the Right Location
Where you place your picnic table also impacts its longevity. Here are a few tips:
- Avoid direct sunlight: If possible, place the table in a shaded area to reduce fading.
- Level ground: Ensure the table is on stable, even ground to avoid warping over time.
- Distance from trees: Avoid placing it directly under trees to minimize sap and debris from falling.
By following these maintenance tips, you can keep your DIY Wooden Picnic Table with Benches looking like new for many seasons. With just a little effort, your outdoor gatherings can continue to be enjoyable in a beautiful setting.
Fun Outdoor Activities to Enjoy Around Your Picnic Table
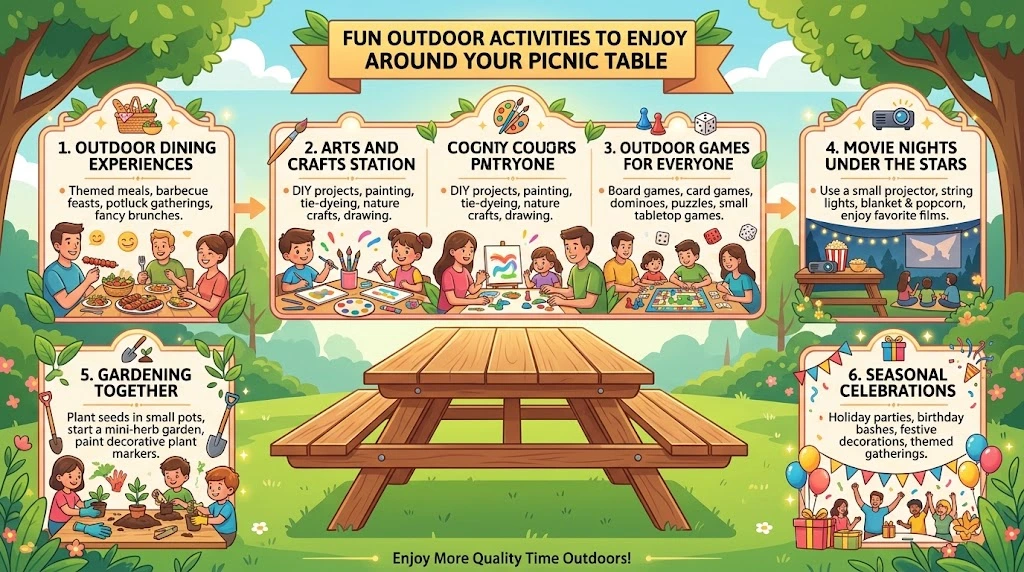
Having a wooden picnic table with benches in your backyard opens up a world of fun outdoor activities. It’s not just a spot for meals; it’s also a fantastic place for games, creativity, and relaxation. Whether it’s a sunny Sunday or a breezy evening, there are plenty of ways to enjoy the great outdoors right around your picnic table. Here are some engaging activities you can do.
Outdoor Dining Experiences
Transform your picnic table into a gourmet dining experience. Plan themed meals where each gathering has a unique cuisine to explore, such as:
- Italian Night: Enjoy pasta dishes with fresh garlic bread.
- Mexican Fiesta: Taco bar with various toppings and sides.
- BBQ Cookout: Grill up burgers, hotdogs, or veggie skewers.
Consider decorating your table according to the theme for added fun!
Arts and Crafts Station
Your picnic table can become an arts and crafts hub. Set up a weekend craft day for your family or friends. Here are some ideas:
- Painting: Use acrylic paints for fun outdoor canvases.
- Scrapbooking: Create memories using photos from past gatherings.
- DIY Plant Pots: Use leftover wood scraps to create unique plant pots.
Children and adults alike will find joy in creating something special while enjoying fresh air.
Outdoor Games for Everyone
Engaging in games around your picnic table can enhance your outdoor experience. Here are some great options:
- Card Games: Classic games like Uno or playing cards are easy to set up.
- Board Games: Have fun with family-friendly board games in the sunlight.
- Outdoor Jenga: Build giant Jenga for a thrilling twist on a classic game.
These games bring everyone together, ensuring laughter and lasting memories.
Movie Nights Under the Stars
Broadcasting a movie night outdoors can be a magical experience. With a little preparation, you can turn your picnic table area into a cozy theater. Follow these steps:
- Set up a projector and a white sheet or screen opposite your table.
- Arrange comfy seating with cushions or blankets on the ground.
- Prepare popcorn and drinks to enjoy during the movie.
Don’t forget to choose family favorites or new releases that everyone can enjoy! Visit websites like Rotten Tomatoes for movie ideas.
Gardening Together
Your picnic table is a perfect place to dig into gardening. Create a small herb garden or potted plants together:
- Choose Your Plants: Select herbs like basil or cilantro which can be used in cooking.
- Plan Your Space: Use pots or raised beds nearby to work easily.
- Planting Day: Schedule a day to plant together, providing a sense of accomplishment.
Gardening not only beautifies your space but also teaches valuable skills.
Seasonal Celebrations
Make full use of your picnic table by hosting seasonal celebrations. Consider:
- Summer BBQs: Fire up the grill and invite friends for a cookout.
- Fall Harvest Feast: Celebrate autumn with seasonal foods and decorations.
- Winter Holiday Potlucks: Invite guests to bring dishes to share.
Planning these gatherings helps create traditions and brings friends and family closer together.
With so many activities to enjoy around your picnic table, you’ll always have a reason to gather. Whether it’s a cozy dinner, a fun game, or a movie night under the stars, making the most of your outdoor space is sure to lead to unforgettable moments. For more ideas on creating your backyard haven, check out resources like Better Homes & Gardens.
Conclusion
Building your own DIY Wooden Picnic Table with Benches is a rewarding project that combines creativity and functionality. By following the step-by-step guide, you’ll craft a sturdy and beautiful piece of outdoor furniture that can elevate your backyard experience. The essential tools and materials outlined in the guide will equip you with everything you need to get started, ensuring that your build is both efficient and enjoyable.
Once your table is built, the fun doesn’t stop there! Customizing your picnic table with creative design ideas allows you to put a personal touch on your project, making it a unique centerpiece for gatherings with family and friends. Don’t forget about maintenance; regular upkeep can keep your picnic table looking pristine for years to come, allowing you to enjoy its beauty while also extending its lifespan.
Remember that your new picnic table serves as an ideal platform for a range of outdoor activities. Whether you’re hosting a summer barbecue, enjoying a family game night, or simply relaxing with a good book, the table becomes a hub of activity and laughter. So gather your loved ones, unleash your creativity, and make the most of your beautiful DIY Wooden Picnic Table with Benches. Embrace the joys of outdoor living and create wonderful memories that will last a lifetime.