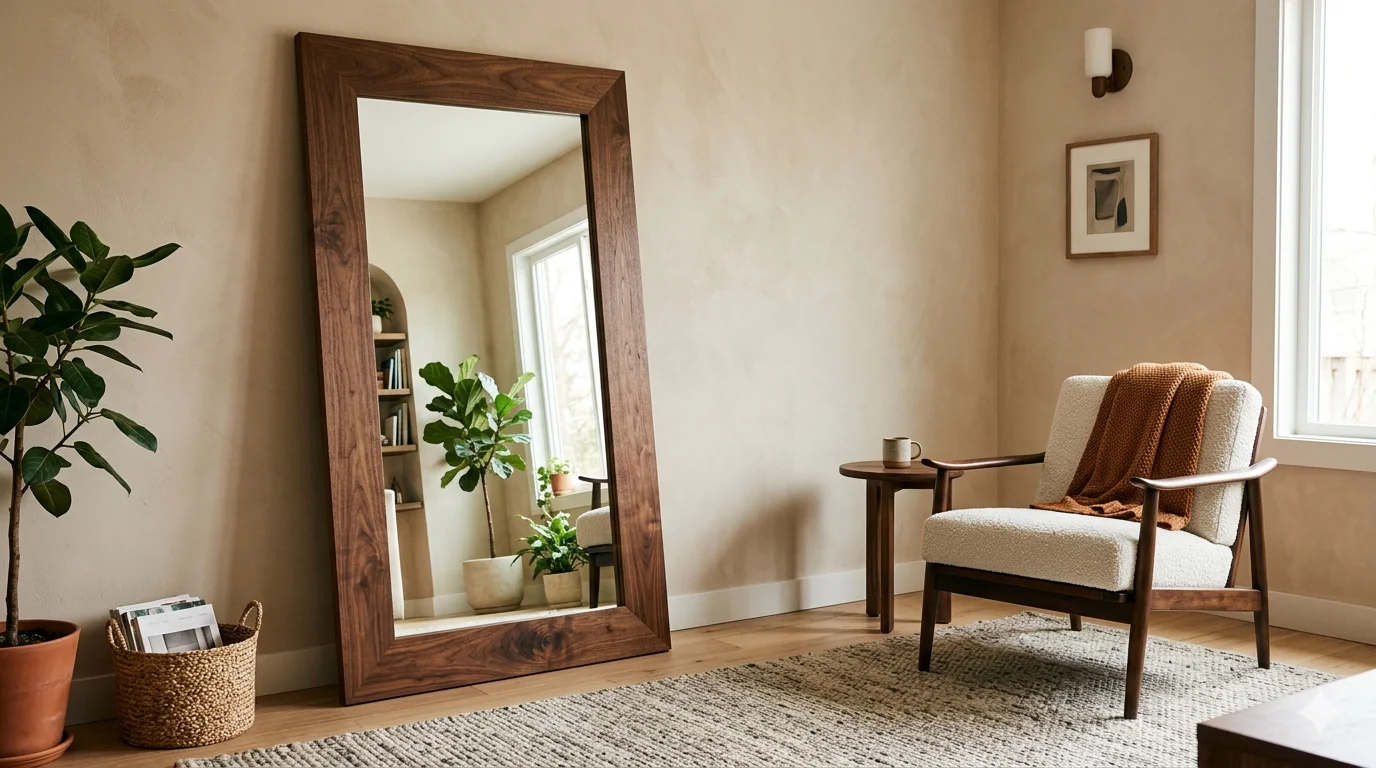
Creating a DIY Wooden Mirror Frame Ideas can transform a simple mirror into a stunning piece of décor that complements any room in your home. Not only does this project allow for personal expression, but it also adds warmth and character to your space. Here are some exciting ideas to inspire your next DIY project.
Rustic Charm with Pallet Wood
Pallet wood is a fantastic material for creating rustic mirror frames. It’s not only affordable but also easy to work with. Start by disassembling a pallet and sanding the wood down to remove splinters. You can create a simple rectangular frame or get creative with layered designs. Once you have your desired shape, apply a wood stain that matches your room decor. This DIY project is perfect for living rooms and entries.
Geometric Wooden Frame
If you enjoy modern design, consider building a geometric wooden frame. This idea adds a contemporary touch to your mirror while showcasing your woodworking skills. Here’s how to create one:
- Gather various lengths of thin wood strips.
- Cut them into different lengths to create your geometric pattern.
- Assemble the pieces using wood glue, forming triangles or hexagons.
- Paint or stain the completed frame to fit your personal style.
This type of frame works perfectly in a bathroom or a trendy bedroom.
Vintage Shutter Frame
Bring a touch of the old-world charm into your home by making a mirror frame from vintage shutters. You can often find these at flea markets or antique stores. Simply clean the shutters and remove any old paint or stains. Secure the shutters around your mirror, leaving the slats open to slightly frame the mirror. This frame is ideal for country-style kitchens or sunrooms, giving them a unique feel.
Colorful Painted Frame
If you’re looking to brighten up a space, a colorful painted frame can make a significant impact. Choose vibrant colors that resonate with your room’s theme. Use painter’s tape to design patterns or stripes for a playful look. You could also let your kids join in on this project, creating a family-friendly art piece that showcases their creativity. This type of frame suits playful spaces like children’s rooms or play areas.
Wire Wrapped Frame
For a unique and artistic touch, consider a wire-wrapped wooden mirror frame. Start with a simple wooden frame, then wrap colorful wire around it in various patterns. You can also incorporate beads or small decorative elements for added flair. This project is great for a creative office or art studio, providing inspiration and personality.
Choosing the Right Mirror
When selecting a mirror for your DIY frame, consider the size and shape that will best fit your intended space. Round mirrors can soften sharp angles in a room, while square or rectangular mirrors provide a clean, modern look. Check out websites like Home Depot or Walmart for affordable mirror options.
Final Touches
After you’ve constructed your frame, it’s essential to ensure everything is secure. Use reliable mounting hardware to hang your mirror safely, especially if it’s heavy. If you want a protective finish, consider applying a clear sealant to the wood. This will not only enhance the finish but also protect against wear and tear.
Essential Tools and Materials for Making Wooden Mirror Frames
Creating a wooden mirror frame can be a fulfilling DIY project that adds a personal touch to your home décor. To start your journey, it’s essential to gather the right tools and materials. Below are the key items you’ll need to successfully craft your own stunning wooden mirror frame.
Essential Tools
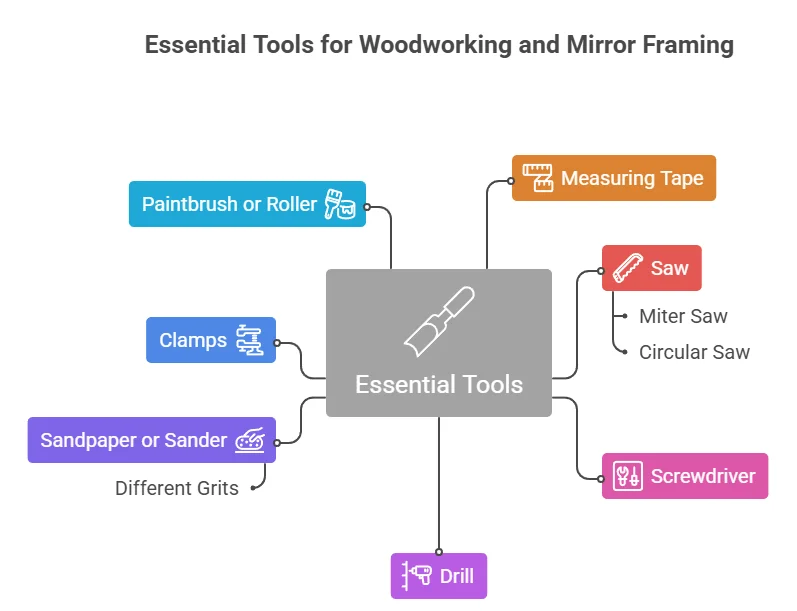
- Measuring Tape: Ensure accurate measurements for the wood you purchase and the mirror dimensions.
- Saw: A miter saw is ideal for making precise cuts at angles. A circular saw can also work for straight cuts.
- Screwdriver: A set of screwdrivers is necessary for assembling parts and securing the mirror in the frame.
- Drill: Use a drill to create pilot holes for screws, making assembly easier and preventing wood from splitting.
- Sandpaper or a Sander: Sanding is crucial for ensuring a smooth finish. Use different grits to achieve the desired texture.
- Clamps: These will help hold your frame pieces together securely while the glue dries.
- Paintbrush or Roller: If you plan to paint or apply a finish to your frame, you’ll need quality brushes or rollers.
Materials Needed
When it comes to materials, the type of wood you choose will influence the final look of your mirror frame. Here are some popular options along with common accessories:
- Wood Types:
- Pine: Affordable and easy to work with, making it great for beginners.
- Oak: Denser, providing durability and a classic look, but may require more effort to cut.
- Maple: Offers a beautiful finish and is strong but can be a bit pricey.
- Wood Glue: Essential for joining pieces together to form a sturdy frame.
- Stain or Paint: Choose your favorite color or wood stain to enhance the frame’s appearance.
- Mirror: Purchase a mirror that fits the dimensions of your frame. Consider an online retailer for a variety of options.
- Backing Board: Used to secure the mirror in place within the frame.
- Picture Hanger: For easy wall mounting once your mirror frame is completed.
Safety Gear
Don’t forget your safety gear! Here’s what to wear while working:
- Safety Goggles: Protect your eyes from dust and debris.
- Dust Mask: Helps keep harmful sawdust out of your lungs.
- Ear Protection: If you’re using power tools, earplugs can help prevent hearing damage.
Diving Deeper into Your Project
Once you have gathered the tools and materials, you can start planning your design. Think about the style of your home and what will blend best with your décor. You can find inspiration and further instructions on DIY Wooden Mirror Frame Ideas on platforms like Wood Magazine or DIY Network.
Storing Your Tools and Materials
Keeping your workspace organized can greatly improve your efficiency. Consider a tool chest or wall-mounted racks for easy access to tools. Store wood in a dry place to avoid warping, and label buckets for different materials to simplify your setup.
Step-by-Step Guide to Building Your Own Wooden Mirror Frame
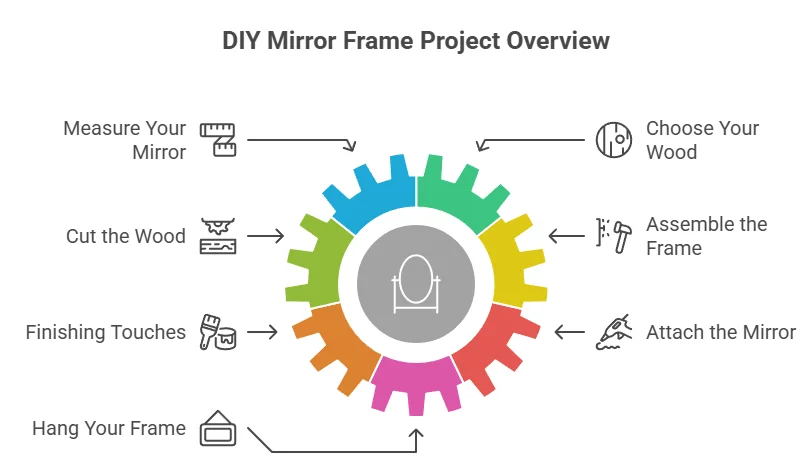
Creating a wooden mirror frame can be a rewarding project that adds a personal touch to your home decor. Not only does it enhance the beauty of your mirrors, but it also allows you to learn new woodworking skills. Below is a detailed guide to help you through the process of building your own wooden mirror frame step by step.
Materials You’ll Need
- Wood boards (your choice of type)
- Measuring tape
- Wood glue
- Screws or nails
- Saw (circular or hand saw)
- Sandpaper (various grits)
- Wood finish or paint
- Clamps
- Mirror of your choice
- Protective gear (goggles, mask)
Step 1: Measure Your Mirror
The first step is to measure the dimensions of your mirror. To do this accurately:
- Use a measuring tape to get the height and width of the mirror.
- Note these measurements as you will need them when cutting the wood.
- Decide how much of the surround you want. This will determine how large your frame needs to be.
Step 2: Choose Your Wood
When selecting wood, consider both aesthetics and durability. Some popular choices include:
- Pine: Affordable and easy to work with.
- Oak: Strong and long-lasting, gives a rustic feel.
- Maple: Smooth finish and can be painted easily.
Step 3: Cut the Wood
Once you have your mirror dimensions and choice of wood, it’s time to make some cuts:
- Cut the wood boards according to the measurements you took earlier.
- Make sure to cut two vertical and two horizontal pieces for the frame.
- For clean edges, use sandpaper to smooth any rough spots after cutting.
Step 4: Assemble the Frame
With your pieces ready, assemble the frame:
- Lay out the cut pieces to form a rectangle or square.
- Use wood glue at the joints and secure with screws or nails for extra strength.
- Clamps can help keep everything in place while the glue dries.
Step 5: Finishing Touches
After your frame is assembled, it’s time to finish it:
- Sand the entire frame thoroughly until smooth.
- Apply a wood finish or paint to achieve your desired look.
- Let everything dry completely before proceeding.
Step 6: Attach the Mirror
Once the frame is dry, you can attach the mirror:
- Carefully place the mirror into the frame.
- Use mirror clips or additional wood support to hold the mirror securely in place.
- Double-check that the mirror is centered and aligned well.
Step 7: Hang Your Frame
Your beautiful new wooden mirror frame is ready to hang! Make sure to:
- Use appropriate hardware for wall mounting.
- Ensure it is secure to avoid any accidents.
Tips for Success
- Plan your design on paper before starting your project.
- Watch related tutorials on platforms like YouTube for visual guidance.
- Don’t rush! Allow drying times for glue and finishes.
For more inspiration on DIY Wooden Mirror Frame Ideas, check out resources at DIY.com. With creativity and the right tools, you can turn a simple mirror into a stunning focal point in your home.
Unique Design Styles for Wooden Mirror Frames
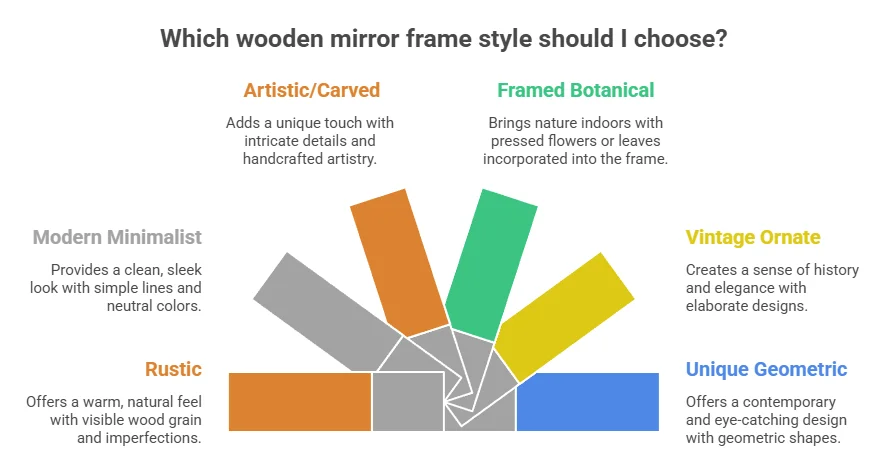
Wooden mirror frames can transform a simple mirror into a stunning statement piece in any room. With an array of styles and designs to choose from, you can personalize your space while adding warmth and character. Here are some unique design styles for DIY Wooden Mirror Frame Ideas that can inspire your next DIY project.
Rustic Wooden Mirror Frames
Rustic design focuses on a raw, natural look. Think of weathered barn wood or reclaimed timber. These materials not only add a unique texture but also tell a story. What makes rustic wooden frames appealing is their ability to blend seamlessly with any décor style, from country chic to modern minimalism.
- Materials: Reclaimed wood, driftwood, or barn wood.
- Finish: Leave it unfinished for a natural look, or apply a light stain to bring out the wood grain.
- Decoration: Enhance your rustic frame by adding twine or burlap as accents.
Modern Minimalist Wooden Frames
If you prefer a clean and sleek look, modern minimalist wooden mirror frames are the way to go. They focus on simplicity, using straight lines and a monochromatic color palette. These frames can often look striking against bold-color walls.
- Materials: Smooth plywood or birch wood.
- Finish: Paint in matte black or white for a contemporary vibe.
- Decoration: Consider geometric shapes or cutouts for added interest.
Artistic or Carved Wooden Mirror Frames
For those who love intricate designs, artistic or carved wooden mirror frames offer a canvas for creativity. These frames often feature elaborate carvings or painted details that could become the focal point of a room.
- Materials: Solid hardwood is ideal for carving.
- Finish: Paint or stain to enhance the carved details.
- Decoration: Add metallic accents or jewels for an extra flair.
Framed Botanical Mirrors
Botanical designs integrate natural elements into wooden mirror frames. This might include pressed flowers or leaves embedded in resin frames. Alternatively, you can paint or etch images of flora onto the frame.
- Materials: Lightweight wood and resin.
- Finish: Clear resin to protect natural elements.
- Decoration: Use a variety of plants to create different seasonal themes.
Vintage Ornate Wooden Frames
Vintage ornate frames bring a touch of elegance and nostalgia. Often featuring detailed carvings and gilded finishes, they can make any mirror look grand. These frames work beautifully in traditional or eclectic settings.
- Materials: Softwoods with intricate patterns.
- Finish: Gold or silver leafing or a distressed paint finish.
- Decoration: Pair with antique or retro mirror styles for added authenticity.
Unique Geometric Wood Frames
Geometric designs can inject a modern twist into the classic wooden mirror frame. By utilizing a variety of angles, lines, and shapes, you can create something truly unique. This style works great in contemporary homes where bold design elements are welcome.
- Materials: Plywood for easy manipulation into shapes.
- Finish: Bright colors for an eye-catching effect.
- Decoration: Mix and match different geometric patterns for a playful look.
When crafting your perfect DIY Wooden Mirror Frame Ideas, consider the integration of personal style with the surrounding décor. Each frame style serves as a functional piece that also contributes to the beauty of your home. For more design inspiration and DIY guides, visit Wood Magazine and Woodworker’s Source. With a bit of creativity and patience, you can create a wooden mirror frame that reflects your individuality and enhances the charm of your living space.
Tips for Personalizing Your DIY Wooden Mirror Frame Project

Transforming a simple DIY Wooden Mirror Frame Ideas into a unique piece of art can be a satisfying project for anyone who loves DIY. Personalizing your wooden mirror frame allows you to express your creativity and make a statement in your home. Here are some effective tips to help you achieve a one-of-a-kind look for your DIY wooden mirror frame project.
Choose the Right Wood
The first step in personalizing your mirror frame is selecting the right wood. Various types of wood have different textures, colors, and finishes. Some popular choices include:
- Pine: Affordable and easy to work with, pine can be stained or painted.
- Oak: Dense and robust, oak has a beautiful grain that enhances with stains.
- Walnut: A bit pricier, walnut provides a rich, dark finish ideal for elegant frames.
Consider your existing decor to ensure the wood complements your home’s aesthetic.
Experiment with Shapes and Sizes
Don’t feel confined to traditional rectangular frames. Exploring different shapes can lead to striking designs. Here are a few ideas to consider:
- Round Frames: Bring a soft touch to your space with circular mirrors.
- Geometric Designs: Try using triangles or hexagons for a modern twist.
- Layered Frames: Create depth by layering smaller frames around a larger mirror.
Taking risks with shapes can lead to stunning outcomes that stand out.
Incorporate Texture
Adding texture can elevate your mirror frame from ordinary to extraordinary. Think about these techniques:
- Carving: Use chisels to add designs or patterns into the wood.
- Wood Burning: A wood burner can create unique images or lettering on your frame.
- Mixed Materials: Combine wood with metal or glass elements for a contrast in textures.
These techniques enhance visual interest without overwhelming the overall design.
Add Color and Finish
Color is a powerful tool in personalizing your mirror frame. Consider these options when selecting the right hue and finish:
- Paint: Go bold with bright colors, or opt for soft pastels for a calming look.
- Stain: A wood stain can highlight the natural beauty of the wood grain.
- Varnish: A glossy finish can add elegance, while matte finishes offer a more modern feel.
Choose colors that resonate with your personality and match the room’s theme.
Incorporate Personal Elements
Add personal touches to make your frame truly yours. Here are some ideas:
- Photo Collages: Frame your mirror with small pictures to create a personalized gallery.
- Quotes: Inscribe motivational quotes along the edges for daily inspiration.
- Memorabilia: Embed small items like seashells or dried flowers for added meaning.
Your frame can tell a story, making it more than just a mirror.
Explore Additional Resources
If you’re seeking more inspiration and tips for your DIY Wooden Mirror Frame Ideas project, consider visiting sites like Wood Magazine for expert advice, or check out Applied Wood for quality wood selection ideas. For tutorials, Instructables provides step-by-step guides that may spark your creativity. By paying attention to the details and letting your personality shine through your choices, your DIY Wooden Mirror Frame Ideas can become a stunning focal point in your home. These tips will not only guide you through personalizing your project but also ensure that your finished piece reflects your unique style and creativity.
Conclusion
Creating your own wooden mirror frame not only adds a personal touch to your home but also allows you to express your creativity. Throughout this article, we’ve explored a variety of creative DIY Wooden Mirror Frame Ideas suitable for every room in your house, from rustic designs that suit a cozy cabin to sleek, modern styles perfect for a minimalist aesthetic. By highlighting the essential tools and materials, we’ve made the process accessible, ensuring you have everything you need to embark on this exciting project.
The step-by-step guide provided serves as a roadmap, making it easy for anyone, regardless of skill level, to successfully craft their own wooden mirror frame. You’ll also find unique design styles that set the tone in any space, whether it’s a framed mirror for your entryway or a chic statement piece in your living room.
Adding your personal touch to a DIY project makes it truly special. Remember, personalizing your DIY Wooden Mirror Frame Ideas can be as simple as choosing different finishes or adding decorative elements like carvings or paint. These little touches will make your project uniquely yours and can transform an ordinary piece into a stunning focal point.
With the right tools, creative designs, and a bit of passion, your DIY Wooden Mirror Frame Ideas will not only enhance your space but also bring you satisfaction and pride knowing you made it yourself. So gather your materials, get inspired, and let your creativity shine as you embark on this rewarding project!