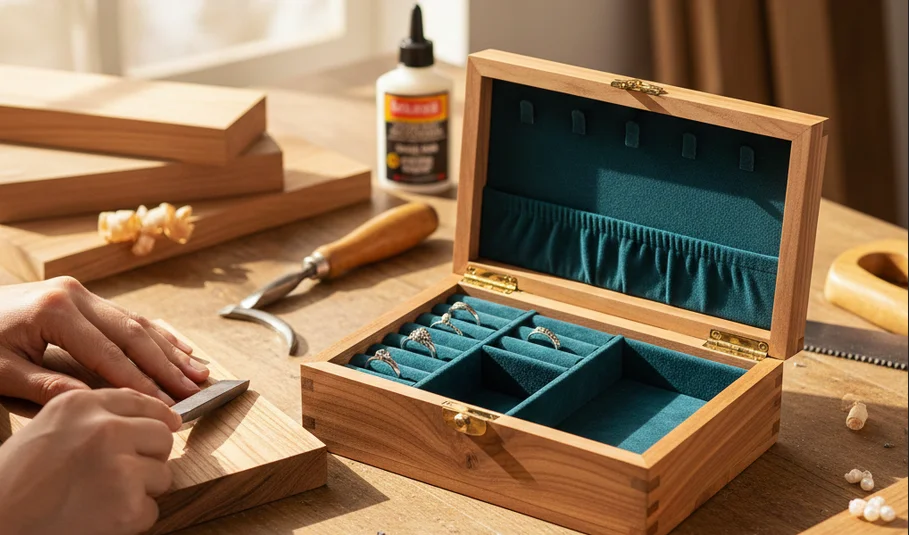
If you’re looking to tap into your creativity and make something special, then DIY Wooden Jewelry Box Plans are a perfect choice. Crafting your own jewelry box not only provides a unique storage solution for your treasures but also enhances your woodworking skills. Whether you’re a complete beginner or someone looking to brush up on your skills, building a wooden jewelry box can be simple, rewarding, and fun.
When getting started, you’ll want to select the right plans that match your skill level. There are plenty of resources available online that can guide you through the entire process.
Choosing Your Materials
Selecting the right materials is crucial for your DIY Wooden Jewelry Box Plans project. Common choices include:
- Pine: Affordable and easy to work with, making it ideal for beginners.
- Oak: Provides durability and a beautiful grain, perfect for a high-quality finish.
- Cedar: Offers a pleasant aroma and natural resistance to moisture, making it an excellent choice for jewelry storage.
In addition to wood, you will also need some tools and supplies:
- Measuring tape
- Saw (hand saw or circular saw)
- Screwdriver
- Sandpaper
- Wood glue
- Wood finish or paint
Simple Jewelry Box Plans
For beginners, it’s best to start with a simple design that doesn’t require advanced woodworking techniques. Here are a couple of straightforward DIY Wooden Jewelry Box Plans to consider:
1. Basic Rectangular Box
This is the easiest design and typically consists of six pieces of wood. Here’s how to build it:
- Cut the wood for the base, sides, and top. Standard dimensions might be 8” x 6” for the base and 4” height for the sides.
- Assemble the box by attaching the sides to the base using wood glue and clamps.
- Attach the top with hinges for easy access.
- Finish with sanding and a wood stain or paint of your choice.
2. Jewelry Box with Drawers
This design adds a little complexity but is still manageable for beginners. Here’s a quick guide:
- Cut the base, sides, and dividers for the drawers.
- Assemble the box frame and install the drawer slides.
- Construct the drawers separately and attach knobs.
- Sand and finish as desired.
Additional Resources
If you need a visual guide or additional inspiration, consider visiting these websites:
- Woodworking for Beginners – Offers beginner-friendly guides and tutorials.
- Ana White – Provides a variety of project plans and tutorials.
- Wood Magazine – Features plans and tips specifically for woodworking enthusiasts.
Final Tips for Success
As you embark on your DIY Wooden Jewelry Box Plans project, keep these tips in mind:
- Measure Twice, Cut Once: Always double-check measurements before cutting to avoid waste.
- Take Your Time: Don’t rush the sanding and finishing processes—these truly make the difference in the final look.
- Seek Help: If you hit a snag, don’t hesitate to ask for advice from experienced woodworkers.
Essential Tools and Materials for Building a Wooden Jewelry Box
Creating a wooden jewelry box is a delightful project that can add a personal touch to your space. Whether you’re a seasoned woodworker or just starting out, having the right tools and materials is essential for crafting a beautiful piece. Here’s a detailed list of what you’ll need to make your DIY Wooden Jewelry Box Plans truly special.
Essential Tools
- Measuring Tape: Accurate measurements are crucial for crafting. A good measuring tape will ensure all pieces fit perfectly.
- Square: This tool helps you ensure that all angles are perfectly 90 degrees, which is essential for maintaining the shape and integrity of your box.
- Saw: Depending on your design, you might need a handsaw, jigsaw, or circular saw. Choose one based on the complexity of your cuts.
- Drill: A cordless drill will be handy for making holes for hinges and other fixtures. It’s also useful for adding decorative elements like knobs.
- Sandpaper: This is crucial for smoothing out edges and surfaces before you finish your box. Use various grits for best results.
- Clamps: Clamps are essential for holding pieces together as the adhesive dries and maintaining the box’s shape during assembly.
- Paintbrushes: If you plan to stain or finish your box, having a good set of brushes is important for an even application.
Material Essentials
Along with the tools, you will need quality materials to craft your wooden jewelry box. Here’s a list of essential materials to consider for your DIY Wooden Jewelry Box Plans:
- Wood: Common choices include pine, oak, walnut, or even birch plywood. Each type of wood brings its unique look and strength. For more details on wood types, visit Woodworkers Source.
- Wood Glue: A strong wood glue is necessary for joining pieces together. Look for one that dries clear for a clean finish.
- Finish: Whether you choose stain, varnish, or lacquer, this will protect your jewelry box and enhance its beauty. Check out Rockler for various finishing options.
- Hinges: Select sturdy hinges that will withstand regular use. Consider decorative options for added flair.
- Knobs or Handles: These can also be chosen based on your design preference. A wide variety can be found at Home Depot.
Planned Cutting List
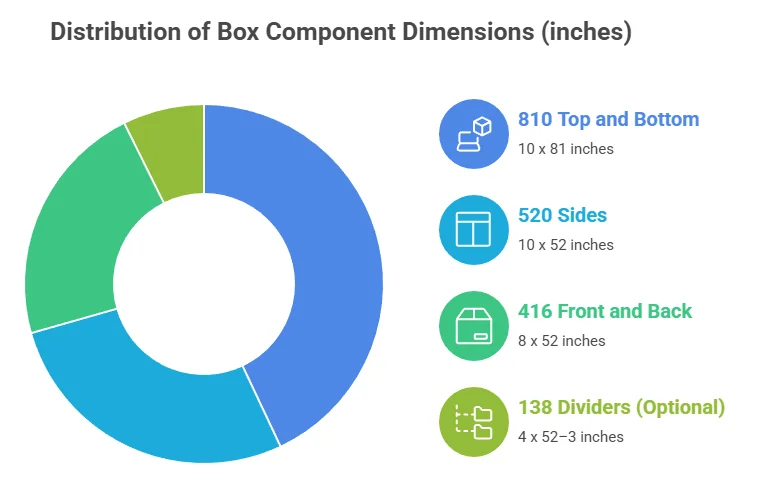
Before you start your project, it’s beneficial to create a cutting plan. This gives you a clear vision of the needed pieces. Below is an example of a simple jewelry box cutting list:
| Component | Dimensions (inches) | Quantity |
|---|---|---|
| Top | 10 x 8 | 1 |
| Bottom | 10 x 8 | 1 |
| Sides | 10 x 5 | 2 |
| Front / Back | 8 x 5 | 2 |
| Dividers (Optional) | 4 x 5 | 2–3 |
Personalizing Your Wooden Jewelry Box: Tips and Ideas
Creating a personalized wooden jewelry box is a wonderful way to showcase your style and keep your cherished items organized. Whether you’re a beginner or a more experienced crafter, there are numerous ways to add a unique touch to your jewelry box. Here are some tips and ideas to inspire your DIY Wooden Jewelry Box Plans project.
Choosing the Right Wood
The first step in personalizing your wooden jewelry box is selecting the right type of wood. Common choices include:
- Pine: Affordable and easy to work with, great for beginners.
- Oak: Strong and durable, perfect for a long-lasting piece.
- Maple: Has a beautiful grain and works well for intricate designs.
- Cherry: Offers a rich color that deepens with age.
Choose the wood that not only fits your budget but also your design preferences.
Designing Custom Features
Personalizing your jewelry box can include various design elements. Here are some ideas:
- Engraving: Add a name or special date using a wood burner or laser engraving tool. This creates a lasting memory.
- Compartment Style: Customize compartments based on your jewelry. For example, create larger sections for necklaces and smaller ones for rings.
- Decorative Lids: Consider adding a carved design or decorative handle to the lid for a more artistic touch.
- Color Stains: Use different wood stains to add color and enhance the appearance of the grain.
Crafting Decorative Details
Add charm to your jewelry box with decorative details. Some popular options include:
- Felt Liners: Line the inside with soft felt to protect your jewelry from scratches.
- Decorative Hardware: Use unique hinges, locks, or even vintage drawer knobs that match your style.
- Painted Designs: For a fun splash of color, paint patterns or images on the exterior.
- Mixed Materials: Incorporate glass, metal, or resin into your design for an eclectic look.
Techniques for Unique Finishes
The finish you choose can dramatically affect the final look of your jewelry box. Some unique finishes include:
- Polyurethane: This clear finish adds durability and protects the wood from moisture.
- Wax Finish: A natural option that enhances the wood grain while providing a soft luster.
- Shellac: Provides a warm glow and helps to resist stains.
- Oil Finish: Penetrates the wood and provides a natural matte look.
Inspo and Resources
If you are seeking more ideas, there are many resources available online for DIY Wooden Jewelry Box Plans. Websites like Wood Magazine offer plans and tutorials that can guide you through the process. Another great resource is Family Handyman, which features DIY projects that include personalization tips.
Celebrating Your Creations
Once your jewelry box is complete, celebrate your creativity! Use it to store family heirlooms, give it as a personalized gift, or even sell it at craft fairs. Each box tells a story and can be a delightful addition to any room.
Common Mistakes to Avoid When Crafting Jewelry Boxes
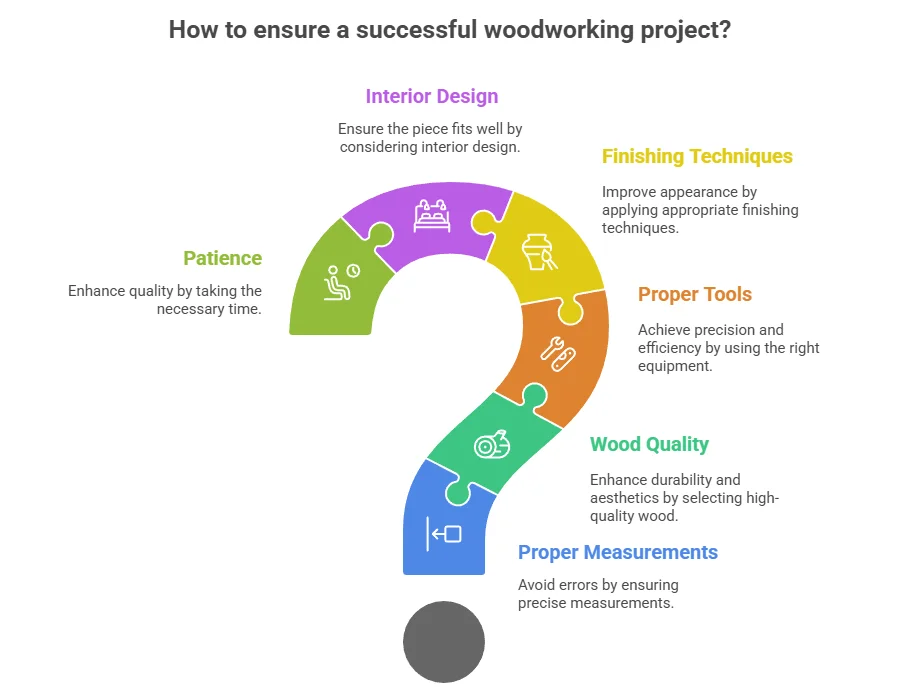
Crafting a wooden jewelry box is a rewarding DIY project that can showcase your creativity and enhance your home decor. However, many crafters encounter common pitfalls that can turn their project into a source of frustration. Here are some mistakes to avoid to ensure your DIY Wooden Jewelry Box Plans project runs smoothly and results in a beautiful finished product.
Overlooking Proper Measurements
One of the most significant mistakes is not measuring accurately. Before you start cutting wood, make sure you have all dimensions well-planned out. Here are some tips:
- Plan Before Cutting: Create a detailed plan with exact measurements for each part of the jewelry box.
- Use Measuring Tools: Invest in quality measuring tools like a tape measure and a square for precision.
- Double-Check: Always measure twice before making any cuts to avoid mistakes.
Ignoring Wood Quality
The type of wood you select can greatly affect the durability and aesthetic of your jewelry box. Choosing low-quality or unsuitable wood can lead to issues later on. When selecting your wood, consider:
- Type of Wood: Hardwoods like oak and maple are ideal for durability, while softer woods like pine can be less costly but may not last as long.
- Grain and Texture: Choose wood with a grain that complements your design for a more visually appealing finished product.
Neglecting Proper Tools
Using the wrong tools can lead to poor craftsmanship and safety risks. Ensure you have the appropriate tools for the job:
- Saws: A saw suitable for cutting wood accurately will help you achieve clean edges.
- Vise or Clamps: These tools can hold your pieces steady while you work, ensuring safety and precision.
- Sanders: Proper sanding is crucial for a smooth finish and will enhance the overall look of your jewelry box.
Forgetting About Finishing Techniques
Once your box is assembled, finishing touches matter. Many crafters skip this step, leading to uneven surfaces and splinters. Consider the following:
- Staining vs. Painting: Choose a finish that enhances the natural beauty of the wood or aligns with your design vision.
- Sealing: A good seal can protect your box from moisture damage and make it last longer.
- Buffering: After applying the finish, buffing the surface will provide a beautiful sheen.
Ignoring Interior Design
While the exterior of your jewelry box is essential, don’t forget about the inside. Neglecting the interior can lead to clutter and damage to your jewelry. Tips for the interior include:
- Dividers: Adding dividers helps organize different types of jewelry, preventing tangling.
- Soft Lining: Consider lining the box with felt or velvet to protect your jewelry from scratches.
- Compartments: Create compartments of various sizes to accommodate different pieces, from rings to necklaces.
Rushing the Process
Crafting a jewelry box requires time and patience. Rushing through any step can lead to mistakes. Take your time with each phase to ensure quality for your DIY Wooden Jewelry Box Plans:
- Start with a Plan: A clear blueprint can guide you through the crafting process smoothly.
- Take Breaks: If you’re feeling fatigued or frustrated, take a break to refresh your perspective.
- Double-Check Work: Always review and double-check each part before moving forward.
By avoiding these common mistakes, you can create a stunning DIY Wooden Jewelry Box Plans item that not only showcases your craftsmanship but also stands the test of time. If you’re looking for detailed plans or more inspiration for your project, check out Wood Magazine for expert advice. Additionally, you can find great tips at Instructables, which offers various DIY plans and creative ideas that will help you craft the perfect jewelry box.
How to Finish and Maintain Your DIY Wooden Jewelry Box
Building a DIY Wooden Jewelry Box Plans item is a fulfilling project that combines creativity and functionality. Once you’ve completed your wooden jewelry box, it’s equally important to finish and maintain it properly to ensure its longevity and beauty. Here are some tips and steps to help you finish and care for your creation.
Choosing the Right Finish
The first step in finishing your wooden jewelry box is selecting the right type of finish. Here are some common options:
- Varnish: Provides a hard, protective layer. It comes in different sheens (matte, satin, gloss) and is resistant to moisture.
- Oil: Enhances the natural beauty of the wood while offering a warm glow. It penetrates deep but may need more frequent applications.
- Shellac: A natural finish that gives a rich, warm tone. It’s easy to apply but not as durable as other options.
- Polyurethane: Extremely durable and ideal for pieces that will be used often. It’s available in both oil- and water-based forms.
Applying the Finish
Once you choose your finish, here’s how to apply it:
- Start with a clean, sanded surface. Make sure there are no dust particles or residue.
- If using varnish or polyurethane, thin the first coat with a solvent (like mineral spirits) to help it soak in better.
- Apply the finish using a high-quality brush or cloth. Work in the direction of the wood grain.
- Allow the first coat to dry thoroughly as per the manufacturer’s instructions.
- Lightly sand between coats using fine-grit sandpaper to ensure a smooth finish.
- Repeat the process until you achieve your desired level of coverage and sheen.
Maintaining Your Wooden Jewelry Box
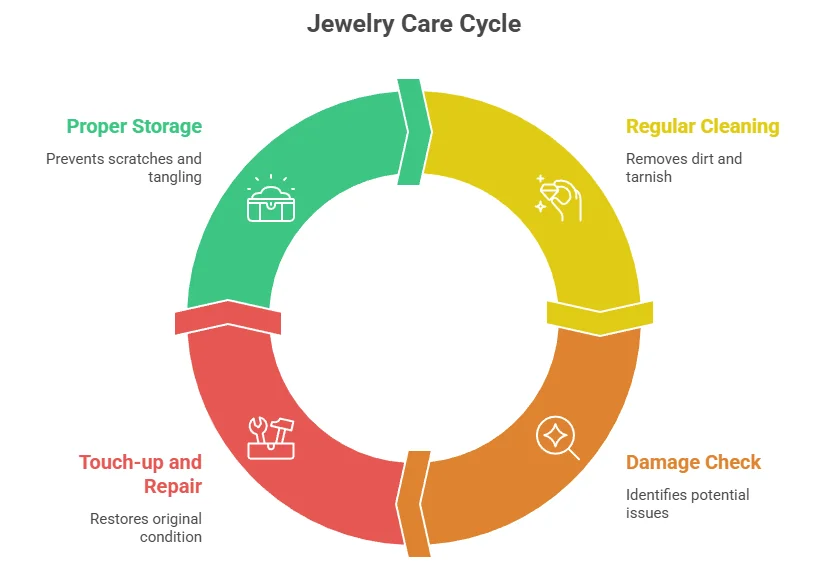
After finishing, proper maintenance will help keep your DIY Wooden Jewelry Box Plans creation looking its best. Here are simple steps for maintenance:
Regular Cleaning
Dust your jewelry box regularly using a soft, lint-free cloth. Avoid using any cleaning products that may contain ammonia or harsh chemicals. Instead, opt for:
- Warm water: Lightly dampen a cloth with warm water, wring it out, then gently wipe the surface.
- Wood polish: Use a wood polish or conditioner formulated for finished wood surfaces.
Checking for Damage
Periodically inspect your wooden jewelry box for any signs of wear, such as:
- Scratches or dents in the finish.
- Any peeling or bubbling of the finish.
- A general loss of sheen or color.
Touch-Up and Repair
If you find any damage, here’s how to repair your wooden jewelry box:
- Cleansing the damaged area gently with a soft cloth.
- If there are scratches, use a matching wood marker or fill the dent with wood filler, sand it smooth.
- Apply touch-up paint or additional finish as needed, allowing proper drying time.
Storing Your Jewelry Box
To maintain the quality of your DIY Wooden Jewelry Box Plans project, consider its storage environment:
- Avoid direct sunlight: Prolonged exposure can fade the wood’s color.
- Keep away from moisture: Excess humidity can warp and damage the wood.
- Stable temperature: Store in a climate-controlled environment to avoid fluctuations that can cause wood movement.
Resources for Further Guidance
For more ideas and plans on wooden projects, you can visit Wood Magazine or check out Woodworking Network for expert tips and detailed guides. Additionally, Ana White offers various DIY woodworking projects that you might find inspiring.
Conclusion
Crafting a DIY Wooden Jewelry Box Plans item is not just a rewarding project; it transforms into a personalized keepsake that showcases your style and creativity. With a variety of beginner-friendly plans available, you can jump into this fulfilling endeavor with confidence. Gathering the right tools and materials lays a solid foundation for your work, ensuring that your final product is both durable and aesthetically pleasing.
Personalization adds a unique touch to your creation. Consider using wood stains, engravings, or painting techniques to match your personality or the decor of your space. Taking these steps can turn a simple wooden box into a cherished heirloom. It’s also essential to be aware of common mistakes that many beginners make, such as incorrect measurements or rushing the assembly process. Learning from these pitfalls will enhance the quality of your craftsmanship.
Once your jewelry box is complete, finishing touches are crucial for both appearance and longevity. Sealants and varnishes not only improve the look but also protect the wood from wear over time. Regular maintenance, including dusting and occasional refinishing, helps keep your jewelry box in top condition.
By following these insights and tips, you’re well-equipped to embark on creating your own wooden jewelry box. Embrace the joy and satisfaction of crafting something beautiful, and enjoy the memories it holds for years to come. Whether it’s for yourself or a thoughtful gift, this project is sure to spark creativity and bring joy to your life. Happy crafting!