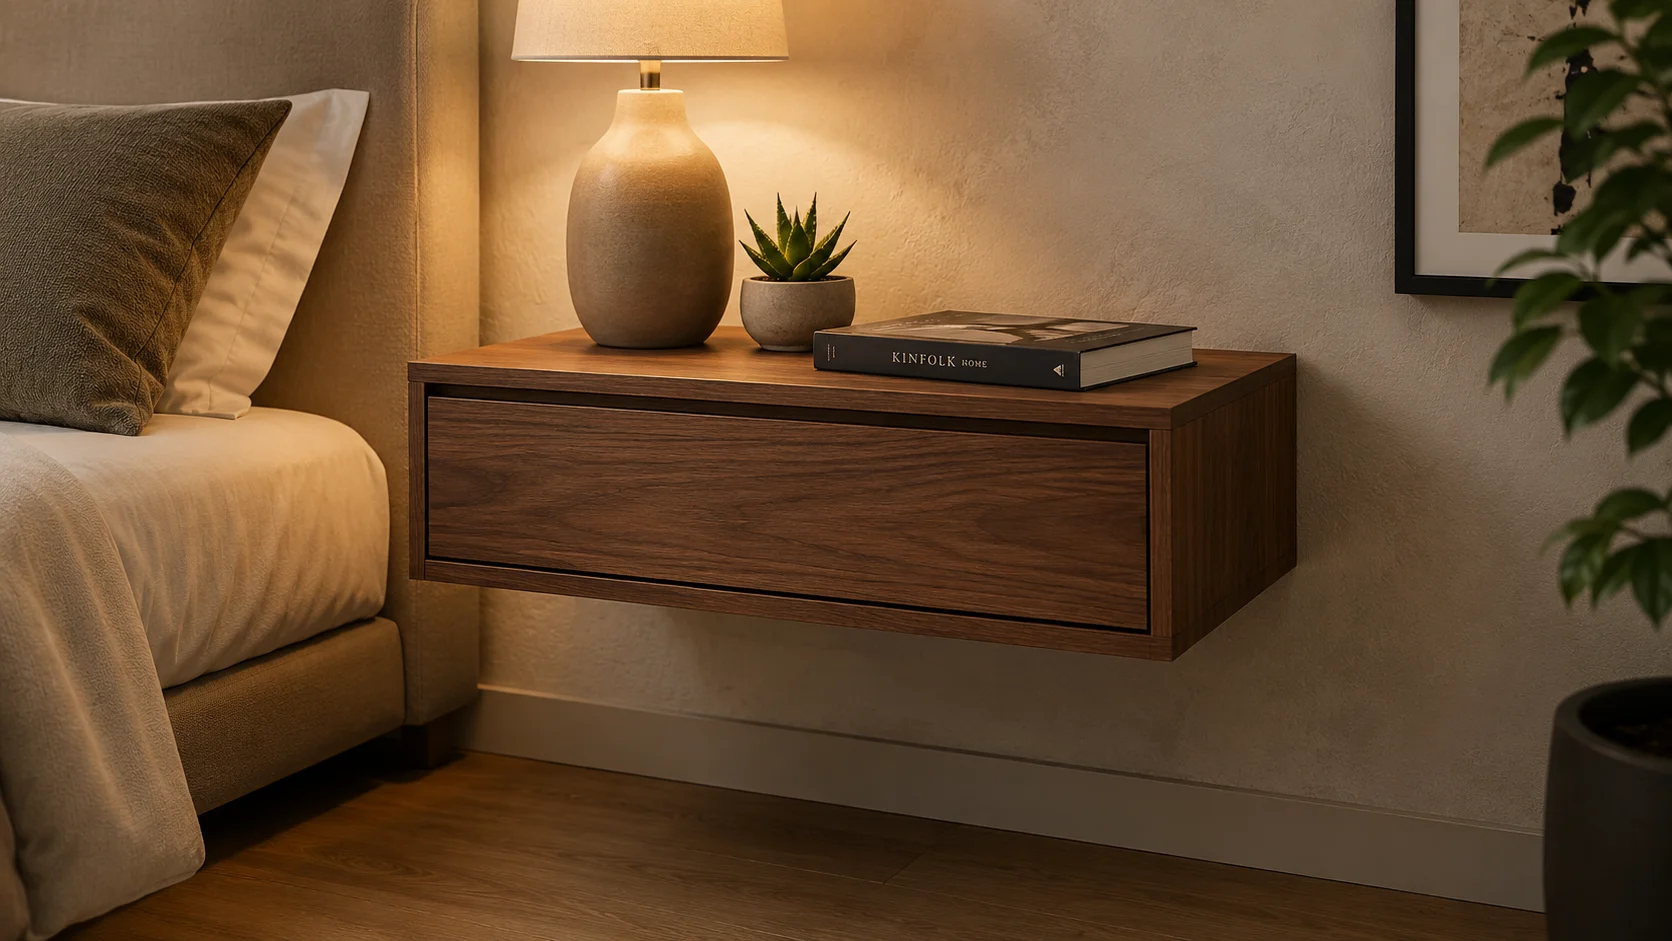
When it comes to creating a unique and functional bedroom space, DIY Wooden Floating Nightstand Plans are a fantastic option. Not only do they save floor space, but they also add a stylish touch to your room. If you’re considering making one yourself, there are several essential features to include in your plans that can help you achieve a great final product.
Ease of Construction
Start by selecting plans that emphasize ease of construction. Look for designs that minimize complicated joinery and extensive tool requirements. Ideally, the plans should allow even beginners to complete the project successfully.
Dimensions and Measurements
Precise measurements are vital when drafting your floating nightstand plans. Consider the following key dimensions:
- Height: The standard bedside table height ranges from 24 to 30 inches, but make adjustments based on your bed height.
- Width: Aim for a width of 18 to 24 inches to ensure it provides enough surface area for your essentials without overpowering the wall.
- Depth: A depth of 10 to 12 inches is often adequate for a floating nightstand, allowing room for décor and necessities.
Material Selection
Choosing the right materials is crucial. Here are some popular options:
- Plywood: A lightweight and budget-friendly choice, ideal for beginners.
- Solid Wood: Provides durability and an upscale look, although it can be heavier and pricier.
- Reclaimed Wood: Adds character and is eco-friendly, but ensure it is properly treated for use indoors.
Mounting System
This is one of the most important features of your nightstand plans. A sturdy and reliable mounting system ensures that your nightstand can hold books, lamps, and personal items safely. Look for plans that outline how to mount the nightstand on the wall using brackets or cleats. It’s essential to secure it to wall studs for added stability.
Design Aesthetic
Your floating nightstand should complement your bedroom’s style. Here are some design ideas to consider:
- Minimalistic: Keep the design simple and clean for a modern look.
- Rustic: Incorporate wood with a natural finish or distressing for a cozy feel.
- Contemporary: Use bold colors or unique shapes to stand out as a statement piece.
Functional Features
Integrating functional features into your floating nightstand design can enhance its usability. Consider adding:
- Drawer Space: A small drawer can be perfect for storing small items out of sight.
- Shelves: Open shelves can provide additional space for books or décor.
- Power Outlets: Some designs include built-in charging stations for devices.
Finishing Touches
Once you’ve built the structural part of your nightstand, don’t forget about the finishing touches. Sanding and applying a finish not only enhances its appearance but also protects the wood. Consider oil-based finishes or water-based polyurethane for durability.
Tools and Materials Needed for Your Floating Nightstand Project
Building a DIY Wooden Floating Nightstand Plans is a rewarding project that can transform your bedroom space. Before you get started, it’s essential to know the tools and materials required to make your floating nightstand project a success. Below, we’ll cover everything you need to gather for your build.
Essential Tools
Having the right tools will ensure the construction process is smooth and enjoyable. Here’s a comprehensive list of tools you will need:
- Power Drill: This is essential for drilling holes and driving screws. A cordless drill is especially handy for mobility.
- Saw: Depending on your design, you may need a circular saw or miter saw to cut the wood to the right sizes.
- Screwdriver: A sturdy screwdriver is necessary for assembling parts of your nightstand.
- Wood Clamps: These are used to hold pieces together as they dry, ensuring a tight fit.
- Level: To ensure that your nightstand hangs straight, a level is crucial during installation.
- Tape Measure: Accurate measurements are required for cutting and placing each piece.
- Sandpaper or Sander: Smoothing the surface of the wood will give your nightstand a professional finish.
- Paintbrush or Roller: If you choose to stain or paint your nightstand, a quality brush will help you apply the finish evenly.
Materials Needed
Next, let’s look at the materials that will be used for the construction of your floating nightstand. The choice of wood is important as it affects both appearance and durability.
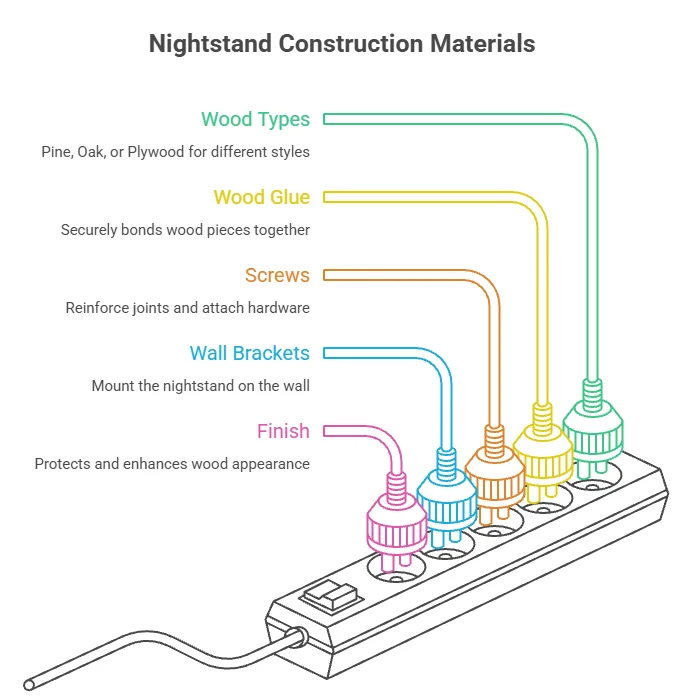
| Material | Description | Recommended Options |
|---|---|---|
| Wood | The main material for your nightstand. Choose a type that suits your style. | Pine, Oak, or Plywood |
| Wood Glue | Helps to bond pieces of wood together securely. | Titebond or Gorilla Glue |
| Screws | Used to reinforce joints and attach hardware. | Wood screws, 1.5 to 2 inches |
| Wall Brackets | Essential for mounting the nightstand on the wall. | L-brackets or floating shelf brackets |
| Finish | Protects the wood and enhances its appearance. | Wood stain, polyurethane, paint |
Additional Considerations
Before you start crafting, here are some additional items that might enhance your floating nightstand:
- Drawer Slides: If your design includes drawers, these will help them open smoothly.
- Handles or Knobs: Finishing touches can make a big difference in the overall look.
- Pads or Feet: To protect your wall and ensure your nightstand remains leveled.
Step-by-Step Guide to Building a Wooden Floating Nightstand
Building a wooden floating nightstand can be an exciting and rewarding project. This guide will take you through the process step by step, ensuring you create a beautiful, functional, and stylish addition to your bedroom. Before you start, gather all the necessary materials and tools.
Materials You’ll Need
- Wood boards (choose your favorite wood type, such as oak, pine, or birch)
- Wood screws
- Wood glue
- Sandpaper (varying grits)
- Wood stain or paint (optional)
- Brackets for wall mounting
- Measuring tape
- Drill
- Level
- Clamps
Step 1: Measure and Cut the Wooden Boards
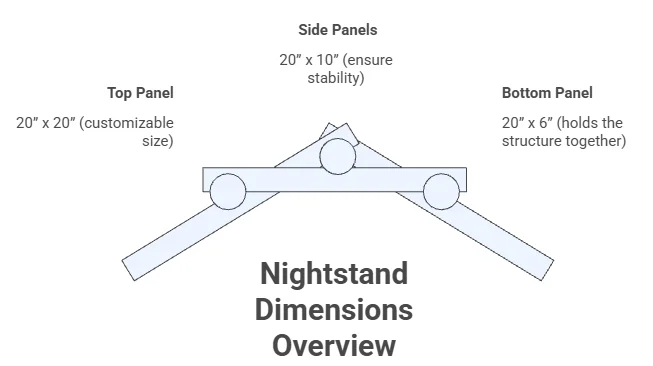
Start by deciding how large you want your nightstand to be. A common height is 24–30 inches, and the width can vary based on your preference, typically between 20 and 30 inches. Here’s a quick guide on the recommended cuts:
| Part | Dimensions |
|---|---|
| Top Panel | 20” x 20” (adjust based on your preference) |
| Side Panels | 20” x 10” (for stability) |
| Bottom Panel | 20” x 6” (holds the nightstand together) |
Use a measuring tape and a saw to cut the boards according to these dimensions. Ensure your cuts are straight and clean for a professional look.
Step 2: Assemble the Panels
Once all pieces are cut, it’s time to assemble them. Start by attaching the side panels to the top panel using wood screws and wood glue for extra strength. Use clamps to hold the pieces together while the glue dries. Ensure everything is aligned correctly to avoid any gaps.
Step 3: Attach the Bottom Panel
The bottom panel provides support and adds stability to your nightstand. Position it in the middle of your side panels. Secure it with screws and glue, making sure to check for levelness. This step is crucial as it will influence how your nightstand hangs on the wall.
Step 4: Sand and Finish the Wood
After assembly, sand all surfaces using sandpaper. Start with a rough grit and move to finer grits for a smooth finish. Pay close attention to edges and corners so they’re comfortable to touch. You can choose to apply a wood stain or paint at this stage to match your bedroom’s decor. Let the finish dry completely according to the manufacturer’s instructions.
Step 5: Prepare for Wall Mounting
To make your nightstand a floating one, you will need appropriate wall brackets. Install the brackets according to the instructions that come with them. Typically, they should be mounted to the wall studs to ensure the nightstand can support weight safely. Use a level during this process to ensure accurate placement.
Step 6: Hang the Nightstand
With the brackets securely on the wall, carefully lift your assembled nightstand and place it onto the brackets. Check that it sits level and adjust as necessary. Ensure it’s firmly secured.
Step 7: Final Touches
Once mounted, add personal touches with decor, lamps, or plants. This can make your floating nightstand not only functional but also an integral part of your room’s design.
Engaging in DIY projects like building a wooden floating nightstand allows you to personalize your space and showcase your creativity. For detailed plans and inspiration, check websites like Wood Magazine and Instructables.
Creative Design Ideas for Customizing Your Floating Nightstand
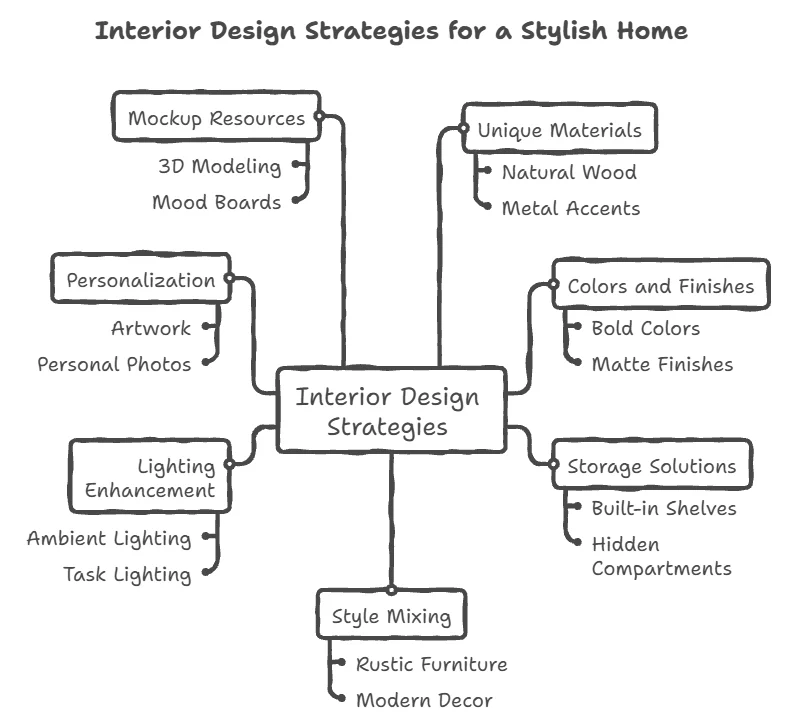
Creating a floating nightstand can add a unique touch to your bedroom while providing much-needed storage and surface space. With the right design ideas, you can customize your floating nightstand to complement your personal style and meet your functional needs. Here are some creative design concepts to inspire your DIY project.
Incorporate Unique Materials
Using unconventional materials can set your floating nightstand apart. Consider these ideas:
- Bamboo: Known for its sustainability, bamboo is not only stylish but also durable.
- Reclaimed Wood: This adds character and a story to your nightstand while being eco-friendly.
- Metal Accents: Incorporate metal frames or handles for a sleek and modern touch.
- Glass Shelves: For a minimalist look, use glass to keep the space feeling light and open.
Play with Colors and Finishes
Don’t hesitate to play with colors to make your nightstand pop. Here are some trendy options:
- Bold Colors: Vibrant blues, yellows, or greens can make a statement.
- Pastel Shades: Soft pinks or mint greens can create a calming atmosphere.
- Natural Wood Finish: If you prefer a rustic look, a natural stain can enhance the wood’s beauty.
- High-Gloss Paint: For a contemporary vibe, consider a shiny finish.
Design with Storage in Mind
Maximizing storage can be both functional and artistic. Think about integrating the following:
- Sliding Drawers: A nightstand with hidden drawers can keep your space tidy.
- Open Shelving: This allows for easy access to books or decorative items.
- Hooks and Racks: Attach hooks for keys or small bags, saving drawer space.
- Baskets or Bins: Use decorative bins on shelves for a stylish, organized look.
Mix Rustic and Modern Styles
This design approach can create a cohesive theme in your bedroom. Pair traditional wood with sleek metal elements for contrast:
- Wood and Steel Combinations: A wooden top with a black metal frame can strike the perfect balance.
- Reclaimed Wood with Clean Lines: Use reclaimed wood yet maintain a modern silhouette for your nightstand.
Enhance Functionality with Lighting
Think about incorporating a light source directly into your nightstand design:
- Built-in USB Ports: This can provide convenient charging options without cluttering your surface.
- LED Strip Lights: Adding these under the shelf can create a soft glow.
- Attached Reading Light: A flexible reading light can be perfect for late-night reading.
Personalize with Decor
Decorating your floating nightstand can reflect your personality:
- Artwork: Incorporate small frames or canvases that resonate with your style.
- Plants: Succulents or small potted plants can add a touch of nature.
- Books: Stack colorful or interesting books to showcase your interests.
- Personal Items: A meaningful item or souvenir can add character.
Design Mockup Resources
If you’re looking for detailed plans and mockups to aid your DIY project, several websites can help:
Maintenance Tips to Keep Your Floating Nightstand Looking Great
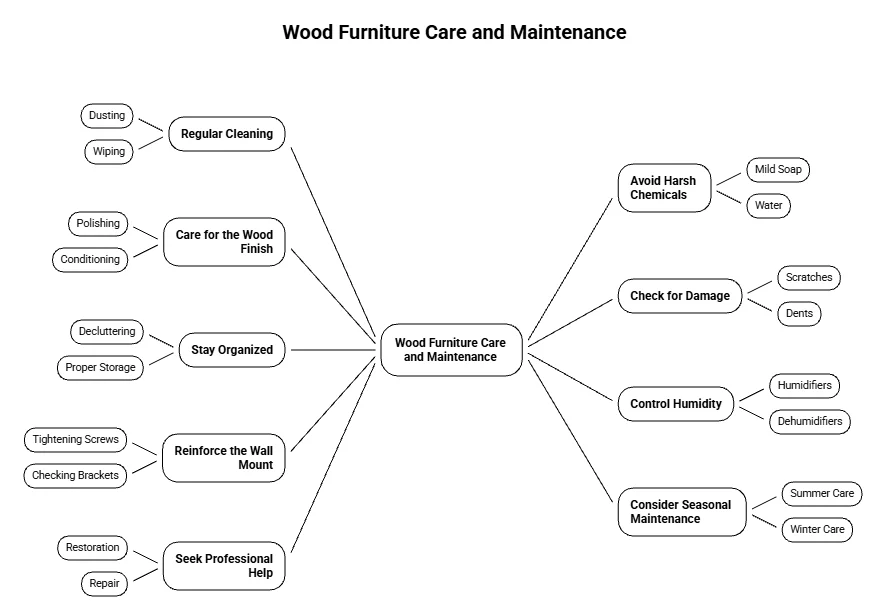
Your floating nightstand is not just a bedside companion; it’s a key element in your bedroom décor. To maintain its beauty and functionality, regular care is essential. Here are some effective tips to keep your DIY Wooden Floating Nightstand Plans looking great for years to come.
Regular Cleaning
To preserve the finish of your floating nightstand, regular cleaning is vital. Dust and dirt can accumulate on the surface, dulling its shine. Use a soft, lint-free cloth to gently wipe down the surface. For more stubborn stains or spills, a damp cloth with mild soap can be effective. Be sure to dry the surface immediately afterward to prevent water damage.
Avoid Harsh Chemicals
Using harsh chemicals can damage the finish of your nightstand. Opt for natural cleaning solutions whenever possible. For instance, a mixture of vinegar and water can be used to clean wood without causing harm. This approach not only protects the wood but also ensures a safer environment in your bedroom.
Care for the Wood Finish
Wood finishes need protection to remain durable. Here are some specific steps to keep your nightstand’s finish in top shape:
- Use Coasters: Always place coasters under drinks to prevent rings and stains.
- Avoid Direct Sunlight: Position your nightstand away from direct sunlight to minimize fading and warping.
- Apply Wood Polish: Regularly apply a good quality wood polish to nourish the finish and enhance its shine. Do this every 3 to 6 months.
Check for Damage
Inspect your floating nightstand for any signs of damage. Look for cracks, scratches, or loose parts. Addressing these issues early can prevent more serious problems down the line. If you notice any scratches, a wood marker can help cover them up, keeping your nightstand looking fresh.
Stay Organized
A crowded nightstand can lead to clutter, increasing the chance of wear and tear. Keep it organized by regularly decluttering. Here are some organizational tips:
- Limit the number of items on your nightstand to essential items like a lamp, clock, or a few books.
- Use decorative trays to corral smaller items like your phone or glasses.
- Incorporate drawers or storage compartments if your design allows for it, to keep things hidden and reduce clutter.
Control Humidity
Humidity can significantly impact the condition of wooden furniture. Too much moisture can lead to swelling, while too little can cause cracking. Maintain a balanced humidity level in your bedroom by using a dehumidifier or humidifier as necessary. Ideally, the humidity level should be around 30-50% for optimal wood care.
Reinforce the Wall Mount
Since floating nightstands are mounted on the wall, it’s crucial to ensure that the mount is secure. Regularly check the brackets and screws to make sure everything is tight and in good condition. If you notice any looseness, tighten the screws or reinstall the wall mount to avoid accidents.
Consider Seasonal Maintenance
With each change of season, your nightstand may benefit from a little extra care. In winter, for example, the dry air can affect wood more significantly. Taking time to inspect and condition the wood during seasonal changes can help prolong the lifespan of your nightstand.
Seek Professional Help When Needed
If you find that your floating nightstand requires repairs beyond your expertise, don’t hesitate to consult a professional. They can provide insight and help restore your nightstand to its former glory. Websites like Wood Magazine offer resources for woodworking and repair ideas that can be useful.
By following these maintenance tips, you can ensure that your DIY Wooden Floating Nightstand Plans continues to be a stylish and functional addition to your bedroom. For additional woodworking ideas and plans, visit Ana White.
Your floating nightstand deserves just as much care as any other piece of furniture in your home. Taking these steps will keep it looking great and functioning well, enhancing the ambiance of your bedroom for years to come.
Conclusion
Crafting your own DIY Wooden Floating Nightstand is an enriching experience that transforms your space while offering practicality and style. By understanding the essential features of these plans, you equip yourself to create a piece that maximizes both aesthetics and function. Gathering the right tools and materials is crucial, as it sets the foundation for a smooth building process. Following a clear step-by-step guide not only simplifies the construction but empowers you to achieve satisfying results.
Adding your personal touch through creative design ideas elevates your floating nightstand from ordinary to extraordinary. Whether you choose a minimalist look or opt for vibrant colors, the customization options are endless, making your nightstand a reflection of your unique taste. Moreover, with some simple maintenance tips, you can ensure your creation remains a stunning focal point in your bedroom for years to come. Regular cleaning and using the right protective finishes will preserve its beauty and durability.
Remember, this project is not just about having a functional piece of furniture; it’s about embracing your creativity and woodworking skills. So gather your tools, choose your design, and embark on this rewarding journey. Your DIY Wooden Floating Nightstand Plans is not just a project; it’s an opportunity to enhance your living space while enjoying the satisfaction that comes from creating something yourself. Happy building!