
If you’re looking to enhance your living space with a personal touch, building a DIY Wooden End Table with Shelf is a fantastic project. It’s not only a practical piece of furniture but also a beautiful addition that can showcase your style. This guide will walk you through each step, making it easy for you to create a stunning end table that suits your needs.
Materials Needed
- Wood boards (1 x 2 inches for the frame and 1 x 3 inches for the top)
- Wood screws (1 1/4 inch)
- Wood glue
- Sandpaper (120 and 220 grit)
- Wood stain or paint
- Paintbrush or rag
- Measuring tape
- Circular saw or miter saw
- Drill and drill bits
- Clamps
Planning Your Design
Before diving into the construction, take time to plan the design of your end table. A standard end table is typically around 24 inches high and 20 inches wide. You can customize these dimensions based on your space. Sketch your design, including the shelf where you can store books or display decor. This step is essential as it gives you a clear vision and minimizes errors while cutting the wood.
Step-by-Step Construction
Now, let’s get into the building process. Follow these steps closely for the best results.
1. Cutting the Wood
Using your circular saw or miter saw, cut the wood boards according to your planned dimensions:
- Four legs (24 inches each)
- Two side rails (20 inches each)
- One top board (20 x 20 inches)
- One shelf board (18 x 18 inches)
2. Sanding the Edges
Take your sandpaper and smooth the edges of each piece. Start with 120 grit and finish with 220 grit to give a nice polished feeling. This step is important for safety and also improves the finish.
3. Assemble the Frame
Begin by attaching the side rails to the legs using wood screws and glue. Make sure everything is square by measuring diagonally from corner to corner. Use clamps to hold the pieces together while you secure them.
4. Attaching the Top
After the frame is stable, place the top board on it and secure it with screws. Use glue on the edges for extra strength. Ensure it’s flush with the edges of the frame.
5. Adding the Shelf
Next, measure and mark where you want the shelf to go. Attach small blocks of wood inside the frame to hold the shelf in place, ensuring it’s at a comfortable height. Then, place the shelf board on top of these blocks and secure it with screws.
6. Finishing Touches
Select your choice of wood stain or paint. Apply evenly using a brush or rag. Allow it to dry completely for the best finish. You may choose to apply a second coat for a richer color.
Essential Tools and Materials for Your DIY End Table Project
Creating a DIY Wooden End Table with Shelf can be a rewarding project that adds both functionality and style to your space. To get started on this project, it’s important to have the right tools and materials at your disposal. Here’s a comprehensive list to help you prepare for your end table build.
Essential Tools

Gathering the right tools will make your DIY project run smoothly. Here’s a list of essential tools you’ll need:
- Measuring Tape: Accurate measurements are crucial. A good measuring tape ensures your pieces fit perfectly.
- Table Saw: For cutting larger pieces of wood. This tool provides straight and accurate cuts.
- Miter Saw: Ideal for making precise crosscuts and miter cuts on your wood pieces.
- Drill and Drill Bits: Use these for making holes and driving screws. A cordless drill adds flexibility while working.
- Screwdriver: Essential for assembling your table, you might need both Phillips and flathead screwdrivers.
- Sandpaper: Get various grits for smoothing surfaces before finishing your project.
- Clamps: These help hold the pieces in place while you work, ensuring accurate assembly.
- Level: A must-have tool to ensure that your end table is even and balanced when it’s complete.
- Wood Glue: Provides additional bonding strength when assembling different parts of the table.
Materials Needed
After gathering the tools, you need to find quality materials for your end table. The following list outlines the primary materials:
- Wood: Choose durable wood suitable for furniture. Common options are pine, oak, or birch. These woods offer both strength and beauty.
- Wood Stain or Paint: To finish your table, select either a wood stain to enhance the natural wood grain or paint for a more colorful look.
- Finish Coat: A polyurethane or lacquer finish will protect your table and give it a polished look.
- Screws: Use wood screws for assembly; ensure they are appropriate for the thickness of your wood.
- Brackets (optional): If you’re designing a shelf, brackets can add extra support beneath the shelf.
Preparation Steps
Once your tools and materials are ready, you can prepare to start building your end table with these essential steps:
- Decide on the dimensions and design of your table. Sketching your ideas can help visualize the final product.
- Measure and cut your wood accurately according to your design. Remember, measure twice and cut once!
- Sand your wood pieces to smooth out any rough edges. This step is vital for a nice finish.
- Assemble the pieces using wood glue and screws. Use clamps to hold everything together while the glue dries.
- Finish your table with your chosen stain or paint, and add a protective coating once dry. Allow adequate drying time for best results.
For guidance on how to use some of these tools effectively, check resources like Wood Magazine or tutorials on YouTube. These platforms offer comprehensive advice and tips for both beginners and experienced woodworkers.
Keep in mind that safety should always come first. Wear protective eyewear and hearing protection when using power tools, and make sure your workspace is organized to avoid accidents.
Design Ideas for Customizing Your Wooden End Table
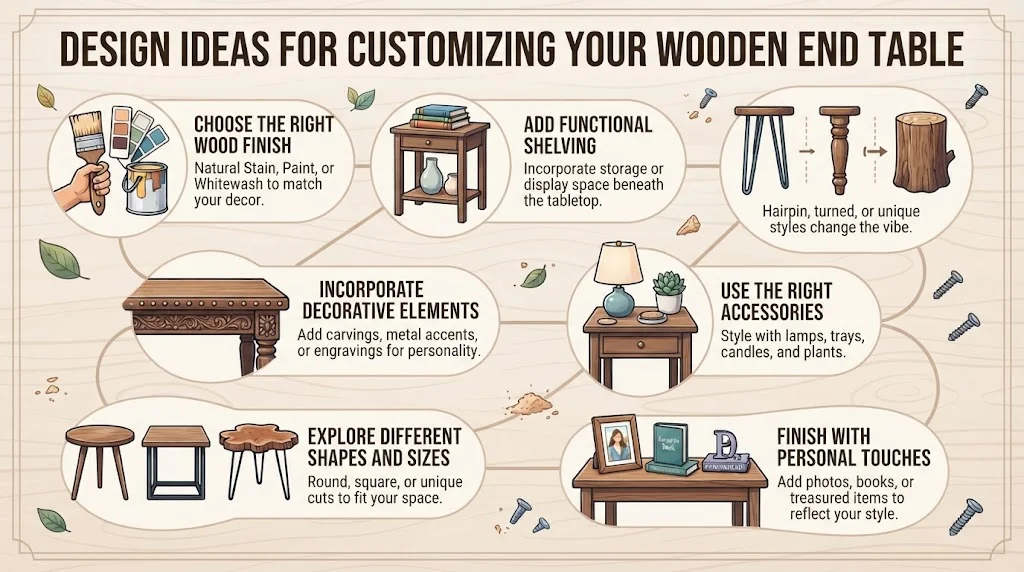
Are you looking to elevate your living space? A wooden end table can be the perfect finishing touch. With a little creativity, you can customize your end table to match your unique style and functionality needs. Here are some design ideas that can help you transform a simple table into a stunning centerpiece.
Choose the Right Wood Finish
The first step to customizing your wooden end table is selecting the ideal wood finish. This can dramatically change the look of your table. Here are a few popular finishes to consider:
- Natural Stain: This brings out the wood’s natural beauty and grain. It’s perfect for a rustic or organic look.
- Paint: If you’re feeling bold, painting your table in a vibrant color adds personality. Soft pastels can create a calming vibe, while bright hues can energize a space.
- Whitewashing: This technique softens the wood’s appearance and can bring a beachy feel to your decor.
Add Functional Shelving
A shelf into your wooden end table not only adds aesthetic value but also enhances functionality. Look for ways to include a shelf beneath the tabletop. This space can be used to:
- Store books, magazines, or remote controls for easy access.
- Showcase decorative items, like vases or photo frames, to personalize your space.
- Create an area for plants, bringing some nature indoors.
Experiment with Legs and Bases
The legs of your end table can significantly impact its overall look. Try different styles to find what suits your decor best. Here are a few ideas:
| Leg Style | Vibe |
|---|---|
| Hairpin Legs | Modern and sleek |
| Turned Legs | Classic and elegant |
| Reclaimed Wood Stumps | Rustic and earthy |
Incorporate Decorative Elements
Don’t hesitate to add decorative elements to your wooden end table. Here are some fantastic ways to make your table stand out:
- Engraving: Personalize your table by engraving designs or initials onto the surface. This adds a unique touch that reflects your personality.
- Metal Accents: Combine wood with metal elements, like drawer handles or corner braces, to infuse a modern feel.
- Textile Accents: Use a cozy fabric runner or placemat on your table for a layered look. It adds softness and can tie your decor together.
Use the Right Accessories
Choosing the right accessories can elevate your wooden end table even further. Keep in mind the following:
- Lighting: A stylish lamp can add warmth and functionality, making your table not only a decorative piece but also a practical one.
- Trays: A decorative tray can organize items on your table while adding a chic layer.
- Candles and Plants: These elements bring life and fragrance, making your table the perfect spot for relaxation.
Explore Different Shapes and Sizes
Another way to customize your wooden end table is to play around with different shapes and sizes. A round table can soften sharp corners in a room, while a rectangular table may provide a more classic look. Choose a size that fits your space and complements your existing furniture.
Finish with Personal Touches
Add items that reflect your personal style. Whether it’s a favorite book, a treasured photo, or a unique decorative piece, these small touches highlight your personality and make your end table a true reflection of you.
Tips for Choosing the Right Wood for Your Furniture Projects
When planning your furniture projects, the type of wood you choose plays a crucial role in the final outcome. The right wood can enhance the beauty, durability, and functionality of your creations. Here are essential tips for selecting the best wood for your DIY endeavors.
First, consider the purpose of your furniture. Different types of wood offer various qualities that suit particular uses:
- Softwoods: Ideal for items that are lightweight and easy to work with. Common examples include pine, cedar, and fir.
- Hardwoods: Preferable for furniture that needs strength and longevity, such as oak, maple, and cherry.
Next, think about the appearance of the wood. Each type has its unique grain and color that can affect your project’s aesthetic:
- Pine: Light in color with visible knots; great for rustic styles.
- Oak: Strong with distinct grains, available in red and white varieties, perfect for traditional furniture.
- Cherry: Rich color that deepens over time, adding warmth to any piece.
When looking at wood types, it’s also essential to be mindful of the finish. Some woods, like beech or birch, take stain remarkably well, while others might need a more protective finish. Make sure you think about how you want your final piece to look and what kind of finish you desire.
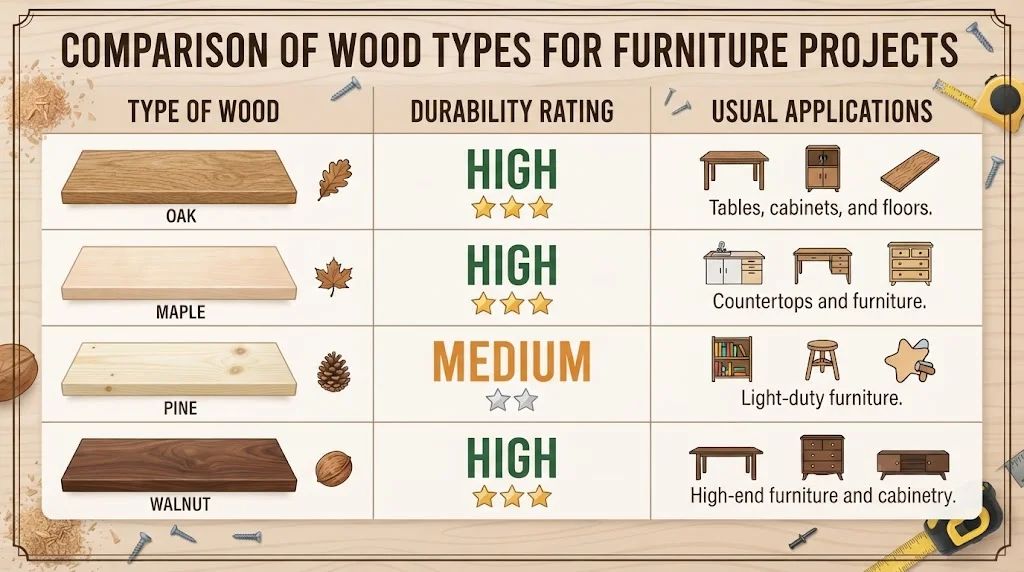
Durability is another vital factor to consider. If your furniture will face heavy use—like tables and chairs—select a wood known for its strength and resistance to wear. Here’s a quick overview of durable woods:
| Type of Wood | Durability Rating | Usual Applications |
|---|---|---|
| Oak | High | Tables, cabinets, and floors |
| Maple | High | Countertops and furniture |
| Pine | Medium | Light-duty furniture |
| Walnut | High | High-end furniture and cabinetry |
Sustainability
Furthermore, consider the sustainability of the wood. It is important to look for sustainably sourced materials to reduce your environmental impact. Certified woods, like those from the U.S. Forest Service or other organizations, can provide peace of mind regarding responsible sourcing.
Price
Price can also influence your decision. If you’re on a budget, softwoods typically cost less than hardwoods. However, investing in high-quality hardwoods may save money over time due to their durability. Always check your local lumber sources and online retailers for prices. You may find resources such as Wood Magazine helpful for comparison.
Workability
Another excellent point to evaluate is the wood’s workability. Some woods can be challenging to work with, particularly for beginners. If you are new to woodworking, softer woods like cedar and pine offer easier cutting and shaping. Get comfortable with various tools to ensure smooth processes, enhancing your skills as you progress.
Look for best suppliers
In addition to all these factors, always look for suppliers that provide wood with minimal defects. Knots, splits, or warping can severely impact your project, so choosing a reputable supplier is crucial. Local hardware stores or dedicated lumber yards often allow you to inspect the wood before purchasing.
Don’t hesitate to draw inspiration from existing furniture designs. Visiting websites specializing in furniture craftsmanship can help you visualize your project. Websites like Wood Magazine and Popular Woodworking offer extensive resources to guide you in your woodworking journey. Learn about different types of woods, finishes, and frame designs that can elevate your project.
Maintenance and Care for DIY Wooden Furniture: Keeping Your End Table in Top Shape
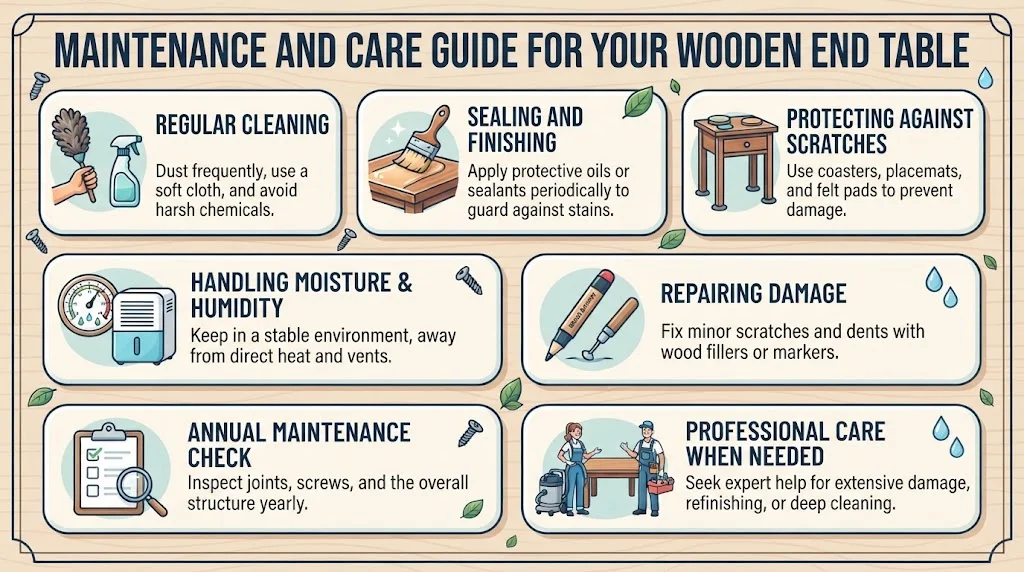
DIY wooden furniture, such as your handcrafted DIY Wooden End Table with Shelf, adds character and warmth to your living space. However, just like any other furniture, it requires proper maintenance to keep it looking its best. Here are some easy maintenance tips and care strategies to ensure your end table remains in excellent condition.
Regular Cleaning
Dust can accumulate quickly on wooden surfaces, which not only affects appearance but can also lead to scratches and imperfections. To keep your wooden end table pristine:
- Use a soft, lint-free cloth to gently wipe the surface.
- For deeper cleans, lightly dampen the cloth with water or a gentle wood cleaner.
- Avoid using harsh chemicals, as they can damage the wood finish.
Sealing and Finishing
Patching up your end table periodically with wood oils or sealants helps protect it from moisture and stains. Here’s how to apply a finish effectively:
- Always clean the table surface before applying any product.
- Choose a high-quality wood finish, such as polyurethane, varnish, or wood oil.
- Apply the finish with a clean brush or cloth in even strokes, following the grain of the wood.
- Allow adequate drying time according to the manufacturer’s instructions before use.
Protecting Against Scratches
To maintain the surface quality of your DIY Wooden End Table with Shelf, consider these protective measures:
- Use coasters for drinks and placemats for hot items to prevent direct contact with wood.
- Regularly reposition decorative items to avoid uneven wear on certain areas of the table.
- Consider using felt pads under household items to minimize scratching.
Handling Moisture and Humidity
Wood is sensitive to changes in humidity and moisture, so it’s essential to regulate your home environment:
- Avoid placing the end table in direct sunlight or near heating vents, as these can warp the wood.
- Use a dehumidifier in particularly moist environments to protect your furniture.
- Wipe up spills immediately to prevent staining or warping.
Repairing Damage
Even with the best care, accidents happen. Learning how to repair minor damages can prolong the life of your end table:
- For scratches, use a wood marker that matches your table’s finish, or a homemade paste from a nut (like a walnut) to fill in scratches.
- For dents, apply moisture with a damp cloth and an iron on low heat to help lift the wood fibers.
- If the finish is damaged extensively, you may need to sand down the area and reapply the finish.
Annual Maintenance Check
Set a yearly reminder to conduct a thorough maintenance check on your wooden furniture. This includes:
- Inspecting the joints and screws, ensuring they are tight and secure.
- Checking for any wear or damage and addressing it promptly.
- Reapplying finish if necessary, and cleaning thoroughly.
Professional Care When Needed
Sometimes, the best way to maintain your DIY wooden furniture is to seek professional help. Consider this when:
- Your end table has extensive damage that isn’t easily remedied.
- You are unsure about how to refinish or repair the table correctly.
- You want a thorough cleaning that uses specialized wood care products.
Taking good care of your DIY Wooden End Table with Shelf ensures it remains a treasured piece in your home. For more specialized care tips, you can visit Wood Magazine or for refinishing advice, check out Family Handyman.
Conclusion
Creating your own DIY Wooden End Table with Shelf is not only a rewarding project but also a great way to infuse your personal style into your living space. By following the step-by-step guide, you have the freedom to craft a piece that fits your aesthetic and functional needs perfectly. Remember, the essential tools and materials discussed are your allies in making this process manageable and enjoyable.
Customization is key, and with various design ideas at your disposal, you can ensure your end table stands out as a conversation starter in any room. Choosing the right wood is crucial for durability and aesthetics, so consider your environment and how you intend to use the piece before making a selection.
Proper maintenance and care will keep your wooden furniture looking fresh and new for years to come. Regular cleaning, conditioning, and appropriate storage will preserve the beauty of your DIY creation.
Your DIY Wooden End Table with Shelf is more than just furniture; it’s a reflection of your creativity and craftsmanship. So gather your materials, unleash your imagination, and let each step of the process bring you one step closer to a unique piece that adds both functionality and charm to your home. Enjoy the journey of building something special, and take pride in the fact that you crafted it with your own two hands.