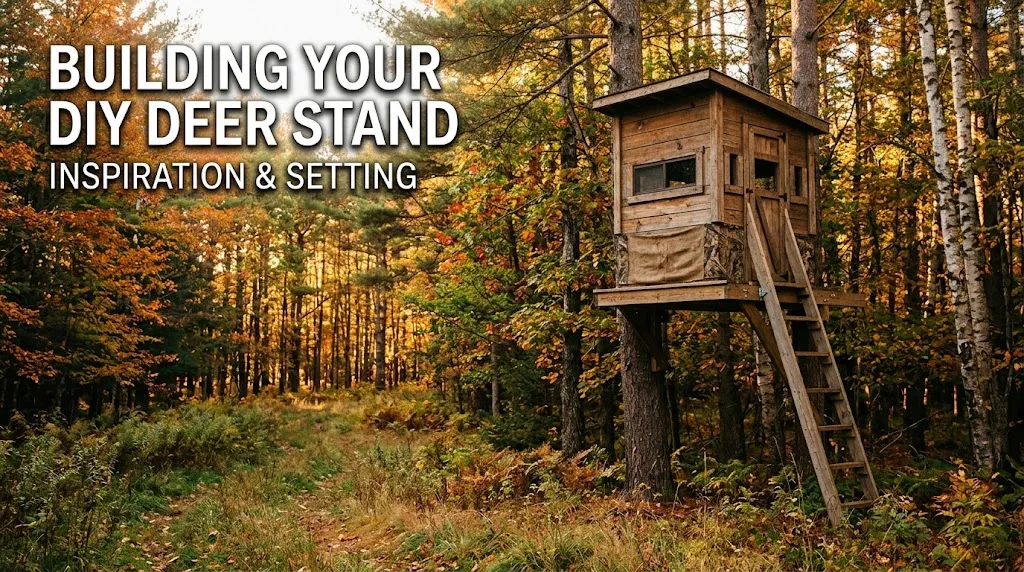
Building a DIY Wooden Deer Stand Box is an exciting project that can enhance your hunting experience. Not only does it provide you with a comfortable and safe spot for observing wildlife, but it also allows for customization based on your personal preferences. Here is a detailed guide to help you through the process of constructing your wooden deer stand box.
Gather Your Materials
Before you start building, it’s essential to have all the materials ready. Here’s a list of supplies you will need:
- Pressure-treated wood for the frame (2x4s or larger)
- Plywood for the walls and floor
- Nails and screws
- Wood glue
- Wood stain or paint (optional)
- Safety goggles and gloves
- Measuring tape
- Hammer and saw
Invest in high-quality materials to ensure your deer stand remains sturdy and durable through different weather conditions.
Measure and Cut Your Wood
Measuring accurately is crucial. You’ll want to decide on the dimensions of your deer stand box. Typical dimensions might be around 4 feet by 4 feet and 6 feet tall, but you can adjust them based on your needs. With your measurements in hand, follow these steps:
- Cut four pieces for the base frame.
- Cut vertical posts according to your desired height.
- Prepare plywood sections for the walls and floor.
Assemble the Frame
Start building the frame using your 2x4s. Secure the corners with nails or screws, creating a sturdy structure. Enforce the joints with wood glue for additional strength. Here’s a straightforward way to assemble the frame:
- Attach two base pieces for the bottom of the box.
- Fix the vertical posts into place at each corner of the base.
- Secure two additional frame pieces at the top to complete the shape.
Ensure everything is square and aligned properly, as this will affect the rest of your build.
Add Plywood Walls and Floor
Next, it’s time to attach the plywood to your frame. This part of the construction creates a shelter for you when hunting. Follow these steps:
- Start by placing the floor panel onto the frame and secure it with screws.
- Attach the wall panels to the vertical posts. Be sure to leave space for windows if you’d like to have openings for observation.
- Don’t forget to add a roof Panel, ensuring it slopes if possible to allow rain runoff.
Cut Out Windows and Add Doors
For a well-designed stand, you’ll need windows where you can see out while keeping concealed. Here’s how to do it:
- Decide the size and placement of your windows on the walls.
- Use a saw to cut them out carefully. Sand the edges to avoid splinters.
- If desired, create a door for easy access, ensuring it’s secure yet easy to open.
Finish Your Stand
After the structure is complete, you can finish your wooden deer stand box. Applying a wood stain or sealant protects the wood and provides a more appealing look. You can also consider adding:
- A ladder for easy access
- Seat cushions for comfort during long hours
- Camouflage paint or material for concealment
Building your deer stand box safely
Always put safety first when using tools. Wear safety goggles and gloves to protect your eyes and hands. It’s advisable to have someone help you when assembling larger pieces to prevent accidents.
Essential Tools and Materials for Constructing a Deer Stand
Building a deer stand can be an exciting project for outdoor enthusiasts and avid hunters. Whether you’re a seasoned builder or trying your hand at DIY for the first time, gathering essential tools and materials is the first step toward creating a safe and effective deer stand. Here, we will discuss the primary items you’ll need to ensure a smooth construction process.
Basic Tools Required
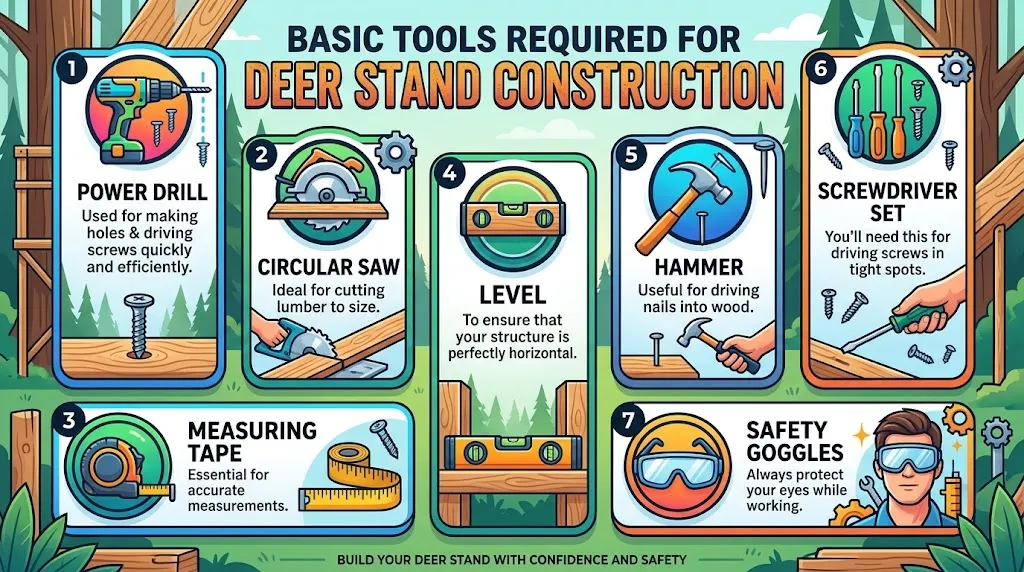
Having the right tools can make a world of difference in any construction project. Here’s a list of tools you should consider when constructing your deer stand:
- Power Drill: Used for making holes and driving screws quickly and efficiently.
- Circular Saw: Ideal for cutting lumber to size.
- Measuring Tape: Essential for accurate measurements.
- Level: To ensure that your structure is perfectly horizontal.
- Hammer: Useful for driving nails into wood.
- Screwdriver Set: You’ll need this for driving screws in tight spots.
- Safety Goggles: Always protect your eyes while working.
Materials for Building Your Deer Stand
Beyond tools, selecting quality materials is crucial to creating a sturdy and durable deer stand. Here’s a breakdown of the materials you’ll typically need:
Lumber
Wood is usually the main component of a deer stand. Here are some types to consider:
- Pressure-treated lumber: Best for the legs and base due to its resistance to moisture.
- Plywood: Ideal for the platform and walls. Opt for exterior-grade plywood for added durability.
Fasteners
Secure your deer stand effectively with strong fasteners:
- Wood screws: Choose corrosion-resistant screws for longevity.
- Nails: For additional support in certain areas.
- Brackets: L-brackets for added stability in joints.
Roofing Materials
Protect your stand from the elements by adding a roof. Consider using:
- Metal roofing: Offers durability and weather resistance.
- Shingles: Commonly used, providing good insulation but may need periodic replacement.
Additional Essentials
Don’t forget these additional items that can enhance your deer stand experience:
- Camouflage Paint: To blend your deer stand naturally into the environment.
- Insulation Materials: Depending on your area, think about insulating your stand for warmth.
- Seating: Comfortable seating can enhance your time spent in the stand.
Safety Considerations
As you embark on your deer stand construction, safety should always be a top priority. Make sure to:
- Wear gloves: To protect your hands from splinters and cuts.
- Work with a partner: Especially for heavy lifting or high-reaching tasks.
- Clearly mark areas: Where tools and materials are located to reduce hazards.
Tips for Choosing the Perfect Location for Your Deer Stand
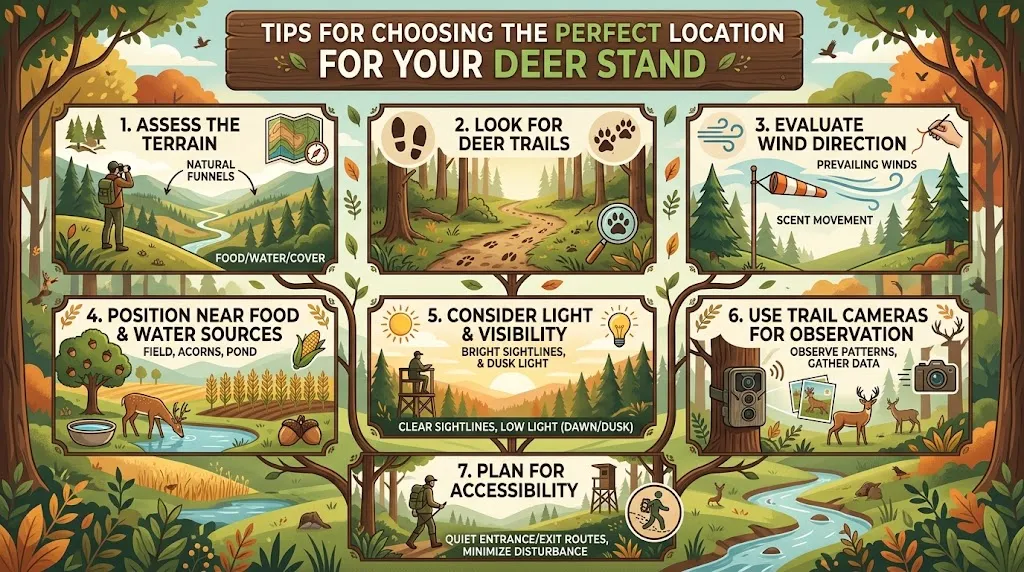
Choosing the perfect location for your deer stand can significantly enhance your hunting experience and improve your chances of success. By taking the time to carefully select your spot, you can maximize visibility, minimize noise, and take advantage of deer behavior patterns. Here are some tips to help you find the best location for your deer stand.
Assess the Terrain
Understanding the landscape where you’ll be hunting is crucial. Start by studying your hunting area. Use maps and satellite images to identify key features such as:
- Natural funnels (narrow corridors where deer naturally travel)
- Food sources (like fields, crops, or natural vegetation)
- Water sources (streams or ponds that provide drinking spots)
- Cover (thickets or wooded areas where deer can hide)
By assessing the terrain, you’ll be able to narrow down the most promising locations for your deer stand.
Look for Deer Trails
Identifying deer trails is essential when choosing where to set up your stand. Look for worn paths in the vegetation that indicate regular deer traffic. These trails are often found near:
- Food sources
- Water sources
- Cover
Mark these locations and observe the trails over a few days or weeks to determine which paths the deer frequent most.
Evaluate Wind Direction
The wind plays a significant role in hunting success by determining how scent travels. Choose a location that allows a favorable wind direction, keeping your scent away from areas where deer are likely to approach. It’s important to:
- Check wind patterns throughout the hunting season
- Consider thermals, which can affect scent movement at different times of day
Utilizing wind direction to your advantage can lead to a successful hunt.
Position Near Food and Water Sources
Deer are highly motivated by food and water, making these sources vital when deciding where to set up your stand. When selecting a location, keep the following points in mind:
- Locate stands near natural food sources, such as acorn-producing trees or agricultural fields.
- Monitor deer patterns during feeding times.
- Establish your stand at a distance from these sources to avoid alarming the deer.
Finding the right balance is key—too close can scare them away, but too far means you might miss out on shooting opportunities.
Consider Light and Visibility
Proper lighting in your hunting area can play a critical role in deer movement. Deer typically prefer to move in low light, such as dawn and dusk. You’ll want to position your stand to capitalize on these times. Additionally:
- Ensure your stand has a clear line of sight
- Avoid areas that are too densely covered, which could limit visibility
- Watch for branches or other obstructions that might interfere with your shot
Having a clear view while hunting can greatly increase your chances of spotting deer before they catch your scent.
Use Trail Cameras for Observation
Trail cameras are invaluable tools for any hunter. They can help you observe and monitor deer activity in your selected area. Place cameras strategically to capture:
- Deer movement patterns
- The time of day they frequent certain locations
- Age and sex of the deer
Plan for Accessibility
The ease of access is also a critical factor when choosing a deer stand location. Ensure you can reach your stand without disturbing the area or alerting deer. Consider these tips:
- Identify entry and exit routes that minimize scent dispersal
- Avoid using paths that deer commonly travel
- Choose a place that allows for a quiet approach
A well-planned route to your stand can keep your hunting area undisturbed, leading to better outcomes.
Safety Considerations While Building and Using Your Deer Stand
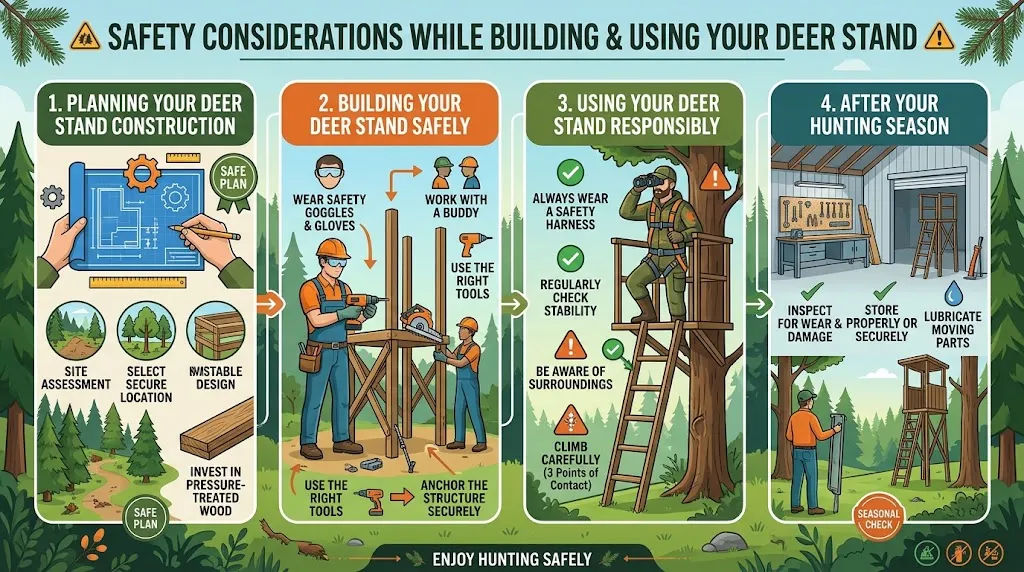
Building and using a deer stand can significantly enhance your hunting experience. However, it is crucial to prioritize safety throughout the process. From the planning phase to the moment you step into your deer stand, there are several factors to consider to ensure a safe and enjoyable outing.
Planning Your Deer Stand Construction
Before you start building your deer stand, proper planning is vital. Think about the following:
- Location: Choose a site away from heavy foot traffic and unpredictable wildlife paths. Look for elevated areas to give you a better view.
- Design: Plan your deer stand design carefully. Ensure it is stable and can support your weight. A DIY Wooden Deer Stand Box can be an excellent option for durability and comfort.
- Materials: Use high-quality, appropriate materials. Pressure-treated wood is highly resistant to rot, making it an excellent choice for outdoor structures.
Building Your Deer Stand Safely
When you start building, safety should always be your top priority. Here are a few essential safety tips:
- Wear Personal Protective Equipment: Always wear gloves, safety glasses, and a hard hat while constructing your deer stand to protect against injury.
- Tools and Equipment: Use the right tools for the job. Ensure all tools are in good condition, and familiarize yourself with their operation before starting.
- Work with a Buddy: It’s always safer to work with a partner when building. If an accident occurs, having someone nearby can be crucial for assistance.
- Secure the Structure: Ensure your box stand is securely anchored. Use bolts and brackets where necessary to prevent it from tipping or collapsing.
Using Your Deer Stand Responsibly
Once your deer stand is built, it’s time to focus on safe usage while hunting. Here are important considerations:
- Check Equipment: Regularly check the stability of your deer stand and the condition of any equipment, including the safety harness. Look for fraying or wear that could lead to accidents.
- Safety Harness: Always wear a safety harness when climbing into or sitting in your deer stand. This is crucial for preventing falls, which can lead to severe injury.
- Stay Aware of Your Surroundings: Always be aware of the area around your stand. This includes monitoring wind direction, possible wildlife movements, and the positioning of other hunters.
- Climb with Care: When climbing up to your deer stand, take your time and use sturdy steps or a ladder. Ensure you have three points of contact at all times for stability.
After Your Hunting Season
Taking care of your deer stand after the hunting season is vital for its longevity and your safety in the future.
- Inspect for Damage: After the season, inspect your stand for signs of wear or damage, especially if it endured harsh weather conditions during the winter.
- Store Properly: If you plan on taking it down, ensure you store the structure properly to avoid damage. If left up, make sure it is secure and stable over the off-season.
Enhancing Your Deer Stand with Custom Features and Accessories
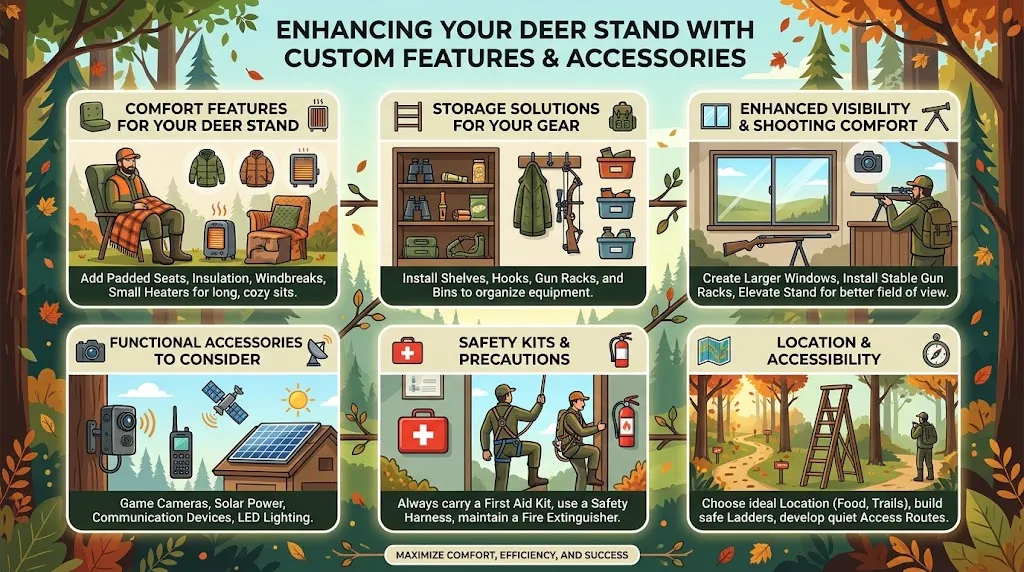
For deer hunters, creating a personalized and functional deer stand can greatly enhance your hunting experience. Whether you’re building one from scratch or improving an existing structure, adding custom features and accessories can provide comfort, convenience, and effectiveness during your hunt.
Comfort Features for Your Deer Stand
Spending hours in a deer stand can be uncomfortable if it isn’t equipped properly. Here are some features you might consider adding:
- Padded Seating: Invest in a high-quality padded seat. A comfortable chair allows for longer sitting periods, reducing fatigue.
- Insulation: If you hunt in cold climates, consider insulating your deer stand to maintain warmth.
- Windbreaks: Adding panels or curtains can reduce wind exposure, making your time in the stand more pleasant.
Storage Solutions for Your Gear
Keeping your equipment organized and within reach is essential for successful hunting. Here are some storage ideas:
- Built-in Shelves: Install shelves inside your stand to hold binoculars, calls, and other small gear.
- Hooks: Wall-mounted hooks are great for hanging bags, jackets, or backpacks.
- Bin Shelving: Consider adding bins to store smaller items that could clutter the stand.
Enhanced Visibility and Shooting Comfort
Improving your shooting and viewing angles is crucial for any deer stand. Here are some tips to enhance visibility:
- Windows: Create larger, adjustable windows that allow for better sightlines while keeping concealment.
- Elevation: Consider raising your stand to improve your field of view. A good height can make a big difference in spotting deer.
- Swivel Seats: A swivel chair allows you to rotate easily without making excessive movements, maintaining your cover while aiming.
Functional Accessories to Consider
When adding features to your deer stand, think about how accessories can further improve your hunting experience:
| Accessory | Function |
|---|---|
| Game Camera | Monitor deer movements before your hunt. |
| Binoculars Holder | Keep your optics secure and ready for use. |
| Light Source | Illuminate your stand without disrupting your location. |
These accessories can improve your efficiency and readiness while you wait, making each hunting trip more enjoyable and productive.
Safety Kits and Precautions
Safety should always be a priority when hunting. Consider enhancing your deer stand with these safety measures:
- Fall Arrest Systems: Install a harness system to prevent falls when climbing in and out of your stand.
- First Aid Kit: Always have a first aid kit accessible in case of emergencies.
- Communication Devices: Keep a cell phone or two-way radio on hand to maintain contact with others.
Location and Accessibility
The location of your deer stand can make a significant difference in your hunting success. Think about:
- Proximity to Feeding Areas: Position your stand near food sources where deer are likely to gather.
- Wind Direction: Always consider wind direction to avoid spooking deer.
- Access Routes: Ensure you have quiet pathways for easy access to your stand without disturbing the area.
By enhancing your deer stand with the right features and accessories, you can improve your overall hunting experience. Doing so not only increases your comfort but also maximizes your chances of a successful hunt. For more tips on building and customizing deer stands, visit Hunting Magazine and explore their DIY resources.
Ultimately, the more time and effort you put into your deer stand, the more rewarding your hunting trips will be.
Conclusion
Building your own DIY Wooden Deer Stand Box can be a rewarding experience that enhances your outdoor adventures. By following the step-by-step guide, you’ve learned how to craft a sturdy and reliable structure, ensuring that you have a comfortable spot for observing wildlife and hunting. The essential tools and materials provided in this guide set the stage for a successful build, emphasizing the importance of using quality supplies for durability and safety.
Choosing the right location is crucial for maximizing your deer stand’s effectiveness. By considering factors like deer trails, wind direction, and visibility, you can create an ideal environment for attracting game. Additionally, safety should always be a priority. Whether you’re constructing the stand or preparing to use it, taking necessary precautions can prevent accidents and ensure you enjoy this activity responsibly.
With a solid foundation in place, you can personalize your deer stand by adding custom features and accessories. Enhancements like camouflage paint, comfortable seating, or even storage for gear can elevate your hunting experience significantly. Embracing creativity in your design not only makes hunting more enjoyable but also showcases your individuality in the great outdoors.
By combining these elements—effective construction, strategic placement, safety precautions, and unique customizations—you are well on your way to building a reliable, functional, and enjoyable DIY Wooden Deer Stand Box. Your effort will not only improve your chances of a successful hunt but also provide a memorable space in nature that you can cherish for years to come. Happy hunting!