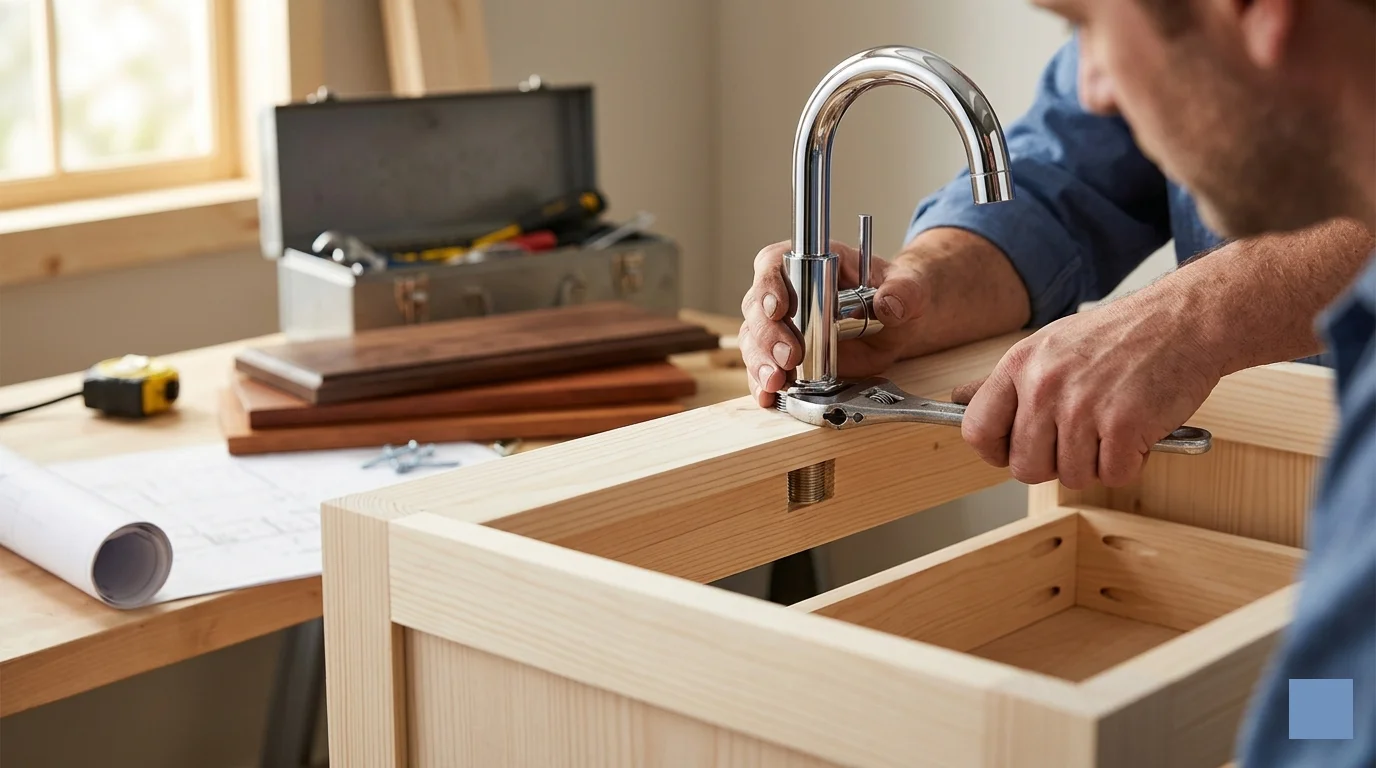
If you’re looking to enhance your bathroom and save money at the same time, creating a DIY wooden bathroom vanity can be a rewarding project. Not only do DIY vanities add character to your space, but they also allow you to tailor the design to your personal style and storage needs. Below, you’ll find creative DIY Wooden Bathroom Vanity Plans and helpful tips that will guide you through the process.
Choosing the Right Wood
Your choice of wood greatly affects the look and durability of your vanity. Common options include:
- Pine: Affordable and easy to work with, perfect for beginners.
- Oak: Durable and has a beautiful grain; suitable for a more high-end look.
- Maple: Hard and sturdy, ideal for high-traffic bathrooms.
- Cedar: Naturally resistant to moisture and insects; offers a lovely aroma.
Essential Tools You Will Need
Before you start building your vanity, ensure you have the necessary tools. Here’s a checklist for your project:
- Measuring tape
- Miter saw or circular saw
- Drill and drill bits
- Wood screws
- Screwdriver
- Sander or sandpaper
- Paint or wood stain
- Wood glue
Basic DIY Wooden Bathroom Vanity Plans
Here’s a simple step-by-step plan to create a basic wooden bathroom vanity.
Step 1: Measure Your Space
Start by measuring the area where you want to place your vanity. Keep in mind the height, width, and depth you desire based on your usage and available space.
Step 2: Design Your Vanity
Sketch a design that incorporates storage options and styling. Consider including:
- Open shelves for towels
- Cabinets for toiletries
- A countertop to hold sinks and decor
Step 3: Select Your Components
Your vanity will need these key components:
- Two side panels
- A back panel
- Top panel for the countertop
- Shelves or cabinets
Step 4: Assemble the Vanity
Start with the frame. Use wood screws to secure the side panels to the back panel. Attach the top panel securely, ensuring all corners are squared and flush. Sand down rough edges for a smooth finish.
Step 5: Create the Countertop
Craft a countertop that fits over your vanity. Ensure it’s sturdy enough to hold the sinks and any accessories. You can also use ready-made countertops if that fits your aesthetic.
Step 6: Finish the Vanity
Once assembled, apply wood stain or paint to give your vanity personality. Choose finishes that complement your bathroom colors. A sealant can protect your wood from moisture.
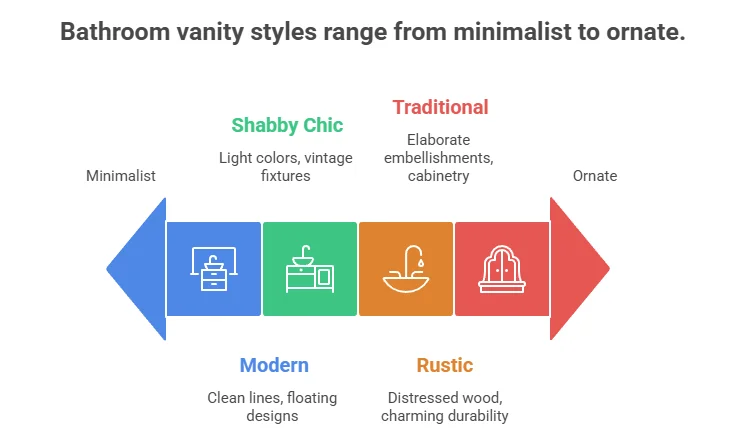
Popular Styles to Explore
Consider these popular styles when planning your DIY Wooden Bathroom Vanity Plans:
| Style | Description |
|---|---|
| Modern | Sleek lines, no ornamentation, often featuring floating designs. |
| Rustic | Natural, distressed wood, combining charm with durability. |
| Shabby Chic | Light colors, vintage fixtures, giving a cozy, airy feel. |
| Traditional | Classic designs, with elaborate embellishments and cabinetry. |
Essential Tools and Materials Needed for Building a Bathroom Vanity
Building your own bathroom vanity can be an exciting project that not only enhances the look of your space but also adds functionality. To successfully tackle this venture, you need to gather the right tools and materials. This guide will provide you with everything you need to know before you start building your custom DIY Wooden Bathroom Vanity Plans.
Essential Tools
Having the right tools is crucial for making the building process smoother and more efficient. Here is a list of essential tools you will need:
- Measuring Tape: Accurate measurements are vital. Use a measuring tape to ensure everything fits perfectly.
- Carpenter’s Square: This tool helps you maintain right angles while assembling your vanity.
- Saw: A miter saw or table saw is excellent for cutting your wood pieces to size. Choose the one that best fits your skill level.
- Drill: A power drill is essential for creating holes and fastening screws for a sturdy construction.
- Screwdriver: A set of screwdrivers will help you attach various components, from the vanity frame to the sink.
- Sandpaper: Use sandpaper to smooth out any rough edges to give your vanity a polished look.
- Clamps: These will help hold your pieces together while the glue dries or while you fasten them together.
- Level: Ensures that your vanity is straight and will help avoid any future issues with installation.
Key Materials
Besides tools, you’ll need various materials to construct a durable and stylish bathroom vanity. Consider the following:
- Wood: Choose a wood type that suits your needs and budget. Common options include pine, plywood, or hardwood. Each has its pros and cons regarding durability and finish.
- Wood Glue: Strong adhesives will help hold your vanity together, especially when combined with screws.
- Cabinet Hinges: If your design includes doors, strong hinges will allow them to swing open and closed smoothly.
- Sink: Pick a sink that complements your vanity design. Ensure it fits well within the space you’ve created.
- Countertop Material: Consider surfaces like granite, quartz, or laminate for durability and style. The right countertop can elevate your entire vanity.
- Finish or Paint: Choose a finish that enhances the wood grain, or paint that suits your bathroom’s overall color scheme. Protective finishes also help increase durability.
- Faucet: Select a faucet that coordinates with your sink and matches your desired aesthetic.
Additional Supplies
In addition to tools and primary materials, some additional supplies may be needed:
- Caulk: This is vital for sealing gaps and preventing water damage around the sink and countertop.
- Rug Pads: If you’re using a rug underfoot in your bathroom, make sure to invest in rug pads that will prevent slipping.
- Extra Fasteners: Having a variety of screws or nails on hand will help ensure that you have the necessary fasteners for unexpected situations.
Where to Find Resources
Having a plan is crucial before you start your DIY project. Websites like Wood Magazine offer various designs and plans for DIY bathroom vanities. You can also explore Instructables for step-by-step guides and community tips. Don’t forget to visit local hardware stores for materials and additional guidance.
Safety First
While working on your bathroom vanity, always prioritize safety. Use safety glasses when cutting wood, ensure your workspace is well-lit, and keep your tools maintained and sharp. This will help prevent accidents and ensure a smoother building process.
With the right tools and materials, building your own bathroom vanity can be a rewarding experience. Following this guide will not only help you gather everything you need but also inspire your creativity and craftsmanship along the way.
Step-by-Step Guide to Assemble Your DIY Wooden Vanity
Assembling your own wooden bathroom vanity can be a satisfying and cost-effective project. With some basic tools and materials, you can create a beautiful piece that fits your bathroom’s style perfectly. Here is a step-by-step guide to help you through the process.
Gather Your Materials
Before you start, make sure you have everything you need:
- Wood boards (choose hardwood for durability)
- Plywood for the base and backing
- Wood screws and brackets
- Wood glue
- Wood finish or paint
- Measuring tape
- Drill and bits
- Saw (circular or miter)
- Sandpaper or a sander
- Level
- Safety goggles
Measure Your Space
Start by measuring the area where your vanity will go. Knowing the width, height, and depth is crucial to creating a vanity that fits perfectly without crowding the space. Use a measuring tape to mark these dimensions. A good rule of thumb is to leave about 30 to 32 inches of height for the vanity, ensuring it is comfortable for you and others using it.
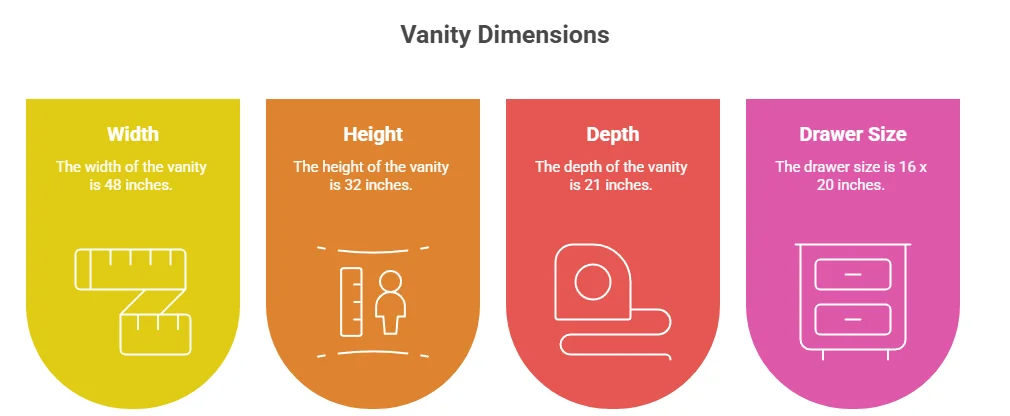
Design Your Vanity
Sketch a simple design on paper. Consider the number of drawers and cabinets you want. Here’s a basic layout to inspire you:
| Feature | Dimension |
|---|---|
| Width | 48 inches |
| Height | 32 inches |
| Depth | 21 inches |
| Drawer Size | 16 x 20 inches |
Make sure to plan for plumbing and sink space. Decide if you want an open shelf, cabinets, or drawers for storage.
Cut Your Wood
Using your saw, carefully cut the wood according to your measurements. Ensure straight cuts to guarantee that all pieces fit together seamlessly. Remember to wear safety goggles while cutting to protect your eyes.
Assemble the Base
Start by building the base of your vanity. Use wood screws and brackets to secure the corner pieces together. If you are adding shelves or drawers, make sure to build those sections next, following the assembly layout from your design.
Add the Back Panel
Once the frame is assembled, attach the plywood backing to provide stability. Use wood glue and screws to hold it in place. This will also give some support to the vanity once it’s positioned against the wall.
Sand and Finish
Now, sand down all the edges to ensure a smooth finish. Pay close attention to corners and joints where splinters can occur. After sanding, apply your chosen wood finish or paint. This not only protects the wood but also gives your vanity a beautiful look. Allow it to dry thoroughly according to the manufacturer’s instructions.
Install the Vanity
With the finishing done, it’s time to install your wooden bathroom vanity. Use a level to ensure the vanity sits evenly against the wall. If necessary, use shims to make minor adjustments. Mark where the plumbing is and make space for the sink. Secure the vanity to the wall using brackets to prevent it from tipping.
Installing the Sink and Faucet
Now it’s time to add the sink and faucet. Follow the manufacturer’s instructions for these installations. Make sure everything is properly sealed to prevent leaks.
Final Touches
Add any final touches such as a mirror, decorative items, or hardware for drawers. Step back and admire your hard work! A DIY Wooden Bathroom Vanity Plans project not only looks stunning but also provides you with a sense of accomplishment.
For more ideas and inspiration related to DIY projects, check out Wood Magazine and Family Handyman.
Design Ideas to Personalize Your Bathroom Vanity

When it comes to bathroom vanities, personalization can transform a standard space into a reflection of your unique style. Whether you prefer a rustic charm or a sleek modern look, there are countless design ideas to freshen up your bathroom vanity. Let’s explore various elements that can be customized to make your vanity stand out.
Choose the Right Material
The materials you select can greatly influence the overall aesthetic of your bathroom vanity. Here are some popular choices:
- Wood: Offers warmth and a natural look. Consider reclaimed wood for a rustic vibe.
- Marble: Adds luxury and elegance. It is a timeless choice that never goes out of style.
- Laminate: An affordable alternative that comes in various colors and designs, perfect for modern aesthetics.
Incorporate Color
Don’t shy away from color when thinking about your bathroom vanity. A fresh coat of paint or colorful stain can give your vanity new life. Here are some color ideas:
- Bold Colors: Consider jewel tones like emerald green or sapphire blue for a statement piece.
- Neutral Palettes: Whites, grays, and beiges can create a relaxing atmosphere, perfect for a spa-like retreat.
- Pastels: Soft pastels, such as mint or blush, add a whimsical touch to your space.
Innovative Lighting
Lighting plays a vital role in highlighting your vanity’s unique features. Consider these ideas:
- Wall-mounted Sconces: Place them on either side of the mirror for balanced illumination.
- Statement Pendant Lights: A bold light fixture can create a focal point above the vanity.
- LED Strip Lights: Install them under the vanity or around the mirror for a modern glow.
Unique Hardware Choices
Changing hardware can make a significant impact without a complete renovation. When selecting knobs and pulls, consider:
- Antique Finishes: These can add character and a sense of history to your vanity.
- Contemporary Designs: Sleek, modern hardware can elevate a classic vanity.
- Colorful Options: Bright knobs can serve as playful accents against neutral tones.
Personal Touches
Personal elements can breathe life into your vanity space. Think about:
- Artistic Displays: Small art pieces or framed photographs on the countertop can personalize your space.
- Plants: Adding greenery like succulents or small potted plants introduces a fresh feel.
- Accessorizing: Use decorative trays and beautiful jars to store everyday items stylishly.
Crafting a Custom Mirror
A customized mirror can enhance the vanity’s design. Here are some ideas:
- Framed Mirrors: Choose a frame that matches or contrasts with your vanity for a layered look.
- Mirror with Storage: Opt for a mirror that includes shelves or cabinets to maximize utility.
Functional Additions
Enhancing your vanity’s functionality not only improves usability but can also elevate the overall design. Think about:
- Built-in Storage: Drawers or shelves for towels and toiletries can keep the space organized.
- Rolling Carts: A stylish cart can provide additional storage and can be moved around as needed.
By leveraging these design concepts, you can create a bathroom vanity that isn’t just functional, but also a personal statement. Don’t hesitate to explore inspiration from various sources, like Renovation Headquarters or Houzz, to find the perfect style that fits your vision. Remember, the key is to enjoy the process of making it your own.
Common Mistakes to Avoid When Crafting a Wooden Vanity
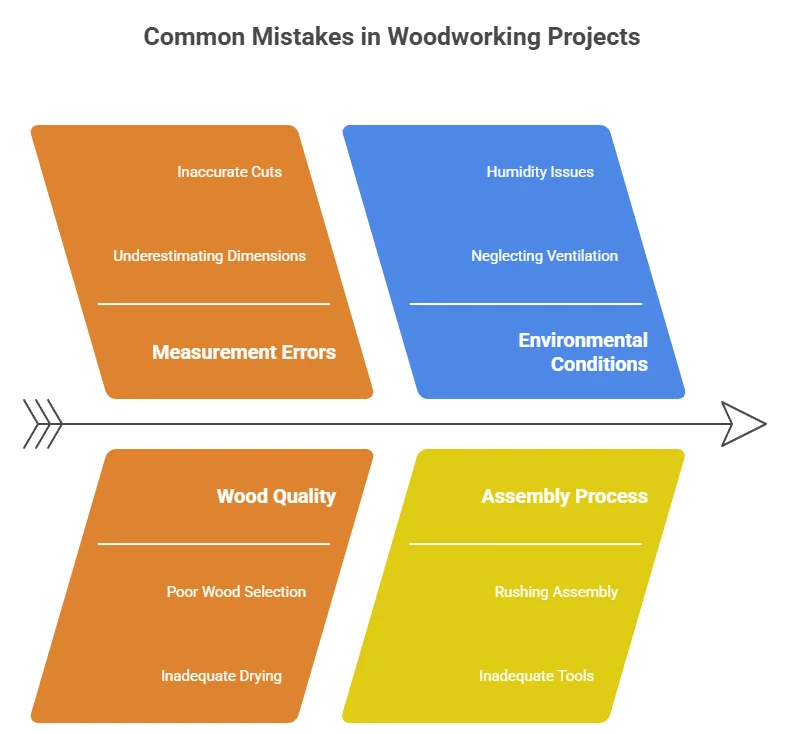
Crafting a DIY wooden bathroom vanity can be a rewarding project that enhances your bathroom’s style and functionality. However, it’s essential to avoid common pitfalls that can lead to frustration and waste of materials. Here are some mistakes to steer clear of when building your wooden vanity.
Underestimating Measurements
One of the most frequent mistakes in vanity construction is inaccurate measurements. Before you cut any wood, ensure you have accurate dimensions for your bathroom space. Take multiple measurements of the area where the vanity will go, considering factors like:
- Height of the vanity: Standard height ranges from 30 to 36 inches.
- Width: Ensure there’s enough space for doors to open without hitting anything.
- Depth: Consider countertop space, as standard depth is usually 21 to 24 inches.
Utilizing a tape measure properly and double-checking your numbers can save you from costly errors.
Poor Wood Selection
Choosing the right type of wood is crucial. Many DIY enthusiasts opt for cheaper options but might not consider their durability or moisture resistance. For bathroom projects, consider these wood types:
- Cedar: Naturally resistant to moisture and rot.
- Maple: Strong and durable with a smooth finish.
- Plywood: Good for the structure, but make sure it’s void-free and treated.
Opt for woods that can withstand humidity to enhance the longevity of your vanity.
Neglecting Ventilation
Bathrooms are typically humid environments, making proper ventilation essential. Without adequate airflow, the wood can warp or develop mold. Consider these ventilation solutions:
- Install an exhaust fan if one isn’t already present.
- Ensure proper spacing between walls and the vanity for air circulation.
This will prolong the life of your wooden vanity and maintain a fresh atmosphere in your bathroom.
Ignoring the Finish
The finish you apply to your wooden vanity plays a significant role in its appearance and durability. Many DIYers overlook this step, leading to premature wear and tear. Choose high-quality finishes that provide water resistance, such as:
- Polyurethane: Offers excellent protection against moisture.
- Varnish: A classic choice that provides a hard, durable shell.
Always test the finish on a sample piece before applying it to your entire vanity for the best results.
Rushing the Assembly Process
Many DIY builders underestimate the time and care required for assembly. Rushing through this process can lead to misaligned components or unfinished surfaces. Follow these steps for an effective assembly process:
- Assemble in stages. Start with the base before adding the top and doors.
- Use clamps to hold pieces in place while the glue dries.
- Double-check alignment before securing pieces permanently.
This patience will ensure a sturdy and visually appealing vanity.
Forgetting About Storage
A common oversight when planning a DIY Wooden Bathroom Vanity Plans project is storage. Consider your needs beforehand to maximize space. Utilize these ideas:
- Add drawers for easy access to toiletries.
- Incorporate shelves for larger items like towels.
- Design a plan that includes cabinet doors to conceal clutter.
Smart storage planning can make your bathroom more functional.
Not Researching Your Design Options
Many skip the stage of researching design ideas, leading to a vanity that may not match their bathroom aesthetics. Check out platforms like Pinterest or Houzz for inspiration. You can also visit sites like Wood Magazine or Popular Woodworking for step-by-step plans and tips on DIY vanities.
Conclusion
Building your own wooden bathroom vanity can be a rewarding project that adds functionality and style to your space. With the creative DIY Wooden Bathroom Vanity Plans discussed, you can transform your vision into reality. Remember, having the right tools and materials is key to a successful build. Investing in quality items will ensure durability and a polished look, so don’t skimp on essentials. Assembling your vanity step-by-step may feel overwhelming at first, but following a structured guide makes the process manageable and enjoyable. Don’t forget to infuse your personality into the design! Customization options are endless, from choosing unique hardware to adding decorative touches that resonate with your style.
Personalization is what makes your project truly yours and enhances the overall aesthetic of your bathroom. However, be aware of common pitfalls that many DIY enthusiasts face. Avoiding mistakes can save you time, money, and frustration. Double-check measurements, plan for plumbing, and always ensure your vanity is securely fastened to the wall for safety. By carefully considering every aspect – from planning to execution – you can create a stunning wooden bathroom vanity that elevates your home. Embrace the joy of DIY and make a statement in your bathroom that reflects your creativity and skills. Whether it’s your first project or a seasoned endeavor, each step you take contributes to a beautifully crafted space you can be proud of for years to come. Happy building!