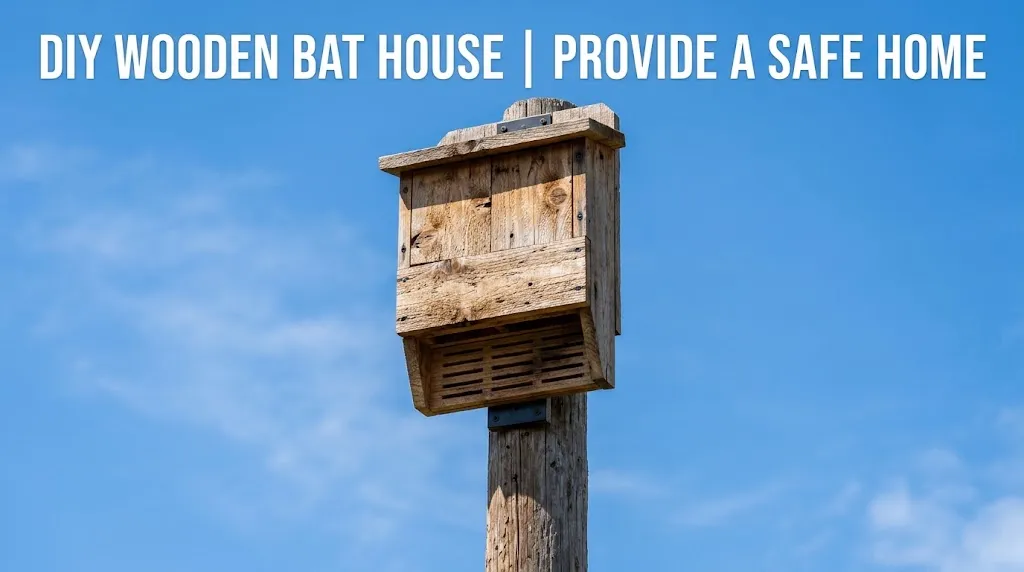
Creating a DIY Wooden Bat House is an exciting project that allows you to support local bat populations. Bats are incredible creatures that help control insect populations, and providing them with a home is a wonderful way to encourage their presence. Here’s a simple step-by-step guide to help you mount your wooden bat house safely and effectively.
Choosing the Right Location
The success of your bat house largely depends on where you place it. Follow these guidelines for optimal bat house placement:
- Mount the bat house at least 10-15 feet above the ground.
- Position it in a sunny location that receives 6-8 hours of direct sunlight daily.
- Avoid places with strong winds or heavy tree cover.
- Ensure it is near a water source like a pond or stream.
Gathering Materials
Before starting your project, make sure you have all the necessary materials:
- 1-inch thick exterior plywood (for sides, front, back, and base)
- 1-inch x 2-inch boards (for the internal baffle and landing pad)
- Exterior-grade wood screws
- Wood glue (non-toxic)
- Non-toxic paint or stain (optional)
- Drill and drill bits
- Saw (preferably a circular saw)
- Measuring tape
- Pencil
Building the Bat House
Here’s how to construct your wooden bat house:
- Cut the plywood into the following dimensions:
- Two side panels: 24 inches high by 12 inches wide
- Front panel: 24 inches high by 14 inches wide
- Back panel: 30 inches high by 14 inches wide (longer for mounting)
- Bottom panel: 12 inches wide by 14 inches long
- Prepare the side panels by cutting a few shallow grooves for bats to grip. This is known as a baffle and will help them enter easily.
- Assemble the bat house by attaching the back panel to the two side panels using wood screws.
- Attach the bottom panel to the side and back panels, ensuring it is securely fastened.
- Attach the front panel.
Mounting Your Bat House
Once you have built your bat house, it’s time to mount it. Here’s how you can do it:
- Select a sturdy pole or tree for mounting. A tall, straight tree is ideal.
- If using a pole, ensure it is at least 4 inches in diameter for strength.
- Use a level to ensure your bat house is straight as you attach it to the pole or tree.
- Secure the bat house with wood screws or brackets.
- Check that the mount is stable and can withstand wind and weather.
Maintaining Your Bat House
After mounting, regular maintenance can keep your bat house functional:
- Check it annually for any signs of wear or damage.
- Clean the house each spring, removing any old nesting materials.
- Ensure there are no obstructions around the entrance.
Additional Resources
If you’re looking for more information about bats and bat houses, consider visiting:
- Bat Conservation International
- National Wildlife Federation
Building and mounting your own bat house provides a safe shelter for bats while enhancing your garden or outdoor space. With a little time and effort, you can make a significant impact on the local ecosystem by creating a welcoming environment for these amazing creatures. Happy building!
Choosing the Perfect Location for Your Bat House
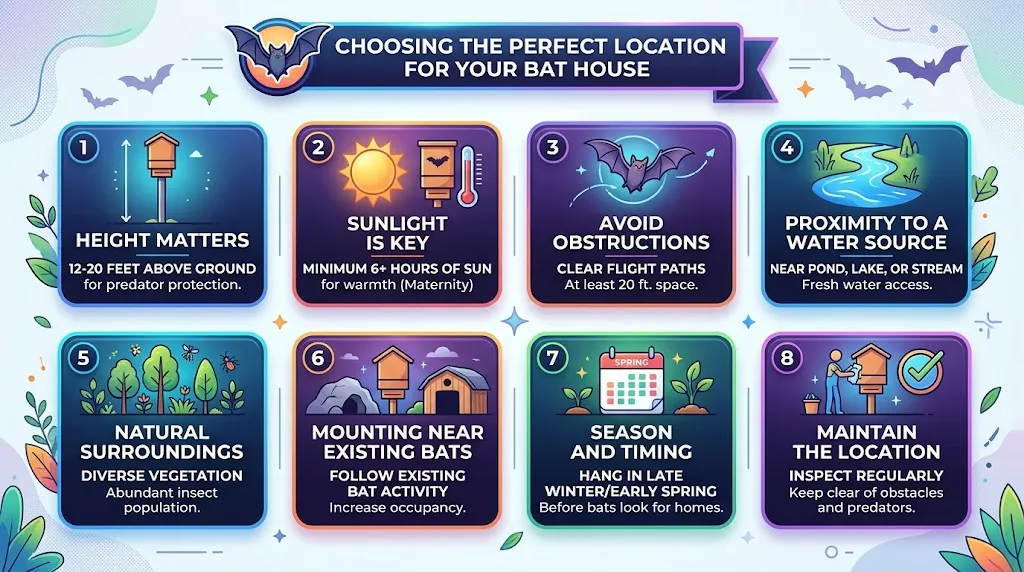
When you”re embarking on the journey of creating a bat house, one of the most crucial elements to consider is its location. Choosing the right spot for your bat house ensures these fascinating creatures will take up residence, benefiting both your local ecosystem and your garden. Bats are exceptional for pest control, and a properly positioned bat house can encourage them to thrive. Here are some tips to help you find the perfect location for your bat house.
1. Height Matters
Firstly, the height at which you mount your bat house can significantly impact its attractiveness to bats. Aim to place your bat house at least 10 to 15 feet above the ground. This height helps protect the bats from potential predators and makes it easier for them to find their way in and out.
2. Sunlight is Key
Bat houses should receive a good amount of sunlight, particularly in the morning. Look for a location that offers at least six hours of direct sunlight each day. Sunlight helps to keep the interior of the bat house warm, especially during cooler months. This warmth is essential for certain bat species, particularly maternity colonies.
3. Avoid Obstructions
When mounting your bat house, ensure there are no branches, power lines, or other obstructions near the entrance. Bats prefer clean flight paths and will shy away from houses that are too close to obstacles. Here are some things to consider:
- Clear flight paths for bats
- No foliage directly in front of the entrance
- Space from any disturbances, such as busy roads or loud machinery
4. Proximity to a Water Source
Bats thrive in environments close to water sources, such as lakes, rivers, or ponds. If you can, place your bat house within a quarter-mile of such a water source. This proximity increases the chances of attracting bats, as they will be more likely to roost nearby. Make sure to maintain a safe distance, as excessive humidity can create unfavorable conditions inside the bat house.
5. Natural Surroundings
Consider the surrounding landscape when choosing a site for your bat house. Bats prefer habitats that provide shelter and a variety of food sources. Here are some features to look for:
- Nearby trees or structures for protection
- A diverse array of insect-rich habitats, such as gardens or meadows
- Minimal human activity around the location
6. Mounting Near Existing Bats
One effective strategy is to place your bat house near an existing natural bat roost, such as under eaves or in tree cavities. If you’ve noticed bats in your area, these are excellent spots for mounting your bat house. This increases the likelihood of attracting these helpful animals.
7. Season and Timing
Timing is essential when locating your bat house. Late winter or early spring is the best time to mount it. This way, you’ll offer a safe space for bats as they emerge from hibernation. Aim to have your bat house up before the weather warms up and insects become plentiful.
8. Maintain the Location
To ensure the bat house remains inviting, keep the area clear of debris and ensure that nothing obstructs access to the entrance. Regular maintenance will not only keep your bat house in good condition but also greater chances of bats wanting to roost there.
Taking the time to choose the perfect location for your bat house increases its efficacy and contributes to a healthier environment. As bats play a vital role in pest control, housing them can be incredibly rewarding. Make sure to implement these guidelines for a successful bat house installation.
Essential Materials and Tools for Building a Bat House
If you’re looking to build a bat house, gathering the right materials and tools is crucial for ensuring a successful and durable outcome. Bats are essential for our ecosystems, and providing them with a safe space can help support their populations. Below you will find a comprehensive list of everything you’ll need to create an effective bat house.
Essential Materials
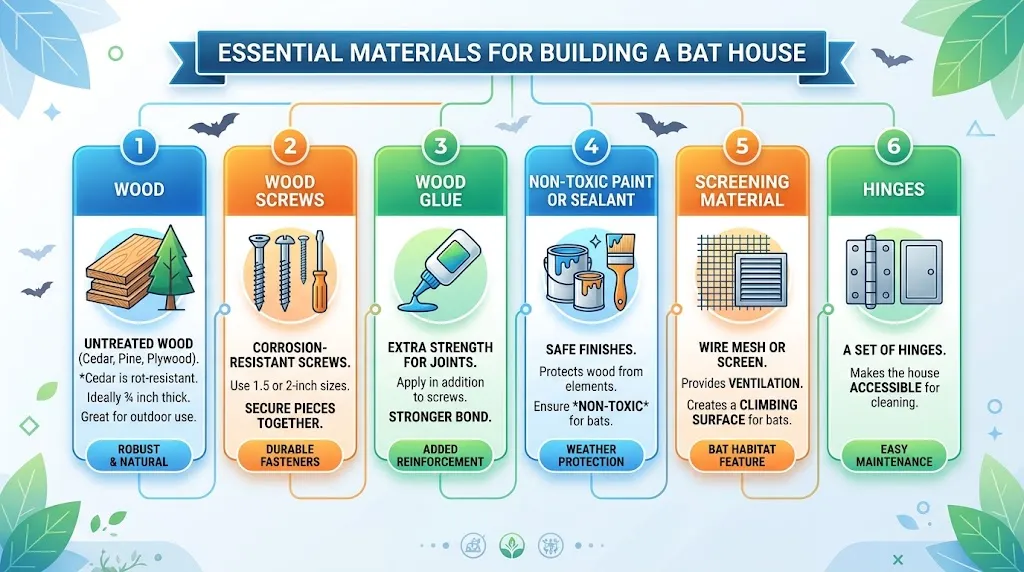
Here’s a breakdown of the materials you’ll require:
- Wood: Choose untreated wood such as cedar, pine, or plywood, ideally ¾ inch thick. Cedar is particularly resistant to rot and is a great choice for outdoor use.
- Wood Screws: Use corrosion-resistant screws to secure the pieces together. 1.5 or 2-inch screws will work well.
- Wood Glue: In addition to screws, wood glue can provide extra strength to your bat house joints.
- Non-toxic Paint or Sealant: If you choose to paint your bat house, make sure to use non-toxic options for safety. This will also help protect the wood from the elements.
- Screening Material: Wire mesh or screening should be included for ventilation and to create a climbing surface for bats.
- Hinges: A set of hinges can be used to make the bat house accessible for cleaning.
Tools Required
Gathering the right tools can make the process of building your bat house much smoother. Consider the following:
- Power Drill: A cordless drill will help you quickly install screws and is essential for creating pilot holes.
- Saw: You’ll need a saw, such as a circular or jigsaw, to cut your wood to size. A miter saw can also work well for precision cuts.
- Screwdriver: A standard screwdriver or drill bit is necessary for securing screws tightly.
- Measuring Tape: This is vital for measuring the dimensions of your wood accurately.
- Level: Ensure that your bat house is attached straight on the wall or post.
- Sandpaper: Use sandpaper to smooth out edges and remove any splinters, which is especially important for the safety of the bats.
- Clamps: Clamping your wood while assembling can help keep pieces in place.
Building Tips
As you gather your tools and materials, keep these tips in mind to ensure a smooth building process:
- Plan Before Cutting: Draft a design for your bat house, including measurements, to minimize mistakes.
- Use Proper Ventilation: Drill vent holes near the top of the bat house to allow for airflow. This can help keep the interior comfortable for the bats.
- Consider Size: A bat house should generally be 14-24 inches tall, with a width of about 12 inches. Deeper houses can attract more bats.
- Positioning Matters: Once your bat house is built, mount it at least 10-15 feet off the ground in a sheltered spot out of direct sunlight.
After your bat house is constructed and mounted, it’s important to maintain it. Check periodically for signs of wear, and be sure to clean it out at least once a year to ensure it remains a hospitable environment.
Where to Learn More
For additional resources and detailed plans, consider checking out:
- Bat Conservation International
- National Wildlife Federation
- The Wildlife Society
By having all the necessary materials and tools, along with some planning and care, you can successfully build a bat house that will provide a safe haven for these essential creatures. Happy building!
The Benefits of Encouraging Bats in Your Garden
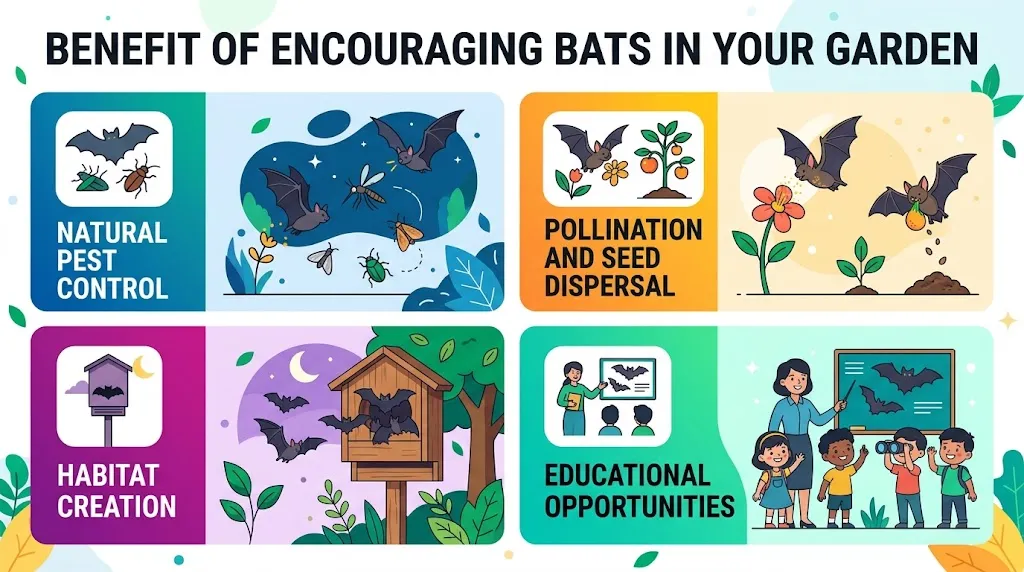
Creating a harmonious garden often involves looking beyond the usual plants and flowers. One wonderful addition that many gardeners overlook is bats. Yes, these flying mammals play a crucial role in maintaining a healthy ecosystem. By encouraging bats, you can harness their natural benefits and improve your garden’s health.
Natural Pest Control
Bats are nature’s pest controllers, consuming large quantities of insects, including mosquitoes, beetles, and moths. A single bat can eat up to 1,000 insects in one hour! This behavior makes them incredibly efficient in reducing pest populations without the need for chemical pesticides.
- Reduced reliance on pesticides
- Improved plant health
- Lowered environmental impact
Pollination and Seed Dispersal
Some bat species are important pollinators and contribute to seed dispersal. While we often think of bees and butterflies as our primary pollinators, bats also play this role in various ecosystems. Their ability to pollinate plants is essential for producing fruits that we and other wildlife can enjoy.
- Support for fruit production
- Healthy biodiversity in the garden
- Encouragement of flowering plants
Habitat Creation
Creating a habitat for bats in your garden can enhance the environment for other wildlife as well. When you install bat houses, you not only provide shelter for bats, but you also create a balanced ecosystem that supports various flora and fauna. Bats typically prefer locations with ample food sources, so having a diverse range of plants will attract them.
- Encouragement of beneficial wildlife
- Enhanced soil quality
- Improved insect populations
Educational Opportunities
Encouraging bats in your garden also opens doors to educational experiences for you and your family. You can learn about these fascinating creatures, their habitats, and their importance to the ecosystem. Bats often become a point of interest for children and adults alike, making gardening an engaging learning experience.
- Understanding local wildlife
- Fostering a sense of responsibility towards nature
- Encouraging curiosity and exploration
How to Attract Bats to Your Garden
If you want to reap the benefits of having bats in your garden, here are a few steps you can take:
- Install a Bat House: Place a bat house in a sheltered location, ideally facing southeast. Ensure it’s at least 10 to 15 feet off the ground for safety.
- Plant Native Flora: Create a diverse garden with native plants that attract insects. This will provide the food bats need to thrive.
- Minimize Pesticide Use: Reducing or eliminating pesticides allows pests to remain in the garden, providing a food source for bats.
- Maintain Water Sources: Manage water features like ponds or bird baths, which can attract insects and bats.
As you dive into bat conservation, consider visiting resources like the Bat Conservation International for comprehensive advice on bat-friendly gardening practices. They offer guidance on creating effective habitats and understanding bats’ ecological impact.
Encouraging bats in your garden not only benefits the environment but also enriches your gardening experience. By coexisting with these mammals, you contribute to a balanced ecosystem while enjoying the numerous advantages they bring to your landscape.
Bats are a vital part of your garden’s ecosystem, providing natural pest control, pollination, and enriching biodiversity. When you take steps to welcome them, you actively participate in nurturing a healthy, vibrant environment for future generations.
Maintenance Tips for a Long-Lasting Bat House
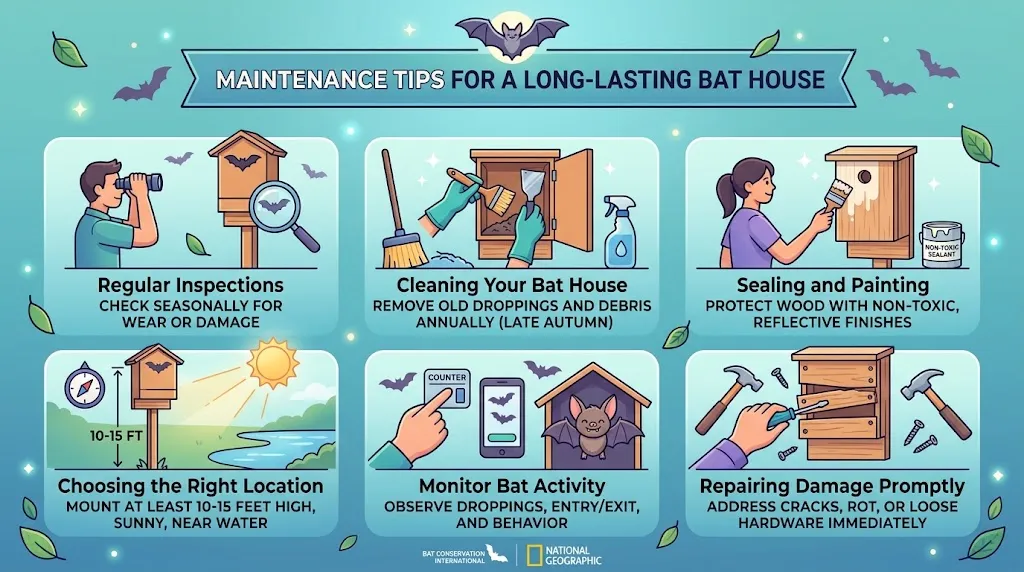
Maintaining your bat house is essential to ensure that it remains an inviting home for bats while also staying durable over the years. Regular upkeep not only enhances its functionality but also helps in conserving these beneficial creatures. Here are some insightful tips to help you maintain a long-lasting bat house.
Regular Inspections
To keep your bat house in good condition, perform regular inspections, ideally at the beginning of each season. Look for signs of wear or damage, including:
- Cracks or splits in the wood
- Signs of insect infestation, like chewed wood or droppings
- Dirt and debris buildup inside or outside the bat house
By catching these issues early, you can prevent larger problems from developing.
Cleaning Your Bat House
Cleaning is a straightforward yet vital part of maintenance. Here’s how to do it effectively:
- Wait until after the bats have roosted for the season, preferably in late autumn.
- Wear gloves to protect yourself from any bat droppings, which can carry harmful germs.
- Carefully remove old droppings and debris using a scraper or a broom.
- Wash the interior with a mild soap solution, then rinse thoroughly with water.
- Allow the bat house to dry completely before sealing it again.
Regular cleaning can prevent the buildup of harmful bacteria and provide a healthier environment for the bats.
Sealing and Painting
Wood can easily deteriorate due to weather exposure. To safeguard your bat house:
- Apply a sealant specifically designed for outdoor wooden structures. Avoid toxic chemicals that can harm bats.
- Consider painting the exterior of the bat house with non-toxic, light-colored paint. Light colors reflect heat and help maintain a suitable temperature inside the house.
Ensure there are no toxic emissions that could affect the bats. Always check product labels for safety information.
Choosing the Right Location
The location of your bat house plays a critical role in its longevity. Choose a spot that qualifies based on these criteria:
- Position it at least 10-15 feet off the ground.
- Place it in an area that receives full to partial sunlight, especially in the afternoon.
- Avoid locations prone to heavy wind or direct rainfall, which can lead to faster wear and tear.
These guidelines will not only prolong the life of your bat house but improve its appeal to the bats.
Monitor Bat Activity
Keeping an eye on bat activity can give you insight into whether your maintenance efforts are successful. Look for:
- Signs of occupancy like bat droppings near the entrance or inside.
- Behavioral signs such as bats entering or exiting during dusk and dawn.
If you notice a decline in bat visits, it may indicate issues such as poor condition or unfavorable placement of the house.
Repairing Damage Promptly
If you find any damage during your inspections, address it immediately. Common repairs include:
- Filling in cracks with a wood filler to prevent leaks.
- Replacing sections of the wood if they are too rotten to fix.
- Adjusting the mounting hardware if it becomes loose.
Timely repairs can greatly extend the life of your bat house and ensure it remains functional.
For additional resources and detailed instructions on building and maintaining bat houses, check out these useful links: Bat Conservation International and National Geographic’s Bat Facts.
By following these maintenance tips, you can ensure that your bat house not only provides a safe haven for bats but also lasts for many years. Regular care reassures you that you’re helping these essential pollinators and pest controllers thrive in your environment.
Conclusion
Building and mounting a wooden bat house is a rewarding project that not only adds charm to your backyard but also promotes a healthier ecosystem. By following the step-by-step guide provided, you can create a safe space for bats, which are beneficial for pest control. Choosing the perfect location for your bat house is crucial; it should be exposed to sunlight, away from strong winds, and placed at least 12-15 feet off the ground to ensure safety and comfort for the bats.
Gathering the right materials and tools is essential to ensure your project is a success. Using untreated wood, non-toxic paint, and the appropriate fasteners will provide a durable and friendly habitat for local bat populations. Remember, the effort you put into building a bat house not only helps the creatures but also enhances the biodiversity of your garden.
Once your bat house is mounted, don’t forget to perform regular maintenance checks. Keeping the house clean and inspecting it for damages will help ensure it stands the test of time and provides a cozy home for your flying friends. Regular monitoring can also help you learn more about the bats visiting your yard.
Encouraging bats into your garden has numerous advantages: they help control insect populations, pollinate plants, and contribute to a balanced ecosystem. As you enjoy the benefits of having these incredible creatures in your life, you’ll take pride in the small yet impactful steps you’ve taken to make the world a better place for them. Happy bat watching!