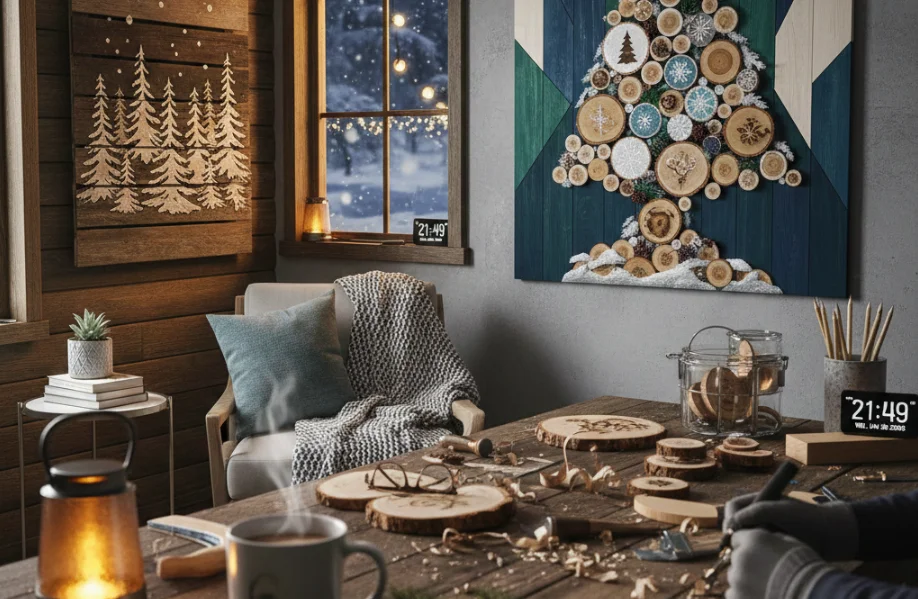
Wood wall art can transform your living space into a warm and inviting atmosphere. With a little creativity, you can create stunning pieces that reflect your style and personality. Let’s explore some creative DIY wood wall art ideas that you can easily craft at home.
1. Rustic Pallet Art
Using wooden pallets is one of the most popular methods for creating rustic wall art. Here’s how you can do it:
- Find an old pallet: Look for one that’s in decent shape. You can often find these free from local businesses.
- Prepare the wood: Sand the surface to remove splinters and rough edges.
- Paint or stain: Customize your palette with colors or stains that match your décor.
- Add designs: Use stencils or freehand to add quotes, patterns, or images.
- Hang it up: Securely mount the art on your wall using picture hooks or brackets.
2. Geometric Wood Panel Art
Geometric designs are trendy and can bring a modern touch to your home. Here’s how to make your own:
- Gather supplies: You’ll need wood panels, a saw, a level, paint, and brushes.
- Cut your wood: Create various geometric shapes, such as triangles or hexagons, from your wood panels.
- Paint your shapes: Use contrasting colors to make the piece pop.
- Arrange and glue: Lay out your shapes on a backing board, then glue them in place.
- Install: Mount your finished art piece on the wall.
3. 3D Wood Art
Bringing depth to your art can create a stunning visual impact. Consider these steps:
- Choose a theme: Select a theme that resonates with you, such as nature or abstract.
- Layer your wood: Cut pieces in various sizes, and layer them to create depth.
- Finish with paint or stain: Highlight different layers using varying finishes.
- Assemble and hang: Artfully arrange the layers on a board and mount it.
4. Inspirational Quote Boards
Combining your love for words and wood can yield beautifully crafted inspirational quote boards:
- Choose your quote: Pick something that inspires you.
- Cut your wood to size: A rectangular piece works best for this project.
- Design your typography: Use stencils or letter stickers for a polished look.
- Stain or paint the background: Choose muted tones to allow the text to stand out.
- Seal it: Apply a clear coat to protect your art.
5. Wood Slice Art
Wood slices can bring a natural element into your home. Follow these simple steps:
- Gather wood slices: You can buy these from craft stores or make them from fallen branches.
- Decorate: Paint, carve designs, or leave them natural for an organic feel.
- Arrange and secure: Create a collage on a canvas or directly on the wall.
Through these creative DIY wood wall art ideas, you can personalize your space easily and affordably. Remember to let your imagination run wild, and tailor your projects to suit your tastes. For more inspiration and ideas, visit Woodworker’s Source and Better Homes & Gardens.
Your walls deserve the unique charm that DIY wood art brings. Whether you opt for something rustic, modern, or inspirational, each project allows you to infuse your personality into your living space. So grab those tools and start crafting your masterpieces today!
Essential Tools and Materials for Wood Wall Art Projects
Creating stunning wood wall art requires not only creativity but also the right tools and materials. Whether you’re a beginner or a seasoned craftsperson, having the essential items at your disposal can make a significant difference in your wood wall art projects. Here’s a detailed look at what you need for a successful endeavor.
Basic Tools for Wood Wall Art Projects
- Measuring Tape: A reliable measuring tape will help you ensure accuracy in your designs. Measure lengths and widths precisely to fit your space perfectly.
- Pencil or Marking Tool: Use a pencil or a marking tool to sketch your design on the wood before cutting or assembling the pieces.
- Handsaw or Jigsaw: A handsaw is ideal for straight cuts, while a jigsaw is great for intricate designs. Choose based on the complexity of your artwork.
- Drill: A power drill can be used for making holes for screws or hanging pieces. Opt for a drill that has adjustable settings for different materials.
- Sander: To achieve smooth edges and surfaces, a sander is crucial. You can choose between a hand sander or an electric sander for faster work.
- Paintbrushes: For those who want to add color, having different sizes of paintbrushes will help you apply paint perfectly on your wood art.
- Safety Gear: Always prioritize safety by wearing goggles and a mask while cutting, sanding, or painting.
Essential Materials for Wood Wall Art
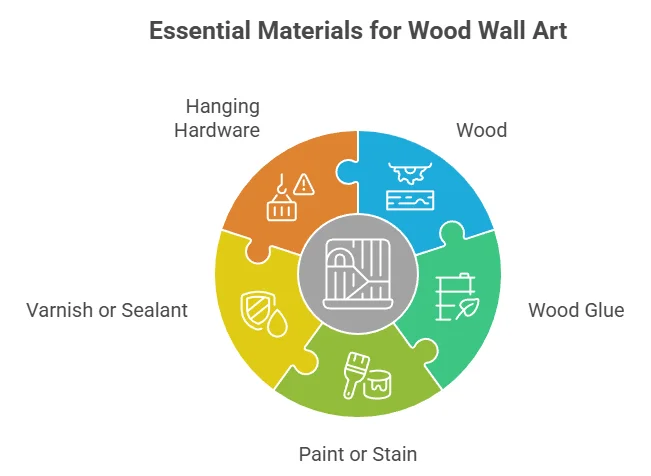
Choosing the right materials is just as important as having the right tools. Here are the essential materials you will need:
- Wood: Select the type of wood that suits your project best. Options include plywood, MDF, or reclaimed wood, each offering different textures and finishes.
- Wood Glue: Use high-quality wood glue for assembling pieces. This will ensure your artwork lasts a long time.
- Paint or Stain: Depending on your desired finish, paint or wood stain can enhance the appearance of your art. Choose colors that complement your room’s decor.
- Varnish or Sealant: To protect your artwork from wear and tear, apply a varnish or sealant after painting or staining.
- Hanging Hardware: Don’t forget to purchase hanging hardware such as D-rings, screws, or sawtooth hangers to display your masterpiece securely on the wall.
Organizing Your Workspace
Once you’ve gathered your tools and materials, it’s crucial to organize your workspace efficiently. Keep everything you need within arm’s reach to ensure a smooth workflow. Here are some tips:
- Dedicated Workbench: Set up a spacious workbench where you can spread out your wood, tools, and materials without feeling cramped.
- Storage Solutions: Use toolboxes and shelves to neatly arrange your tools and consumables. Clear containers can help you see what you have at a glance.
- Good Lighting: Proper lighting can significantly affect the quality of your work. Ensure your workspace is well-lit so you can see your cuts and designs clearly.
Where to Find Quality Tools and Materials
Finding the right tools and materials is essential. Here are some excellent online sources:
| Tool/Material | Website |
|---|---|
| Wood and Lumber | Woodworker’s Source |
| Power Tools | Home Depot |
| Paints and Stains | Lowe’s |
| Hanging Hardware | Fastener SuperStore |
With the correct tools and materials, your wood wall art projects can turn from ideas into beautiful pieces of decor. Take the time to gather what you need, plan your workspace, and enjoy the creative process!
Step-by-Step Techniques for Creating Stunning Wooden Designs
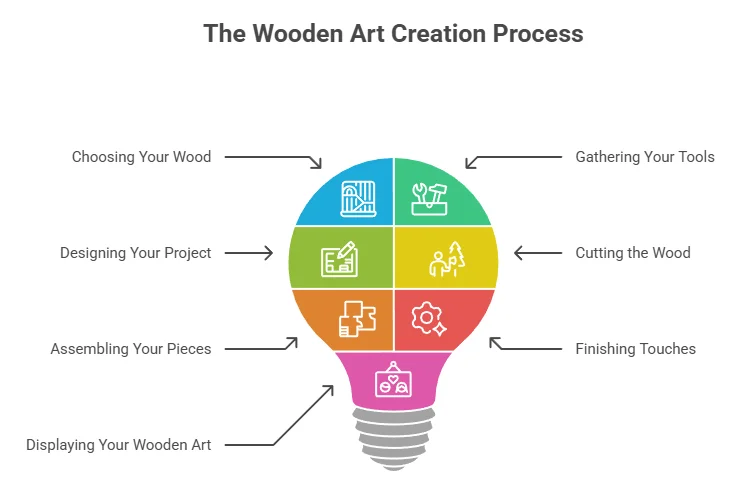
Create stunning wooden designs that enhance your home decor with simple techniques and a little creativity. Here are several steps to guide you through the process of crafting beautiful wood art, from selecting the right materials to finishing touches that will make your pieces stand out.
Choosing Your Wood
The first step in creating wooden designs is to select the right type of wood. Different types of wood vary in texture, grain, and color. Here are some popular options:
- Pine: Soft, easy to work with, and affordable; great for beginners.
- Cedar: Naturally resistant to decay and has a pleasant aroma.
- Maple: Hard and dense with a fine, consistent grain; ideal for detailed work.
- Oak: Strong and durable; provides a beautiful finish.
Gathering Your Tools
Next, gather the tools you’ll need for your DIY project. Here’s a checklist of essentials:
- Measuring tape
- Pencil for marking
- Saw (hand saw or power saw)
- Sander (or sandpaper)
- Wood glue
- Drill with bits
- Paint or wood finish
Designing Your Project
Before cutting any wood, sketch out your design. Simplicity works best, especially for beginners. Consider these design ideas:
- Geometric shapes
- Nature-inspired themes, like trees or animals
- Abstract patterns
- Framed quotes or sayings
Once your design is ready, transfer it onto the wood using your pencil.
Cutting the Wood
With your design mapped out, it’s time to cut the wood. Always remember to follow safety precautions:
- Wear protective eyewear.
- Secure your wood on a stable surface.
- Follow your design lines carefully.
After cutting, use your sander or sandpaper to smooth out any rough edges.
Assembling Your Pieces
If your design involves multiple wood pieces, now is the time to assemble them. Use wood glue to secure each piece in place. For added strength, consider drilling small pilot holes and using screws.
Finishing Touches
To enhance the beauty and longevity of your wood art, apply finishes or paints. Here are some options:
- Natural oils: Help bring out the wood’s grain.
- Stains: Change the color while showcasing the natural patterns.
- Paint: For vibrant and bold designs.
Apply your chosen finish with a brush or cloth, ensuring you follow the product instructions for best results.
Displaying Your Wooden Art
Once dry, think about how you’ll display your wooden art. Here are a few ideas:
- Wall-mounted pieces
- Tabletop displays
- Hanging designs using twine or hooks
Your unique creations can bring warmth and personality to any space.
Exploring Different Styles: Rustic, Modern, and Minimalist Wood Art
Wood wall art can transform your living space, adding warmth and character to any room. When exploring different styles of wood art, three standout options come to mind: rustic, modern, and minimalist. Each style has its own charm and can greatly influence the atmosphere of your home. Let’s dive into these styles and see how you can incorporate them into your space.
Rustic Wood Art
Rustic wood wall art embodies a charming, homey vibe. This style often features natural materials, distressed finishes, and designs that celebrate the beauty of the outdoors. Here are some popular characteristics:
- Natural Colors: Earthy tones such as browns, greens, and creams dominate rustic wood art.
- Raw Textures: Unrefined surfaces and visible grains showcase the wood’s journey.
- Nature-Inspired Designs: Many rustic pieces include nature motifs, such as trees, animals, or landscapes.
To create your own rustic wood wall art, consider repurposing old wooden pallets or reclaimed barn wood. You can easily turn them into art by painting or staining them, or by arranging pieces in a striking layout. Explore creative ideas at Homedit.
Modern Wood Art
Modern wood wall art breaks away from traditional designs, focusing instead on bold lines and unique shapes. This style often integrates different materials and techniques to create striking pieces. Here are some defining features of modern wood art:
- Geometric Patterns: Clean lines and bold shapes dominate modern wood designs.
- Vibrant Colors: Bright and unexpected colors can infuse energy into your space.
- Mixed Media: Combining wood with metal or acrylic adds dimension to your artwork.
For a modern touch, you might try building three-dimensional wall sculptures or installing a slatted wood feature wall. A combination of painted wood pieces with lighter shades can create a stunning focal point. Check out more innovative ideas at Woodworkers Source.
Minimalist Wood Art
If you prefer simplicity, minimalist wood wall art may be the perfect fit for you. This style focuses on clean aesthetics and a limited color palette. Key hallmarks of minimalist wood art include:
- Simplicity: A few carefully chosen elements create a sophisticated appearance.
- Neutral Colors: Often limited to shades of white, black, and natural wood tones.
- Focus on Form: The shape and structure are essential; less is more.
To achieve a minimalist look, consider selecting one or two pieces of finely finished wood and hanging them at eye level. A large, simple wall hanging can be incredibly effective in a minimalist room. For additional inspiration, visit Decoist.
Combining Styles for Unique Wall Art
Whether you lean towards rustic, modern, or minimalist styles, don’t be afraid to experiment and mix elements from each. For instance:
| Style Combination | Example Idea |
|---|---|
| Rustic + Modern | A rustic wood frame around a vibrant modern painting. |
| Modern + Minimalist | A single geometric wooden shape in a neutral space. |
| Rustic + Minimalist | A few distressed wooden plaques hung in a row. |
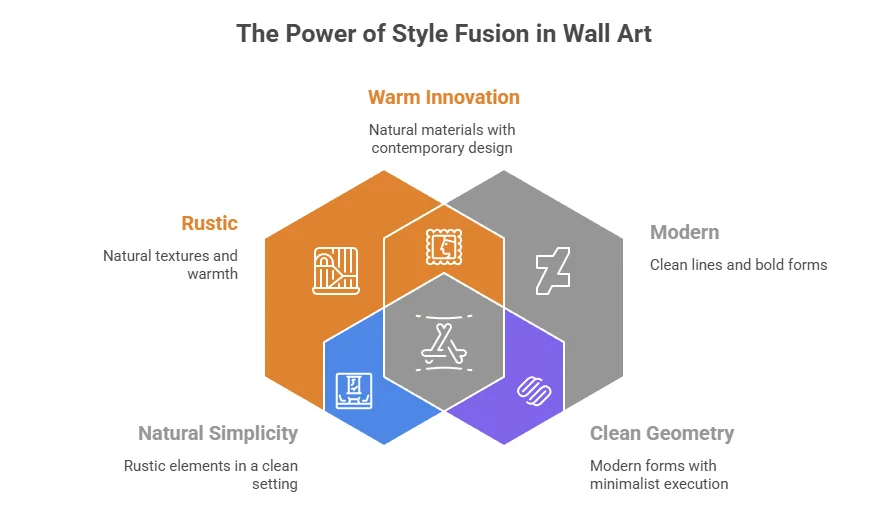
Various styles can result in one-of-a-kind pieces that reflect your personal taste and enhance your home’s atmosphere. Start by envisioning your space and how each style of wood wall art can contribute to its character. Exploring rustic, modern, and minimalist wood art reveals endless possibilities for self-expression. Whether you’re using reclaimed wood, experimenting with shapes, or sticking to a neutral palette, the key is to create art that resonates with you. For more tips on enhancing your space with DIY wood projects, visit The Home Depot.
Tips for Personalizing Your Wood Wall Art to Reflect Your Personality
Crafting wood wall art is not just about decorating your space; it’s a chance to showcase your personality and creativity. Personalizing your wood wall art can transform a simple piece into a reflection of who you are. Here are some tips to make your wood wall art uniquely yours.
Choose a Theme That Resonates with You
The first step in creating personalized wood wall art is selecting a theme that resonates with your personality. Consider what inspires you or brings joy to your life. Here are some themed ideas to consider:
- Nature: If you love the outdoors, you can create art featuring trees, mountains, or wildlife.
- Geometric Shapes: For a modern twist, think about incorporating geometric patterns.
- Sentimental Quotes: Use phrases or quotes that hold a special meaning to you.
- Favorite Hobbies: Showcase your interests like music, travel, or cooking through your designs.
Incorporate Your Favorite Colors
Color plays a vital role in expressing personality. Choose a color palette that reflects your style. Consider these strategies for color selection:
- Match Your Decor: Pick colors that complement the existing colors in your room.
- Use Meaningful Shades: Incorporate colors that have personal significance, like your favorite shades from childhood memories.
- Experiment with Stains: Wood stains can change the appearance of your wood art. Test different stains to find the perfect hue.
Mix Different Materials
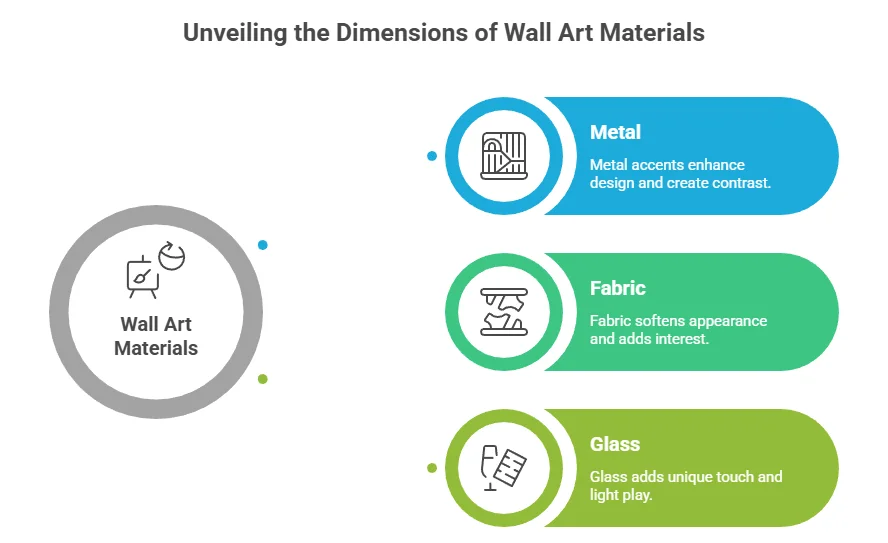
Don’t hesitate to mix different materials to add variety and texture to your wall art. Here are some materials to consider combining with wood:
- Metal: Adding metal accents can enhance the overall design and create an eye-catching contrast.
- Fabric: Using fabric can soften the appearance and introduce an additional layer of interest.
- Glass: glass can add a unique touch and allow for light play, making your art more dynamic.
Personalize with Engravings or Woodburning
Engravings or woodburning can take your wooden art to the next level by adding a personal touch. Here are some options to consider:
- Names or Initials: Engrave your name, initials, or those of loved ones for a personal touch.
- Messages: Create a lasting memory by adding special dates or messages that mean something to you.
- Images: Consider woodburning images that reflect your memories or interests on the piece.
Experiment with Shapes and Sizes
The shape and size of your wood wall art can greatly impact its visual appeal. Think outside the box with these tips:
- Large Statement Pieces: A large piece can act as a focal point in your room, making a bold statement.
- Layered Designs: Use multiple pieces to create a layered design that adds depth and richness.
- Unconventional Shapes: Explore various shapes like circles, rectangles, and abstract forms for a modern vibe.
Incorporate Personal Photos
Adding personal photos to your wood art can offer a nostalgic touch. You can achieve this by:
- Printing Photos on Wood: Use special techniques to print your favorite images directly onto wood.
- Creating Collages: Combine multiple photos for a unique collage that tells your story.
Seek Inspiration from Others
Sometimes you need a little help to ignite your creativity. Check out websites like Pinterest for endless wood wall art ideas. You can also look at platforms like Etsy for unique handmade items that inspire your personal creations.
Bring It All Together
Personalizing wood wall art is a joyful process where you can express who you are. By selecting a theme, colors, materials, and incorporating engravings or photos, you create something truly remarkable. Not only does it beautify your space, but it also serves as a reflection of you. With these tips, you can dive into your DIY project and create unique wood wall art that showcases your personal style.
Conclusion
DIY wood wall art offers an exciting opportunity to add a unique touch to your living space. With creative ideas ranging from intricate geometric patterns to rustic landscapes, there’s something for everyone. By understanding the essential tools and materials needed for your project, you can embark on these crafting adventures with confidence and clarity. The step-by-step techniques outlined allow you to develop your skills, making the process both enjoyable and rewarding.
Exploring different styles helps you cater to your personal taste, whether you lean towards the warmth of rustic designs, the sleek lines of modern art, or the simplicity of minimalist decor. Each style offers its own flair, allowing you to tailor your creations to fit seamlessly into your home.
Moreover, personalizing your wood wall art can truly make it shine. By incorporating colors, shapes, and themes that resonate with your personality, you can craft pieces that not only beautify your space but also tell a story about who you are. Remember, the beauty of DIY projects lies in their flexibility; there’s no right or wrong way to express yourself through your artwork.
So gather your supplies, unleash your creativity, and dive into the world of DIY wood wall art. Whether you’re an experienced crafter or a beginner, this enjoyable hands-on experience can lead to stunning results that enhance your home and reflect your unique style.