If you’re a pet lover with a knack for woodworking, turning your passion into creative DIY Pet Furniture Woodworking Projects can be equally fun and functional. Your furry friends deserve cozy, stylish spaces, and DIY furniture not only enhances your home but also gives your pets a comfortable spot just for them. Below are several creative ideas for DIY Pet Furniture Woodworking Projects to inspire your next creation.
Pet Beds That Blend with Your Decor
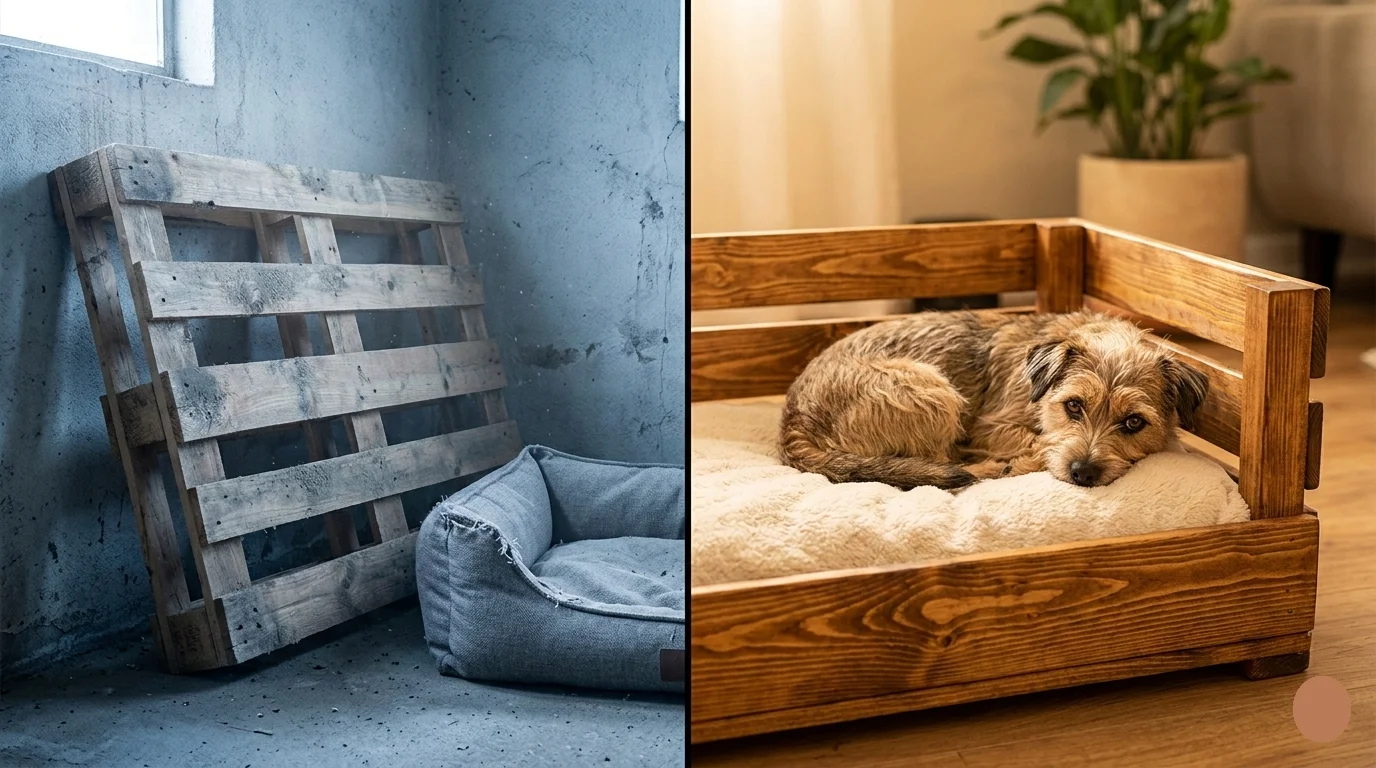
One of the most rewarding projects is building a custom pet bed. You can create a luxury spot for your dog or cat using wooden pallets or plywood. Here’s a simple guideline:
- Materials: Pallets or plywood, foam mattress, wood screws, sandpaper, non-toxic stain.
- Steps:
- Sand the wood to make it smooth.
- Assemble the frame using wood screws.
- Add a foam mattress for comfort.
- Stain the wood to match your decor.
This bed not only looks great but can also be customized for various sizes, accommodating any breed.
Stylish Cat Trees and Scratching Posts
Cats love to play and scratch, and creating a multi-level cat tree is a perfect project that combines function with aesthetics. Here’s how you can get started:
- Materials: 2×4 lumber, sisal rope, carpet remnants, wood screws.
- Steps:
- Build a sturdy base for stability.
- Create levels using plywood platforms.
- Wrap some posts with sisal rope to promote scratching.
- Add carpet for lounging areas.
This cat tree will keep your feline friends entertained while protecting your furniture!
Stylish Feeders and Bowls
Elevating your pet’s feeding station can improve their dining experience and keep messes off the floor. Building a pet feeder is straightforward:
- Materials: Wooden boards, bowl inserts, wood glue, paint or stain.
- Steps:
- Measure and cut the wood to shape a frame that will hold the bowls.
- Assemble the frame with wood glue.
- Drill holes for the bowl inserts, making sure they fit snugly.
- Finish with paint or stain for an appealing look.
This DIY feeder can easily match your kitchen decor while being practical for your pets.
Crate Furniture That Looks Good
If you have a pet crate, you can convert it into an attractive piece of furniture. With a bit of woodworking, turn your pet’s home into an end table or a side table:
- Materials: Solid wood for the frame, plywood for the top, wood screws, and finish.
- Steps:
- Build a frame that can hold the crate.
- Add a plywood top that adds height and function.
- Sand and finish the wood to your taste.
This project not only provides a comfy spot for your pet but also serves additional storage or display space.
Useful Resources for DIY Projects
For those planning to dive deeper into woodworking projects, there are fantastic resources available:
| Resource | Link |
|---|---|
| DIY Network | diynetwork.com |
| Instructables | instructables.com |
| Wood Magazine | woodmagazine.com |
With a little creativity and skills, you can transform simple wood into functional and stylish DIY Pet Furniture Woodworking Projects. Make sure to involve your pets during the process; they’ll love helping you choose their new favorite hangout spot!
Essential Tools and Materials for Building Pet Furniture
Building pet furniture can be a fun and creative way to provide your furry friends with comfortable and stylish spaces. To get started on your DIY Pet Furniture Woodworking Projects, you need to equip yourself with the right tools and materials. Here’s a comprehensive guide to help you navigate through the essentials that will ensure your project is both enjoyable and successful. Before you dive into the fun part of building, let’s talk about the tools you will need. Having the proper tools at your disposal will make the process smoother and safer.
Essential Tools
- Measuring Tape: Accurate measurements are key in woodworking. A reliable measuring tape will help you achieve precise cuts.
- Square: A carpenter’s square ensures that your cuts are perfectly straight and angles are accurate.
- Saw: A miter saw or circular saw is essential for cutting wood to the right sizes. Each saw has its own advantages, so choose one based on your specific project needs.
- Drill: A power drill is vital for making holes and driving screws. An electric drill with various bit sizes is ideal for versatility.
- Sander: A sander will give your furniture a smooth finish, making it comfortable for your pets. You can choose between an orbital sander or a hand sander.
- Screwdriver Set: A set of screwdrivers will ensure you can assemble your furniture securely.
- Clamps: Clamps hold pieces together while the adhesive sets or while you screw them together, ensuring everything stays aligned.
- Safety Gear: Always remember to wear safety glasses and a dust mask to protect yourself from sawdust and flying debris.
Materials Needed
Once you have your tools ready, it’s time to gather the necessary materials for your project. Choosing high-quality wood and supplies is essential for durability and safety.
- Wood: Select pet-safe wood, such as pine, birch, or plywood. Make sure the wood is untreated or finished with non-toxic products.
- Wood Glue: A strong wood adhesive helps reinforce joints for added strength.
- Screws: Use screws that fit the type of wood you are working with. It’s best to use stainless steel or brass screws for longevity.
- Finish: A non-toxic wood finish or sealant protects your furniture from scratches and moisture. Look for finishes that are safe for pets.
- Fabrics: If you are creating pet furniture like couches or beds, choose durable and washable fabrics. Materials like canvas or denim work well.
Where to Buy Your Tools and Materials
You’ve gathered your list of tools and materials, but where should you shop? Here are a few recommended online resources to help you find what you need:
- Home Depot – A reliable source for woodworking tools and supplies.
- Lowe’s – Offers a wide variety of materials and hardware for DIY projects.
- Woodcraft – Specializes in woodworking tools and materials for all levels of woodworkers.
- Rockler – A great option for specialty woodworking tools and hardwood choices.
Equipped with the right tools and materials, you will find that building pet furniture is not only rewarding but also a fantastic way to personalize a space for your beloved pets. It’s important to keep your pets’ safety and comfort in mind as you plan and execute your DIY Pet Furniture Woodworking Projects. As you embark on your DIY Pet Furniture Woodworking Projects journey, remember to take your time and enjoy the process. With the correct approach, you can create a cozy haven that your pets will love to lounge in.
Step-by-Step Guide to Designing Custom Pet Beds
Creating a custom pet bed is a rewarding woodworking project that can enhance your home decor while providing comfort for your furry friend. This step-by-step guide will help you design and build a unique bed tailored to your pet’s needs. Let’s dive into the process!
Choosing the Right Materials
When designing your custom pet bed, selecting the right materials is essential. Here are some options to consider:
- Wood: Plywood, pine, or oak work well for structure.
- Fabric: Choose durable fabrics like canvas or denim for the cover.
- Foam: High-density foam ensures comfort for your pet.
- Paint/Stains: Use non-toxic finishes to keep your pet safe.
Gathering Your Tools
Before you get started, make sure you have all the necessary tools on hand:
- Measuring tape
- Table saw or circular saw
- Screwdriver
- Drill
- Sander
- Paintbrush (if applying a finishing coat)
Designing Your Bed
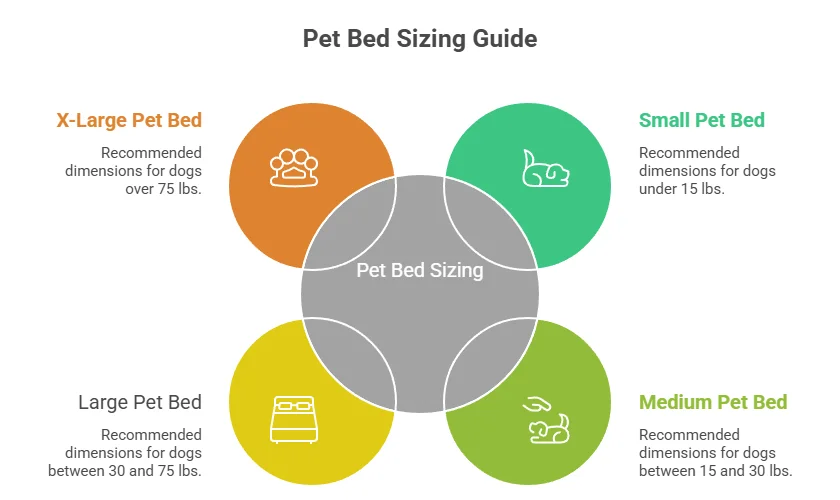
Next, sketch your design. Consider the size and shape that will best suit your pet. Measure your pet from nose to tail while they are lying down to determine the proper dimensions. Here are common pet bed sizes:
| Pet Size | Recommended Bed Dimensions |
|---|---|
| Small (Dogs under 15 lbs) | 24” x 18” |
| Medium (Dogs 15-30 lbs) | 30” x 24” |
| Large (Dogs 30-75 lbs) | 36” x 30” |
| X-Large (Dogs 75+ lbs) | 48” x 36” |
Building the Bed Frame
Now comes the fun part – building the bed! Follow these steps:
- Cut the Wood: Using your saw, cut your selected wood to match your design. Create a base and four sides for the frame.
- Assemble the Frame: Use wood screws to attach the sides to the base. Ensure it’s sturdy and can support your pet’s weight.
- Sand the Edges: Smooth any rough edges with sandpaper to prevent splinters.
- Paint or Stain: Use non-toxic paint or stain to finish the frame. Let it dry completely before proceeding.
Adding the Cushion
To make the bed cozy, you need to add a cushion. Here’s how:
- Cut Foam: Measure and cut your foam to fit the inside dimensions of your frame.
- Cover the Foam: Sew a fabric cover that matches your decor and slide it over the foam.
- Place the Cushion: Set the cushion inside the wooden frame once it’s complete.
Optional Customizations
Here are some ideas for customizing your pet bed:
- Add a removable cover for easy cleaning.
- Include a built-in storage space for toys or treats.
- Paint your pet’s name on the bed to personalize it.
For additional inspiration and plans, visit PetMD for various DIY Pet Furniture Woodworking Projects designs. Once your custom pet bed is complete, introduce your pet to their new comfy spot. You’ll enjoy watching them snuggle up in a bed made just for them! For more tips and projects, check out Wood Magazine, where you can find great strategies for DIY Pet Furniture Woodworking Projects.
Tips for Ensuring Pet Safety in DIY Furniture Designs
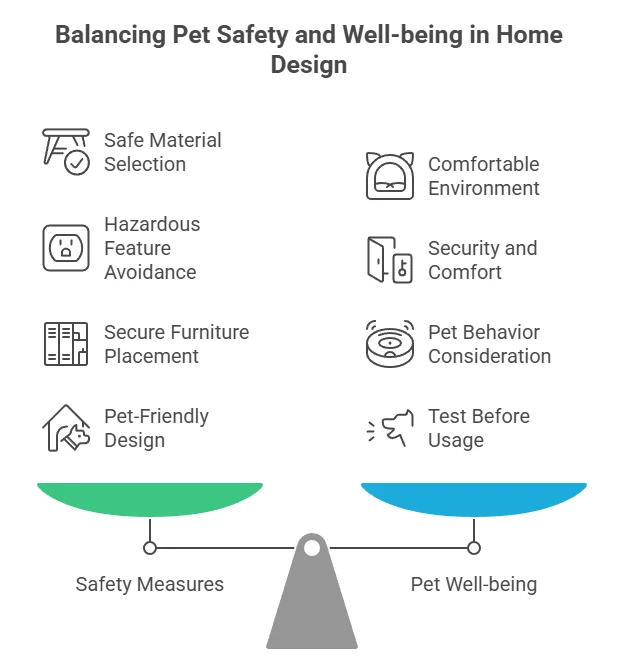
When crafting DIY furniture for your furry friends, pet safety should always be a top priority. Whether you are building a cozy cat bed or a sturdy dog crate, ensuring your pet’s well-being while they enjoy their new space is crucial. Here are essential tips to consider during your DIY Pet Furniture Woodworking Projects that focus on safety for your pets.
Choose Safe Materials
As you embark on your DIY Pet Furniture Woodworking Projects, always opt for pet-safe materials. Look for products that are:
- Non-toxic: Avoid using wood treated with harmful chemicals. Instead, choose natural woods like pine, oak, or birch.
- Durable: Pets can be rough. Select materials that can withstand wear and tear.
- Non-splintering: Ensure that edges and surfaces are sanded down to avoid any injury from splinters.
Avoid Hazardous Features
Be mindful of designs that could pose risks to your pet. For example:
- Sharp edges: Round off all sharp corners and edges. This reduces the risk of cuts if a pet bumps into the furniture.
- Stability: Ensure that your furniture is sturdy and won’t tip over easily. Consider adding rubber feet to prevent sliding on floors.
- Small parts: Avoid designs that include small components that can be chewed off and swallowed.
Secure Furniture Properly
No matter what you create, securing your pieces can prevent accidents. Here’s how:
- Anchor large designs: If you build a large piece, such as a multipurpose pet house, attach it securely to the wall to eliminate tipping hazards.
- Check joints: Make sure all joints and connections are tight. Loose pieces can create risks for playful pets.
- Regular maintenance: Inspect your furniture for any wear and tear regularly. Tighten screws and replace any worn-out parts promptly.
Provide Comfort and Security
Your pets will enjoy their new furniture more if it feels secure and comfortable. Consider these aspects:
- Soft surfaces: Use soft cushions or blankets for beds to keep pets cozy.
- Familiar scents: Incorporate items that smell like your pets to help them feel secure in their new space.
- Space considerations: Ensure the size of the piece fits your pet. A snug spot is comfortable, but too confined can be stressful.
Consider Pet Behavior
Understanding your pet’s behavior can influence your designs. Here are a few points to assess:
- Chewing habits: If your pet tends to chew on things, avoid using soft woods or fabrics that can be easily destroyed.
- Playful tendencies: If your pet is lively, create spaces that allow for jumping and climbing safely.
- Height preferences: Some pets prefer heights; consider building a stable shelving unit or cat tree.
Research Pet-Friendly Design Ideas
Explore different design inspirations through websites focused on pet furniture. Great resources for ideas include PetMD, which offers insights into constructing safe furniture for pets. Additionally, check out DIY websites like DIY Network for guides that focus on creative furniture solutions.
Test Before Usage
Once you finish your project, test it thoroughly before letting your pets use it. Here’s a quick checklist:
- Ensure stability by applying weight and checking for wobbling.
- Examine the surfaces for any sharp edges or splintered areas.
- Monitor your pet’s reaction to the new furniture for any signs of discomfort.
Creating DIY Pet Furniture Woodworking Projects can be a rewarding project that enhances your home while providing comfort for your furry friends. By following these tips for safety, you can ensure that your creations are not only stylish but also secure for your beloved pets.
Upcycling Old Wooden Furniture into Functional Pet Spaces
Transforming old wooden furniture into functional pet spaces is a fantastic way to breathe new life into unused items while providing comfort and style for your furry friends. With a little creativity and basic DIY Pet Furniture Woodworking Projects skills, you can create unique pet beds, feeding stations, and even play areas that perfectly fit your home décor.
Why Upcycle?
Upcycling is not just an eco-friendly practice; it’s also a chance to personalize your pet’s living space. Here are a few reasons why you should consider this project:
- Environmental Impact: By upcycling, you help reduce waste and decrease the demand for new materials.
- Cost-Effective: Using old furniture saves you money compared to purchasing new, specialized pet furniture.
- Creativity: Designing custom furniture allows you to match your pet’s needs with your home’s style, showcasing your creativity.
- Bonding Time: Building a pet space can be a fun project to do with family or friends, creating memorable moments.
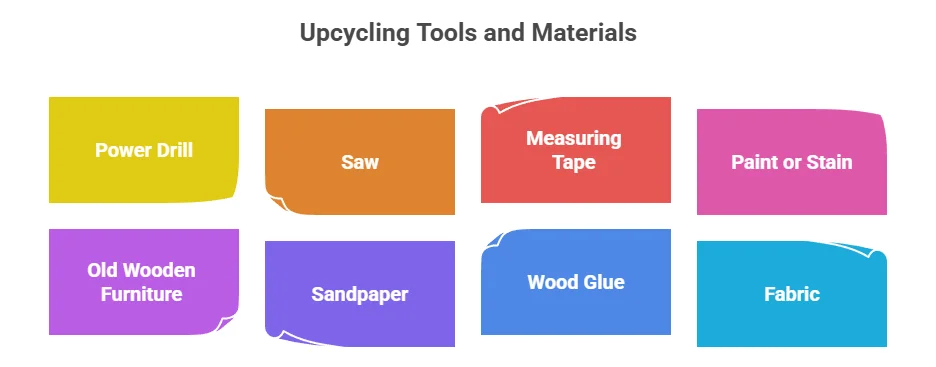
Getting Started: Tools and Materials
Before you dive into your upcycling project, gather the necessary tools and materials. Here’s a list to help you:
| Tools | Materials |
|---|---|
| Power Drill | Old Wooden Furniture (like chairs, tables, or dressers) |
| Saw | Sandpaper |
| Measuring Tape | Wood Glue |
| Paint or Stain | Fabric (for cushions) |
Ideas for Upcycling Projects
Now that you have your materials, it’s time to get inspired! Here are several creative projects to consider:
1. Pet Bed from an Old Chair
If you have an old wooden chair, you can easily transform it into a cozy pet bed. Start by removing the seat and replacing it with a soft cushion or a blanket. You can paint or stain the wood to match your decor, making it a stylish addition to your space.
2. Feeding Station from a Side Table
A small side table can serve as a neat feeding station. Adjust the table height according to your pet’s size, and secure two bowls in place using wood glue. This project keeps your pet’s dining area tidy and reduces mess.
3. Cat Playhouse from an Old Bookshelf
For cat owners, an old bookshelf can be turned into a multi-level playhouse. Remove some shelves and create openings for your cat to climb and hide in. This not only provides a fun playground for your pet but also adds an artistic touch to your home.
4. Doggy Dresser or Storage Bench
If you have an old dresser, you can convert the drawers into storage for your pet’s toys and supplies. With a little modification to the top, it can double as a bench for your furry friend to relax on. This project helps keep your space organized while providing additional seating.
Finishing Touches
Once you’ve built your pet space, it’s time to add personal touches. Consider the following:
- Paint or Stain: Choose a color or finish that complements your home.
- Cushions: Add comfortable cushions that can be easily washed.
- Toys: Include your pet’s favorite toys in their new area.
Finding Inspiration and Resources
Looking for more inspiration? Websites like Instructables and Ana White offer endless ideas for DIY Pet Furniture Woodworking Projects. Don’t forget to check out local craft stores for materials that can enhance your builds! By upcycling old wooden furniture into functional pet spaces, you not only create a unique and personalized environment for your pets but also contribute positively to the planet. Your furry friends will appreciate it, and you can take pride in your creative efforts. Dive into your project today, and see how much joy it can bring!
Conclusion
As you embark on these DIY Pet Furniture Woodworking Projects, you’ll not only create unique and practical spaces for your furry companions but also enjoy the rewarding experience of crafting with your hands. With the right tools and materials at your disposal, transforming your ideas into reality can be both fun and fulfilling.
Designing custom pet beds tailored to your pet’s needs can enhance their comfort while showcasing your personal touch in your home. Remember to follow the essential safety tips to ensure that your creations are not only stylish but also safe for your beloved pets. The joy of knowing that your projects contribute to their happiness is immeasurable.
Furthermore, upcycling old wooden furniture into functional pet spaces gives you an opportunity to get creative while being environmentally responsible. It’s a win-win situation that adds character to your home and keeps waste to a minimum.
Whether you’re a seasoned woodworker or just starting, these projects allow you to bond with your pets through shared spaces that reflect both your taste and their comfort. So, gather your tools, unleash your creativity, and let your pets’ personalities guide your designs. Your unique creations are sure to spark joy for you and your furry friends alike, all while creating beautiful additions to your home. The world of DIY Pet Furniture Woodworking Projects is a canvas waiting for you—let your imagination soar!