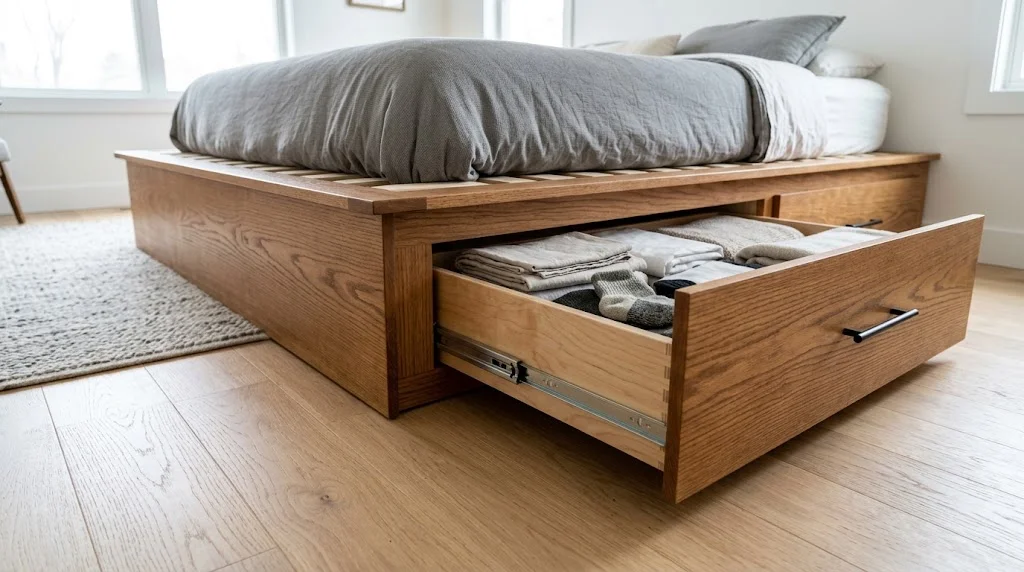
Building your own DIY King Size Bed Frame with Drawers with Free Plans is an exciting project that not only adds a personal touch to your bedroom but also maximizes storage space. Here’s a simple, step-by-step guide that will take you through the entire process, along with free plans to help you along the way.
Materials Needed
- Plywood: 3/4 inch thick, for the frame and drawer dividers
- 2×4 Lumber: for the frame, legs, and support beams
- Wood Screws: 2.5 inch screws for assembling the frame
- Drawer Slides: 22-inch slides for smooth opening and closing
- Wood Glue: for added strength
- Sandpaper: 120 and 220 grit for smoothing edges
- Wood Finish: paint or varnish to protect the wood
Tools Required
- Circular Saw
- Drill and Drill Bits
- Screwdriver
- Measuring Tape
- Square
- Clamps
Step-by-Step Construction Process
Start your project by gathering all materials and tools listed. Create a clean workspace and ensure you have enough room to maneuver the pieces. Follow these steps for a successful build:
1. Cut the Wood
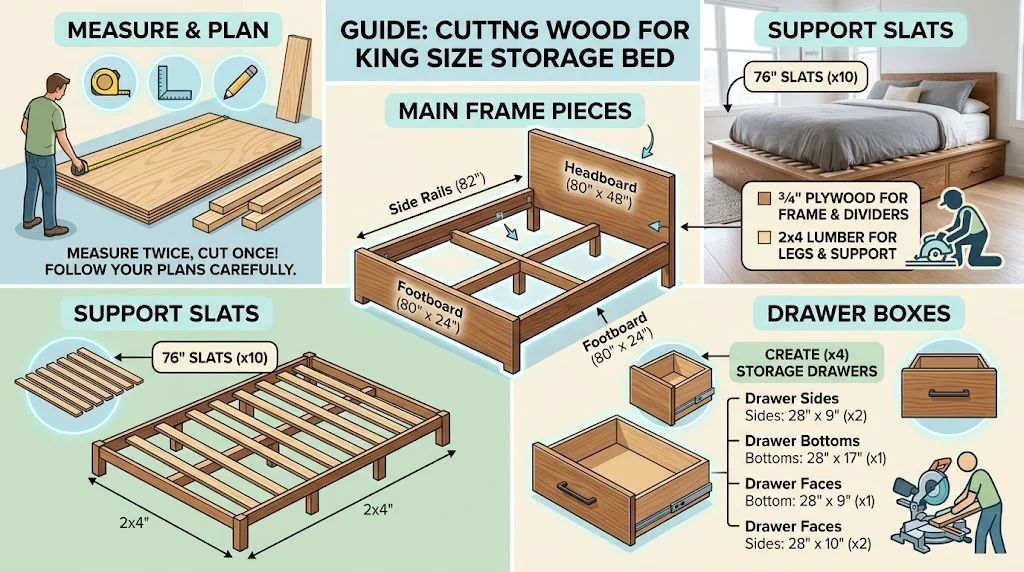
Measure and cut your plywood and lumber according to the dimensions in your plans. For a king size bed frame, your main pieces will generally include:
| Piece | Dimensions |
|---|---|
| Side Rails | 82 inches |
| Headboard | 80 inches x 48 inches |
| Footboard | 80 inches x 24 inches |
| Slats | 76 inches (x10) |
2. Assemble the Frame
Begin by assembling the rectangular frame. Attach the side rails to the headboard and footboard using wood screws. Ensure everything is square before fully tightening each screw. Use clamps to hold everything in place as you work.
3. Add Slats
Attach the slats evenly across the frame to support the mattress. Space them about 4-6 inches apart to provide adequate support. Secure them with screws to prevent them from moving.
4. Build the Drawers
To build the drawers, measure and cut additional pieces from plywood. Each drawer should be around 28 inches wide, 18 inches deep, and 10 inches tall, depending on your design preferences. Assemble the boxes using wood screws and glue for added stability.
5. Install Drawer Slides
Attach the drawer slides to the side of each frame opening. Ensure they are level for smooth operation. Then, mount the corresponding part of the slides to the completed drawers.
6. Finish the Frame
Sand the entire bed frame to smooth out all edges and corners. Apply a wood finish to protect the frame from wear and tear over time. This is also where you can get creative with color or stain to match your bedroom décor.
7. Final Assembly
Once everything is dry, position the frame in your bedroom. Slide the drawers into place and ensure they open and close smoothly. Place your mattress on top of the frame, and your new DIY King Size Bed Frame with Drawers with Free Plans is complete!
For detailed plans and tips, you can check out resources like Ana White or Wood Magazine. These websites offer a variety of DIY projects and free woodworking plans to help you along the way.
This DIY project not only provides a sturdy and stylish bed but also solves storage issues, making it perfect for smaller bedrooms or guest rooms. Enjoy your new space-saving solution!
Essential Tools and Materials for Your Bed Frame Project
Building your own king size bed frame with drawers can be a rewarding project that saves money and allows for customization. To get started on this home improvement venture, you must have the right tools and materials. Below, you’ll find a comprehensive list of both, which will help you tackle your DIY King Size Bed Frame with Drawers with Free Plans seamlessly and effectively.
Essential Tools
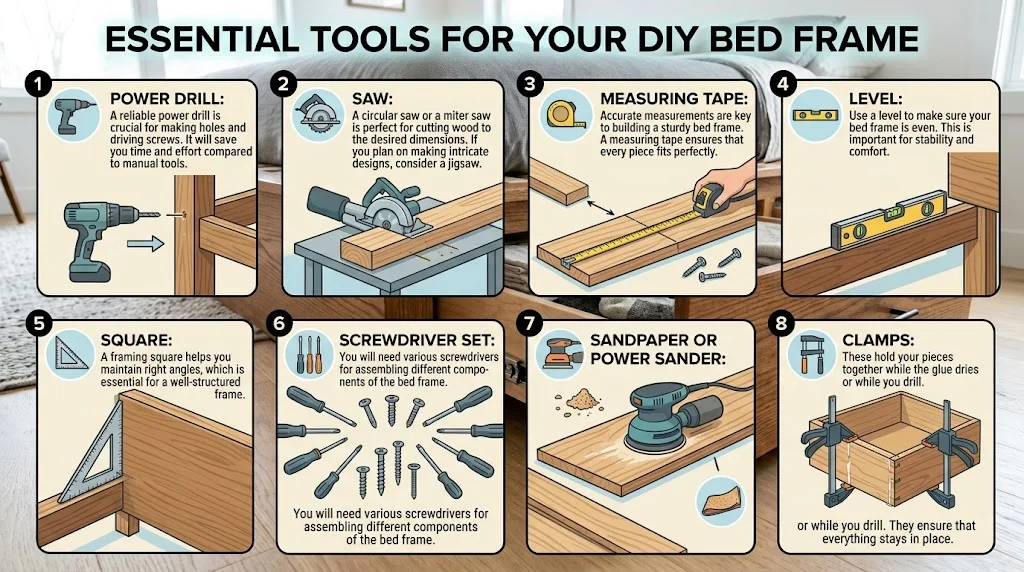
Having the appropriate tools will make your project smoother and more enjoyable. Here are the essential tools you will need:
- Power Drill: A reliable power drill is crucial for making holes and driving screws. It will save you time and effort compared to manual tools.
- Saw: A circular saw or a miter saw is perfect for cutting wood to the desired dimensions. If you plan on making intricate designs, consider a jigsaw.
- Measuring Tape: Accurate measurements are key to building a sturdy bed frame. A measuring tape ensures that every piece fits perfectly.
- Level: Use a level to make sure your bed frame is even. This is important for stability and comfort.
- Square: A framing square helps you maintain right angles, which is essential for a well-structured frame.
- Screwdriver Set: You will need various screwdrivers for assembling different components of the bed frame.
- Sandpaper or Power Sander: Smooth out rough edges on your wood pieces for safety and appearance.
- Clamps: These hold your pieces together while the glue dries or while you drill. They ensure that everything stays in place.
Key Materials
Now that you have your tools ready, it’s time to gather the materials for your king size bed frame with drawers. Here’s a detailed list:
- Wood: The type of wood you choose will impact both the appearance and durability of your bed frame. Common choices include:
- 1×4 or 1×6 boards for the frame support
- 2×4 or 2×6 boards for the side rails and legs
- Plywood for the bed base, usually ¾ inch thick
- Wood Glue: High-quality wood glue helps bond pieces together, ensuring a strong and stable frame.
- Screws: Use screws that are appropriate for the thickness of the wood. A mix of drywall screws and wood screws is commonly used.
- Drawer Slides: If you want to add drawers beneath your bed, don’t forget to get quality drawer slides for smooth operation.
- Finishing Material: Stain, paint, or varnish for giving the final touch to your bed frame. Choose a finish that complements your bedroom decor.
Helpful Tips
Gathering the right tools and materials is just the beginning. Here are some useful tips to make your project easier:
- Plan your design carefully to ensure you purchase the right amount of wood and hardware. Free plans are available online, such as on Wood Magazine.
- Take your time measuring and cutting. Precision is essential to avoid mistakes that could affect the overall structure.
- Don’t rush through the assembly. Make sure each connection is secure to create a sturdy bed frame.
- If you’re new to woodworking, consider watching video tutorials. Websites like YouTube have countless DIY videos that can guide you through the process.
With the right tools and materials, building a king size bed frame with drawers can be an enjoyable experience that adds both functionality and style to your bedroom. Make sure to double-check your plans and measurements before you start cutting wood. Also, explore resources for free plans and community support, such as Family Handyman, which offers many DIY projects and tips to help you succeed.
Creative Design Ideas for Integrated Storage in Bed Frames
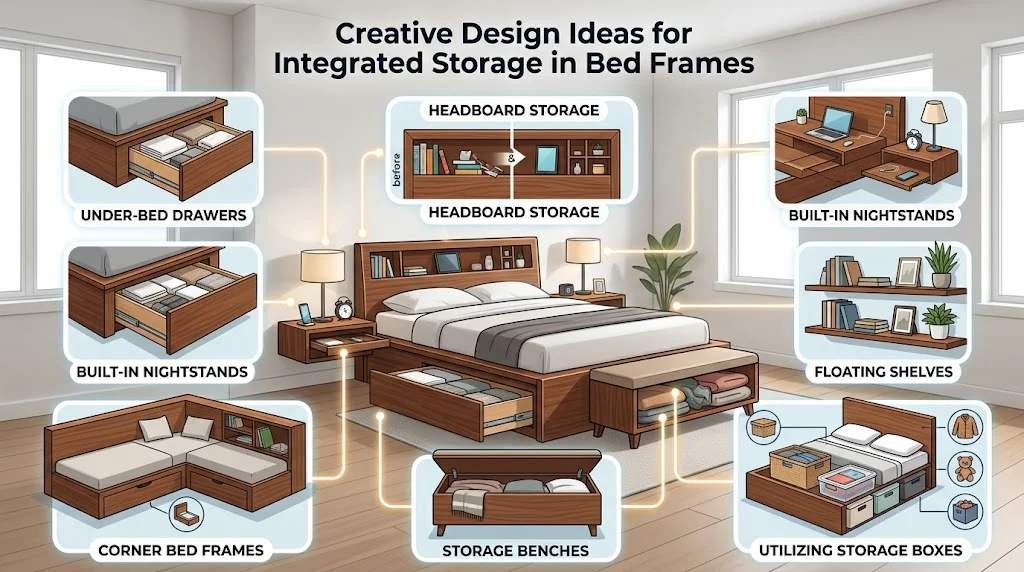
Finding creative design ideas for integrated storage in bed frames can transform clutter into organized bliss. Those who live in smaller spaces often face the challenge of maximizing every inch while keeping the décor stylish. A bed frame with built-in storage is not only practical but can also serve as a chic centerpiece in your bedroom. Here are some innovative ideas to inspire your next DIY project.
Under-Bed Drawers
Under-bed drawers are a classic solution that offers ample storage without taking extra floor space. You can customize the size of these drawers based on your needs. Here’s how to get started:
- Choose the Right Materials: Plywood pieces are great for constructing sturdy drawers. Use a high-quality wood finish that matches your bedroom aesthetic.
- Consider Wheels: Adding wheels will make it easy to pull the drawers in and out, providing more accessibility.
- Utilize Dividers: Adding dividers inside the drawers can help keep items organized. They work well for storing shoes, seasonal clothing, or extra linens.
Headboard Storage
Your headboard doesn’t have to be just a decorative piece; it can also offer storage solutions. The key is to design it with shelves and compartments:
- Open Shelves: Build shelves on either side of your headboard to display books or decorative items.
- Hidden Compartment: A headboard with a flip-top can hide away books, gadgets, or small treasures.
- Lighting Integration: Incorporate built-in lighting to highlight your stored items while adding a cozy ambiance.
Built-In Nightstands
No more awkwardly positioned nightstands! You can build nightstands into the frame:
- Combine Functionality: Use the space for books, phones, and nightly essentials, while also keeping a clean look.
- Integrated Drawers: Consider having a small drawer within your nightstand for discreet storage of smaller items.
Corner Bed Frames
Using corner bed frames can maximize space while integrating smart storage solutions. Here are a few design ideas:
- Diagonal Shelves: Use the corners to create shelves for easy access to items.
- Corner Cubbyholes: Design small cubbyholes or spaces where you can stow away seasonal décor or blankets.
Storage Benches
A storage bench at the foot of your bed serves dual purposes as seating and storage. This is particularly useful when getting ready for the day. Consider these ideas:
- Cushioned Top: Create a comfortable spot with a cushioned top that is perfect for sitting.
- Multi-Functional: Use it for storing extra pillows, blankets, or even shoes.
Floating Shelves
Adding floating shelves alongside your bed frame can utilize vertical space and allow for various display options:
- Versatile Design: Floating shelves can hold books, plants, or other decorative items without cluttering the bedside area.
- Customization: Paint or stain the shelves to coordinate with your bed frame or overall bedroom theme.
Utilizing Storage Boxes
Underneath your bed or in the headboard, you can place decorative storage boxes. This offers an aesthetic way to hide clutter:
- Accessible and Stylish: Choose boxes that match your bedroom decor while remaining easy to access.
- Seasonal Storage: Use these boxes for out-of-season clothing, reducing the need for closet space.
These innovative design ideas can spark your creativity when building an integrated storage bed frame. Whether you opt for under-bed drawers, headboard shelves, or multifunctional pieces, your bedroom can remain organized and stylish. For more DIY furniture inspiration, check out Ana White’s website or Family Handyman for expert plans and ideas.
Building a bed frame with integrated storage is not only an efficient use of space but also allows you to express your personal style. Start envisioning your perfect storage solutions today!
Tips for Choosing the Right Wood for Durability and Aesthetics
Choosing the right wood is essential when embarking on any DIY project, especially if you’re crafting furniture or structures that require durability and an appealing aesthetic. With so many wood types available, it’s important to consider factors such as durability, appearance, and cost. Here are some tips to help you make an informed decision.
When it comes to durability, certain types of wood stand out due to their natural resistance to wear, rot, and pests. Hardwoods, such as oak, maple, and cherry, are generally considered the best choices for long-lasting results. Softwoods, including pine and cedar, are also popular, but they may not offer the same level of resilience as hardwoods. Here are a few key points to consider:
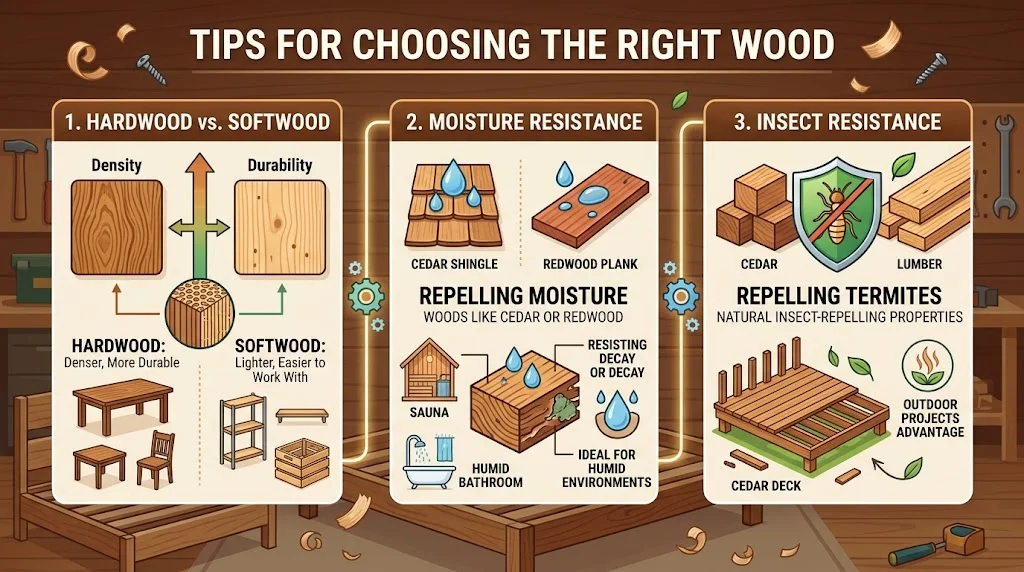
- Hardwood vs. Softwood: Hardwoods are typically denser and more durable, making them suitable for furniture heavily used, like tables and chairs. Softwoods are lighter and easier to work with, making them ideal for projects that don’t require maximum durability.
- Moisture Resistance: If your project will be in a humid environment, woods like cedar or redwood are better options due to their natural ability to resist moisture and decay.
- Insect Resistance: Some woods have natural insect-repelling properties. For instance, cedar is known to resist termites, which can be a significant advantage for outdoor projects.
Another important aspect to consider is the aesthetic appeal of the wood you choose. The grain, color, and texture of the wood can greatly influence the overall look of your project. Take some time to evaluate your design goals. Here’s what to keep in mind:
- Grain Patterns: Different wood types feature unique grain patterns that can enhance the visual interest of your project. Oak has a pronounced, distinctive grain, while maple offers a more subtle appearance.
- Color: The natural color of wood can range from light shades, like pine, to deep tones, like mahogany. Consider how the color fits into your overall design.
- Finish Options: The type of finish you apply can alter the wood’s color and appearance drastically. Some woods respond better to stains and finishes, so this could influence your choice.
Cost is also a crucial factor when selecting wood. While hardwoods may provide superior durability and aesthetics, they often come with a higher price tag. If you’re on a budget, consider these tips to balance quality and cost:
- Look for Reclaimed Wood: Not only is it eco-friendly, but reclaimed wood can also provide a unique character at a lower price point compared to new hardwood.
- Plan Your Cuts: Think ahead about your project to minimize waste. If using expensive wood, make your cuts efficiently to save on costs.
In addition to all the above considerations, it’s essential to know your project requirements. Different types of projects might require different specifications. For example:
| Project Type | Recommended Wood Types |
|---|---|
| Outdoor Furniture | Cedar, Redwood |
| Indoor Furniture | Oak, Maple, Cherry |
| Cabinetry | Birch, Ash |
Always look up supplier reviews and specification sheets before making a purchase. Websites like Wood Magazine offer expert advice and reviews on wood types, while Woodworking Network provides insights into industry trends and products. Knowing details about your wood’s source can also impart confidence in its quality.
By understanding the properties and aesthetics of different wood types, you can make a well-informed choice that balances durability and beauty. Remember, the right wood not only enhances your project’s longevity but also its overall appeal.
Common Mistakes to Avoid When Building Furniture at Home
Building furniture at home can be a rewarding experience, offering both creativity and satisfaction. However, it is easy to make mistakes along the way that can lead to frustrating outcomes. Understanding the common pitfalls can help you avoid them and create beautiful pieces that enhance your living space. Here are some key mistakes to watch out for when you embark on your DIY furniture-building journey.
Ignoring the Importance of Planning
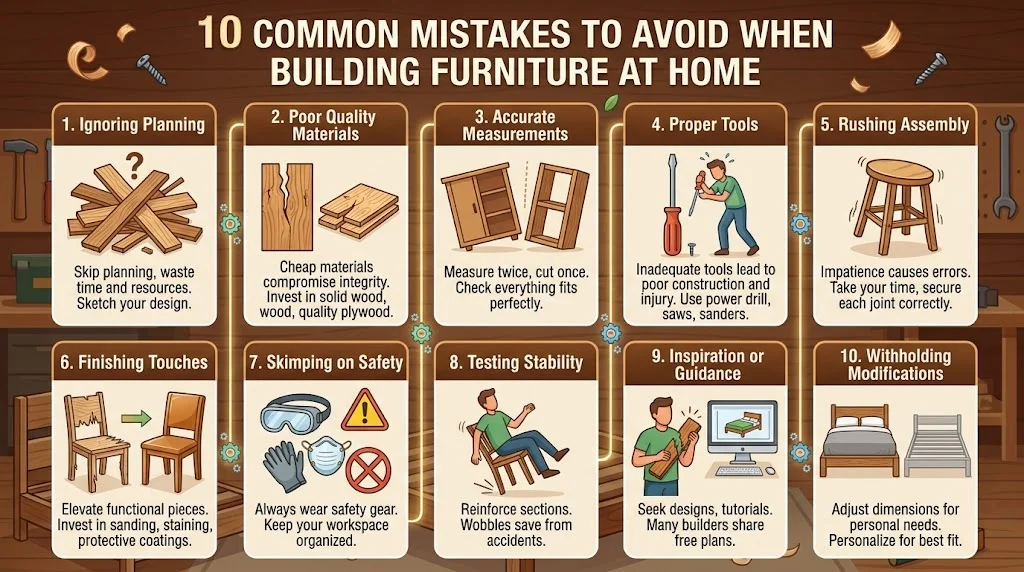
One of the first mistakes is bypassing the planning stage. Skipping this crucial step can lead to wasted time and resources. Taking time to sketch out your design can provide a clearer vision of your project and help you think about dimensions, materials, and the overall style.
- Draw a sketch to map out the dimensions.
- List all materials and tools required.
- Research similar projects for inspiration.
Using Poor Quality Materials
Investing in quality materials is essential for durability. Choosing cheap materials may save you money initially, but they can compromise the integrity of your furniture. Solid wood, high-quality plywood, and durable finishes are vital for achieving a lasting piece. Sources like Wood Magazine offer insights on selecting materials for various projects.
Neglecting Accurate Measurements
One measurement error can derail the entire project. Always double-check your measurements before cutting materials. A good practice is to measure twice and cut once. Keep a tape measure, square, and level handy to ensure every piece fits perfectly.
Overlooking Proper Tools
Using the right tools is crucial for achieving a professional finish. Trying to complete projects with inadequate tools can result in poor construction and even injury. Here’s a basic list of tools that are valuable for most home furniture projects:
- Power drill
- Circular saw
- Sander and sandpaper
- Measuring tape
- Clamps
For more tool recommendations, visit Popular Mechanics.
Rushing Through Assembly
Impatience can lead to mistakes when assembling your furniture. Taking your time ensures that each piece is fitted correctly and securely. Follow your plans carefully and make sure every joint is tightened and stable. Don’t hesitate to test the stability of your furniture during assembly.
Forgetting Finishing Touches
Finishing touches are what elevate your furniture from functional to beautiful. Many DIY builders forget to invest time in sanding, staining, or painting their creations. Always allow ample time for finishes to dry properly, and don’t skimp on protective coatings. Visit Fine Woodworking for finishing techniques and tips.
Skimping on Safety
Safety should always come first. Not wearing protective gear can lead to injuries. Ensure you wear safety goggles, dust masks, and ear protection when necessary. Additionally, make sure your workspace is clean and organized to minimize risks.
Not Testing Stability
After finishing your piece, it’s critical to test its stability. If it wobbles or feels unstable, you may need to reinforce certain sections. This can save you from future accidents and ensure that your furniture serves its purpose effectively.
Failing to Seek Inspiration or Guidance
Don’t hesitate to look for inspiration from existing designs or tutorials. Many experienced builders share their knowledge online, offering free plans and insights that can inform your project. Websites like Ana White provide excellent free plans for various furniture items.
Withholding Modifications
Don’t be afraid to modify a plan to suit your needs better. Each space is unique, and personalizing your project can create a better fit. Adjust dimensions, select different finishes, or incorporate features that reflect your style.
By avoiding these common mistakes, you can enhance your DIY furniture building experience. Take your time, plan your projects, and most importantly, have fun creating pieces that bring joy to your home.
Conclusion
Building a DIY King Size Bed Frame with Drawers with Free Plans is not just a practical project but also a rewarding creative endeavor. By following a step-by-step guide, you can ensure that your bed frame meets your needs while maximizing space in your bedroom. With the right tools and materials, you can craft a sturdy and stylish piece of furniture that holds up for years to come.
Exploring various design ideas allows you to infuse your personal touch into the frame. Consider incorporating integrated storage that complements your bedroom aesthetics without compromising on functionality. As you choose the type of wood, remember that the right selection can enhance both durability and visual appeal, making your bed frame a striking focal point.
While the process may seem daunting, avoiding common mistakes will help you achieve a polished final product. Take your time to measure carefully, cut accurately, and assemble with precision. Preparation and patience are key components of a successful DIY experience.
By engaging with this project, you’re not just building a bed frame; you’re creating a unique piece of furniture that reflects your taste and needs. So gather your tools, unleash your creativity, and embark on this fulfilling journey. Your dream bed frame awaits, complete with clever storage solutions to keep your space organized and inviting. Happy building!