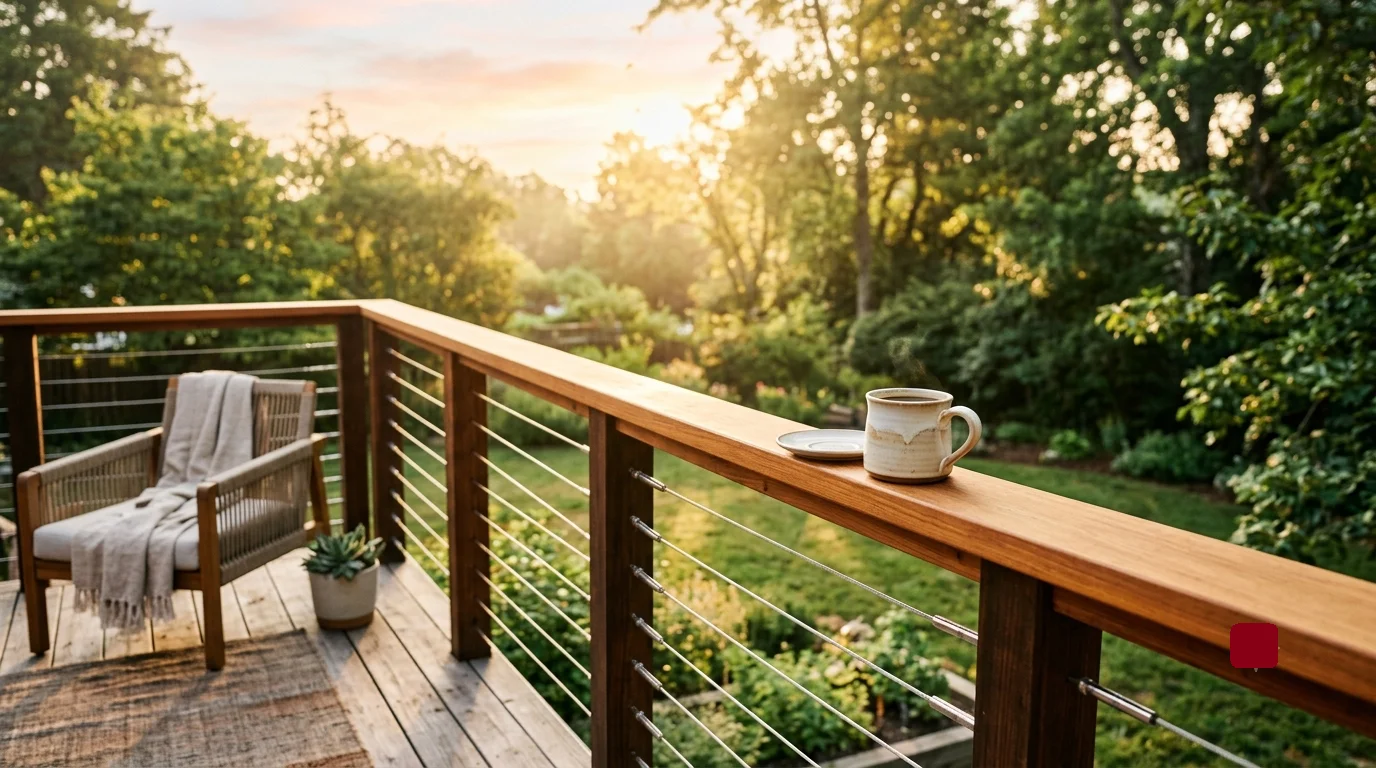
Your deck is the heart of your outdoor living area. It is where morning coffees turn into weekend barbecues and quiet evenings under the stars. Yet, if your deck railings are worn out, outdated, or nonexistent, the entire space can feel incomplete. Upgrading your perimeter safety does not require hiring an expensive contractor or holding a degree in master carpentry. With the right approach, building a custom look is well within your reach.
Many homeowners assume deck installation demands advanced skills, expensive machinery, and weeks of tedious labor. The truth is vastly different. Modern hardware, modular kits, and accessible design approaches allow any motivated DIY enthusiast to construct stunning, code-compliant barriers in a single weekend. Whether you prefer rustic warmth, sleek modern lines, or panoramic views, there is a beginner-friendly design tailored to your style and budget.
In this guide, we will explore creative concepts, essential tools, cost-effective materials, and expert installation secrets. You will learn how to approach your project with complete confidence and achieve professional-grade results without the premium price tag.
Why DIY Your Deck Railings?
Taking on an outdoor home improvement project provides benefits that go far beyond basic aesthetics. When you choose to build your own barriers, you take control of your home’s curb appeal, safety, and overall value.
- Massive Cost Savings: Professional installation labor often costs two to three times the price of raw materials. By completing the assembly yourself, you can reallocate those savings toward higher-quality lumber, premium lighting, or stylish outdoor furniture.
- Complete Customization: Off-the-shelf contractor options are usually limited to plain wood pickets. DIY construction lets you mix materials, alter colors, incorporate ambient illumination, and tailor exact dimensions to fit your yard’s architecture.
- Enhanced Home Value: Curb appeal influences property evaluations significantly. Fresh, well-engineered perimeters give potential buyers immediate confidence in the structural care and maintenance of the property.
- Unmatched Satisfaction: There is a distinct pride in relaxing on your patio while admiring a sturdy, beautiful structure built entirely with your own hands.
Essential Planning and Building Codes Before You Begin
Before buying lumber or unboxing hardware kits, you must understand local construction regulations. Railings are critical safety barriers designed to prevent falls, meaning strict municipal rules apply regardless of who performs the work.
Most regional building departments follow guidelines aligned with the International Residential Code (IRC). Key structural standards typically include:
- Height Requirements: For decks elevated more than 30 inches above grade, residential codes usually demand a minimum guard height of 36 inches. Higher decks may require 42-inch guards depending on jurisdiction.
- The 4-Inch Sphere Rule: Baluster spacing must be narrow enough that a solid 4-inch sphere cannot pass through any opening. This prevents small children and pets from slipping through or getting stuck.
- Structural Load Resistance: The top rail must withstand a concentrated force of at least 200 pounds applied in any downward or outward direction to ensure stability when leaned upon.
Always check with your local municipality or homeowners association (HOA) before buying supplies. Securing necessary permits early saves you from costly tear-downs or compliance fines later.
Top Beginner-Friendly DIY Deck Railing Concepts
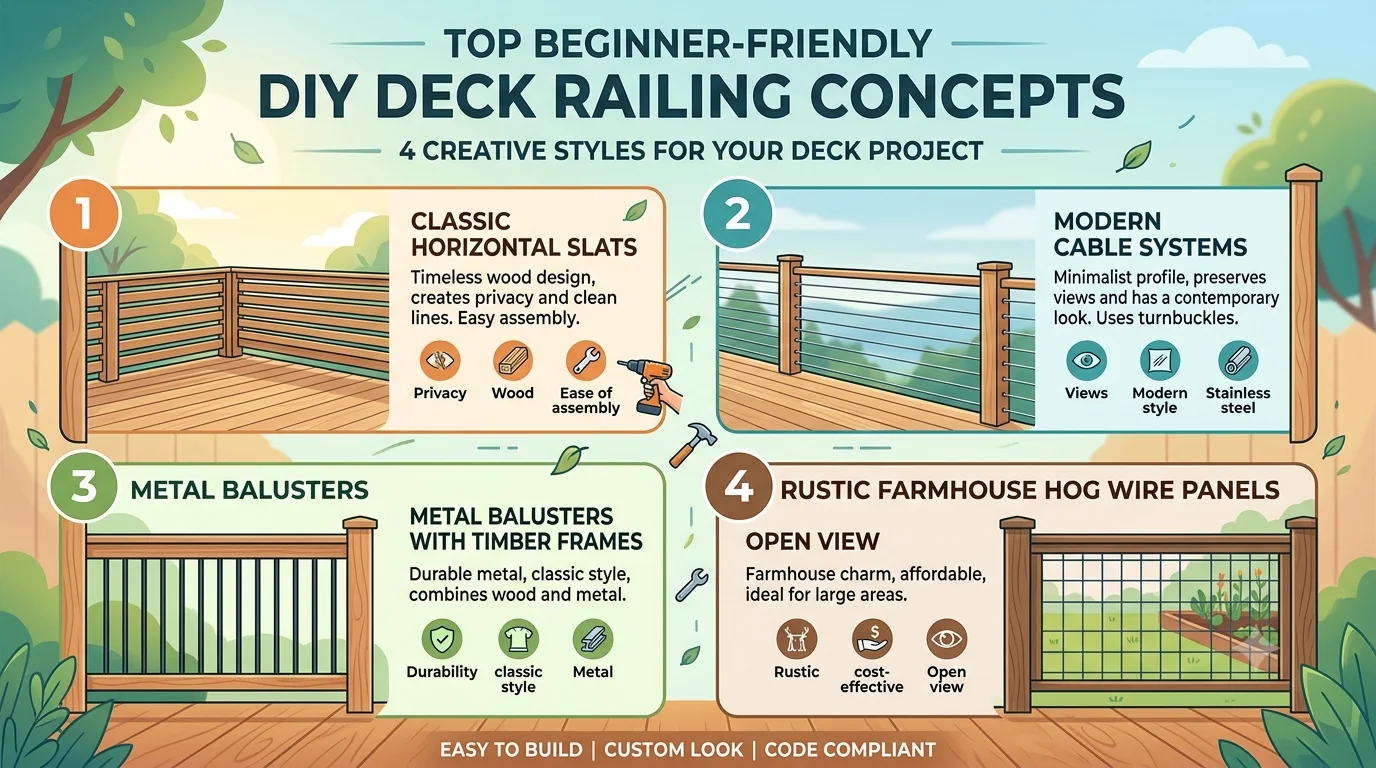
Ready to upgrade your home’s outdoor aesthetic? These designs combine simplicity, structural integrity, and eye-catching style without requiring advanced woodshop tools.
1. Classic Horizontal Slats
Horizontal timber designs offer a sleek, modern update to traditional vertical pickets. They create an illusion of added length, making small patios feel significantly larger. Because horizontal boards attach straight across supporting posts, alignment is straightforward for newcomers using a simple spirit level.
- Best For: Contemporary homes, privacy screening, and clean visual lines.
- Material Choices: Cedar, pressure-treated pine, redwood, or composite lumber.
- Pro Tip: Use custom wood spacer blocks during installation to maintain exact vertical gaps between each horizontal board without measuring every board manually.
2. Modern Cable Systems
Cable setups have exploded in popularity due to their ultra-modern, minimalist look and unobstructed viewlines. Stainless steel aircraft cables pass horizontally through timber or aluminum posts, held taut by specialized tensioning fittings.
While cable systems used to require specialized industrial crimping tools, modern turnbuckle kits thread easily using standard wrenches and drills. You can buy complete turnbuckle assembly sets from suppliers to simplify your ordering process.
- Best For: Properties with scenic backyard views, lakehouses, or contemporary architectural layouts.
- Material Choices: Marine-grade 316 stainless steel cable paired with timber or metal end posts.
- Pro Tip: Space your structural intermediate posts no more than 4 feet apart to prevent the steel wire from sagging under pressure.
| Railing Style | Skill Level | Cost Index | Maintenance Need |
|---|---|---|---|
| Horizontal Slat | Beginner | Budget-Friendly | Moderate (Stain/Seal) |
| Stainless Cable | Beginner to Intermediate | Moderate to High | Very Low |
| Black Metal Baluster | Beginner | Budget to Moderate | Low |
| Hog Wire Mesh | Beginner | Budget-Friendly | Low to Moderate |
3. Metal Balusters with Timber Frames
Combining dark metal pickets with warm wooden top and bottom rails offers a timeless, rustic-industrial aesthetic. Round or square black aluminum balusters drop into pre-drilled adapter shoes mounted along the top and bottom wooden plates, keeping assembly quick and precise.
Pre-drilled mounting connectors available through outdoor retailers eliminate guesswork, allowing you to slide pickets into place without precise mortising skills.
- Best For: Craftsman homes, traditional deck structures, and budget-conscious updates.
- Material Choices: Powder-coated aluminum balusters paired with cedar or pressure-treated frames.
- Pro Tip: Spray adapter connectors with a small amount of silicone lubricant to help metal tubes slide smoothly into position without scratching the powder finish.
4. Rustic Farmhouse Hog Wire Panels
If you want a cozy, country-inspired look that preserves wide-open views, heavy-gauge galvanized wire panels (often called hog wire or cattle panels) are an ideal option. The thick grid panel is secured within a stout wooden picture frame created from 2×4 or 2×6 lumber.
- Best For: Farmhouse aesthetics, cabin retreats, and garden-adjacent decks.
- Material Choices: 4-gauge galvanized steel utility mesh set inside pressure-treated wood framing.
- Pro Tip: Cut steel grid panels clean using an angle grinder equipped with a metal cut-off wheel or high-leverage bolt cutters, making sure to sand down sharp edges before mounting.
Essential Tools Every DIYer Needs
Having proper tools on hand transforms a challenging project into an efficient, enjoyable process. You do not need a shop full of commercial machinery, but reliable basic power tools are vital for clean cuts and solid fastener driving.
- Miter Saw: Critical for making crisp, 90-degree square ends and precise angle cuts on top cap rails.
- Cordless Drill and Impact Driver Set: Essential for drilling pilot holes and driving heavy structural timber screws into framing posts.
- Laser or Torpedo Spirit Level: Guarantees your support posts stand plumb and top rails run perfectly level across the deck edge.
- Speed Square: Helps mark straight cross-cuts quickly and check 90-degree corner joints.
- Measuring Tape and Chalk Line: Ensures consistent layout lines along your perimeter rim joists.
- Personal Safety Gear: Eye protection, ear protection, and sturdy work gloves are mandatory whenever operating cutting machinery.
Selecting the Best Lumber and Materials
Your material selection dictates your structure’s lifespan, maintenance needs, and total project cost. Choosing wood grade or composite alternatives carefully ensures your work lasts through severe seasonal weather variations.
Pressure-Treated Southern Yellow Pine
Pressure-treated pine is the most economical and widely available structural wood on the market. Chemical treatment protects the internal fibers against rot, insect infestation, and fungal decay. However, wet-treated lumber contains high moisture levels when purchased, requiring a few months of drying time before accepting paint or stain coats.
Natural Cedar and Redwood
Cedar and redwood offer gorgeous natural grain, rich color tones, and built-in resistance to decay thanks to natural tannic oils. While more expensive than pressure-treated options, cedar remains lightweight, resists warping, and smells wonderful. Regular oil sealing maintains its vibrant red-gold hues; otherwise, it naturally ages into a silver-gray patina.
Composite and Aluminum Alternatives
If you want to avoid yearly sanding, staining, and board replacements, composite and aluminum materials provide long-lasting convenience. Synthetic products engineered by brands resist splintering, staining, and fading, cleaning up easily with standard soap and water.
Step-by-Step Construction Overview
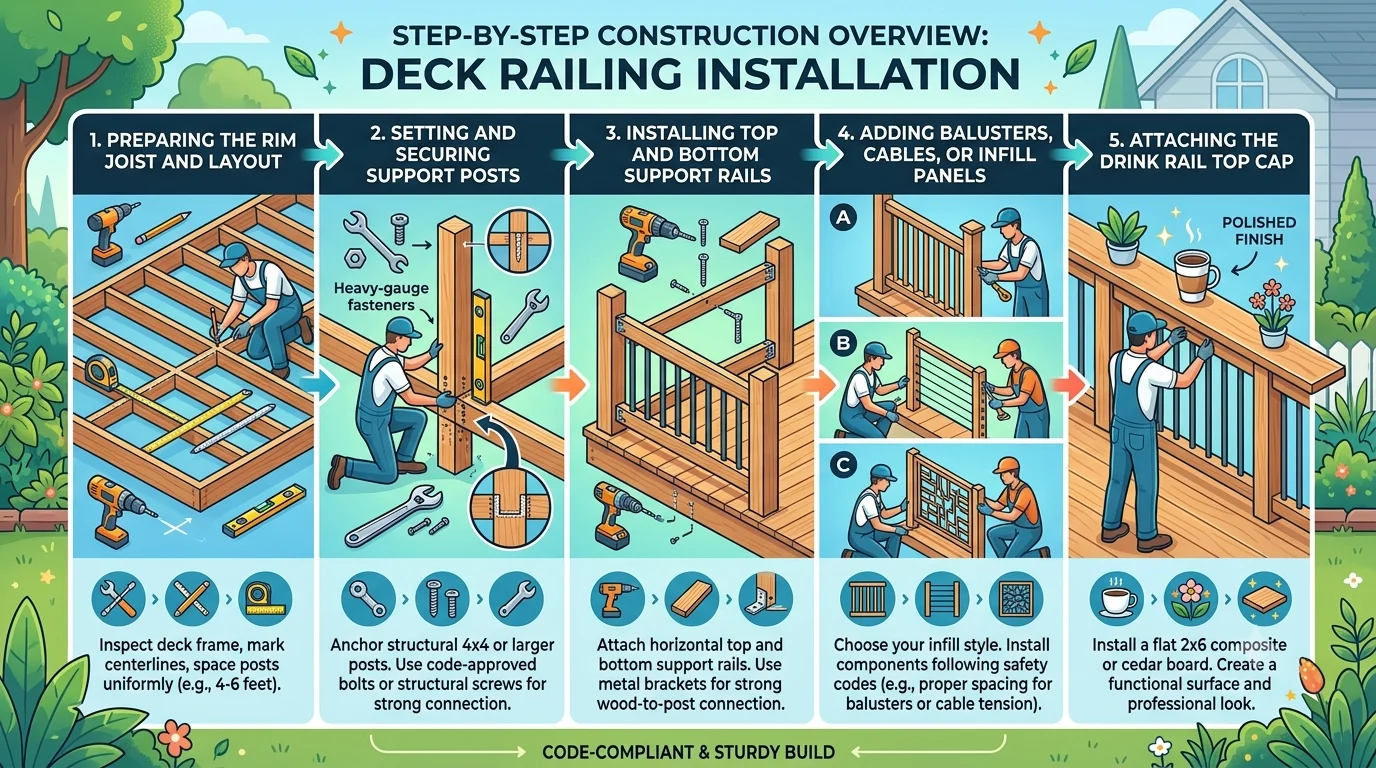
While every design features unique assembly details, standard installation follows a clear logical sequence. Master these fundamental construction phases to execute your project flawlessly.
Preparing the Rim Joist and Layout
A barrier is only as strong as its attachment points. Frame posts must fasten directly into the structural deck frame rather than top deck boards. Inspect your perimeter rim joists to confirm the wood is solid, free of rot, and reinforced with internal blocking wherever posts will sit.
Snap a chalk line along the perimeter edge to mark where each post center belongs. Keep spans between posts uniform, usually between 4 and 6 feet apart, to ensure structural rigidity and balanced visual appeal.
Setting and Securing Support Posts
Corner and intermediate 4×4 posts carry structural loads. Never rely on standard deck screws alone to attach structural posts to framing. Use heavy-gauge, hot-dipped galvanized through-bolts or code-approved structural ledger fasteners with wide washers.
- Notch posts slightly only if permitted by local building codes; solid unnotched posts fastened to the interior rim joist provide superior lateral strength.
- Use temporary wood diagonal braces to hold posts plumb while checking alignment with a spirit level.
- Tighten structural bolts down firmly against joist framing until post movement is completely eliminated.
Installing Top and Bottom Support Rails
Once posts stand rigid, install horizontal 2×4 framing rails running between posts. Angle-drive heavy stainless structural screws through metal mounting brackets attached to the posts. Using dedicated steel brackets adds structural reinforcement and simplifies alignment for solo builders.
Keep the bottom rail positioned roughly 2 to 3 inches above the deck floorboards. This gap prevents leaf debris and snow build-up while keeping the clearance well under the critical 4-inch maximum code limit.
Adding Balusters, Cables, or Infill Panels
With the framework established, install your chosen infill material. For vertical wood or metal pickets, attach individual balusters using pre-spaced connectors or direct face-screwing methods.
For cable systems, drill straight pass-through holes through intermediate posts, feed stainless cables through, install end fittings, and tighten tension turnbuckles evenly from the center cables working outward. Use a tension gauge to ensure cables stay taut enough to pass safety inspections.
Attaching the Drink Rail Top Cap
A wide flat top rail—often called a “drink rail”—adds functionality and polished visual appeal. Fasten a flat 2×6 composite or cedar deck board horizontally across the top of your posts and top support rail. This creates a flat, comfortable surface perfect for placing beverages, small potted plants, or resting your arms while enjoying the view.
Pro Secrets for a Professional Finish
Small craftsmanship details separate average amateur builds from jaw-dropping custom projects. Incorporate these clever techniques to elevate your final results:
- Pre-Drill All Screw Holes: Avoid splitting board ends or snapping fastener heads by taking time to pre-drill pilot holes through all timber components.
- Incorporate Low-Voltage Cap Lighting: Install solar or low-voltage LED post cap lights from suppliers. They add ambient evening illumination and highlight pathways safety without complex electrical wiring.
- Apply High-Performance Sealants: If using natural wood, seal cut ends with clear wood preservative during construction to block moisture intrusion inside hidden joints.
- Use Stainless or Coated Fasteners: Cheap drywall screws rust quickly, stain timber, and snap under pressure. Always specify exterior-rated stainless steel or ceramic-coated deck screws.
Maintenance Tips to Protect Your Investment
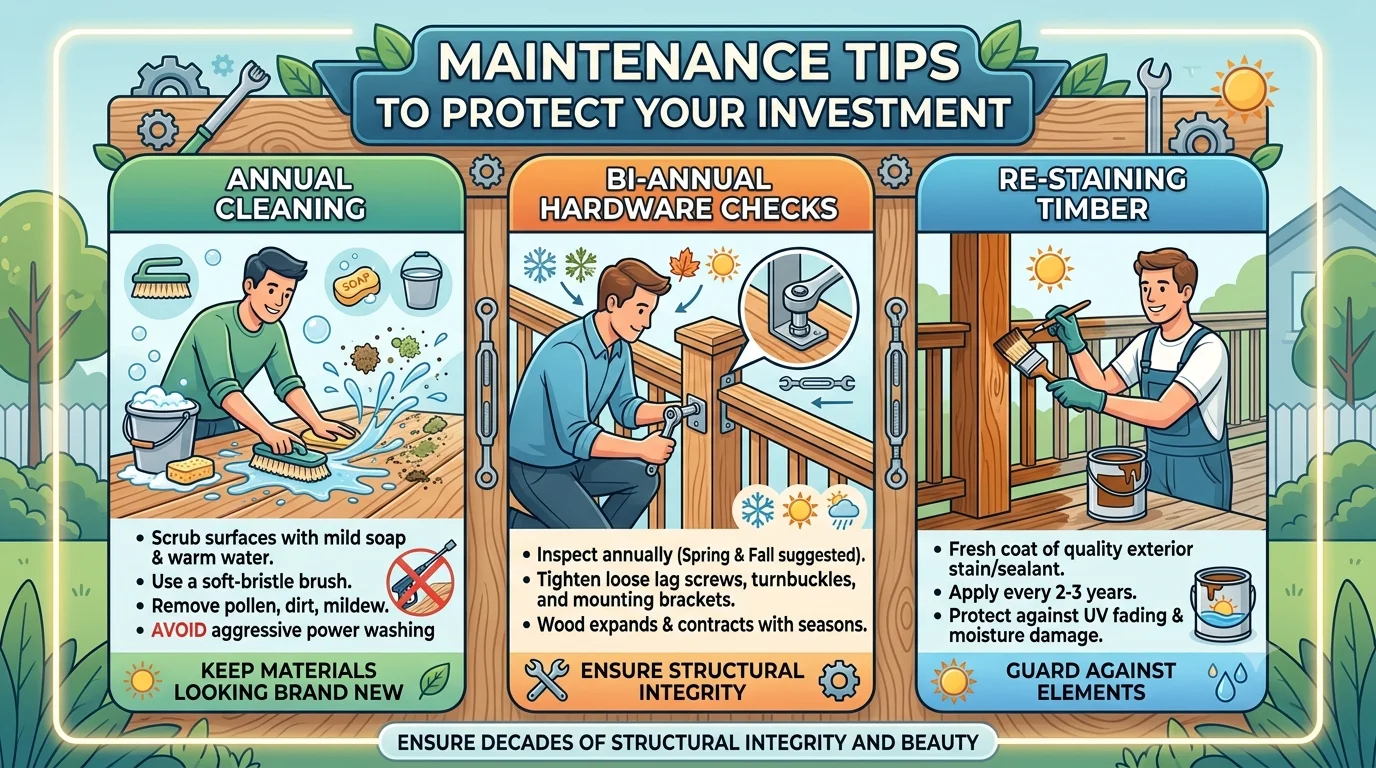
Protecting your project ensures its structural integrity and beauty for decades. Adopt a simple seasonal routine to keep materials looking brand new:
- Annual Cleaning: Scrub surfaces with mild soap, warm water, and a soft-bristle brush to remove pollen, dirt, and mildew accumulation. Avoid aggressive power washing settings that can gouge soft wood grain.
- Bi-Annual Hardware Checks: Wood expands and contracts through natural seasonal cycles. Inspect lag screws, turnbuckles, and mounting brackets annually, tightening loose fittings as needed.
- Re-Staining Timber: Natural wood barriers typically require a fresh coat of quality exterior stain or water-repellent sealant every two to three years to guard against UV fading and moisture damage.
Conclusion: Ready to Upgrade Your Outdoor Living Space?
Upgrading your deck with custom DIY railings is one of the most rewarding home improvements you can undertake. It redefines your outdoor living aesthetic, improves safety, and adds real value to your property—all while saving thousands of dollars in contractor fees.
Choose a style that matches your home’s personality, plan your layout carefully according to local codes, and tackle assembly one step at a time. With basic tools, quality hardware, and a bit of weekend effort, you can transform your backyard deck into a stunning outdoor retreat you will enjoy for years to come.