Creating your own barn door can be a rewarding and satisfying woodworking project. Before you jump into the fun part of crafting, it is vital to choose the right materials. The type of wood you use significantly affects the durability, appearance, and overall success of your barn door. When searching for DIY Barn Door Woodworking Plans, consider these essential materials:
- Wood Type: Select the best wood species that meet your design preferences and functional needs.
- Hardware: Invest in quality barn door hardware for smooth operation.
- Finish: Choose a finish that enhances the wood’s beauty while providing protection.
Here’s a detailed look at each category to help you make informed choices: Wood is the heart and soul of any woodworking project. For barn doors, you have several options:
- Pine: Affordable and readily available, pine is great for beginners. It’s easy to work with and can be painted or stained.
- Oak: Known for its strength and durability, oak offers a beautiful grain. This wood is a good choice for those wanting a rustic look that lasts.
- Cedar: Lightweight and naturally resistant to decay, cedar is perfect for outdoor barn doors. Its rich color provides a natural aesthetic.
- Maple: If you’re after a sleek and modern look, maple has an even texture that’s perfect for staining.
As you consider your wood choices, also think about the following factors: Cost: Some woods are pricier than others. Evaluate your budget before committing. Availability: Check local lumber yards or online retailers for the woods you want. Workability: Some woods are easier to cut and assemble than others, especially for beginners.
Next on your list is the hardware. High-quality hardware ensures your barn door operates smoothly. Here’s a breakdown of the essential components: Track System: This allows the door to slide. Choose a sturdy system that can support the weight of your door. Hangers: These are attached to the door and slide along the track. Ensure they fit securely and are durable. Stops: Install these to prevent the door from sliding off the track. Pull Handles: The right handles not only serve a functional purpose but also add to the aesthetics of your barn door. For detailed plans and quality hardware options, websites like Home Depot and Lowe’s offer ample resources.
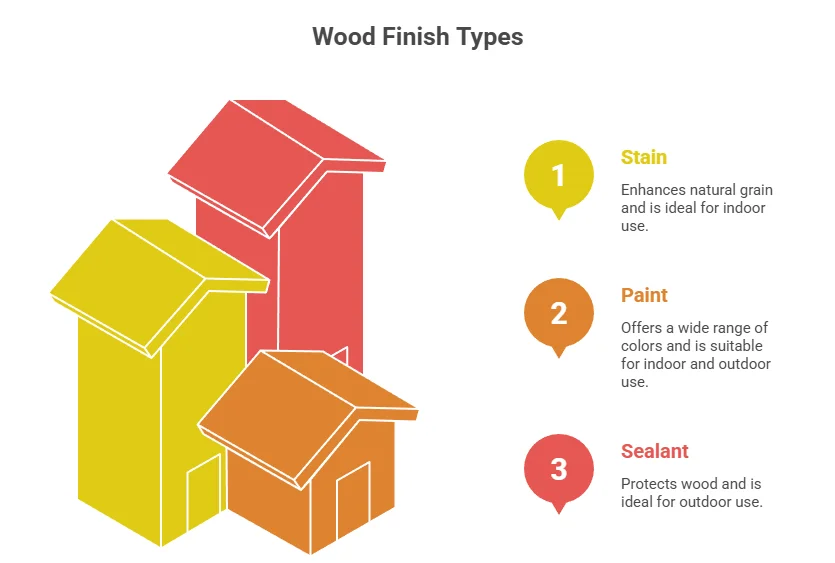
Once you have your wood and hardware in mind, the finish can transform your project. A good finish protects the wood and enhances its natural beauty. Here are a few options: Stains: Different stains can highlight the wood grain. Consider how dark or light you want the finish. Paint: This is a great option for a complete color change. Opt for exterior paint if your barn door faces the elements. Sealants: If you choose not to stain or paint, a clear sealant will protect the wood without altering its natural look.
| Finish Type | Benefits | Ideal For |
|---|---|---|
| Stain | Enhances natural grain | Indoor use |
| Paint | Wide range of colors | Indoor and outdoor use |
| Sealant | Protects wood | Outdoor use |
Before you start shopping, it’s beneficial to plan out your barn door design. Consider dimensions and the style you want. You can find many DIY Barn Door Woodworking Plans on sites like Ana White and Instructables. These resources will guide you through the design and construction process. Your barn door project can serve various purposes, from creating a stylish room divider to enhancing your home’s exterior. By carefully selecting the right materials, you can ensure that your barn door is not only beautiful but also functional and durable.
Step-by-Step Guide to Building a Rustic Barn Door
Building a rustic barn door adds charm to your home, offering both functionality and aesthetic appeal. This guide walks you through the step-by-step process, providing you with the essential plans and techniques for crafting your very own barn door. With just a few tools and materials, you can transform your space with this trendy design.
Tools and Materials You’ll Need
Before getting started, gather the following tools and materials:
- Wood planks (choose reclaimed wood or new lumber)
- Circular saw or hand saw
- Screws and wood glue
- Drill
- Measuring tape
- Sandpaper (grit 80 and 220)
- Wood finish or paint
- Barn door hardware (track, rollers, etc.)
Step 1: Measure Your Doorway
Begin by measuring the dimensions of your doorway. Take note of the height and width, as this will determine how big your barn door will be. To ensure a good fit, consider adding a few extra inches to both measurements for clearance. This step is essential for achieving a professional look in your project.
Step 2: Select Your Wood Type
Your choice of wood significantly affects the final appearance of your barn door. Common options include: Pine: Lightweight and affordable, perfect for beginners. Oak: Durable and attractive with a unique grain pattern. Reclaimed Wood: Eco-friendly choice with rustic charm. Choose wood that suits your style and fits your budget.
Step 3: Cut the Wood Planks
Using your circular saw or hand saw, cut the wood planks to the desired size. Typically, a barn door consists of several vertical planks with horizontal support beams. A common design has three horizontal beams for added stability. Ensure all cuts are straight and clean for best results.
Step 4: Assemble the Door
Lay out the planks on a flat surface. Position the horizontal support beams across the back of the vertical planks, forming a frame. Secure the planks using screws and wood glue, ensuring they are tight and even. Allow the glue to dry completely before proceeding to the next step.
Step 5: Sand the Surface
Once the assembly is complete, sand the entire surface of the door. Start with a coarse grit (80) to remove any rough edges, then finish with a finer grit (220) for a smooth surface. This meticulous step will ensure a polished finish and allow paint or stain to adhere properly.
Step 6: Apply Finish or Paint
Choose whether to stain or paint your barn door. A stain brings out the natural beauty of the wood, while paint can match or complement your home’s decor. Apply an even coat, allowing it to dry fully before adding a second coat if necessary. Consider using a clear sealant for extra protection against wear.
Step 7: Install the Hardware
Installing the barn door hardware can be a bit tricky, but it’s crucial for proper functionality. Follow the manufacturer’s instructions to install the track and rollers: Attach the track to the wall. Install the rollers onto the top of your door. Hang the door on the track, ensuring it glides smoothly.
Step 8: Final Adjustments
Once installed, check that the door slides without obstruction. Make any necessary adjustments to the track or rollers to ensure smooth operation. This final check will make your barn door a joy to use.
Design Inspiration: Creative Styles for Your Barn Door

Creating a barn door can enhance your home’s charm and functionality. However, selecting the right design that matches your style is just as important as the construction itself. Let’s explore some creative styles for your barn door that will elevate your interior or exterior space.
Rustic Charm
If you adore a cozy, inviting atmosphere, rustic barn doors are a perfect choice. Made from reclaimed wood or rough-hewn planks, these doors embody natural beauty. You can even keep the original textures and colors to enhance their character. Adding metal hardware, like wrought iron pulls, can elevate the rustic feel.
Modern Minimalist
For a sleek, contemporary touch, opt for a modern minimalist barn door. This style often features smooth, simple lines with a flawless finish. Materials like plywood or MDF work well here. You can choose solid colors or even a gloss finish for a chic effect. Pair it with minimalist hardware to maintain the streamlined aesthetic.
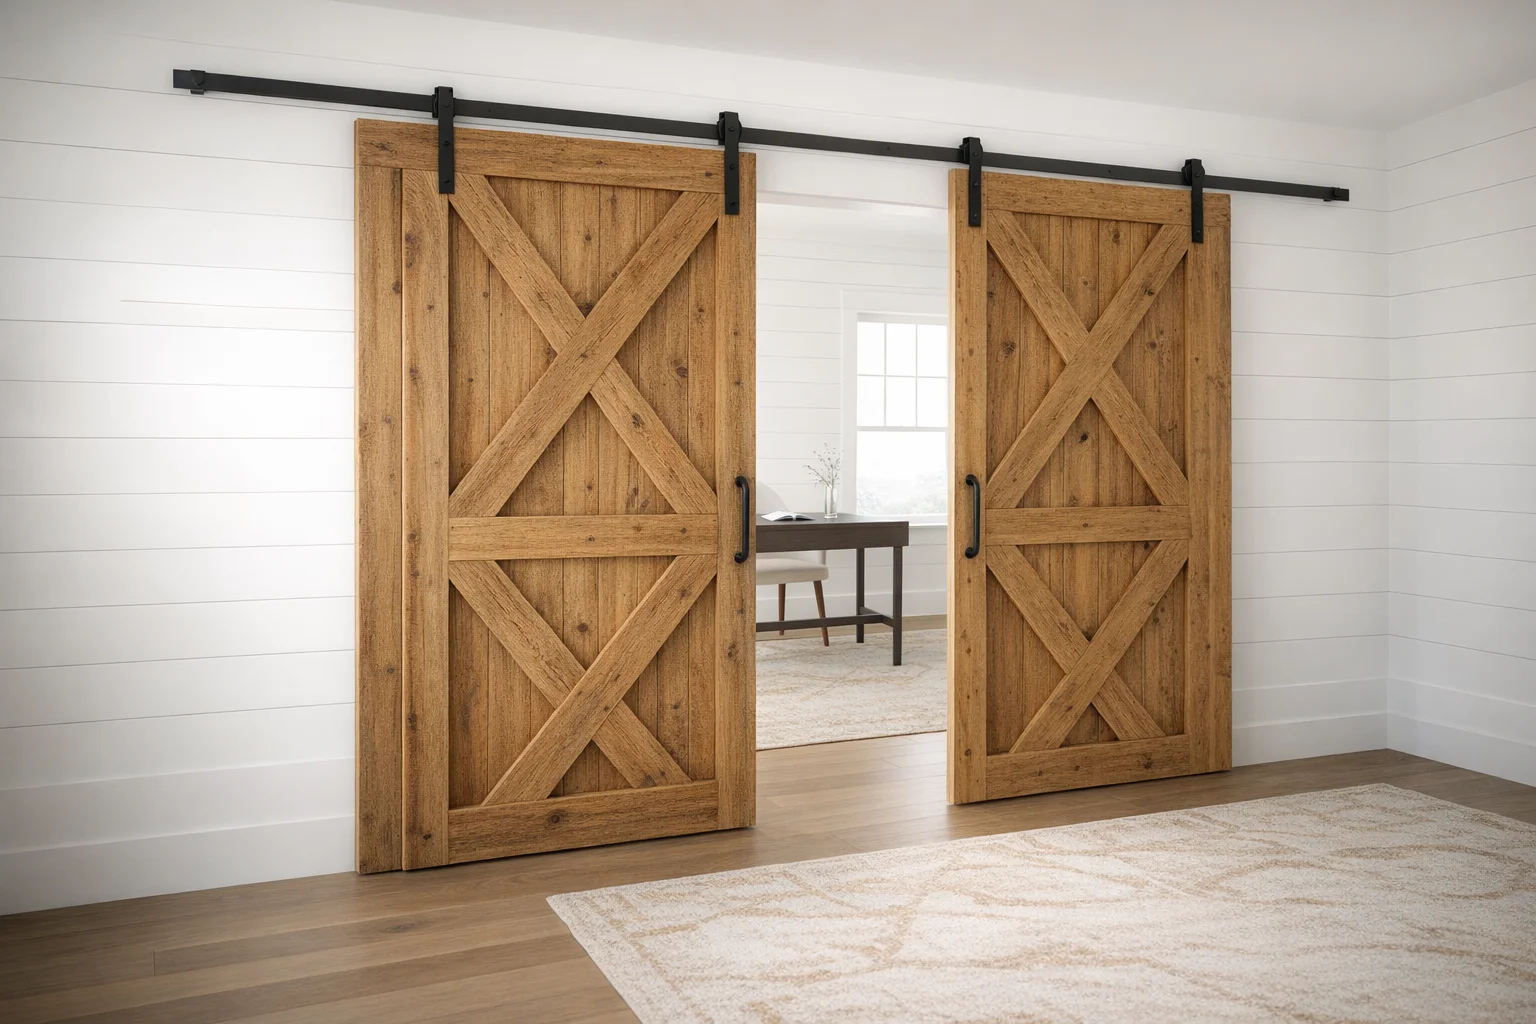
Farmhouse Style
The farmhouse style combines comfort with practicality. Characterized by open spaces and warm hues, a barn door in this style usually features traditional designs with a cross-frame pattern. Paint the door in soft pastels or muted tones for that classic look. Use farmhouse-style accents such as wooden knobs to complete the design.
Industrial Edge
If you’re drawn to an industrial theme, a barn door made from metal or a mix of wood and metal can bring an urban touch to your space. Choose darker finishes and consider incorporating elements like oversized wheels or pipes as sliding mechanisms. This style pairs well with exposed brick walls and concrete flooring, creating a striking contrast.
Glass and Frame
Glass barn doors are an excellent way to add an airy feel to your home while maintaining easy access between rooms. These doors often feature wooden frames that hold clear or frosted glass panes. Choose frosted glass for privacy, or clear glass for an open look. This design works wonderfully in spaces where light flow is essential, like between a living room and a sunroom.
Colorful Statements
Don’t shy away from color! A boldly painted barn door can serve as a stunning focal point in your home. Think about deep blues, rich greens, or even cheerful yellows. Choosing a vibrant color can frame the entryway beautifully and add vibrancy to your decor. Be sure to paint surfaces with weather-resistant finishes if the door is outdoor-oriented.
Traditional Style
For a timeless approach, consider traditional designs that reflect classic carpentry techniques. These doors often feature raised panels, beadboard accents, or intricate carvings. They work incredibly well in cozy settings and can even be integrated with vintage furnishings for a harmonious look.
How to Choose the Right Style
When selecting the design for your barn door, consider the following: Space: Think about the room’s size and layout. Larger doors can make a bold statement, while smaller ones can complement the existing decor. Functionality: Determine how often the door will be used. If it’s a high-traffic area, choose harder-wearing materials. Complementary Décor: Ensure that the barn door style enhances your existing decor. This could involve matching your door’s color with wall art or furniture.
Creative Design Tips
Here are some additional tips to spark your creativity: Mix Materials: Don’t hesitate to combine wood with other materials like metal or glass for a unique look. Accessorize: Consider adding unique handles or locks that match your style. Personal Touch: Customize your barn door with stenciling or personalized artwork for a unique flair. To help you further, you can explore DIY Barn Door Woodworking Plans and find project inspiration. Websites such as Home Depot and Ana White offer great resources for designs and building guidelines. With these ideas, you can create a stunning barn door that reflects your personality and complements your home’s overall theme. Happy building!
Tools and Techniques Every DIYer Should Know for Barn Door Projects
Building a barn door can add charm and functionality to your home. However, accomplishing this DIY project requires knowledge of the right tools and techniques. Familiarity with the right equipment can make all the difference in achieving a polished finish. Here are the essential tools and techniques that will take your barn door project to the next level.
Essential Tools for Barn Door Projects
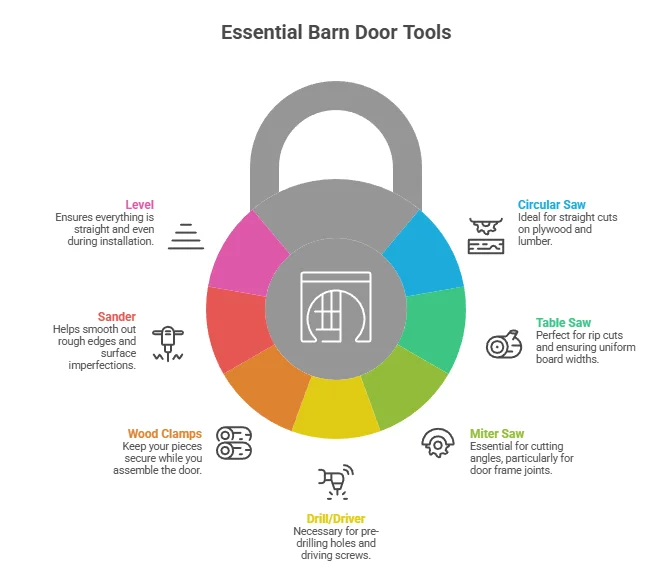
Having the right tools is crucial for any woodworking project. Here’s a list of tools you should consider when undertaking a barn door project:
- Circular Saw: Ideal for making straight cuts on plywood and lumber. Ensure you adjust the depth accurately to prevent splintering.
- Table Saw: Perfect for rip cuts and ensuring uniform board widths. It delivers accuracy and speed.
- Miter Saw: This tool is essential for cutting angles, particularly for the door frame joints.
- Drill/Driver: Necessary for pre-drilling holes and driving screws. A cordless option offers flexibility and mobility.
- Wood Clamps: These keep your pieces secure while you assemble the door, ensuring a clean and stable build.
- Sander: A power sander or hand sander will help smooth out rough edges and surface imperfections.
- Level: To ensure everything is straight and even, use a level during installation.
Wood Selection Techniques
Choosing the right type of wood is essential for both aesthetics and durability. Common wood types for barn doors include: Pine: Affordable and easy to work with, pine is a popular choice for DIY barn doors. Oak: This hardwood is durable but comes at a higher price point. Its grain patterns can add a beautiful touch. Maple: Known for its strength and rich color, maple can elevate the look of your barn door. Reclaimed Wood: For a rustic feel, incorporating reclaimed wood can add character and history to your project.
Key Techniques for Assembly
With your tools and wood ready, it’s time to focus on techniques to ensure a successful build. Measuring and Cutting: Accurate measurements are the backbone of any woodworking project. Here’s how to do it right: Measure twice and cut once to avoid mistakes. Use the correct measuring tape and mark with a pencil for visibility. When cutting, support the wood properly to prevent splintering.
Assembly Methods: Following a clear plan during assembly can save time and effort: Assemble the frame first, attaching the vertical pieces to the horizontal top and bottom pieces. Secure the boards using wood glue and screws for added stability. Consider using pocket holes for a cleaner, hidden fastener look.
Finishing Touches: Once assembled, it’s time to finish your barn door: Sanding: Ensure all surfaces are smooth to the touch. Staining or Painting: Choose a finish that complements your home’s décor. Sealing: Seal your door to protect it from moisture and wear, especially if it’s located in a humid area.
Installation Techniques: When it comes time to install the barn door, precision is key. Here’s a quick guide: Use a header board to mount the track securely to the wall. Ensure the track is level and straight before securing. Attach the door hardware according to the manufacturer’s instructions for smooth operation. After all these detailed steps, you’re finally ready to enjoy your beautiful DIY barn door. For more detailed woodworking plans and guides, you can check out Wood Magazine or Popular Woodworking for inspiration. By using the right tools and mastering essential techniques, you can create a stunning barn door that fits perfectly in your space. Happy building!
Maintenance and Care Tips for Your Finished Barn Door

After you’ve built your beautiful barn door using DIY Barn Door Woodworking Plans, it’s essential to keep it in top-notch condition. Maintenance and care play a significant role in preserving the longevity and appearance of your barn door. Whether it’s made of wood, metal, or a mix of materials, following these tips will ensure your investment remains as stunning as the day you completed it.
Inspection and Cleaning
Regular inspection and cleaning can prevent issues before they become serious problems. Here’s what you need to do: Monthly Inspections: Look for signs of wear and tear. Check the hinges, tracks, and any hardware for rust or damage. Clean with Care: Use a soft damp cloth to wipe down the surface. For wooden doors, avoid soaking it with water. Instead, use a gentle wood cleaner. Remove Dust: Ensure that you dust regularly to minimize dirt buildup, especially in grooves and hardware.
Lubrication
Keeping the barn door hardware moving smoothly is essential for functionality. Here’s how to handle lubrication: Friction Points: Apply a silicone-based lubricant to hinges and tracks. Avoid oil-based products as they can attract dust and grime. Frequency: Lubricate at least twice a year to ensure smooth operation.
Weather Protection
Weather can take a toll on your barn door, especially if it’s made of wood. Protect it by: Sealing and Staining: Use a high-quality sealant or stain to repel moisture. Reapply every couple of years for the best protection. Watch Humidity Levels: Use a dehumidifier in damp areas to prevent warping and mold.
Repairing Scratches and Dings
Your barn door may experience scratches or dings over time. Here’s how to remedy that: Wood Filler: For wooden doors, a wood filler can fill in deep scratches. Follow it up with a matching stain or paint. Metal Doors: For metal doors, use a rust-inhibiting primer and paint to cover scratches and prevent rust.
Climate Considerations
Different climates can require varied care for your barn door.
| Climate Type | Maintenance Tips |
|---|---|
| Wet and Humid | Seal doors every year and minimize water exposure. |
| Dry and Sunny | Check for cracking and apply protective finishes regularly. |
| Cold and Icy | Lubricate hinges more frequently to prevent freezing. |

Hardware Maintenance
Hardware parts are an essential component of your barn door. To maintain them: Check Screws and Bolts: Ensure all screws are tight. Loose bolts can lead to misalignment and malfunction. Replace Worn Out Parts: If you notice any rusted or broken parts, replace them promptly to ensure safety and functionality.
Professional Help
Sometimes, your barn door may need professional assistance. Seek experts for: Adjustment of misaligned doors, handling extensive repairs, and evaluating and reinforcing structural issues. Maintaining your barn door effectively requires regular care, attention to detail, and a few simple practices. Regularly inspecting, cleaning, lubricating, and addressing any cosmetic or structural issues will help you enjoy the beauty and functionality of your barn door for years to come. For more tips and resources about barn door care, check out Barn Conversions and JL Woodworks. They offer valuable information that can help you keep your barn door looking great.
Conclusion
Creating your own barn door can be a rewarding project that not only enhances the beauty of your space but also adds a personal touch to your home. By carefully choosing the right materials, you can ensure durability and aesthetics that complement your design vision. Following a step-by-step guide simplifies the building process and helps you achieve a professional finish, even if you’re a novice woodworker. Exploring various design inspirations can spark your creativity, allowing you to tailor your barn door to match your unique style, whether it’s rustic, modern, or somewhere in between.
Remember that the right tools and techniques are crucial for success. Familiarizing yourself with essential woodworking tools will empower you to tackle the project confidently and safely. Once your barn door is complete, maintaining its beauty is key. Regular cleaning and periodic checks for wear and tear are important steps to ensure your door remains functional and stunning for years to come. By following these DIY Barn Door Woodworking Plans, not only will you achieve a beautiful addition to your home, but you’ll also gain valuable skills along the way. Take pride in your hard work, and enjoy the compliments that come your way as your new barn door becomes the centerpiece of your space. Happy building!