 ATTENTION: World's Largest Collection of 16,000 Woodworking Plans!
Stop struggling with incomplete plans that waste your time and money!
Step-by-step instructions that make woodworking super easy, even for beginners
Detailed schematics, cutting lists, and materials lists for every project
Get new plans monthly for life - no recurring fees or hidden costs
Request custom plans for your unique projects at no extra charge
Get 4 valuable bonuses including woodworking guides and business tips
GET INSTANT ACCESS NOW!
ATTENTION: World's Largest Collection of 16,000 Woodworking Plans!
Stop struggling with incomplete plans that waste your time and money!
Step-by-step instructions that make woodworking super easy, even for beginners
Detailed schematics, cutting lists, and materials lists for every project
Get new plans monthly for life - no recurring fees or hidden costs
Request custom plans for your unique projects at no extra charge
Get 4 valuable bonuses including woodworking guides and business tips
GET INSTANT ACCESS NOW!
When embarking on the journey of building a crib, understanding the essential features of effective Crib Woodworking Plans is crucial. These plans serve as a roadmap, guiding you through each step of the construction process. Having detailed and well-structured plans ensures that you create a safe and sturdy crib for your child. Here are some key characteristics that every good Crib Woodworking Plans should include.
Detailed Measurements
One of the most critical aspects of Crib Woodworking Plans is precise measurements. Each dimension should be outlined clearly to avoid any confusion during the building process. Lack of accurate measurements can lead to safety hazards or design flaws. Make sure your plans provide:
- Overall dimensions of the crib
- Specifications for each wooden panel
- Measurements for the mattress platform
- Detailed cut lists
Material Specifications
Effective Crib Woodworking Plans should specify the type of wood and other materials needed. Different types of wood have varying strengths, durability, and aesthetics. Commonly used materials for cribs include:
- Hardwoods like oak, maple, or cherry for durability
- Plywood for strength and affordability
- Non-toxic finishes to ensure safety for your baby
A clear list of materials helps you gather everything you need before starting your project, saving time and effort later on.
Step-by-Step Instructions
Well-structured plans must include clear, step-by-step instructions. This feature is essential for both beginners and experienced woodworkers. Here are some elements to look for:
- Sequential actions: Each step should logically follow the previous one.
- Visual aids: Diagrams or photographs that illustrate the process can be incredibly helpful.
- Troubleshooting tips: Anticipating common mistakes can save you from costly errors.
Safety Standards
Crib Woodworking Plans should incorporate safety standards recommended by organizations like the Consumer Product Safety Commission (CPSC). It’s vital that the crib you build offers your child a safe sleeping environment. Key safety features include:
- Proper spacing between slats to prevent entrapment
- Sturdy construction to handle the weight of a growing child
- Non-toxic materials that are safe for babies
Always check the latest safety guidelines to ensure your crib meets current standards.
Adaptability and Customization
A great set of woodworking plans should allow room for adaptability. You might want to customize the crib to fit your specific style or needs. Consider plans that offer:
- Options for different finishes or paint colors
- Ways to convert the crib into a toddler bed in the future
- Adjustable mattress heights to accommodate your growing baby
Customization options can transform your project into a unique piece tailored for your nursery.
Access to Resources
Effective Crib Woodworking Plans should direct you to resources that enhance your woodworking experience. Links to instructional videos, forums, or woodworking calculators can be invaluable. A few helpful resources include:
These resources provide additional information, tips, and community support to boost your woodworking skills.
Effective Crib Woodworking Plans should incorporate detailed measurements, specify materials, provide step-by-step instructions, outline safety standards, offer customization options, and grant access to valuable resources. By making wise choices and following these features, you can create a beautiful and safe crib for the little one in your life.
Safety Considerations When Building a Crib
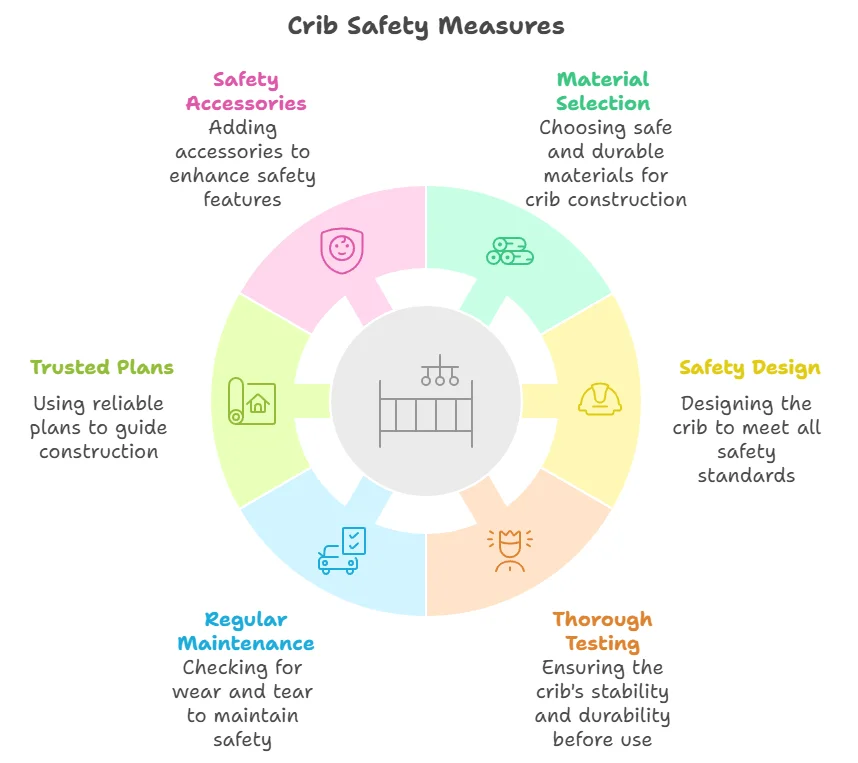
Building a crib is a rewarding project that can add a personal touch to your nursery. However, ensuring the safety of your design is absolutely critical. Following established safety guidelines can help protect your little one and give you peace of mind. Here are some key safety considerations when building a crib.
Choosing the Right Materials
Make sure to select safe materials for your crib. Avoid using softwoods like pine, as they can splinter easily. Instead, opt for hardwoods such as oak or maple, which provide better durability. Be cautious with the finish you choose; it should be non-toxic and child-safe. Look for finishes that are free of volatile organic compounds (VOCs) to make sure they won’t harm your baby’s health.
Designing for Safety
While the aesthetic of the crib is important, safety must be your top priority. Consider the following design features:
- Slat Spacing: Ensure that the distance between the slats is no more than 2 3/8 inches. This prevents your baby’s head from getting trapped.
- Stable Base: The base of the crib should be sturdy and stable. A solid construction prevents tipping over as your baby grows and starts to move.
- Corner Posts: Keep corner posts flush with the sides of the crib. If they stick out, clothing or blankets can get caught, posing a strangulation hazard.
- Height Adjustment: Build adjustable mattress heights so you can lower the mattress as your baby grows and becomes active.
Testing the Crib
Once you have built your crib, rigorous testing is essential to ensure that it meets safety standards. Here’s what you need to do:
- Check for Stability: Push down on various points of the crib to see if it wobbles. It should remain sturdy and stable.
- Inspect for Sharp Edges: Sand down all sharp edges and corners. Use a fine-grit sandpaper to ensure everything is smooth.
- Load Testing: Use weight (like heavy pillows) to simulate baby weight, ensuring that the crib can handle the pressure without bending or breaking.
Regular Maintenance Checks
After building your crib, regular maintenance is crucial for ongoing safety. Check the following items frequently:
- Screws and Bolts: Inspect all screws and bolts for tightness. Re-tighten them as needed to ensure stability.
- Finish Wear: Look for any worn-out areas in the finish. If found, consider refinishing to protect against splinters and toxins.
- Mattress Fit: Ensure that the mattress fits snugly against the sides of the crib. Gaps can be dangerous.
Finding Trusted Plans
When searching for Crib Woodworking Plans, make sure to use resources that prioritize safety. Websites dedicated to woodworking often offer plans that are pre-tested for safety risks. Look for plans with clear guidelines on safety standards. Trusted sites such as Wood Magazine can provide reliable plans.
Safety Accessories
In addition to building a safe crib, consider the use of accessories that enhance safety:
- Safety Rail: A safety rail can prevent your baby from rolling out of bed as they grow.
- Crib Mattress: Choose a firm, snug mattress designed specifically for cribs to offer maximum support.
Choosing the Right Wood for Your Crib Project
Are you ready to create a beautiful crib for your little one? Choosing the right wood is one of the most essential steps in your Crib Woodworking Plans. The material you select impacts not only the durability and aesthetics but also the safety of your crib. Here’s a guide to help you navigate through the wood selection process.
Why Choose the Right Wood
Using the appropriate wood can make a significant difference in how the crib turns out. The main considerations include:
- Strength and Stability
- Safety and Non-toxicity
- Cost-effectiveness
- Ease of Workability
Popular Wood Types for Crib Projects
Let’s delve into some of the preferred wood choices for crib construction:
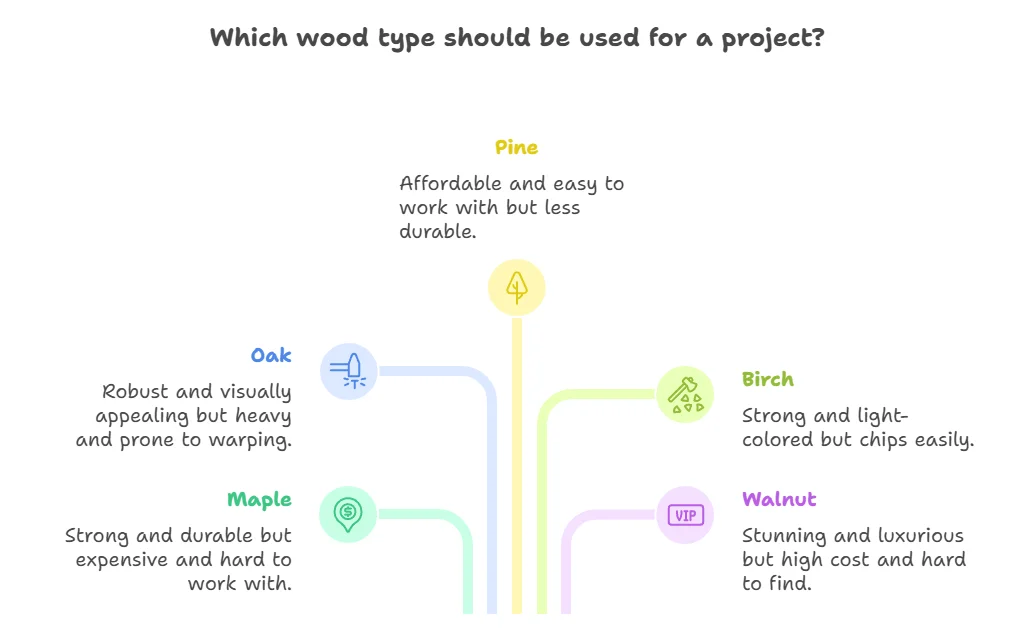
| Wood Type | Pros | Cons |
|---|---|---|
| Maple | Very strong and highly durable; resists wear and tear well | More expensive; harder to work with due to density |
| Oak | Robust and sturdy; great for heavy use; visually appealing grain | Can be heavy; tends to warp if not dried properly |
| Pine | Affordable; lightweight and easy to work with; smooth finish | Less durable; softer wood may dent easily |
| Birch | Strong and excellent for stabilization; light color enhances appeal | Can chip easily; requires careful handling |
| Walnut | Stunning color variations; adds luxury feel; strong grain | High cost; more difficult to find |
Factors to Consider When Choosing Wood
Beyond just the type of wood, there are other important factors to consider to ensure you pick the right option:
- Safety: Make sure the wood is free of harmful chemicals. Look for options labeled as non-toxic. Finishing products should also be safe for children.
- Finish: A smooth, splinter-free finish is crucial. Any rough edges or surfaces could pose a safety hazard.
- Grain and Appearance: Choose a wood that will appeal to your nursery’s theme. Woods like walnut offer a rich, deep color, while maple or birch provide a lighter, more neutral appearance.
- Availability: Depending on your location, some woods might be easier to source than others. Consider shopping locally to reduce cost and ensure quality.
Where to Find Quality Wood
To start your crib woodworking project, find reliable sources for your wood. Consider visiting:
- Woodworkers Source – A great option for various hardwoods.
- Lumber Liquidators – Offers both softwoods and hardwoods at competitive prices.
- Rockler – Known for high-quality wood and tools.
Connecting with Other Woodworkers
Engaging with a community of woodworkers can provide you with insights and support during your crib project. Online forums and local woodworking clubs can be invaluable. Websites like Woodworking Talk and Reddit Woodworking have enthusiastic members willing to share their experiences and advice.
Your choice of wood for Crib Woodworking Plans is central to your overall success in crafting a safe and beautiful nursery piece. By understanding the strengths and weaknesses of different materials, you can make an informed decision that not only suits your aesthetic vision but also prioritizes your child’s safety and comfort.
Step-by-Step Guide to Assembling Your Crib
Assembling a crib can seem like a daunting task, especially if you’re new to woodworking. With a clear step-by-step guide, however, you can make the process straightforward and enjoyable. Below are the essential steps you need to follow, ensuring that you construct a safe and sturdy crib for your little one.
Gather Your Tools and Materials
Before starting, ensure you have all the necessary tools and materials within reach. You will typically need:
- Wooden crib components (side rails, headboard, footboard, slats)
- Wood screws
- Wood glue
- Drill
- Screwdriver
- Measuring tape
- Spirit level
- Sandpaper
- Safety goggles
- Gloves
Prepare the Work Area
Choose a spacious, well-lit workspace where you can assemble the crib without distractions. Clear the area of any clutter to minimize the risk of accidents. Make sure that you have your plans or instructions handy, so you can refer to them as needed. Safety is crucial, so wear your safety goggles and gloves before you dive in.
Start with the Base
Many Crib Woodworking Plans will start by constructing the base. Follow these steps:
- Lay down the footboard and headboard flat on the ground.
- Connect the side rails to the headboard and footboard using wood screws. Ensure that each screw is tightened properly to prevent any wobbling.
- Use a spirit level to check that the base is even.
Attach the Mattress Support
The mattress support is an important part of the crib, as it determines the height of the mattress. Here’s how to attach it:
- Locate the pre-drilled holes in the side rails.
- Place the mattress support brackets in these holes.
- Secure the brackets with screws, ensuring they are tightly fastened.
Install the Crib Slats
Crib slats are crucial for safety, as they keep the baby secure. To install them:
- Align the slats evenly between the side rails. Depending on your Crib Woodworking Plans, this might involve sliding them into grooves or securing them with additional screws.
- Check to ensure that the slats are no more than 2.5 inches apart, as this is the maximum spacing recommended for safety.
Final Assembly and Safety Check
Once the slats are installed, it’s time for the final assembly:
- Carefully flip the crib upright.
- Check that all screws and bolts are tightened securely.
- Inspect the crib for any sharp edges and sand down any rough spots using sandpaper.
Safety Guidelines
After you’ve assembled your crib, following these safety guidelines is essential:
- Always ensure the crib meets safety standards set by the Consumer Product Safety Commission.
- Regularly inspect the crib for any signs of wear and tear.
- Never place pillows, blankets, or soft toys in the crib with the baby.
Customizing Crib Designs for Unique Styles and Needs
When it comes to creating a safe and stylish space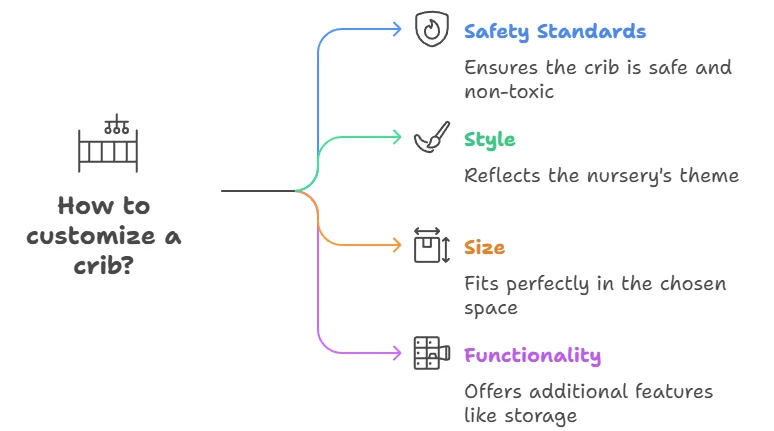 for your little one, customizing crib designs can make all the difference. Every family has unique needs and personal styles, which makes Crib Woodworking Plans an exciting challenge. Whether you’re a seasoned woodworker or a DIY novice, the ability to tailor a crib to fit your aesthetic and functional requirements is both fulfilling and practical.
One of the first steps in customizing your crib is to choose the right woodworking plans. Look for plans that are clear, detailed, and adaptable to your specific preferences. Websites like Wood Magazine provide comprehensive designs that cater to various styles and are suitable for different skill levels.
Here are some factors to consider when customizing your crib:
- Safety Standards: Ensure that your design adheres to safety guidelines. Cribs should have a secure structure with no sharp corners, and the materials used must be non-toxic.
- Style: Think about the overall theme of your nursery. Do you prefer a modern look, a rustic charm, or something eclectic? Your design can reflect this.
- Size: Measure the space where the crib will go. Customizing the dimensions helps to ensure that the crib fits perfectly in your chosen area.
- Functionality: Consider whether you want additional features like storage drawers or a convertible design that transforms into a toddler bed.
Once you’ve settled on these factors, you can move on to designing the crib itself. Draw a sketch based on your Crib Woodworking Plans, making notes of any adjustments you want to make. For instance, if you’ve chosen to go with a traditional style but want to add a modern twist, consider incorporating sleek lines or unique finishes. You could also introduce color through painted accents or cushions.
The choice of wood is another crucial aspect. Some popular options include:
| Wood Type | Characteristics |
|---|---|
| Maple | Durable and has a fine grain, ideal for elegant designs. |
| Pine | Budget-friendly and easy to work with, typically has a rustic charm. |
| Birch | Strong and versatile, great for contemporary designs. |
After selecting your wood, prepare your workspace. Make sure you have all your tools handy, like a saw, drill, and sander. Following your Crib Woodworking Plans, start cutting the pieces needed for the crib. Pay close attention to measurements to ensure everything fits well together.
Assembly is the most exciting part. Carefully put together the crib frame, attaching the sides, ends, and base securely. Use high-quality fasteners to guarantee the crib’s stability. If your plan includes features like adjustable mattress heights, now’s the time to install those components, ensuring they’re easy to adjust in the future.
Don’t forget about the finishing touches. Sanding the wood will create a smooth surface, while stains or paints will enhance its aesthetic appeal. If you’re unsure about which type of finish is safe for a baby’s environment, consider using non-toxic, water-based finishes that are easier to clean and environmentally friendly.
Accessorizing your crib is the last step. You can add beautiful bedding that complements your design or soft toys to make the space inviting. Choose components that are easy to clean and safe for your baby to ensure the nursery not only looks good but is also practical.
Customizing your crib can lead to a rewarding experience. The process allows you to create a beautiful, functional piece of furniture that reflects your individual style and meets your family’s needs. By using thoughtful Crib Woodworking Plans and focusing on safety and aesthetics, you can craft a crib that is a true centerpiece of your nursery.
Conclusion
Building a crib from Crib Woodworking Plans not only allows you to create a safe and functional sleeping space for your baby but also gives you the opportunity to express your creativity. Understanding the essential features of effective Crib Woodworking Plans ensures you have a solid foundation to start your project, with clear instructions that simplify assembly. Equally important are the safety considerations; adhering to safety standards protects your child and offers peace of mind as they sleep.
Choosing the right wood is crucial, as it impacts both the durability and aesthetics of the crib. Selecting high-quality, non-toxic materials ensures a safe environment for your baby. The step-by-step guide provided simplifies the building process, making it approachable even for novice woodworkers. Follow these instructions closely to create a sturdy structure that will last throughout your child’s early years.
Customization is an exciting part of the crib building journey. Personalizing your crib design allows you to incorporate unique styles that fit your home decor and specific needs. Whether you prefer a classic look or something modern, there are countless ways to tailor your project.
By combining safety, quality materials, and personalization, you’ll not only create a beautiful piece of furniture but also a treasured family heirloom. Take pride in your craftsmanship and enjoy the process of creating a special space for your little one. With careful planning and attention to detail, your crib project can be fulfilling and rewarding, setting the stage for countless memories ahead.