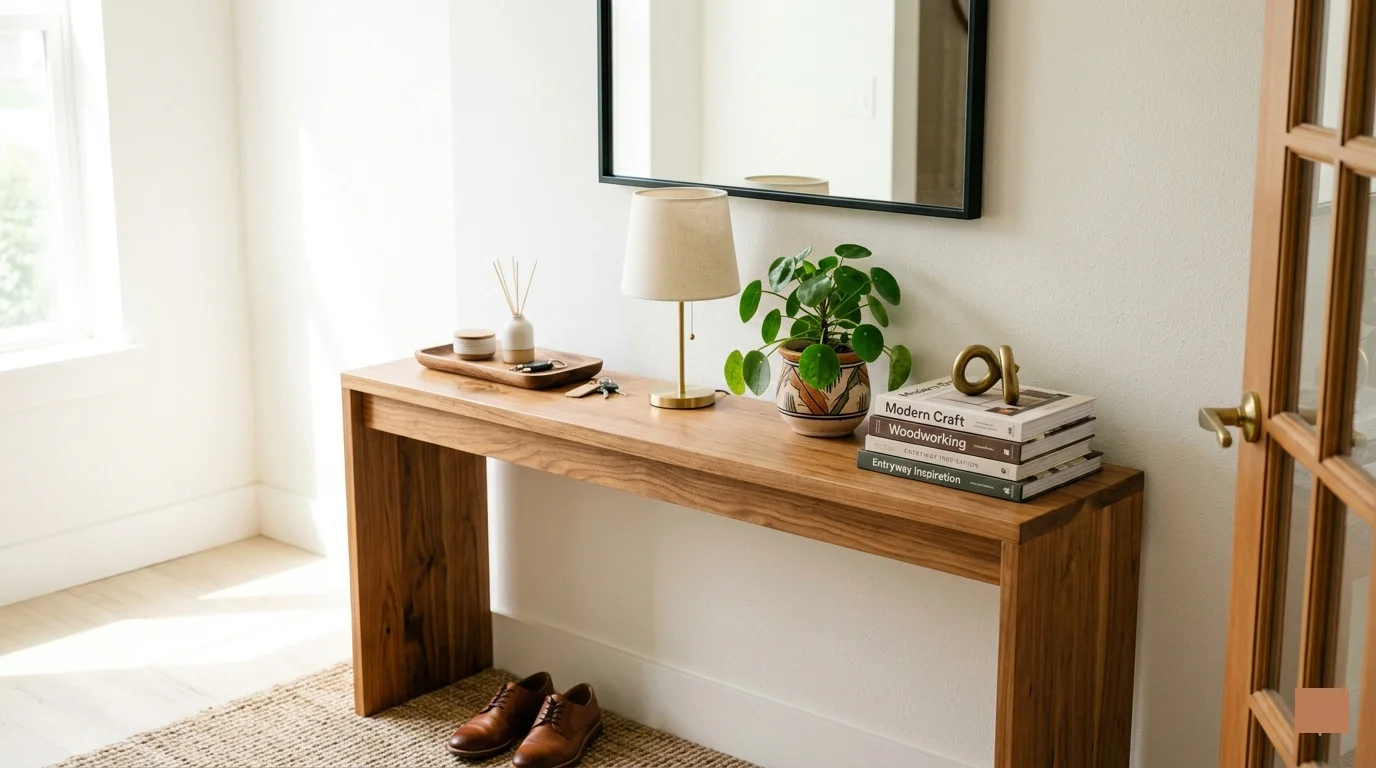
Building your own DIY wooden console table is a rewarding project that not only enhances your living space but also allows you to express your creativity. With the right DIY Wooden Console Table Plans and tips, you can design a piece that fits perfectly into your home. Below, you will find essential aspects to consider as you embark on this exciting journey.
Choosing the Right Design
The first step in creating your DIY wooden console table is selecting a design that meets your needs. Here are some popular styles:
- Modern Minimalist: Clean lines and a sleek appearance.
- Rustic Farmhouse: A cozy, charming look with a weathered wood finish.
- Industrial: metal accents for a more urban feel.
- Traditional: Classic styles with intricate details.
Consider the overall decor of your home when choosing a design. This will help ensure the console table complements your space seamlessly.
Essential Materials
Once you have a design in mind, gather your materials. Common supplies include:
- Wood: Pine, oak, or plywood are good options.
- Wood Glue: For stronger joints.
- Wood Screws: To hold the structure together.
- Sandpaper: To smooth the surfaces.
- Finish: Paint, stain, or sealant to protect the wood.
Basic Plans for Your Console Table
Your DIY wooden console table can be built using basic DIY Wooden Console Table Plans that outline the necessary cuts and assembly steps. Here’s a simple blueprint outline:
| Part | Dimensions (inches) |
|---|---|
| Top | 48 x 16 |
| Sides | 30 x 3 |
| Shelves | 44 x 14 |
| Legs | 30 x 2 |
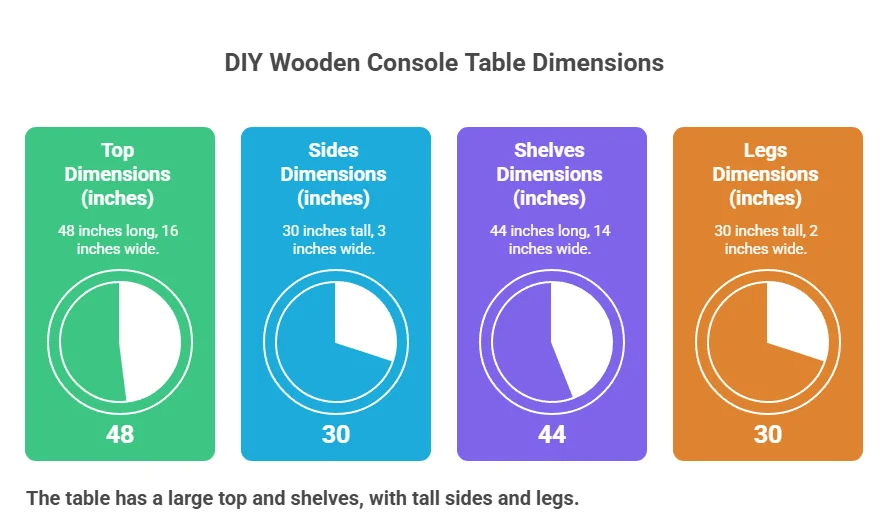
These dimensions can be adjusted based on your personal style and space requirements. Don’t hesitate to personalize the design by adding drawers or decorative touches.
Assembly Instructions
Once you have your materials and DIY Wooden Console Table Plans ready, it’s time to assemble your console table. Follow these steps for a successful build:
- Cut the Wood: Begin by cutting the wood pieces to the required dimensions.
- Sand the Edges: Smooth out any rough edges using sandpaper for a polished look.
- Assemble the Frame: Join the legs and shelves securely using wood glue and screws.
- Add the Top: Once the frame is sturdy, attach the top securely.
- Finish the Table: Apply your chosen finish to protect the wood and enhance its appearance.
Tips for Success
To ensure your DIY wooden console table turns out great, consider these additional tips:
- Take Your Time: Building takes patience. Don’t rush through the process.
- Measure Twice, Cut Once: Always double-check your measurements before making cuts.
- Test Stability: Once assembled, make sure the table is stable and sturdy.
- Seek Inspiration: Browse sites like Wood Magazine or Ana White for creative ideas and variations of console table designs.
By following these DIY Wooden Console Table Plans and tips, you’ll not only create a beautiful DIY wooden console table, but you’ll also gain a sense of accomplishment in crafting something unique for your home. Remember to have fun with the process and let your creativity shine!
Choosing the Right Wood: Materials for a Durable Console Table
When embarking on a DIY project like building a wooden console table, one of the first and most crucial decisions you’ll face is selecting the right type of wood. The wood you choose not only influences the final product’s appearance and durability but also impacts the ease of construction and maintenance. Here’s a brief overview of popular wood types and factors to consider when making your selection.
Selecting Hardwood or Softwood

The main categories of wood are hardwoods and softwoods, and each has its unique characteristics. Choosing between them can significantly affect your project’s outcome.
- Hardwoods: These woods generally come from deciduous trees that lose their leaves annually. Hardwoods tend to be denser and more durable, making them ideal for furniture. Examples include:
- Oak: Known for its strength and beautiful grain, it can withstand wear.
- Maple: A fantastic choice for a smooth finish and durability.
- Walnut: Offers a luxurious look and excellent strength but can be pricier.
- Softwoods: Sourced from coniferous trees, these woods are typically lighter and easier to work with. While they can be less durable, they often come at a lower cost. Examples include:
- Pine: Affordable and easy to find, perfect for beginner projects.
- Cedar: Naturally resistant to decay, great for outdoor projects.
- Fir: Strong and affordable, suitable for structural pieces.
Consideration of Grain Patterns
The grain of the wood is fundamental in the aesthetic appeal of your console table. Different species offer various patterns, from the straight grain of oak to the swirling patterns found in walnut. Understanding grain types can help you make decisions based on visual preferences:
- Straight Grain: Easier to stain and finish evenly.
- Curly or Figured Grain: Adds character and visual interest.
Moisture Resistance
Depending on where you plan to place the console table, moisture resistance can be vital. If your table will be in a humid environment, some woods perform better than others:
- Teak: Naturally water-resistant and durable, often used in marine applications.
- Cypress: Another excellent choice for durability against moisture.
Sustainability Factors
As an environmentally conscious builder, consider sourcing sustainable woods. You might look for options like:
- Bamboo: Rapidly renewable, a great eco-friendly alternative.
- Reclaimed Wood: Using salvaged timber reduces the need for new lumber.
Finishing and Maintenance
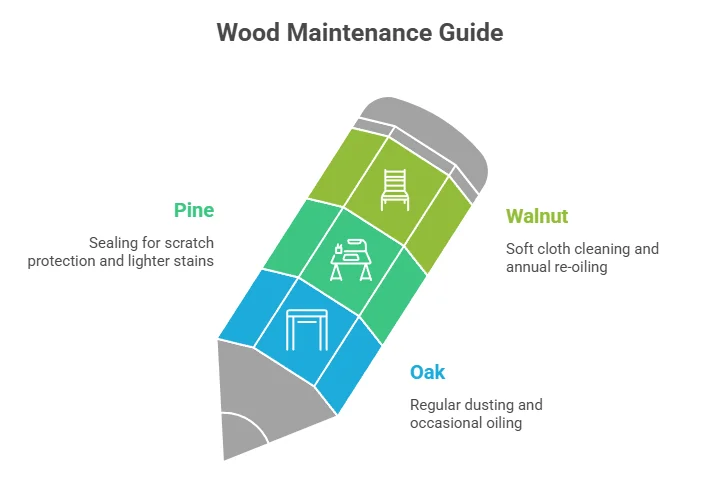
The type of wood you select will affect how you finish and maintain your console table. Hardwoods typically accept stains and finishes well, while some softwoods may require a primer before painting. It’s also crucial to consider durability, especially for pieces that will see daily use. Here are some maintenance tips based on wood types:
| Wood Type | Maintenance Tips |
|---|---|
| Oak | Regular dusting and occasional oiling to maintain luster. |
| Pine | Sealing can protect against scratches; opt for lighter stains to show grain. |
| Walnut | Use a soft cloth to clean; re-oil annually for longevity. |
Choosing the right wood involves evaluating your project’s needs and the characteristics of various wood species. Visit resources like Wood Magazine or Woodworker’s Source for more insights and specific wood options. As you gather the materials needed for your DIY wooden console table, keep these tips in mind for a project that looks great and stands the test of time.
Step-by-Step Guide for Building a Wooden Console Table
Crafting your very own wooden console table can be a rewarding and fun project. Whether for your entryway, living room, or as functional storage, a console table adds both beauty and utility to your space. Follow this step-by-step guide to create a stunning piece that complements your home decor.
Materials Needed
- Wood boards (choose a type like pine, oak, or plywood)
- Screws and wood glue
- Wood stain or paint (optional)
- Sandpaper (grit 120 and 220)
- Clamps
- Measuring tape
- Woodworking saw (circular or miter)
- Drill
- Safety goggles and gloves
Tools Required
- Measuring tape
- Woodworking saw
- Drill with bits
- Sander
- Clamps
- Paintbrush (if staining or painting)
Step 1: Plan Your Console Table Design
First, sketch the design of your console table. Determine the dimensions based on the space you have available. Typical measurements are around 30 inches in height, 48 inches in width, and 12 inches in depth, but customize it to fit your needs. Consider additional shelves or drawers for extra functionality.
Step 2: Gather and Prepare Your Wood
Once you have your design, gather your wood. For a standard console table, you will likely need the following pieces:
- 1 tabletop (48×12 inches)
- 4 legs (30 inches long)
- 2 bottom shelves (optional, depending on your design)
- 2 side supports
Cut these pieces to size using your saw. Wear safety goggles to protect your eyes while cutting. After cutting, sand down all edges and surfaces using the 120 grit sandpaper, followed by the 220 grit for a smooth finish.
Step 3: Assemble the Console Table
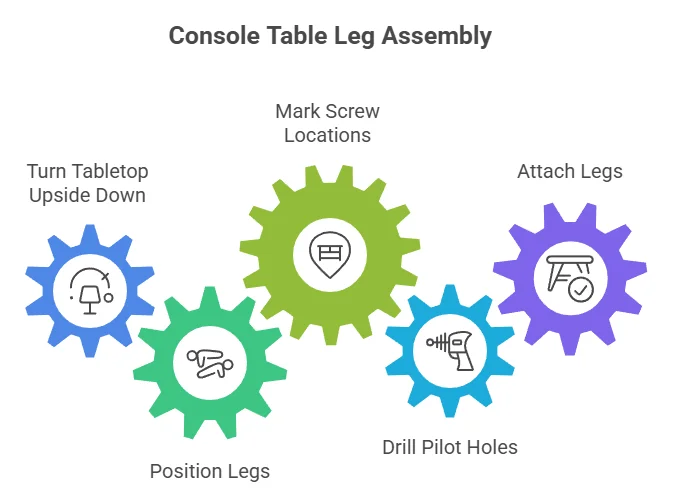
Start by attaching the legs to the tabletop. Here’s how:
- Turn the tabletop upside down on a flat surface.
- Position each leg at the corners and mark where the screws will go.
- Drill pilot holes to prevent the wood from splitting.
- Attach the legs using screws, ensuring stability.
If you’re adding shelves, attach the side supports about 8-12 inches above the floor to hold the bottom shelves securely. Make sure everything is squared up as you go along.
Step 4: Stain or Paint Your Console Table
If you choose to stain or paint your console table, do so after the assembly is complete. Apply a wood stain with a paintbrush for a natural look, or use a vibrant paint color to make a statement. Allow drying time as per the instructions on the product label.
Step 5: Finishing Touches
Once your stain or paint has dried, give your table a final sanding with 220 grit sandpaper for a smoother surface. You might want to apply a protective finish like polycrylic to ensure durability.
Step 6: Place in Your Desired Location
Now that your console table is complete, find the perfect spot for it in your home. Style it with decorative items like lamps, books, or photos to fit your theme.
Additional Resources
If you’re looking for more advanced DIY Wooden Console Table Plans or inspiration, consider checking the following resources:
By following these steps, you can create a beautiful and functional console table that reflects your style and fulfills your home needs. Happy building!
Finishing Touches: Staining and Painting Your DIY Console Table
Creating a DIY console table is an exciting project that allows you to add a personalized touch to your home decor. Once you’ve built your table, the next critical step is deciding how to finish it. Whether you prefer a sleek, modern look or a rustic finish, the right staining or painting technique can enhance the beauty and durability of your table. Here’s how to make the most out of your DIY Wooden Console Table Plans finishing touch.
Choosing the Right Finish
Selecting the right finish is vital for your console table. Here are some popular options:
- Stain: Stains enhance the natural beauty of the wood grain while adding color. They are available in various shades, allowing you to match your furniture style.
- Paint: If you want to make a bold statement, painting your console table can be a fantastic choice. You can use bright colors to create a focal point in your room.
- Varnish: This clear coat adds a protective layer over stained wood, helping to prevent scratches and wear.
- Sealer: A sealer protects the wood and can be used before staining or painting for added durability.
Preparing Your Console Table for Finishing
Before applying any paint or stain, preparing your table properly is essential. Follow these steps for the best results:
- Sand the Surface: Start by sanding the table to make the surface smooth. Use medium-grit sandpaper, followed by finer grits to finish up.
- Clean the Dust: After sanding, wipe down the table with a damp cloth to remove dust and debris. Let it dry completely.
- Fill in Imperfections: Use wood filler for any cracks or holes. Once it’s dried, sand it smooth.
Staining Your Console Table
If you decide to stain your console table, here’s how to do it:
- Choose Your Stain: Decide on the shade you prefer, and test a small area first to see how it looks on your wood.
- Apply the Stain: Use a clean rag or brush to apply the stain evenly. Wipe off any excess after a few minutes to control the darkness.
- Let It Dry: Allow the stain to dry completely before applying a second coat, if desired.
- Add a Topcoat: Once the stain is dry, finish with a clear topcoat for added protection.
Painting Your Console Table
If you opt for paint, follow these steps:
- Pick Your Paint: Choose a high-quality paint suitable for furniture. Chalk paint or acrylic paints work well for DIY projects.
- Prime the Surface: Apply a primer to help the paint adhere better and reduce the chances of peeling.
- Apply the Paint: Use a brush for smaller areas and a roller for larger surfaces. Apply thin coats, allowing each coat to dry before applying the next.
- Seal the Paint: Finish your project with a clear sealer to protect the paint from scratches and stains.
Tips for a Flawless Finish
Here are some additional tips to ensure your finishing work looks professional:
- Always test your paint or stain on a small, inconspicuous area first.
- Work in a well-ventilated area to avoid inhaling fumes.
- Use painter’s tape to protect areas you don’t want stained or painted.
- Take your time; rushing the process can lead to mistakes.
After the finishing touches are applied, allow your console table to cure fully before placing items on it. A beautifully stained or painted console table can bring a unique flair to your home and showcase your craftsmanship. For more inspiration and detailed DIY Wooden Console Table Plans for your DIY projects, consider visiting Ana White or Wood Magazine, both of which offer fantastic resources for DIY wood projects.
Functional Decor: Styling Your Console Table for Every Room

Console tables serve as a versatile piece of furniture that can enhance the aesthetic of any room while also providing practical storage and display options. Whether you’re aiming to beautify your entryway, living room, or bedroom, the key to styling these tables lies in functionality and personal touch. Let’s delve into some clever ways to style your console table for various spaces in your home.
Entryway Essentials
Your entryway is the first impression guests have of your home. A well-styled console table can set the tone. Here are some tips:
- Go Bold with Color: Choose a bold vase or a colorful piece of art to bring vibrancy to the space.
- Add Functional Storage: Use decorative baskets or boxes for storing items like shoes or keys neatly.
- Mirror Magic: Hanging a mirror above the console table not only makes the space feel larger but also reflects light, making it more inviting.
- Seasonal Decor: Switch out decorations with the seasons; pumpkins in fall, greenery in spring, and festive decor during holidays can keep the look fresh.
Living Room Charm
The living room is often the heart of your home, and a well-styled console table can elevate its charm. Consider the following ways to enhance this space:
- Layered Textures: Combine books, candles, and photo frames of different materials. Mixing glass, wood, and metal can create visual interest.
- Artistic Displays: Use one or two larger items as focal points. A unique sculpture or a striking vase can be eye-catching while adding personality.
- Functional Lighting: Incorporate a small lamp for both functionality and coziness. A warm light can make the living room feel more welcoming.
Bedside Beauty
A console table can also function beautifully as a bedside table. Here’s how to style it:
- Simple Elegance: Keep it minimal with a few essential items: a lamp, a book, and a small jewelry tray.
- Natural Touch: Adding plants can bring life to the space. Consider low-maintenance plants like succulents that require little effort to keep them alive.
- Personalized Style: Items like framed photos or meaningful knick-knacks can create a personal touch that reflects your personality.
Creative Home Office
Transforming a console table into a workspace can be both functional and stylish. Here’s how to make it work:
- Organizational Tools: Utilize trays, organizers, or vertical file holders to keep papers and office supplies tidy and accessible.
- Inspirational Decor: Include quotes or artwork that inspire you, making the workspace motivating.
- Tech Integration: Use cord management solutions to keep electronic devices organized. A neatly arranged charging station can prevent clutter.
Mixing and Matching Styles
When styling a console table, remember that mixing different styles can create a more dynamic and interesting display. Use these quick tips for mixing styles effectively:
- Balance: Ensure a balance in color and size to avoid visual clutter.
- Theme Cohesion: Stick to a color palette or indicative theme that matches your room’s decor.
- Layering Heights: Combine objects of varying heights for a visually appealing arrangement.
Styling your console table is about creating a space that is both functional and visually pleasing. By following these tips, you will ensure that your console table not only serves a purpose but enhances the overall decor of the room. For more inspiration on how to style your console table and other home decor ideas, check out these helpful resources: The Spruce, Houzz, Apartment Therapy.
Conclusion
Creating a DIY wooden console table is not just a rewarding project; it also allows you to express your personal style and enhance your living space. By carefully designing your own console table, you can ensure it meets your specific needs and complements your home’s decor. Choosing the right wood is crucial for durability and aesthetic appeal, so consider options like oak or pine, which offer strength and beauty.
With a clear step-by-step guide, building your console table becomes an exciting journey rather than a daunting task. Remember to take your time during assembly, as attention to detail will yield a sturdier and more polished final product. Once your table is built, the finishing touches are what truly make it unique. Whether you opt for a sleek stain or a vibrant paint, these choices can transform your table into a statement piece.
Styling your console table is an opportunity to showcase your personality. Use decorative items that resonate with you, and don’t be afraid to change them according to the season or occasion. With these essential DIY Wooden Console Table Plans and tips, you’ll not only have a beautiful piece of furniture but also a space that reflects who you are. Embrace the creative process and enjoy every moment of your DIY adventure—the satisfaction of crafting your own console table will be worth it, elevating both your home and your skills.