When working on outdoor wood projects, choosing the right finish is essential for the longevity and beauty of your crafts. With numerous options available, understanding which finish is the best can help you make an informed decision that aligns with your needs, project type, and environmental conditions.
Types of Finishes for Outdoor Wood Projects
There are several types of finishes designed specifically for outdoor use. Here are some of the most effective options:
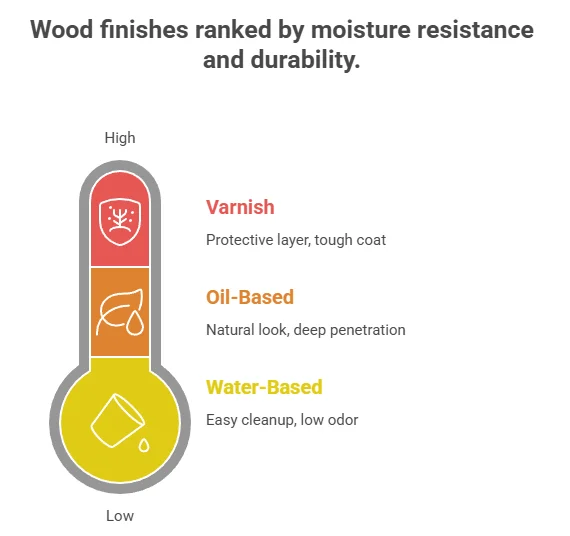
- Varnish: A traditional choice, varnish forms a hard, protective layer over wood. It is resistant to UV rays, moisture, and scratches. However, it requires reapplication every few years, as it can wear off under extreme weather conditions.
- Deck Stain: Ideal for wood decks and furniture, deck stains penetrate the wood and offer both color and protection. They can be semi-transparent, solid, or tinted and allow the wood’s natural grain to show.
- Oil Finishes: Options like linseed oil and teak oil nourish the wood, enhancing its color and grain. They provide protection but may need more frequent reapplication compared to varnishes or stains.
- Polyurethane: This synthetic finish offers high durability and resistance to water and chemicals. It’s perfect for surfaces that will see heavy use, although it can be tough to apply correctly due to its thick consistency.
- Water-Based Finishes: These finishes are easy to apply and have less odor than oil-based products. They dry quickly and are often easier to clean up. However, they may not provide as much protection against UV rays.
Factors to Consider When Choosing a Finish
Several factors should influence your decision on the Best Finish for Outdoor Wood Projects:
- Climate: If you live in a region with harsh weather conditions, look for finishes specifically designed to withstand humidity, rain, and UV exposure.
- Wood Type: Different types of wood absorb finishes in unique ways. For instance, dense hardwoods may require a different approach compared to softwoods.
- Desired Appearance: Consider whether you want your wood to have a natural look or if you’d prefer a colored stain for enhanced aesthetics.
- Maintenance Needs: Think about how often you are willing to reapply the finish. Some may need touch-ups every season, while others may last a few years.
Application Tips for Outdoor Finishes
Applying the finish correctly is equally essential for achieving the best results. Here are some tips to keep in mind for the Best Finish for Outdoor Wood Projects:
- Prep the Surface: Always start with sanding the wood to create a smooth surface. Clean it of dust and debris before applying any finish.
- Follow the Manufacturer’s Instructions: Each product will have specific application guidelines and drying times that you must adhere to for the best outcome.
- Use the Right Tools: A brush may work best for varnishes and oils, while a sprayer can offer a smooth, even coat for stains and sealers.
- Apply in Optimal Weather Conditions: Avoid applying finishes when it’s too hot or humid, as this can affect the drying time and adhesion.
Popular Products to Consider
With so many products available, selecting the right one can feel overwhelming. Here are some popular options that consistently receive high praise:
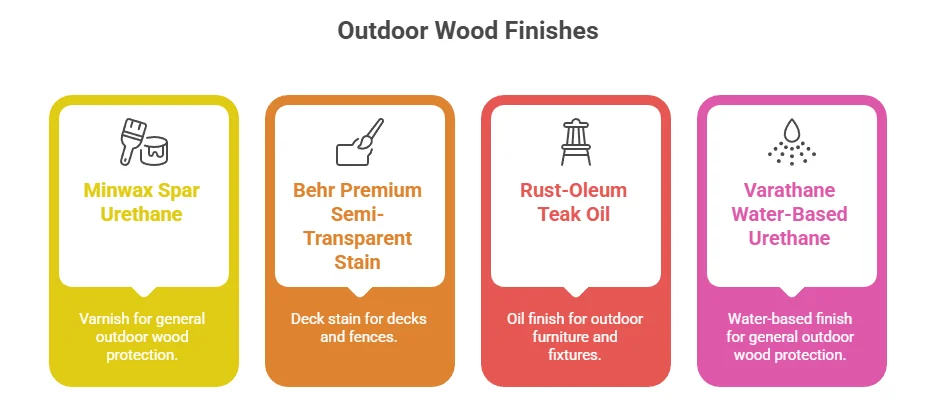
| Product Name | Type | Best For | Website |
|---|---|---|---|
| Minwax Spar Urethane | Varnish | General outdoor wood protection | Minwax |
| Behr Premium Semi-Transparent Waterproofing Stain | Deck Stain | Decks and fences | Behr |
| Rust-Oleum Teak Oil | Oil Finish | Outdoor furniture and fixtures | Rust-Oleum |
| Varathane Water-Based Spar Urethane | Water-Based Finish | General outdoor wood protection | Varathane |
Selecting the Best Finish for Outdoor Wood Projects is vital for protecting your investment and ensuring that your creations last. By considering the type of wood, climate, maintenance needs, and desired appearance, you can choose a finish that meets your specific requirements. Furthermore, proper application and using high-quality products ensure that your outdoor wood crafts will shine for years to come.
How Weather Conditions Impact Wood Finishes
Wood finishes play a crucial role in protecting your outdoor projects from the elements. However, understanding how weather conditions affect these finishes can make a significant difference in the longevity and appearance of your woodwork. Each season brings different challenges for wood finishes, and being aware of these challenges will help you make better choices for your projects.
Temperature and Wood Finishes
Temperature affects drying times and the application of various finishes. Extreme heat can cause finishes to dry too quickly, resulting in uneven application and a less durable surface. Conversely, very cold temperatures can slow down the curing process, leading to poor adhesion.
- Optimal Temperature Range: Most finishes perform best between 50°F and 90°F.
- High Temperatures: Can cause bubbling and brush marks.
- Low Temperatures: Lead to extended drying times and increased chances of imperfections.
Humidity Levels
Humidity influences the moisture content of wood, which can change the way finishes bond to the surface. High humidity often results in longer drying times, while very dry conditions can lead to finishes curing too fast. Your wood will absorb moisture in humid conditions and can swell, which can lead to finishes cracking once the wood dries out. On the other hand, dry conditions can lead to finishes drying too quickly, often resulting in a rough texture.
Rain and Water Exposure
Exposure to rain and moisture can greatly impact the performance of wood finishes. Here are some key considerations:
- Precipitation: Avoid applying finishes if rain is expected within 24 hours.
- Surface Protection: Wood needs to be completely dry before applying finish to achieve optimal adhesion.
- Waterproofing Finishes: Select finishes that are specifically formulated for wet conditions to enhance durability.
Sunlight and UV Protection
UV rays can deteriorate wood finishes over time, causing them to fade and wear down. Choosing a finish with UV protection is essential for projects that will be exposed to direct sunlight. Here are some popular options:
- Oil-Based Finishes: Provide strong UV resistance and a rich finish compared to other options.
- Water-Based Finishes: Offer fast drying times but may require more frequent reapplication.
- Acrylics and Polyurethanes: Often contain UV inhibitors, making them excellent choices for outdoor wood.
Seasonal Changes Affecting Finishing Choices
When planning your outdoor wood projects, consider how seasonal weather influences your finishing choices. Each season presents specific challenges:
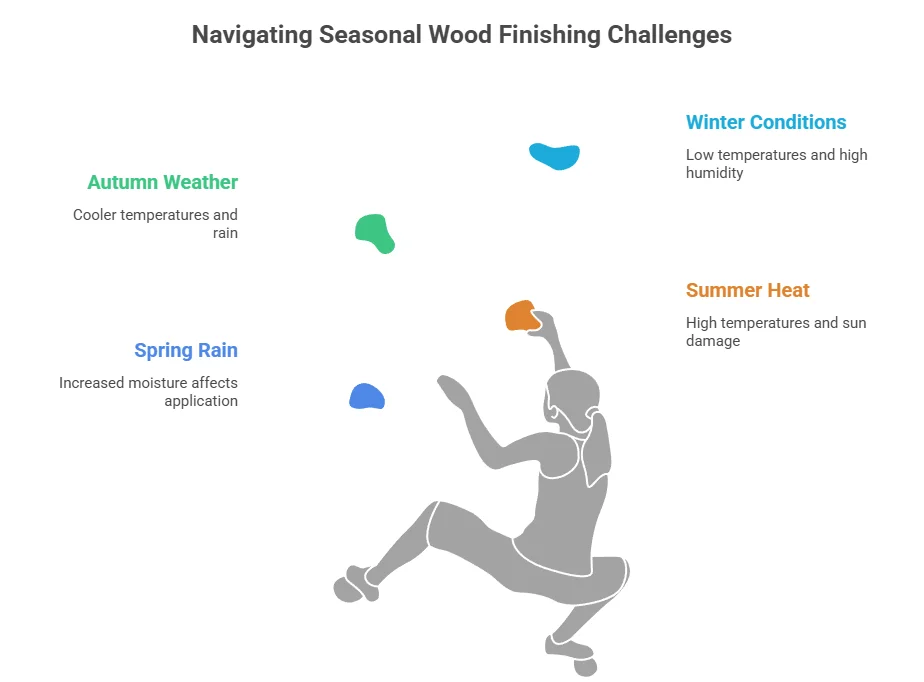
| Season | Challenges | Recommended Solutions |
|---|---|---|
| Spring | Increased rain | Use water-resistant finishes and ensure wood is dry before applying. |
| Summer | High temperatures and sun exposure | Choose UV-resistant finishes and work during cooler parts of the day. |
| Autumn | Cooler temperatures, potential rain | Consider oil-based finishes that allow for a longer drying time. |
| Winter | Low temperatures and high humidity | Avoid outdoor finishing; use heated environments if necessary. |
Being informed about weather conditions allows you to pick the Best Finish for Outdoor Wood Projects. Learn more about best practices for finishing outdoor wood projects by visiting Wood Magazine, and Woodworker’s Source. By considering these factors, not only will your outdoor wood projects last longer, but they’ll also look stunning throughout the seasons. Proper care and choice of finish can transform a simple project into a lasting piece of craft, resistant to weather conditions while highlighting the beauty of wood.
Comparing Different Types of Outdoor Wood Finishes
When it comes to outdoor wood projects, selecting the right finish is crucial. Different types of finishes can affect the look, feel, and durability of your wooden structures. Let’s explore several popular outdoor wood finishes, comparing their benefits and drawbacks. This will help you choose the Best Finish for Outdoor Wood Projects for your specific needs.
Oil-based Finishes
Oil-based finishes are one of the most popular choices for outdoor wood projects. They penetrate deep into the wood and offer excellent protection against moisture while enhancing the natural beauty of the wood grain.
Advantages: Provides a rich, warm finish; Protects against UV damage; Enhances the wood’s natural grain; Improves water resistance.
Disadvantages: Long drying time; Must be reapplied regularly; Strong odors during application.
Some well-known oil-based finishes include linseed oil and mineral spirits oil.
Water-based Finishes
Water-based finishes are becoming increasingly popular for outdoor wood projects. They are known for their quick drying time and low odor, making them easier to work with.
Advantages: Fast drying time; Low odor and easy clean-up; Less prone to yellowing over time; Environmentally friendly.
Disadvantages: Can raise the wood grain; May not penetrate as deeply as oil-based finishes; Can require multiple coats for optimal protection.
Common water-based finishes include acrylics and polyurethanes.
Varnish Finishes
Varnish is a highly durable finish that combines oil and resin, creating a strong protective layer over the wood. It’s especially good for woods that will be exposed to harsh weather conditions.
Advantages: Strong protection against moisture and UV rays; Available in different sheens; Durable and long-lasting.
Disadvantages: Can be difficult to remove; Requires sanding between coats for proper adhesion; Long drying time.
Two popular varnishes include spar varnish and polyurethane varnish.
Stains
Stains can provide both color and protection for your outdoor wood projects. They come in oil-based and water-based options, allowing for versatility in your selection.
Advantages: Enhances wood grain with color; Works well on decks and fences; Easy to apply and reapply.
Disadvantages: May require a topcoat for added protection; Can fade over time; May not provide as much moisture resistance as other finishes.
Selecting the Best Finish for Outdoor Wood Projects comes down to understanding the specific requirements of your project. By considering the durability, application ease, and visual effect, you can make an informed choice that will enhance your outdoor spaces for years to come.
Tips for Preparing Wood Before Applying Finish
Preparing wood properly is essential for achieving the Best Finish for Outdoor Wood Projects. When you take the time to prepare your wood correctly, you set the foundation for a durable and beautiful surface. Here are some key tips to ensure your wood is ready for finishing.
Start with the Right Tools
Before you begin, gather the necessary tools. Having the right equipment makes the process smoother and more efficient. Here’s a basic list:
- Sanding blocks or an electric sander
- File or rasp
- Wood cleaner or vinegar
- Cloth or tack cloth
- Masking tape
Choose the Right Wood
Not all woods are created equal. Some woods are more suited for outdoor projects than others. For example:
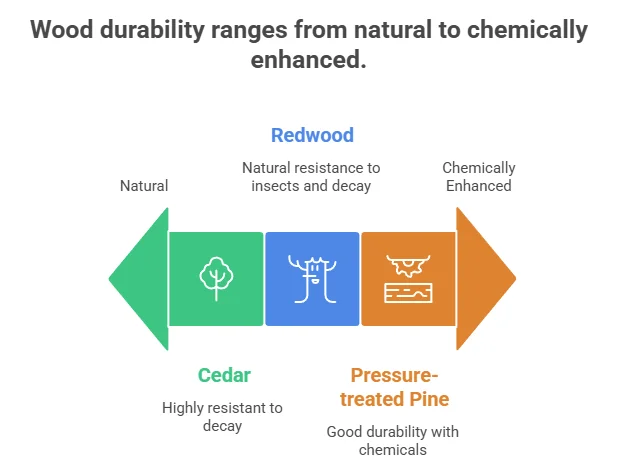
| Type of Wood | Durability | Common Uses |
|---|---|---|
| Cedar | Highly resistant to decay | Decks, outdoor furniture |
| Redwood | Natural resistance to insects and decay | Fences, pergolas |
| Pressure-treated Pine | Good durability with chemicals | Decks, framing |
Choosing durable wood can greatly influence the longevity of your project and the effectiveness of the Best Finish for Outdoor Wood Projects.
Clean the Surface Thoroughly
Before applying any finish, ensure that the wood surface is clean. Dust, dirt, and grease can all impact the adhesion of the finish. Here’s how to clean it:
- Wipe down the wood with a damp cloth to remove loose dirt.
- For stubborn dirt, use a wood cleaner or a mixture of vinegar and water.
- Rinse with clean water and allow it to dry completely.
Sanding the Wood
Sanding is a crucial step in preparing wood for finishing. It helps create a smooth surface and allows the finish to penetrate better. Follow these tips:
- Use progressive grit sandpaper. Start with a coarse grit (80-120) and move to finer grits (220-320).
- Sand with the grain of the wood to avoid scratches.
- Always check for rough spots by running your hand over the surface.
Remove Dust and Debris
After sanding, it’s vital to remove any dust generated. Here’s how:
- Use a vacuum with a brush attachment to suck up the dust.
- Wipe the surface with a tack cloth to remove remaining particles.
Test the Finish
Before finishing the entire surface, test the finish on a small, inconspicuous area. This will give you a sense of how the wood reacts. You’ll appreciate the chance to see the final look before committing to the entire piece.
Consider Pre-Staining
If you are working with certain wood types, a pre-stain conditioner can help enhance the finish. This is particularly helpful with softwoods, which may absorb stain unevenly. Just apply the conditioner according to the manufacturer’s instructions and allow it to dry.
By following these preparation tips, you are set to achieve the Best Finish for Outdoor Wood Projects. For further guidance on outdoor wood finishing, you can visit Wood Magazine or Woodworking Network. These resources offer in-depth tips to help you succeed in your woodworking endeavors. Taking these steps to prepare your wood ensures a beautiful finish. Remember, preparation is just as important as the finishing itself. Happy woodworking!
Common Mistakes to Avoid When Finishing Outdoor Wood Projects
When it comes to finishing outdoor wood projects, avoiding common mistakes can make all the difference in terms of durability and appearance. With the right approach, your outdoor wood furniture, decks, or garden structures can withstand the elements and look stunning for years. Here are key mistakes to sidestep to ensure your projects turn out beautifully.
Neglecting Surface Preparation
One of the biggest mistakes people make is skipping or rushing surface preparation. Properly prepping your wood is crucial for any finish to adhere correctly. Make sure to:
- Clean the surface thoroughly to remove dirt, dust, and grease.
- Sand the wood to create a smooth surface. Use sandpaper with varying grits, starting from coarser and finishing with finer grits.
- Remove sanding dust with a tack cloth or vacuum prior to applying any finish.
Taking the time to prepare your surfaces will enhance the effect of your Best Finish for Outdoor Wood Projects and elongate its lifespan.
Choosing the Wrong Finish
Selecting the Best Finish for Outdoor Wood Projects is vital. Not all finishes are suited for exterior use. Here are three common types you might consider:
| Finish Type | Description | Best Use |
|---|---|---|
| Oil-Based Finish | Provides a warm, natural look and penetrates deep into the wood. | High moisture areas, such as decks and wooden fences. |
| Water-Based Finish | Dries quickly and is easy to clean up. Less odor compared to oil-based options. | Indoor applications or areas with low moisture exposure. |
| Varnish | A durable finish that forms a protective layer on the wood surface. | Furniture and structures that need a tough protective coat. |
Always choose finishes specifically designed for outdoor use to withstand weather elements. For more information on finishes, you can visit Wood Magazine.
Ignoring the Weather
Conducting finishing work under poor weather conditions can lead to subpar results. Avoid finishing wood when it’s raining or snowing, the temperature is outside the 50°F to 90°F range, or high humidity levels are present. Plan your projects around the weather forecast to ensure you have optimal conditions for applying the Best Finish for Outdoor Wood Projects.
Applying Too Many Coats
An emerging mistake for many DIYers is applying too many coats of finish. Overapplication can lead to drips, unevenness, and peeling. Follow these guidelines:
- Apply thin, even coats rather than thick layers.
- Read the product instructions for recommended coats. Most finishes do well with one to three coats.
- Allow adequate drying time between coats to prevent peeling and bubbling.
Skimping on Maintenance
Many people overlook the importance of maintenance after finishing their outdoor wood projects. Maintenance is crucial for protecting your wood and preserving its appearance. Be sure to inspect regularly for signs of wear, reapply finish as recommended (typically every one to three years), and clean the surfaces to remove grime. Regular maintenance can significantly extend the life of your Best Finish for Outdoor Wood Projects.
By avoiding these common mistakes, you can ensure that your outdoor wood projects not only look great but also last for years to come. For more tips and techniques on outdoor wood finishing, visit the Fine Woodworking website.
Conclusion
Choosing the Best Finish for Outdoor Wood Projects is vital for ensuring longevity and aesthetic appeal. As we’ve explored, weather conditions play a significant role in determining which type of finish is suitable for your project. Factors like humidity, sunlight, and temperature must be considered to enhance the durability of your wood. Comparing different types of outdoor wood finishes reveals that products like stains, sealants, and paints each have unique advantages and disadvantages. Selecting the right one depends on your specific needs, whether it’s adding color, protecting against moisture, or ensuring UV resistance.
It’s key to assess the climate where your project will reside and choose a finish that can withstand those conditions. Before you apply your chosen finish, proper preparation of the wood is essential. Cleaning, sanding, and ensuring that the wood is dry can significantly improve the adhesion and effectiveness of the finish. Taking these extra steps helps prevent common problems such as peeling or flaking. Additionally, being aware of common mistakes can save you time and money.
Over-applying finishes, neglecting to test a sample on a small area, or skipping maintenance can lead to premature failure of the finish. By following these guidelines and understanding the nuances of outdoor wood finishing, you can confidently protect your wooden projects while enhancing their beauty. Whether you’re working on furniture, decks, or other outdoor structures, the Best Finish for Outdoor Wood Projects will not only provide protection but also highlight the natural beauty of the wood for years to come.