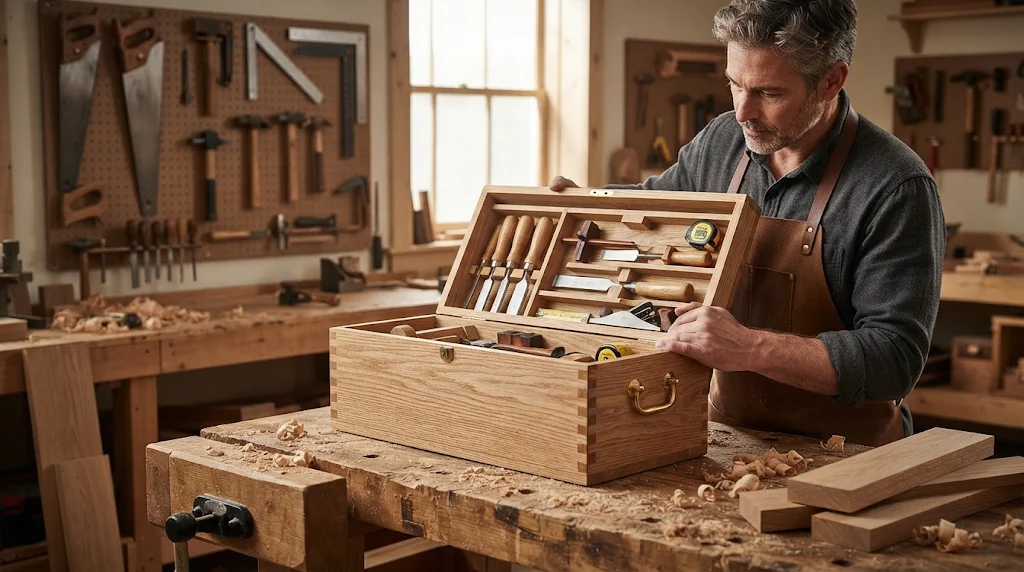
Creating a traditional joiner’s tool chest is a rewarding project that combines craftsmanship, utility, and history. This tool chest not only serves as a practical storage solution but also reflects the craftsmanship that has stood the test of time. If you’re ready to embark on this journey, here are the essential steps to guide you through the crafting process.
Gather Your Materials
Before you begin, it’s essential to gather the necessary materials. Here are the key components you’ll need:
- Wood: Choose hardwoods like oak or maple for durability.
- Wood Glue: Ensure a strong bond between joints.
- Wood Screws: For added strength in construction.
- Plywood: For the base and possibly the lid.
- Handles: Brass or wooden handles enhance functionality.
- Hinges: Durable hinges for easy accessibility.
Tools Needed
Having the right tools at your disposal is crucial for accuracy and efficiency. Here’s a brief list of essential tools you might need:
- Saw (miter saw or hand saw)
- Chisels
- Drill with drill bits
- Ruler or measuring tape
- Square
- Sanding blocks or electric sander
Design Your Tool Chest
Next, sketch out your design. Consider the size and type of tools you’ll store. A traditional joiner’s tool chest typically has a rectangular shape with a sloped or flat top. You might want to include compartments or shelves for better organization. Here’s a simple breakdown of the components:
- Base: The bottom of the chest that provides stability.
- Sides: The two vertical elements that connect the base and lid.
- Lid: The top that protects the tools inside.
- Dividers: Optional, for organization, especially for small tools.
Cutting the Wood
With your design ready, it’s time to cut the wood. Use a saw to follow the measurements from your design carefully. Always check your cuts with a square to ensure they’re straight. Precision is crucial for a better fit during assembly!
Assembly Process
Now it’s time to assemble the chest. Begin by constructing the base. Secure the sides to the base using wood glue and screws for added strength. Once the sides are attached, attach the back panel.
Next, move on to the front panel. Be sure to leave space for the hinges on top. After the front is in place, attach the lid, ensuring it opens smoothly.
Finishing Touches
After assembly, it’s time to give your tool chest a polished look. Sand the surfaces smoothly, paying attention to any rough edges. You can opt to apply a finish, such as varnish or oil, to protect the wood and highlight its natural beauty.
Install the handles and hinges, ensuring everything is secure. You may also want to personalize your chest with a stencil or engraving.
Organizing Your Tools
Populate your tool chest with your essential tools. Organizing your tools effectively can save you a lot of time in the workshop. Consider the following tips:
- Sort tools by type – keep saws with saws, chisels with chisels.
- Use small compartments for tiny items like screws and blades.
- Keep frequently used tools towards the top for easy access.
Crafting a traditional joiner’s tool chest isn’t just about building something functional; it’s also a journey into the world of woodworking and craftsmanship. You can find additional resources and insights from websites such as Woodworking Network and Popular Woodworking. These sites offer expert advice that will guide you through every step of your woodworking projects.
Choosing the Right Materials for Your Tool Chest
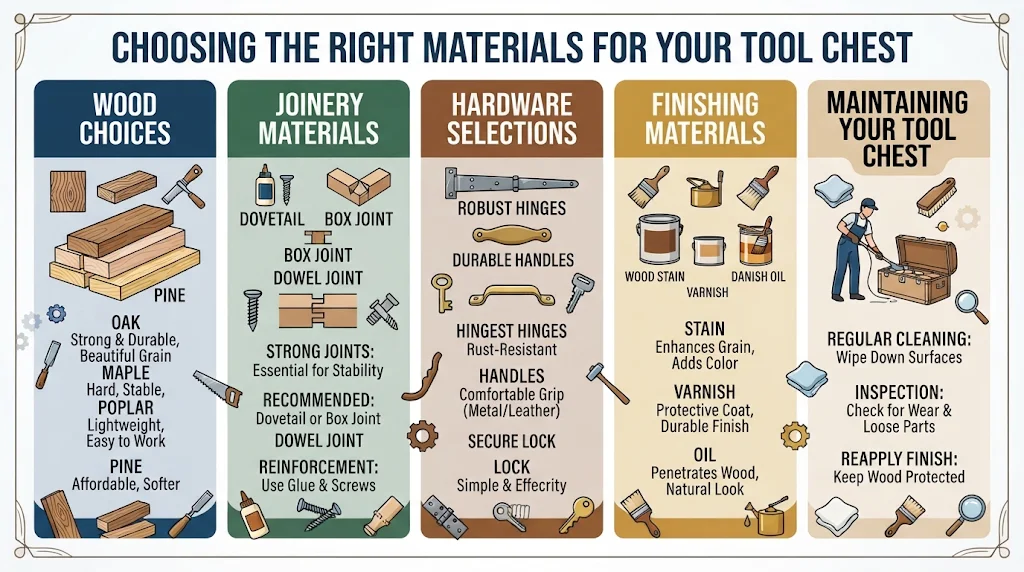
Building a traditional joiner’s tool chest requires careful consideration of the materials you choose. The right materials not only enhance the durability and function of the chest but also contribute to its appearance and ease of use. Here’s a detailed look at how to select the best materials for your tool chest project.
Wood Choices
Wood is the primary material for constructing your tool chest. The type of wood you select can greatly influence the chest’s strength, weight, and aesthetics. Here are some popular options:
- Poplar: This is a cost-effective option that is easy to work with. It’s lightweight, making it suitable for a portable tool chest, although it may not be as durable as harder woods.
- Oak: Known for its strength and beautiful grain, oak is heavier but provides outstanding durability. It’s great for making a long-lasting tool chest.
- Pine: An affordable choice, pine is widely available and easy to handle. However, it may dent or scratch more easily than hardwoods.
- Maple: This hardwood is dense and sturdy, ideal for a tool chest that gets a lot of use. It has a fine grain that can finish beautifully.
When choosing wood, consider the weight you are willing to manage. If you plan to move your tool chest frequently, lightweight options like poplar or pine may be your best bet. For a stationary chest, go with oak or maple for added strength.
Joinery Materials
The joints in your tool chest structure play a crucial role in its stability. Here are some common joinery materials and methods:
- Dowels: Wooden dowels are a straightforward choice for reinforcing corners and edges.
- Wood Glue: A strong adhesive can ensure joints are secure without the need for visible hardware, maintaining a clean look.
- Wood Screws: For added strength at the joints, consider using screws in conjunction with glue or dowels. Choose brass screws for a classic look.
Make sure to select high-quality glue and screws to enhance the longevity of your tool chest. Proper joinery will ensure that the chest withstands wear and tear over time.
Hardware Selections
The choice of hardware is equally important for your chest’s functionality. Here’s what to look for:
- Hinges: Opt for robust, rust-resistant hinges that can handle the weight of the lid. Heavy-duty strap hinges or concealed hinges are popular options.
- Handles: Consider the grip and comfort of the handles. Metal or leather handles can provide a classy touch and are durable.
- Locks: A quality lock, if you need to secure your tools, should be simple yet effective, preventing unauthorized access.
Hardware can make a significant difference in the usability of your chest, so select pieces that complement the overall design and ensure functionality.
Finishing Materials
A good finish not only enhances the appearance of your tool chest but also protects the wood from moisture and wear. Here are some finishing options:
- Stain: Use wood stains to enhance the natural beauty of your selected wood. Stains can help unify mismatched pieces and add depth to the wood grain.
- Varnish: A clear varnish can provide a protective coat, ensuring longevity and durability against scratches and water damage.
- Oil Finish: For a more natural look, consider oil finishes such as linseed or Danish oil. They penetrate the wood and highlight its grain while providing a protective barrier.
Maintaining Your Tool Chest
Regardless of the materials you select, regular maintenance will prolong the life of your tool chest. Regularly inspect for any signs of wear, and reapply finish as needed to keep the wood protected. This will help maintain the appearance and functionality of your tool chest for many years to come.
Tools Required for Building a Joiners Tool Chest
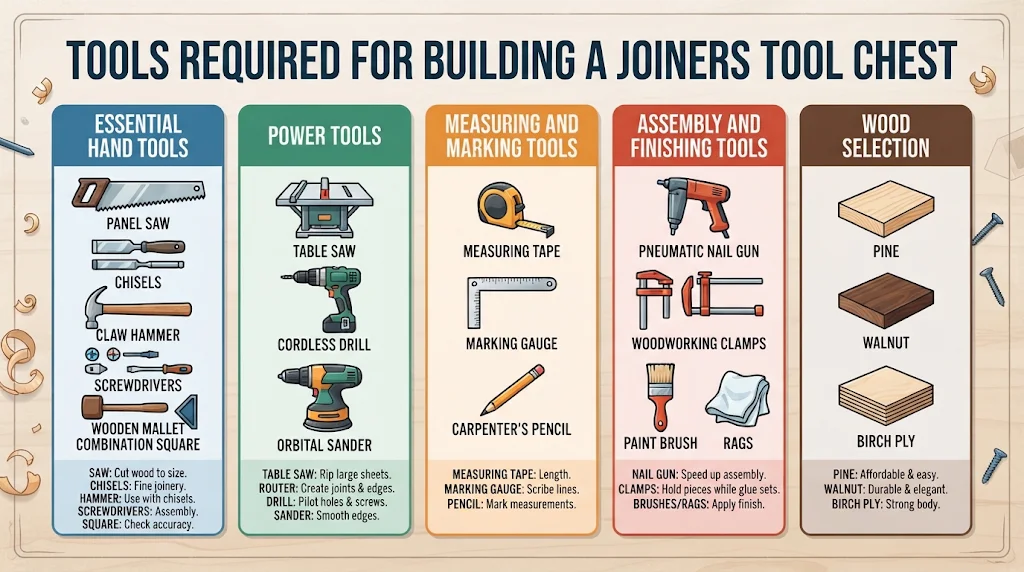
Building a traditional joiner’s tool chest can be a fulfilling project for any woodworker or DIY enthusiast. Knowing the right tools is essential for making this sturdy and functional storage solution. Here’s a list of tools you’ll need to ensure your crafting experience is smooth and enjoyable.
Essential Hand Tools
When constructing a tool chest, having the right hand tools will make the process much easier. Here are the main hand tools you should consider:
- Saw: A panel saw or crosscut saw will be needed to cut your wood to size.
- Chisels: A set of chisels ranging from 1/4 inch to 1 inch is necessary for fine joinery work.
- Hammer: A claw hammer is perfect for driving nails, while a wooden mallet works well with chisels.
- Screwdrivers: Having a variety of Phillips and flat-head screwdrivers will help assemble your tool chest.
- Square: A combination square ensures your cuts are accurate and properly aligned.
Power Tools
While traditional tools are essential, power tools can expedite the construction process and improve accuracy. Here’s a list of power tools you might want to use:
- Table Saw: Ideal for ripping large sheets of plywood and ensuring clean cuts.
- Router: A router helps create decorative edges and grooves for joints.
- Drill: A cordless drill is necessary for making pilot holes and driving screws quickly.
- Sander: An orbital, sand, or belt sander smooths rough edges and finishes surfaces.
Measuring and Marking Tools
Accurate measurements are crucial in woodworking. Therefore, having the right measuring and marking tools will help you keep everything precise:
- Measuring Tape: A 25-foot tape measure is usually sufficient for most projects.
- Marking Gauge: This tool is essential for laying out lines and ensuring depth for cuts.
- Pencil: A carpenter’s pencil offers good visibility and accuracy for marking wood.
Assembly and Finishing Tools
Once the main structure of your tool chest is complete, you’ll need tools for assembly and finishing:
- Nail Gun: A pneumatic or electric nail gun can speed up the assembly process significantly.
- Clamps: Woodworking clamps are vital for holding pieces together while glue sets or fasteners are installed.
- Finishing Tools: Brushes and rags for applying paint, stain, or protective finish to your completed chest.
Wood Selection
The materials you choose are also vital in building a traditional joiner’s tool chest. Common options include:
- Pine: Affordable and easy to work with, making it a popular choice.
- Walnut: A durable, high-quality option that adds elegance to the chest.
- Birch Ply: Strong and stable, ideal for the main body of the tool chest.
Tips for Designing Your Custom Tool Chest Layout
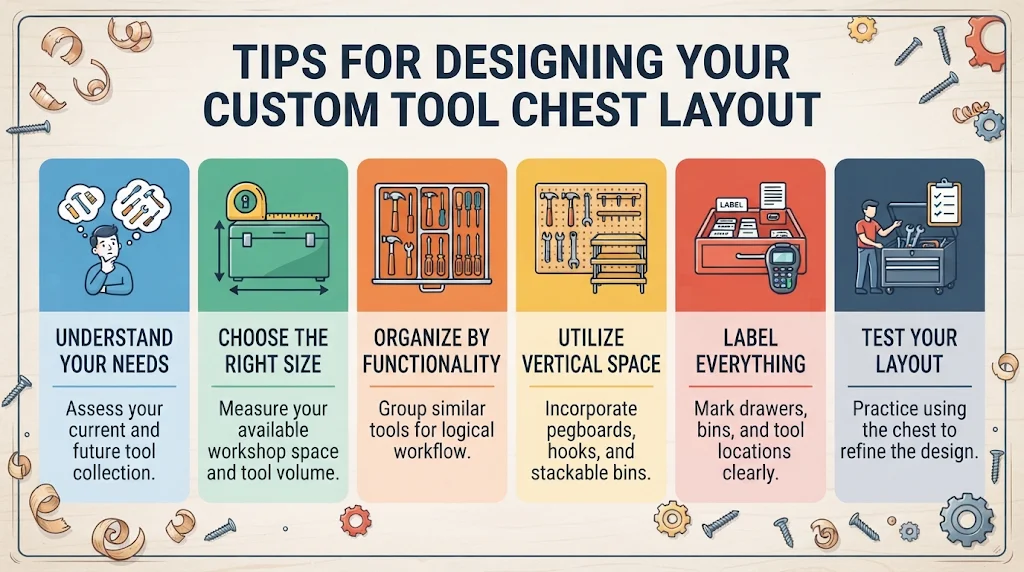
Designing a custom tool chest layout can significantly enhance your woodworking or tool organization experience. A well-thought-out layout not only saves you time but also improves efficiency in your workspace. Here are some valuable tips to consider when creating your custom tool chest layout.
Understand Your Needs
Before you start sketching out your design, take a moment to assess what tools you currently own and how you use them. Think about the following:
- What types of tools do you have? (e.g., hand tools, power tools)
- How often do you use each tool?
- Do you need space for additional tools or supplies in the future?
By understanding what you need, you can customize your tool chest layout to suit your specific requirements.
Choose the Right Size
Determining the size of your tool chest is essential. A larger chest may hold more tools but can become cumbersome. Conversely, a smaller chest might not accommodate all your necessary tools. To strike the right balance:
- Measure your available workspace to establish a size limit.
- Factor in the number of tools you own and their sizes.
- Consider how you want to organize the tools (e.g., drawers, trays).
Choosing the right size will not only help you store tools effectively but also maintain a clean workspace.
Organize by Functionality
When designing your layout, organize tools by their functions to enhance workflow. Here are some example groups for consideration:
| Category | Tools Included |
|---|---|
| Cutting Tools | Saws, knives, chisels |
| Measuring Tools | Rulers, tape measures, squares |
| Fasteners | Nails, screws, glue |
| Finishing Tools | Sanders, brushes, rags |
By employing this organization method, you’ll save time looking for the tool you need, allowing for a more streamlined process.
Utilize Vertical Space
Don’t forget about the vertical space in your tool chest. Adding vertical storage can help you utilize every inch of available space. Here are a few ideas:
- Incorporate pegboards for hanging tools.
- Use tiered shelves to store tools of varying heights.
- Install hooks or magnetic strips for frequently used items.
Vertical storage not only keeps your tools organized but also makes them easily accessible.
Label Everything
Labeling your tools and their storage locations can save you time and frustration. Consider these tips for effective labeling:
- Use clear, easy-to-read labels.
- Color-code for different categories.
- List the contents of each drawer or tray on the outside.
Labels help maintain order and organization, ensuring that everything has its rightful place.
Test Your Layout
Once you’ve designed your custom tool chest layout, it’s important to test it out. Spend some time using the chest in your workshop:
- Observe how easily you can access tools.
- Adjust placement based on your workflow.
- Consider if there’s anything else you need to store.
This testing phase is essential in ensuring your layout is as functional and efficient as possible.
Understanding Your Joiners Tool Chest
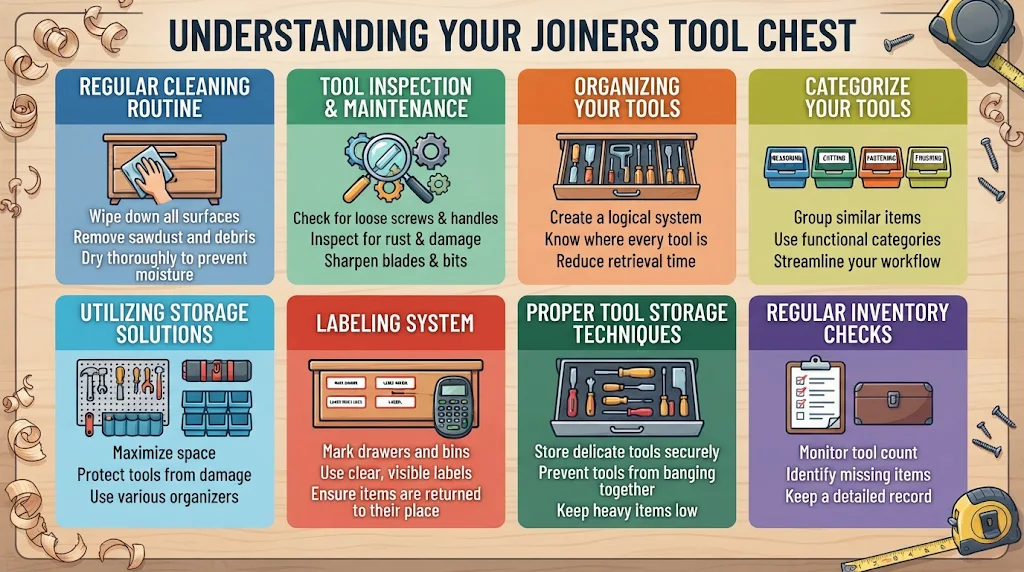
The joiners tool chest is an essential component for any woodworker or craftsman. It not only stores your valuable tools but also keeps them organized for easy access. By maintaining and organizing your tool chest effectively, you can enhance your productivity and ensure that your tools remain in excellent condition.
Regular Cleaning Routine
To keep your tool chest in top condition, start with a regular cleaning routine. Here’s how to do it:
- Empty the chest completely.
- Wipe down all surfaces with a damp cloth.
- Inspect each tool for signs of rust or wear.
- Use a mild cleaner if necessary, especially for sticky residue.
- Dry the surfaces thoroughly to prevent moisture accumulation.
Tool Inspection and Maintenance
Regularly inspecting your tools is crucial. Look for:
- Loose screws or bolts that may need tightening.
- Damaged handles or grips that require replacement.
- Rust on metal parts that should be removed with rust remover or sandpaper.
- Blades that need sharpening to ensure they perform well.
Keeping an eye on these details will help extend the lifespan of your tools.
Organizing Your Tools
An organized tool chest saves time and frustration. Consider the following strategies for effective organization:
Categorize Your Tools
Group similar tools together. You might have categories such as:
- Hand tools (hammers, screwdrivers, etc.)
- Pneumatic tools (nail guns, air compressors)
- Electric tools (saws, drills)
- Measuring tools (tape measures, squares)
Utilizing Storage Solutions
Use storage solutions that maximize space. Here’s a simple table to guide you:
| Type of Storage | Benefits |
|---|---|
| Tool trays | Keep smaller tools grouped and accessible. |
| Drawer dividers | Prevent tools from banging around; saves space. |
| Magnetic strips | Convenient for holding metal tools visibly. |
| Plastics bins | Ideal for storing screws, nails, and small parts. |
Labeling System
Implementing a labeling system can significantly improve organization. Use simple labels to mark the categories in your tool chest. This will make it easier for you to find what you need quickly. Furthermore, consider using color coding so you can identify types of tools at a glance.
Proper Tool Storage Techniques
When placing tools in your chest, consider the following:
- Store frequently used tools at eye level.
- Keep heavier tools in the bottom drawers to maintain stability.
- Use protective cases for delicate tools to prevent damage.
These simple storage techniques can help keep your tools ready for use and reduce wear and tear.
Regular Inventory Checks
Conduct a regular inventory check to ensure nothing is missing. Checking your tools every few months helps keep track of your inventory and ensures that you can find everything when needed. Additionally, keeping a record of your tools will assist you in replacing lost or damaged items quickly.
Where to Find More Information
If you’re looking for detailed plans or more insights into building your tool chest, several websites offer useful resources:
- Popular Woodworking Offers various woodworking plans and articles.
- Wood Magazine – Features build instructions and expert tips for woodworking projects.
- Fine Woodworking – A hub for advanced woodworking techniques and tool reviews.
With this comprehensive list of tools and resources, you’re well on your way to building a high-quality traditional joiner’s tool chest. Make sure to gather everything you need before diving into the project for a smooth crafting experience.
Conclusion
Building a traditional joiners tool chest is a rewarding project that combines craftsmanship with functionality. By following the essential steps outlined in this guide, you can create a sturdy and beautiful chest that reflects your style and meets your storage needs. Selecting the right materials is crucial; opt for durable woods like oak or pine that will stand the test of time.
Equipping yourself with the necessary tools—such as chisels, saws, and hammers—will simplify the construction process. Each tool plays a significant role in the assembly and finish of your chest. As you design your tool chest layout, think carefully about how you use your tools. A well-organized layout ensures that everything has its place, promoting efficiency when you’re working on projects.
Maintaining your tool chest is key to preserving its functionality and aesthetic appeal. Regular organization and care will keep your tools in top condition and make it easier for you to find what you need.
Embarking on this project not only enhances your woodworking skills but also provides you with a beautiful centerpiece for your workspace. With patience and attention to detail, your traditional joiners tool chest will be a source of pride for years to come, serving not just as a storage solution, but as a testament to your craftsmanship and dedication. Happy building!